
When life gets busy—and trust me, I totally get it—sometimes you just need a dessert that feels like a huge, necessary indulgence. Something that screams celebration without demanding you spend three days in the kitchen. That’s exactly why I’m sharing this ultimate red velvet cheesecake recipe with you today! This isn’t just any dessert; it’s a tested centerpiece that merges that signature, slightly tangy red velvet flavor with an unbelievably smooth, creamy cheesecake structure. It looks totally show-stopping, but honestly, the steps are built around simplicity so you can bring that baked-from-work joy right into your week. Forget fuss; we’re focusing on flavor and texture here! If you love this vibe, you should definitely check out my recipe for Sugar Cookie Cheesecake next!
- Why This Red Velvet Cheesecake Recipe is Your Next Showstopper
- Gathering Ingredients for Your Red Velvet Cheesecake
- Step-by-Step Instructions for the Red Velvet Cheesecake Recipe
- Tips for Your Showstopper Cheesecake Success
- Variations on the Red Velvet Cheesecake
- Serving Suggestions for Your Festive Dessert Centerpiece
- Storage and Reheating Instructions for Red Velvet Cheesecake
- Frequently Asked Questions About This Decadent Dessert
- Your Next Step in Simple, Rewarding Baking
Why This Red Velvet Cheesecake Recipe is Your Next Showstopper
I know you want a dessert that’s decadent but doesn’t fight you every step of the way, and this red velvet cheesecake delivers on every promise. It’s designed to look like it needs a pastry chef, but really, it’s just smart home baking! We nail that bakery quality every single time.
- It delivers that rich, gorgeous color and flavor combo you crave.
- The final texture is unlike anything you’ve tried—so perfectly smooth!
- It looks absolutely incredible ready for any party spread.
If you’re looking for other incredible cheesecake ideas, you have to try my Chocolate Chip Cheesecake Cookies or maybe swap the crust completely with my Salted Caramel Cheesecake recipe!
Achieving Velvety Smooth Cheesecake Texture
The secret to that velvety smooth cheesecake texture isn’t luck; it’s technique! We use room temperature ingredients—seriously, pull that cream cheese out early—and we bake it low and slow nestled inside a water bath. That gentle steam is key to avoiding dryness and those dreaded cracks.
The Perfect Red Velvet Swirl Integration
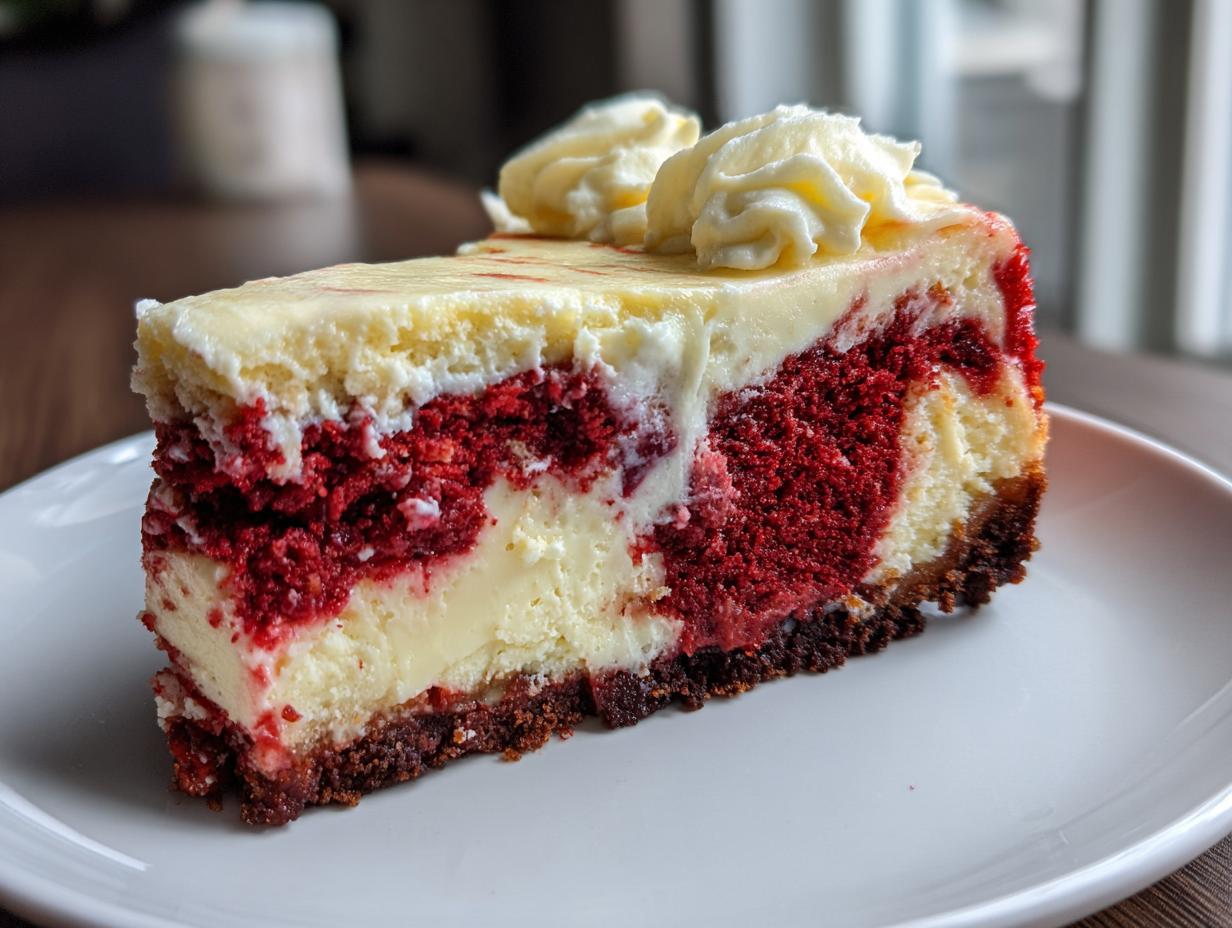
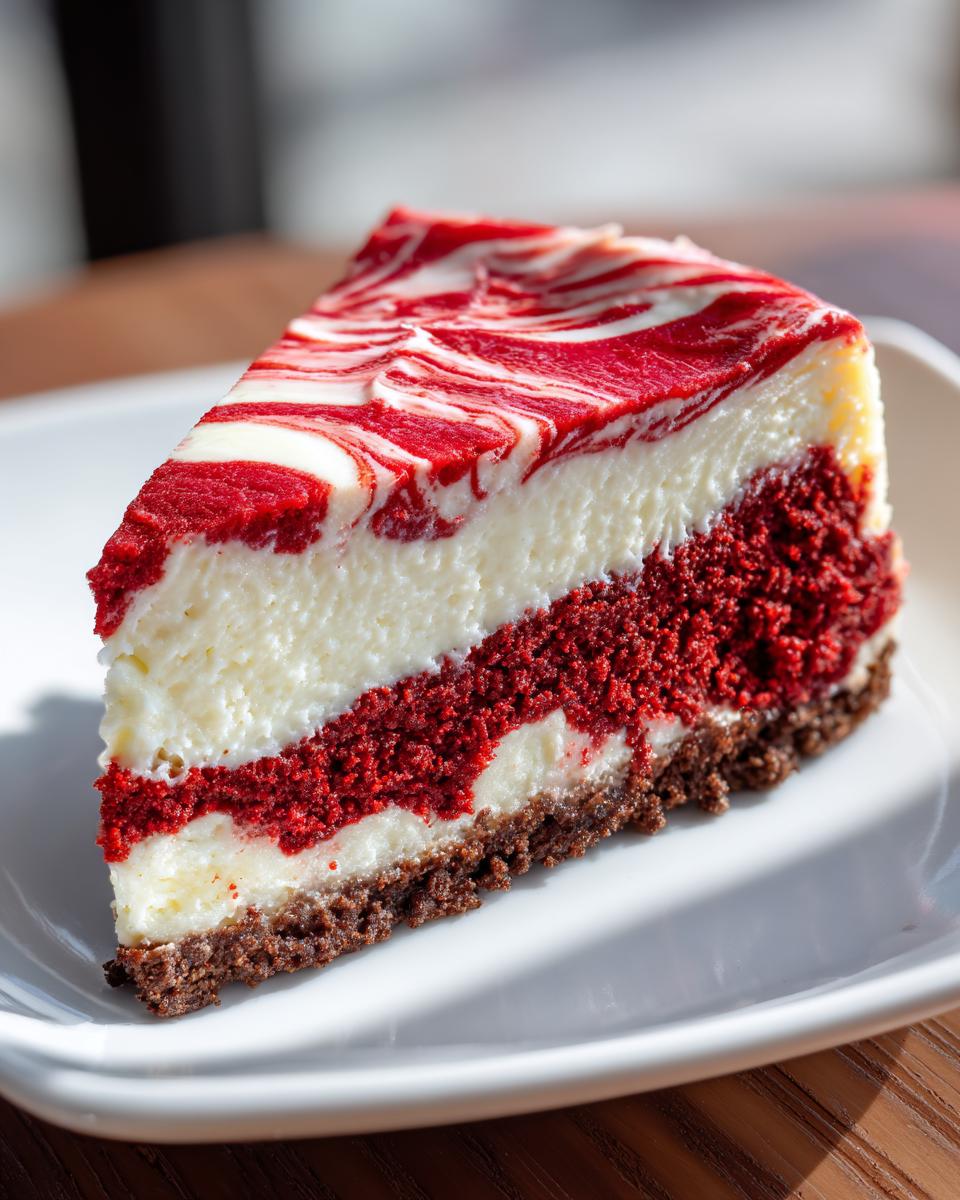
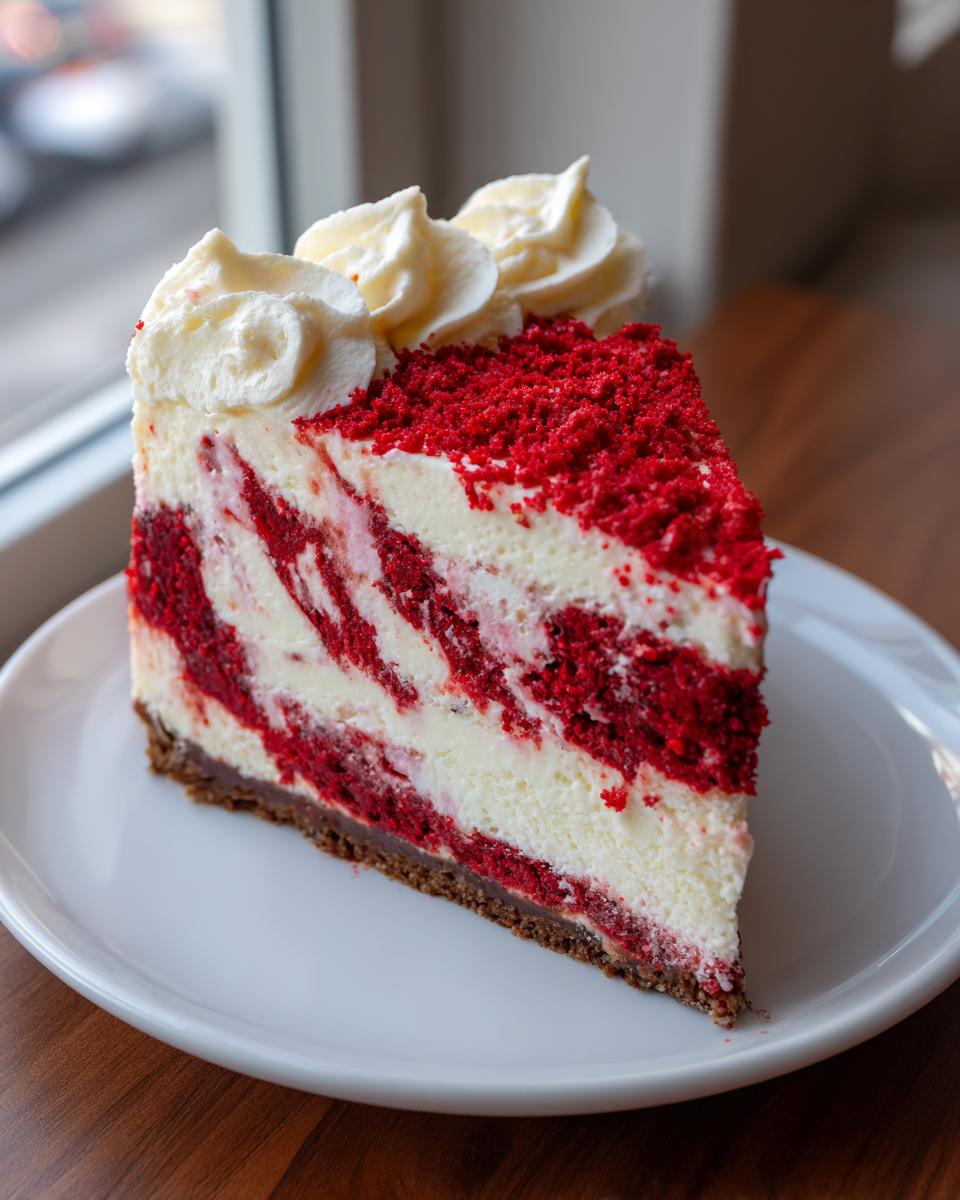
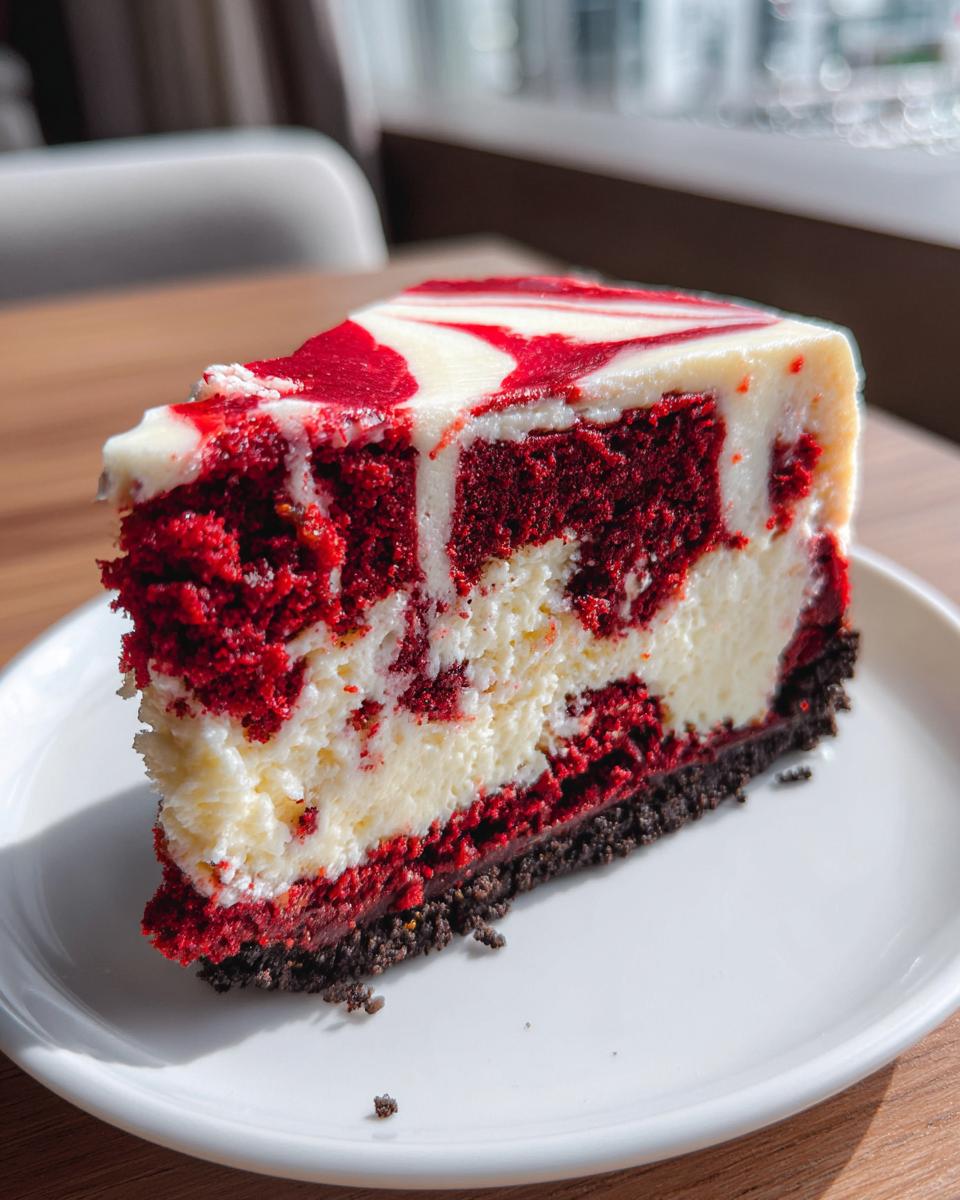
This is where the visual magic happens! Instead of mixing the red velvet batter fully in, we gently layer it and use a skewer to create a gorgeous marble effect. This red velvet swirl recipe means you get pockets of deep red flavor throughout the tart, creamy white base. It’s stunning without being complicated!
Gathering Ingredients for Your Red Velvet Cheesecake
Okay, getting the right ingredients ready is absolutely half the battle when we talk about baking something truly special like this red velvet cheesecake. In my philosophy here at Pure Plate Path, we want quality ingredients that are simple to find—no mystery items allowed! Having everything measured out *before* you start mixing is what separates a panicked bake from a peaceful one. Trust me on this!
Crust Components
Since the search buzz showed so many people love that extra crunch, we’re going with an Oreo base. It acts like a fantastic, chocolatey frame for the delicate filling. You’ll need:
- 1 1/2 cups crushed Oreo cookies (Don’t worry about scraping all the filling out, we want that flavor!)
- 6 tablespoons unsalted butter, melted
Creamy Cheesecake Base Ingredients
Remember what I always say? Room temperature ingredients are non-negotiable if you want that perfectly creamy cheesecake texture. Pull everything out an hour ahead! This is your foundation for an ultra-smooth bake.
- 3 (8 ounce) packages cream cheese, softened
- 1 1/2 cups granulated sugar
- 1 teaspoon vanilla extract
- 1/4 cup sour cream
- 3 large eggs (room temperature!)
Red Velvet Flavor Elements
This is where we introduce that iconic tang and beautiful crimson hue. Make sure you have good quality coloring; gel coloring really helps you get that deep red without adding too much liquid, which can throw off the texture.
- 1 teaspoon white vinegar
- 1/2 teaspoon salt
- 1 tablespoon unsweetened cocoa powder
- 1 tablespoon red food coloring (Gel preferred!)
- 1/2 teaspoon baking soda
- 1/4 cup buttermilk
- 1/4 cup vegetable oil
- 1 teaspoon white distilled vinegar (Yes, we use two vinegars—it helps activate that classic flavor!)
- 1 teaspoon vanilla extract
- 1 large egg
Phew! That’s a lot, but look how organized we are! We just have the final topping left.
Step-by-Step Instructions for the Red Velvet Cheesecake Recipe
Okay, now we get to the best part—putting it all together! Making a cheesecake that looks this fancy is actually part of what makes this an easy cheesecake baking experience. The water bath is your best friend here; don’t skip it if you want that perfect, uncracked top for your **red velvet cheesecake** masterpiece!
Preparing the Oreo Crust and Pan Setup
First things first, grab that 9-inch springform pan. Mix your crushed Oreos and melted butter right in there, pressing it firmly and evenly onto the bottom. I use the bottom of a measuring cup to really compact it down. Pop that chilling in the fridge for about 15 minutes while you get your other bowls ready. Next, preheat your oven to 325°F. Remember to get that water ready for your bath too—boiling water makes this process quicker later on!
Mixing the Cheesecake and Red Velvet Batters
You need two completely separate mixtures. In your main bowl, beat that softened cream cheese until it’s happy and lump-free, then add the sugar, vanilla, and sour cream. The eggs go in one at a time, and I mean one at a time. Stop mixing right after the yellow disappears. For the red velvet part, just whisk together all those wet and dry red velvet elements in a separate bowl until it’s that beautiful, vibrant color. Be careful not to over-mix anything here!
Assembling and Creating the Red Velvet Swirl
This layering is crucial for the final look. Pour about half of the plain, white cheesecake batter over your chilled Oreo crust. Then, gently pour all of your red velvet mixture right on top of that white layer. Finally, spoon the remaining plain batter over the red layer. Now for the dramatic part: take a knife or a thin skewer and gently trace a figure-eight or large ‘S’ pattern through the layers a few times. That’s your red velvet swirl recipe! Don’t dig too deep or you’ll mix it all into muddy brown.
Baking and Cooling for a Crack-Free Finish
Carefully set your springform pan inside a larger roasting pan. Pour that boiling water into the roasting pan until it comes halfway up the sides of your cheesecake pan. Bake this beauty for about 60 to 75 minutes. When the edges look set, but the very center still has a tiny bit of wobble, turn the oven off. I leave the door cracked open for a full hour—this gentle cooling is the ultimate hack to prevent cracks! Once it’s cooler, take it out of the water bath, let it come to room temp, cover it, and chill it for a minimum of six hours, but honestly, overnight is best!
Tips for Your Showstopper Cheesecake Success
If you followed the steps above, you should be well on your way to the most beautiful red velvet cheesecake! But since we’re aiming for absolute perfection here at the Path, let me quickly share a couple of nudges you can give your bake to ensure it’s truly top-tier decadent.
Ingredient Temperature Matters for Creamy Cheesecake
I mentioned it before, but I’m going to yell it from the rooftops just one more time: the temperature of your cream cheese, eggs, and sour cream is foundational! If those ingredients are cold, you’re going to end up with lumps, no matter how long you beat them. Lumps mean uneven baking, and uneven baking means potential cracking. So, always let those dairy items sit out until they feel soft to the touch. This is the secret to a truly creamy cheesecake!
Color Intensity and Food Coloring Tips
When people ask how I get that deep, rich red color in my desserts, it’s usually about using the right *kind* of coloring. If you use standard liquid drops from the grocery store, you end up having to dump in so much that it throws the moisture balance of the batter completely off. Always reach for a high-quality gel paste coloring if you can. A little bit goes such a long way to giving you that stunning, vibrant red we want in a classic red velvet dish.

For other fantastic ideas on mastering rich flavors, you might love my brown butter sugar cookies for your next baking adventure!
Variations on the Red Velvet Cheesecake
You know I love a recipe that can be bent a little bit to suit exactly what you’re craving! While this red velvet cheesecake is perfect as is, sometimes we need a little extra crunch or maybe we want to lean harder into the cake element. Don’t feel boxed in by my original plan; this is your kitchen, make it yours!
Incorporating an Oreo Crust Cheesecake Base
We already have a fantastic Oreo crust, right? But if you’re a true chocolate cookie fanatic, you don’t have to stop there! The little note I added in the details section suggests sprinkling about half a cup of mini chocolate chips directly into your plain cheesecake batter before you begin the swirling process. This simple addition gives you those little bursts of dense chocolate throughout the creamy filling, really upgrading that Oreo crust cheesecake experience.
Layered Red Velvet Dessert Options
If you want to go totally over the top and bring in that true ‘cake’ feeling, you can absolutely turn this into a layered creation! The next time you make this, consider baking a very thin round of actual red velvet cake batter first—maybe about a quarter-inch thick—and bake that for maybe 10 minutes until just set. Let it cool slightly, and then pour your cheesecake mixture right on top! This creates a genuine layered red velvet dessert that is just show-stopping. Just remember to account for the extra layer in your cooling time, because that bottom layer will add structure and richness!
Serving Suggestions for Your Festive Dessert Centerpiece
Once that gorgeous **red velvet cheesecake** has chilled overnight—patience pays off, my friends—it’s time to make it shine! Since the flavor profile is so rich and wonderfully balanced, you don’t need much fuss for presentation. My favorite way to serve this festive dessert centerpiece is simply sliced onto small white plates.
To really elevate it for a party, finish it with a dollop of extra whipped cream right on top of the slice. A light dusting of cocoa powder or some shaved white chocolate looks incredibly chic against that deep red. It’s already amazing, so let the vibrant color do the talking!
Storage and Reheating Instructions for Red Velvet Cheesecake
This is the part where the hard work pays off later! You absolutely must resist the urge to slice into your beautiful red velvet cheesecake right away. Seriously, that long chill time is non-negotiable if you want the texture to set up perfectly. The goal is a firm, sliceable, yet creamy experience, and that only happens when it’s properly rested.
You need to cover that springform pan tightly—I usually use plastic wrap, but aluminum foil works too if you press it lightly over the frosting so it doesn’t stick to the topping. Pop it into the refrigerator. As I mentioned before, I always aim for at least six hours, but if you can manage it, letting your cheesecake sit overnight is honestly the best thing you can do for the flavor and structure.
Now, for the not-so-great news: you don’t really reheat cheesecake! Because it relies on that cold temperature to maintain its dense, creamy structure, warming it up is just going to turn it back into soup, which we definitely don’t want after all that careful water bath work. Thankfully, it keeps wonderfully in the fridge for up to four days. If you want to give the frosting a little life after a few days, maybe serve it with a fresh cup of coffee. For the best leftovers, make sure you store it in the fridge before it sits out too long at room temperature—bacteria hate leftover dairy!
If you’re looking for more make-ahead desserts that hold up well, you have to check out my guide on easy apple tart recipe; those store beautifully too!
Frequently Asked Questions About This Decadent Dessert
I know when you’re tackling something as gorgeous as this **red velvet cheesecake**, you might have a few last-minute worries! That’s totally normal, especially with cheesecakes. Here are the questions I get asked most often while folks are getting ready to bake. I promise, these little answers will help you nail that luxurious texture!
Can I skip the water bath when making this red velvet cheesecake?
Oh, please don’t! I really, truly advise against skipping the water bath. I know it seems messy, but that gentle, steamy environment is the absolute single best thing you can do to guarantee that velvety smooth cheesecake texture you’re after. The steam keeps the air inside the oven moist, which means the top of your cake cooks slowly and evenly, preventing those awful cracks that ruin the presentation.
How do I ensure the red velvet color is deep enough?
This is all about quality coloring! If you want that rich, deep red that photographs beautifully, you need gel food coloring, not the liquid drops you usually use for Easter eggs. The liquid coloring adds too much water, which messes with the batter’s set. A little dab of gel coloring goes a long, vibrant way! It interacts better with the cocoa and buttermilk, giving you that signature depth.
What is the best topping besides cream cheese frosting?
That cream cheese frosting is divine, but if you want something lighter or different, you have great options! You can whip up some heavy cream with a touch of powdered sugar until you get soft peaks—it’s much lighter! Or, if you want something truly simple, a light dusting of powdered sugar over the chilled cake looks so elegant. If you’re feeling adventurous, you could even try making a homemade whipped topping following my tips over in the easy creamy Mexican street corn dip recipe section!
Your Next Step in Simple, Rewarding Baking
Now that you have the blueprint for this incredible treat, I hope you feel confident making this showstopper! Please save this recipe so it’s ready next time you need a delicious, accessible indulgence. I truly can’t wait to hear how your **red velvet cheesecake** turns out for you! If you want to learn more about how we approach simple, nourishing recipes, check out our philosophy on our About page!
PrintShowstopper Red Velvet Cheesecake with Creamy Swirl

Create an ultra-creamy and visually stunning Red Velvet Cheesecake. This recipe blends rich red velvet flavor with a smooth cheesecake layer, making it a perfect centerpiece for holidays or special gatherings.
- Prep Time: 30 min
- Cook Time: 75 min
- Total Time: 105 min
- Yield: 12 servings 1x
- Category: Dessert
- Method: Baking
- Cuisine: American
- Diet: Vegetarian
Ingredients
- 1 1/2 cups crushed Oreo cookies (for crust)
- 6 tablespoons unsalted butter, melted (for crust)
- 3 (8 ounce) packages cream cheese, softened
- 1 1/2 cups granulated sugar
- 1 teaspoon vanilla extract
- 1/4 cup sour cream
- 3 large eggs
- 1 teaspoon white vinegar
- 1/2 teaspoon salt
- 1 tablespoon unsweetened cocoa powder
- 1 tablespoon red food coloring (gel preferred)
- 1/2 teaspoon baking soda
- 1/4 cup buttermilk
- 1/4 cup vegetable oil
- 1 teaspoon white distilled vinegar
- 1 teaspoon vanilla extract
- 1 large egg
- 1/2 cup cream cheese frosting (for topping)
Instructions
- Prepare the crust: Mix crushed Oreos and melted butter. Press mixture firmly into the bottom of a 9-inch springform pan. Chill the crust for 15 minutes.
- Preheat your oven to 325 degrees Fahrenheit. Boil water for a water bath.
- Make the cheesecake batter: Beat the softened cream cheese and sugar in a large bowl until smooth. Mix in vanilla extract and sour cream. Beat in eggs one at a time, mixing just until combined after each addition.
- Prepare the red velvet component: In a separate bowl, whisk together vinegar, salt, cocoa powder, red food coloring, baking soda, buttermilk, oil, vanilla extract, and one egg until smooth.
- Assemble the cheesecake: Pour half of the plain cheesecake batter over the chilled crust. Gently pour all of the red velvet batter over the plain layer. Top with the remaining plain cheesecake batter.
- Create the swirl: Use a knife or skewer to gently swirl the layers together for a marbled effect. Do not overmix.
- Bake: Place the springform pan inside a larger roasting pan. Carefully pour boiling water into the roasting pan until it reaches halfway up the sides of the springform pan. Bake for 60 to 75 minutes, or until the edges are set and the center has a slight jiggle.
- Cool: Turn off the oven, crack the door open, and let the cheesecake cool inside the oven for 1 hour. Remove from the water bath and cool completely on a wire rack.
- Chill: Cover the cooled cheesecake and refrigerate for at least 6 hours, or preferably overnight, before serving.
- Finish: Before serving, spread the cream cheese frosting evenly over the top of the chilled cheesecake.
Notes
- Use room temperature ingredients for the cheesecake batter to prevent lumps and ensure a smooth texture.
- For an Oreo crust variation, add 1/2 cup of mini chocolate chips to the batter before swirling.
- If you want a richer red color, use a high-quality gel food coloring instead of liquid drops.
Nutrition
- Serving Size: 1 slice
- Calories: 450
- Sugar: 35g
- Sodium: 320mg
- Fat: 30g
- Saturated Fat: 18g
- Unsaturated Fat: 12g
- Trans Fat: 0.5g
- Carbohydrates: 40g
- Fiber: 1g
- Protein: 7g
- Cholesterol: 110mg