
You know how sometimes you have a totally reliable, classic recipe that you just adore, but part of you wonders, “Could this be *more*?” That’s exactly where I was until I figured out the magic touch for these brown butter sugar cookies. This isn’t just another cookie; it’s the upgraded version of the classic you’ve been waiting for! Browning the butter transforms everything, giving these treats an unbelievable, deep nutty flavor and the absolute dream texture—crispy edges that snap just enough, leading into a wonderfully chewy center. This is where **easy brown butter baking** truly changed my life in the kitchen. It’s a simple step that connects me right back to my roots, reminding me that the best flavor comes from taking that extra ten seconds to do things right.
- Why These Brown Butter Sugar Cookies Are the Best Sugar Cookie Recipe Upgrade
- Ingredients for Your Brown Butter Sugar Cookies
- Mastering How to Brown Butter for Cookies
- Step-by-Step Instructions for Brown Butter Sugar Cookies
- Making Your Brown Butter Sugar Cookies Bakery Style
- Storage and Reheating Instructions for Brown Butter Cookies
- Variations for Your Browned Butter Vanilla Cookies
- Frequently Asked Questions About Brown Butter Sugar Cookies
- Estimated Nutrition for These Rich Buttery Cookies
Why These Brown Butter Sugar Cookies Are the Best Sugar Cookie Recipe Upgrade
Honestly, moving to brown butter kicks your standard sugar cookie up several notches. You aren’t just making a treat; you’re creating something that feels truly special and worthy of being called **gourmet sugar cookies**. The effort is minimal, but the payoff is huge when you taste those **rich buttery cookies**.
- The browning process toasts the milk solids, unlocking a deep, hazelnut-like flavor that plain butter just can’t touch.
- It’s a simple, single upgrade that makes these cookies feel like they came straight from that little bakery you love.
- You get that incredible depth of flavor without adding fancy extracts or spices—it’s all in the fat!
I use this trick for so many things now, and I highly recommend checking out my simple icing guide for when you want to jazz these up even more.
Achieving Crispy Edge Cookies and Soft Centers
This is the gold standard texture everyone wants, right? The slightly cooled brown butter is crucial here. When we mix it in, it sets up just right while cooling, which helps those edges get perfectly crisp during baking. But because the butter is still decadent and rich inside the dough, you end up with that wonderfully irresistible center. These **crispy edge cookies** stay delightfully soft and **soft and chewy cookies** in the middle, making every single bite perfect.
Ingredients for Your Brown Butter Sugar Cookies
Now that you’re excited about the rich flavor, let’s talk about what you actually need! Getting the right measurements upfront saves so much headache later. Since this recipe relies so heavily on that butter upgrade, make sure you have good quality unsalted butter on hand—it makes a difference when you’re browning it! Before you start prepping, gather everything so you can go straight from brown butter cooling to mixing.
If you’re planning on cutting these out later, I always suggest checking out my guide for soft and chewy cookie bars for tips on managing dough texture, but for scoop-and-roll cookies, this list is perfect:
- 1 cup (2 sticks) unsalted butter (This is what we’re browning!)
- 1 1/4 cups granulated sugar (For the dough itself)
- 1 large egg
- 1 teaspoon vanilla extract
- 2 1/2 cups all-purpose flour
- 1 teaspoon baking soda
- 1/2 teaspoon salt
- Extra granulated sugar for rolling (You’ll need a shallow plate of this ready!)
See? Simple ingredients, right? The complexity comes from that technique we talk about next, not from a pantry full of specialty items!
Mastering How to Brown Butter for Cookies
Okay, this is the make-or-break moment for these **nutty sugar cookies**, and I promise, it’s easier than you think! This step is why these turn into genuine **gourmet sugar cookies**. You take your full cup of butter—two sticks—and you put it in a light-colored saucepan. I always use light because you need to *see* what’s happening, trust me!
Turn the heat up to medium. At first, it just melts, which is boring. Then, it starts to foam up like crazy. Don’t panic! Just keep swirling the pan gently. As the foam calms down, you’ll notice little golden-brown specks start collecting at the bottom. That’s the magic—those are the milk solids toasting! Soon, the whole kitchen starts smelling like decadent hazelnuts. That nutty aroma is your signal!
The second you smell that gorgeous, rich scent, pull the pan off the heat immediately. Pour that browned butter, brown bits and all (don’t leave any behind!), into a heatproof bowl. You simply must let this cool for about 15 minutes until it’s slightly solidified but still soft. If you try to cream hot butter with sugar, you end up with soup, not dough! Once it’s cool and soft, *then* you can move over to creaming it with your sugar. Ready to see the payoff? Check out how others manage this step over at this great salty-flavored recipe if you need another visual!
Step-by-Step Instructions for Brown Butter Sugar Cookies
The hard part—browning the butter and letting it chill—is over! Now we get to the satisfying part where everything comes together to form the perfect **chewy sugar cookies recipe**. I always feel the most focused right before this stage, ensuring I don’t rush the creaming, which is vital for that final texture. If you love chocolate, make sure you check out my chocolate chip cheesecake cookies later for another easy win!
Here is exactly how I move through the mixing and shaping process to get those perfect, slightly flattened, sugary orbs:
- Remember that slightly solidified, soft brown butter? You’re going to beat that in the large bowl with your 1 1/4 cups of granulated sugar. You want it creamy and light, just like you would for any other good cookie.
- Next, mix in the single egg and the teaspoon of vanilla extract until everything looks smooth and combined. Don’t worry if it looks a little separated at first; the dry stuff will bring it together.
- In a separate bowl, make sure you whisk your dry ingredients—the flour, baking soda, and salt. This ensures the leavening is evenly distributed.
- Now, add those dry ingredients to the wet mixture slowly. Mix on low speed, just until you see the last streaks of flour disappear. Seriously, stop mixing the second it comes together! We want soft, not tough!
- Time for the crunch! Get that remaining granulated sugar ready on a shallow plate.
- Scoop out dough balls—about 1.5 tablespoons worth is perfect for this recipe to yield about 24 cookies. Roll each ball thoroughly in that extra sugar until it’s completely coated. That sugar shell is what gives us our beautiful sugary crust!
- Place your sugared dough balls onto baking sheets lined with parchment paper. Now, this is important for flatness: gently press down on each ball with the bottom of a clear glass. You just want to flatten them slightly, not mash them flat, because they will spread when baking.
- Get your oven preheated to 375°F (190°C). Bake these beauties for just 9 to 11 minutes. You are looking for the edges to be set and just turning light gold, but the center MUST look slightly soft. They aren’t done when they look fully baked!
- The final, critical wait: Slide the sheets out and let the cookies rest right there on the hot pan for 5 whole minutes. They are too delicate to move right away. Afterward, transfer them carefully to a wire rack to finish cooling completely. Once cool, they firm up into those amazing **rich buttery cookies**!

Tips for Success with Brown Butter Cookies
If you want these **brown butter cookies** to live up to their hype, you need to respect the brown butter! The nutty depth it brings is what sets these apart from any other basic **homemade sugar cookies from scratch**.
- Seriously watch that butter when you’re browning it. It goes from perfectly toasted to burnt and bitter in about 10 seconds flat once it starts turning brown. Smell is your best cue!
- To guarantee you get those wonderfully **chewy sugar cookies recipe** centers, remember to pull them out when the middle still looks a little soft. They firm up beautifully as they rest.
- If your kitchen is super warm or you’re having a humid baking day, don’t skip chilling the dough for about 30 minutes before scooping and rolling. This helps keep the shape tight, especially when we press them down with the glass.
If you are looking for a truly reliable method, I highly recommend checking out the details over at Barley & Sage for another perspective on getting that perfect texture!
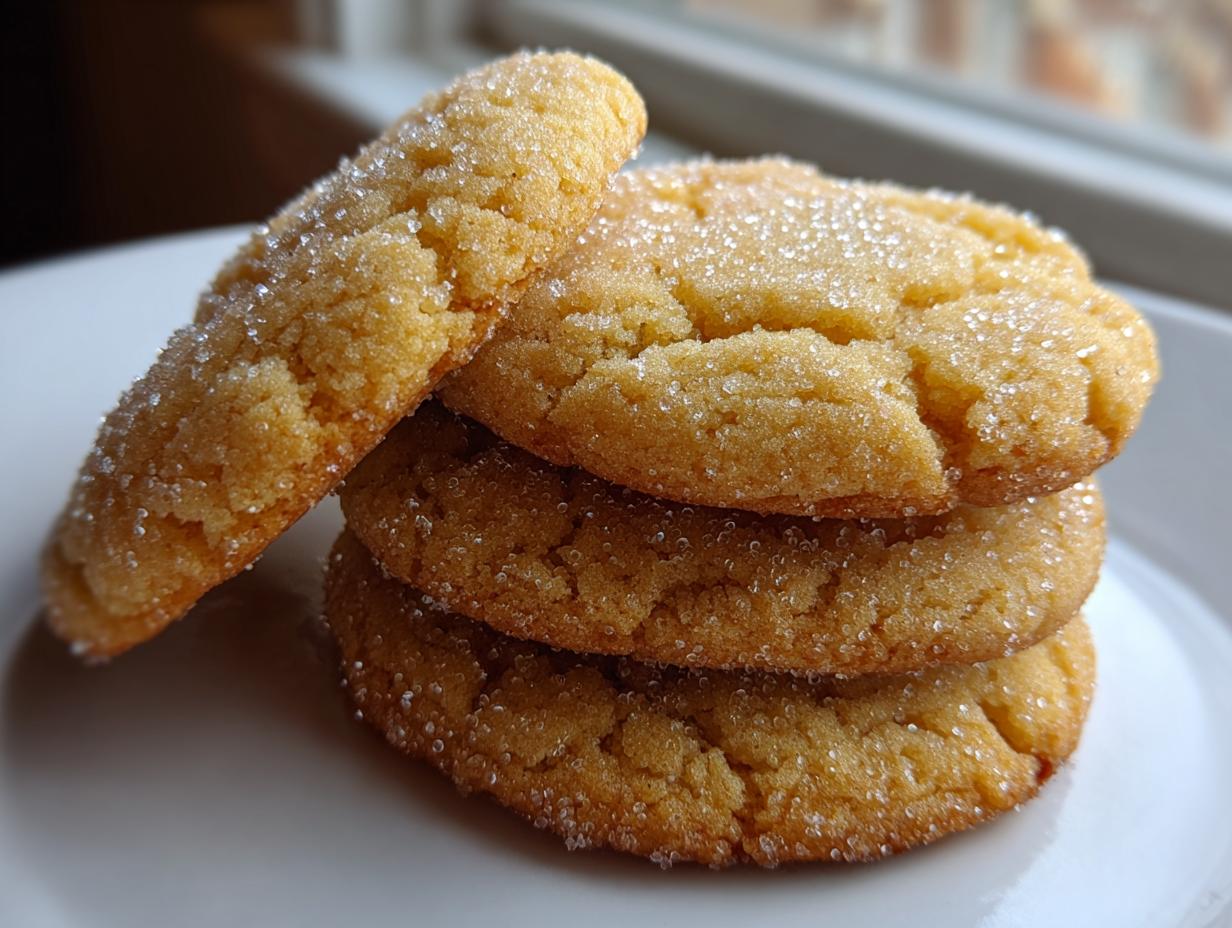
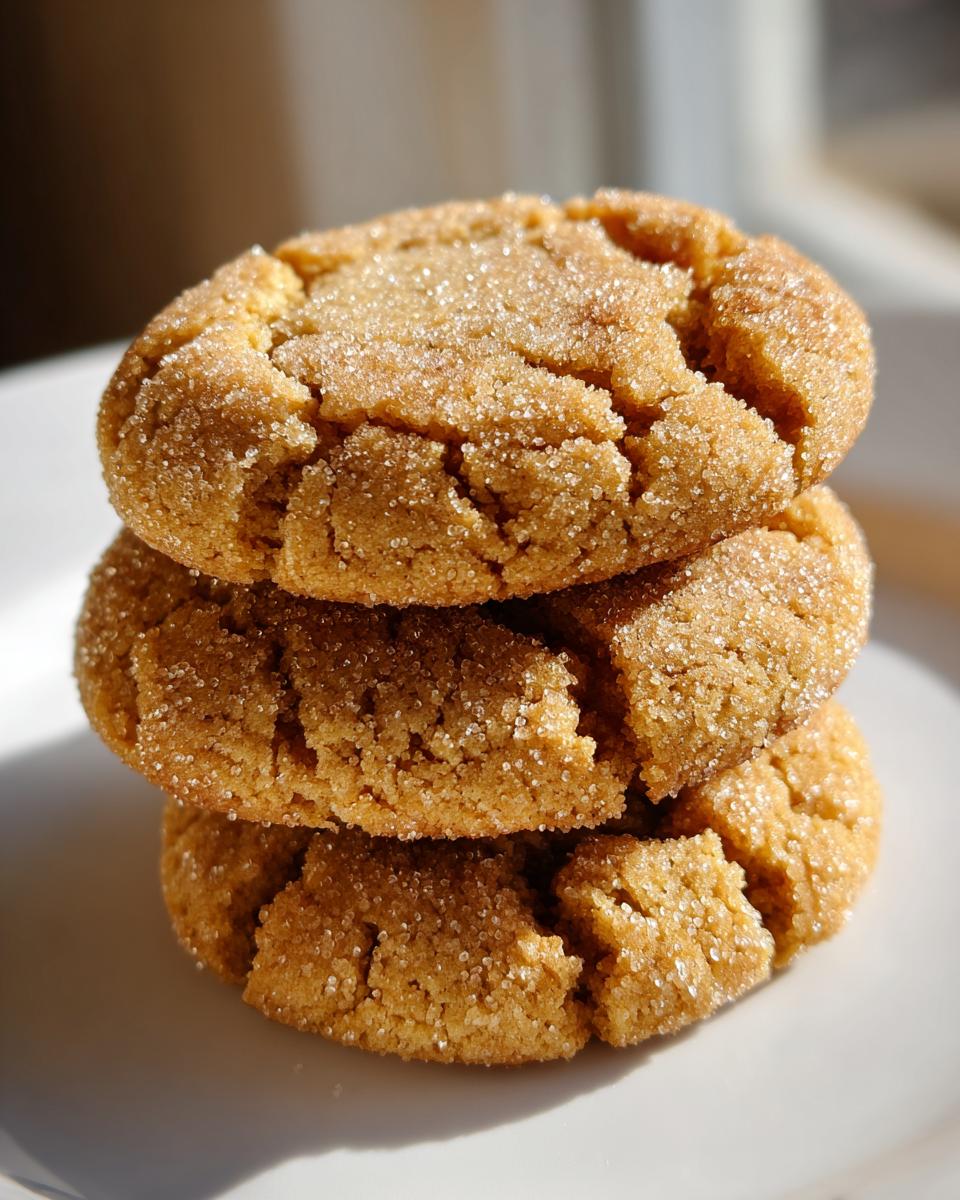
Making Your Brown Butter Sugar Cookies Bakery Style
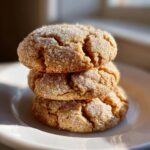
I absolutely *love* how these turn out looking when you give them that final sugar coat. It’s what takes them from my kitchen table to a fancy **bakery style brown butter cookies** display! That final roll in extra granulated sugar isn’t just for looks, mind you. It catches the light and gives you those gorgeous, crisp, sparkly edges we talked about. Honestly, achieving this level of finish from scratch is what makes me so proud of this recipe.
You don’t need complicated cutters or fancy techniques here. Just scoop, roll completely in sugar, and then give a gentle press with the bottom of a glass. That action helps the sugar stick perfectly and encourages that desirable spread and crispness. It’s such an easy trick to get that professional, delicious-looking texture at home, but if you want to try another simple classic, take a peek at my peanut butter blossoms next!
Storage and Reheating Instructions for Brown Butter Cookies
Listen, these **brown butter cookies** are so good that you might actually have leftovers—although I certainly never do! But for those of you with incredible willpower (or bigger families!), you need to know how to keep that amazing, nutty flavor locked in.
The best way to store them is definitely airtight. I grab one of those simple plastic containers with a good snap lid, or even a heavy-duty zip-top bag, and pack the cookies in in a single layer if I can manage it, maybe using parchment paper between layers so they don’t stick together.
They stay wonderfully soft and chewy at room temperature for a good three to four days. Because we used brown butter, they have a rich flavor base that keeps them tasting fresh longer than a standard sugar cookie.
If they somehow get a little stale after that time, don’t throw them out! That’s just an excuse to eat them warm. You can easily refresh them. Just place one or two cookies on a microwave-safe plate and zap them for about 10 to 15 seconds. They come out warm, slightly gooey, and tasting brand new—just watch them closely so those delicate edges don’t burn!
If you’re planning ahead for the holidays, these freeze beautifully too, which is why I always suggest checking out my recipe for easy creamy maple fudge—it’s another make-ahead favorite that saves time later!
Variations for Your Browned Butter Vanilla Cookies
While I love these **browned butter vanilla cookies** exactly as written, sometimes you have to mix things up, right? That beautiful nutty base we created from browning the butter acts like a fantastic, warm canvas for just a few little additions. It naturally boosts the flavor of the vanilla, making these truly a **cookie recipe with depth of flavor**, but you can push that even further without complicating this simple cookie!
If you’re looking to evolve these beyond the classic, keep the changes small so you don’t mess up the texture we worked so hard to nail. Take a look at my lemon cookie recipe if you ever want to go bright and zesty, but for these rich cookies, try these easy swaps:
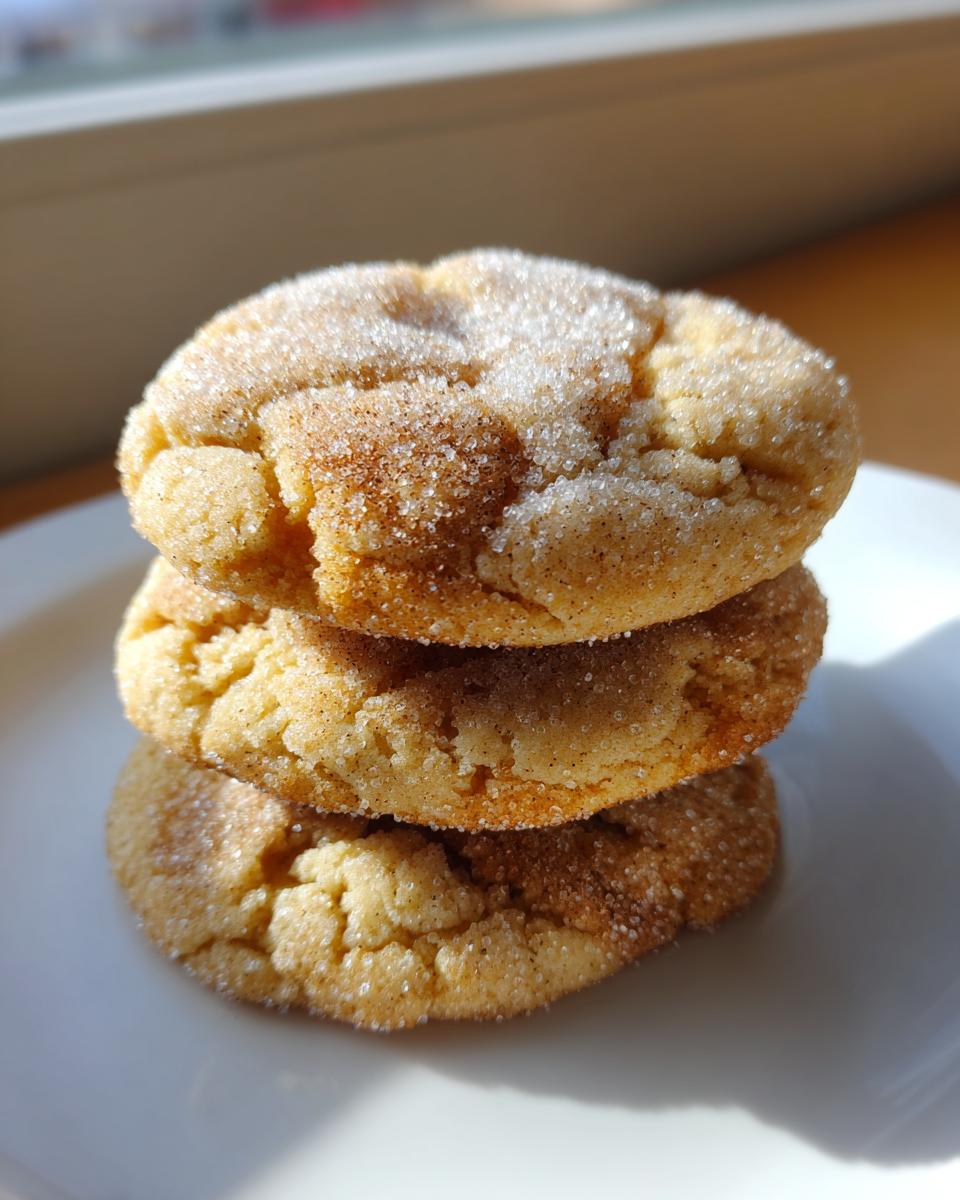
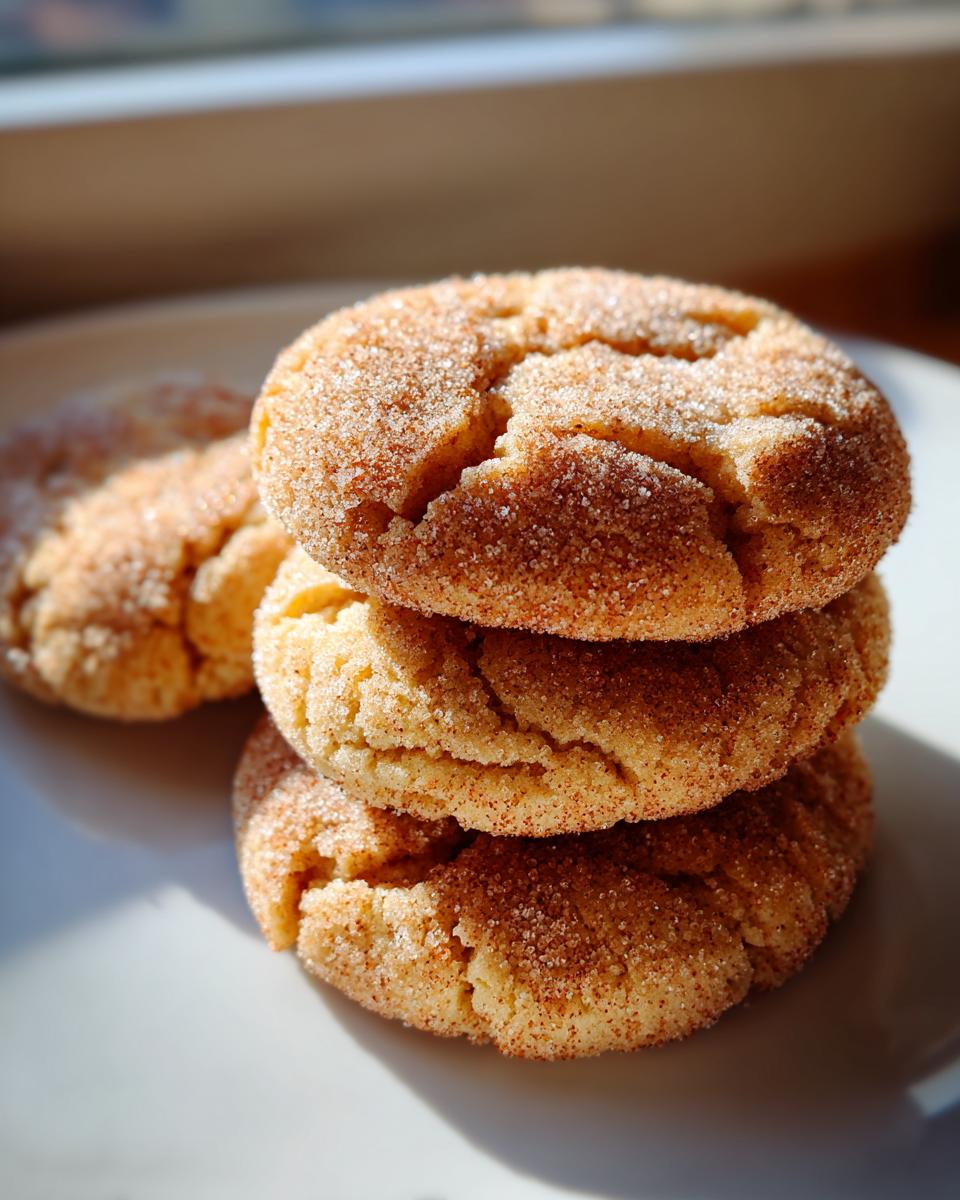
- A Little Spice: Add 1/2 teaspoon of ground cinnamon and a tiny pinch of nutmeg when you mix in the dry ingredients. It gives the cookies a beautiful, autumnal warmth that pairs unbelievably well with the nutty butter.
- Salted Finish: Seriously consider skipping the extra sugar roll (or cutting the sugar roll amount in half) and instead sprinkling just a few flakes of flaky sea salt over the top of the dough balls just before they go into the oven. This enhances that caramel note from the brown butter!
- Extract Swap: Instead of pure vanilla, try using almond extract instead, or a blend of the two. Just use 3/4 teaspoon total extract, as almond is very strong. It really makes the nutty notes sing.
You can find some great ideas on presentations and flavor tweaks on this site here, too. But trust me, sometimes the smallest sprinkle can yield the biggest flavor impact!
Frequently Asked Questions About Brown Butter Sugar Cookies
I know sometimes even the best recipes leave you with a lingering question or two, especially when you’re trying a new technique like browning butter. Don’t worry! I’ve collected the most common things people ask me about these wonderful **brown butter cookies** so you can bake with total confidence. If you are stocking up for the holidays, these are a fantastic addition to your kiss cookies rotation!
Can I skip browning the butter in this easy brown butter baking recipe?
You absolutely *can* skip it, yes. But why would you want to? Browning the butter is the entire point! If you use regular softened butter, you’ll end up with a great, standard sugar cookie—a perfectly fine **homemade sugar cookie recipe from scratch**—but it will completely lack that deep, rich, nutty flavor that makes these an upgrade. You lose all the complexity that makes this my favorite **easy brown butter baking** method.
How do I get the perfect soft and chewy cookies texture?
This is where precision comes in! To get those amazing **soft and chewy cookies** that are crispy on the outside, you have to pay attention to two things. First, make sure you are using the butter *after* it has cooled down for about 15 minutes—it needs to be soft but not warm or liquidy when you cream it with the sugar. Second, the baking time is everything! Pull them out when the center still looks slightly soft and underbaked. They continue to cook on that hot pan, firming up into that perfect chewy texture as they cool down.
Are these considered gourmet sugar cookies or holiday cookie recipes brown butter?
That’s such a wonderful question! They are definitely both! Because the flavor is so much deeper and more sophisticated than a regular vanilla cookie, they absolutely qualify as **gourmet sugar cookies**. You feel like a baking wizard when you pull these out. And because they are so rich and comforting, they are a fantastic addition when you are compiling your **holiday cookie recipes brown butter** platter. They stand out!
Estimated Nutrition for These Rich Buttery Cookies
I always try to share the nutrition info, not because I think anyone eating one of these glorious, **rich buttery cookies** is stopping at just one, but because I believe in being totally transparent about what we’re putting into our bodies. Knowing what’s in our food is the first step in making simple, balanced choices! Remember, this is my estimate based on the ingredients list for the whole batch.
For those of you looking to track things, these numbers are broken down per cookie, which is a pretty standard way to look at treats like this. If you’re interested in exploring ways to lighten up your baking in general, I have a whole section dedicated to making simpler, healthier dessert choices, but these traditional ones are for pure enjoyment!
Here is the breakdown:
- Serving Size: 1 cookie
- Calories: 165
- Sugar: 14g
- Sodium: 95mg
- Fat: 8g
- Saturated Fat: 5g
- Unsaturated Fat: 3g
- Trans Fat: 0g
- Carbohydrates: 22g
- Fiber: 0g
- Protein: 2g
- Cholesterol: 30mg
Please keep in mind that these figures are just estimates! They rely on the exact brands I use, especially for the butter and sugar. Baking is chemistry, and even small changes in ingredient amounts can shift these numbers slightly. But honestly, the joy these **brown butter sugar cookies** bring is completely immeasurable, no footnotes required!
PrintBrown Butter Sugar Cookies: Soft, Chewy, and Rich Flavor
Learn to make these bakery-style brown butter sugar cookies. Browning the butter adds a deep, nutty richness that upgrades the classic sugar cookie, resulting in treats with crispy edges and soft, chewy centers.
- Prep Time: 20 min
- Cook Time: 11 min
- Total Time: 31 min
- Yield: 24 cookies 1x
- Category: Dessert
- Method: Baking
- Cuisine: American
- Diet: Vegetarian
Ingredients
- 1 cup (2 sticks) unsalted butter
- 1 1/4 cups granulated sugar, plus more for rolling
- 1 large egg
- 1 teaspoon vanilla extract
- 2 1/2 cups all-purpose flour
- 1 teaspoon baking soda
- 1/2 teaspoon salt
Instructions
- Place the butter in a light-colored saucepan over medium heat. Cook, swirling often, until the butter melts, foams, and then brown bits form at the bottom, releasing a nutty aroma. This takes about 5 to 8 minutes. Immediately pour the browned butter into a heatproof bowl, scraping in the brown bits. Let it cool for 15 minutes until it is slightly solidified but still soft.
- In a large bowl, beat the slightly cooled brown butter and 1 1/4 cups of granulated sugar together until creamy.
- Beat in the egg and vanilla extract until just combined.
- In a separate bowl, whisk together the flour, baking soda, and salt.
- Gradually add the dry ingredients to the wet ingredients, mixing on low speed until just combined. Do not overmix.
- Place the remaining granulated sugar on a shallow plate.
- Scoop the dough into balls, about 1.5 tablespoons each. Roll each ball in the extra sugar until fully coated.
- Place the dough balls on baking sheets lined with parchment paper, spacing them 2 inches apart. Gently press down on each ball with the bottom of a glass to flatten slightly.
- Bake at 375°F (190°C) for 9 to 11 minutes. The edges should look set and lightly golden, but the centers should still look slightly soft.
- Let the cookies cool on the baking sheet for 5 minutes before transferring them to a wire rack to cool completely.
Notes
- Browning the butter is key for that deep, nutty flavor. Watch it closely after it foams to prevent burning.
- For extra chewy cookies, slightly underbake them; they will firm up as they cool.
- You can chill the dough for 30 minutes if your kitchen is warm, which helps maintain shape during baking.
Nutrition
- Serving Size: 1 cookie
- Calories: 165
- Sugar: 14g
- Sodium: 95mg
- Fat: 8g
- Saturated Fat: 5g
- Unsaturated Fat: 3g
- Trans Fat: 0g
- Carbohydrates: 22g
- Fiber: 0g
- Protein: 2g
- Cholesterol: 30mg