
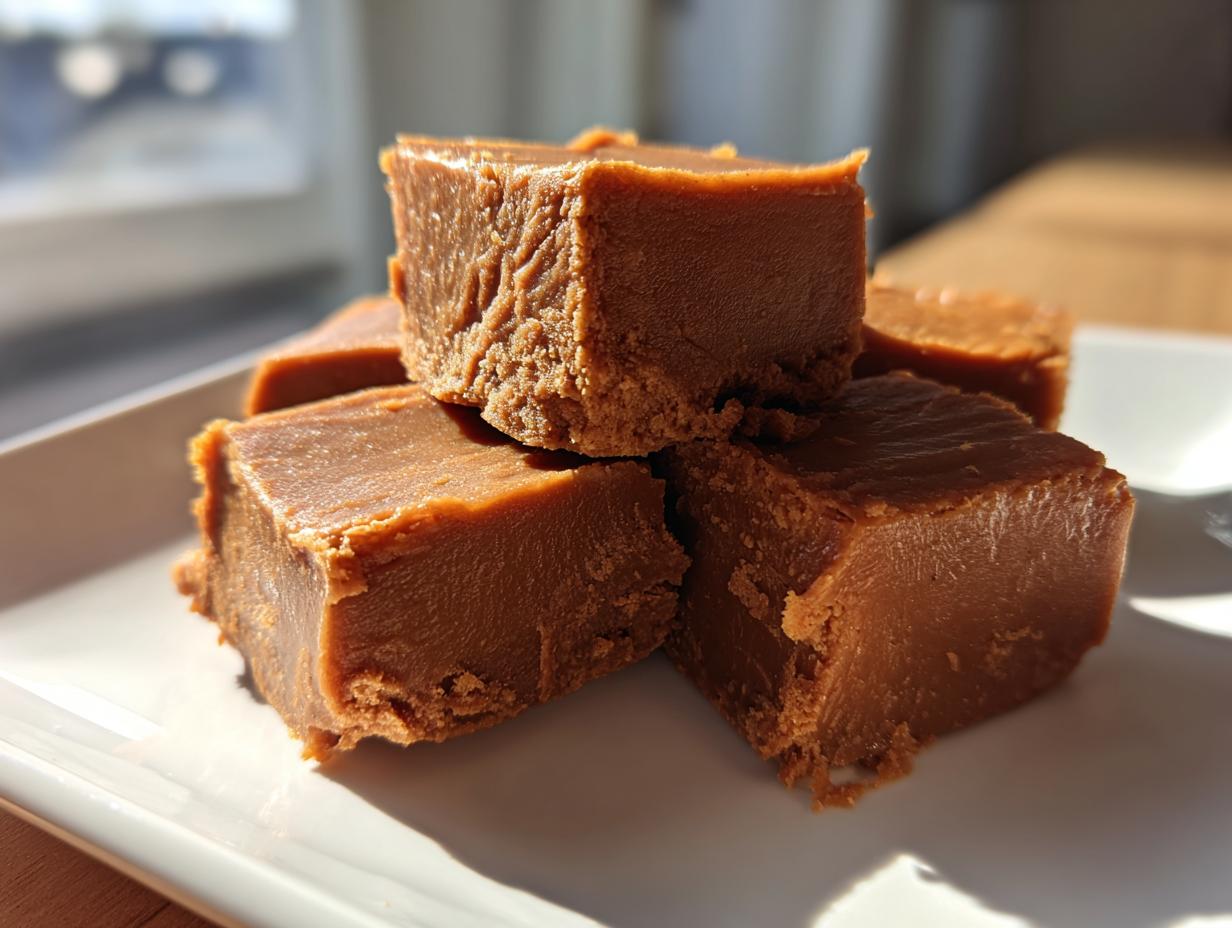
There’s nothing quite like the comfort of homemade candy, especially when it tastes like crisp autumn mornings and warm syrup. When I think about reclaiming simple joys in the kitchen, my mind immediately goes to this maple fudge. Making it brings me right back to that time I was so swamped with work, and I needed something deeply satisfying without a huge fuss. Trust me when I say this recipe is my go-to for achieving that incredibly creamy maple fudge that literally melts the second it hits your tongue. It’s so straightforward, yet the pure maple flavor makes it taste like an indulgence. If you’re looking for genuinely silky smooth fudge that feels decadent but is actually easy, you’ve found it right here. For more ways to incorporate maple into your favorite indulgences, check out my thoughts on fudgy maple sweet potato brownies. Let’s make some candy!

- Why This Easy Maple Fudge Recipe Works for You
- Gathering Ingredients for Silky Smooth Maple Fudge
- Step-by-Step Instructions for Homemade Maple Fudge
- Tips for Achieving Best Maple Fudge Texture
- Storage and Serving Suggestions for Your Maple Fudge
- Frequently Asked Questions About Maple Fudge
- Nutritional Estimates for Maple Fudge
- Share Your Decadent Sweet Treats Experience
Why This Easy Maple Fudge Recipe Works for You
When I first started making this, my goal was pure simplicity. I didn’t want 12 steps or a complicated technique. This recipe delivers exactly what busy cooks need. You get that beautiful, rich maple flavor without any fuss!
Here is why I always come back to this method:
- It’s a genuine quick fudge recipe. After about 15 minutes on the stove, the rest is waiting time.
- The temperature control is the key to that super creamy maple fudge texture; it’s foolproof if you use a thermometer.
- It uses straightforward pantry staples, so you aren’t dashing to the specialty store for weird ingredients.
You can even find inspiration for other simple sweets, like my recipe for easy peppermint fudge, if you’re looking for more holiday candy ideas!
Gathering Ingredients for Silky Smooth Maple Fudge
When you’re making candy, the quality of what goes in really dictates what comes out. For the best results—that perfect creamy texture we’re after—we need to be diligent about our ingredients. This isn’t the place to cut corners, especially when it comes to our star flavor. I promise, if you follow this list, you’ll end up with true homemade maple fudge.
Essential Components for Perfect Maple Fudge
We start with the basics for that fantastic melt-in-your-mouth candy base. You’ll need:
- 2 full cups of granulated sugar.
- 2/3 cup of whole milk or heavy cream. Use cream if you want it extra rich!
- 1/2 cup of real maple syrup. And I mean 100% pure stuff! If you use pancake syrup, you’re going to get a sugary mess instead of fudge, so skip the imitation stuff completely.
- 1 tablespoon of unsalted butter, softened a little bit.
- Just 1/4 teaspoon of salt to wake up all those sweet maple notes.
- 1 teaspoon of simple vanilla extract right at the end.
Optional Addition: Maple Walnut Fudge Ingredients
If you want to turn this into a showstopper, especially for Christmas fudge gifts, we can add walnuts. This creates the most amazing maple walnut fudge variation. All you need is 1 cup of chopped walnuts. I really suggest you lightly toast them in a dry pan for about five minutes before you add them. It brings out their flavor so much! It’s a tiny extra step that makes a huge difference in the final taste.
Step-by-Step Instructions for Homemade Maple Fudge
Okay, this is where the magic—and the critical timing—happens! Don’t let the candy making scare you off. When working with sugar, precision is kindness to yourself. If you follow these stages exactly, you will get that perfect pourable, then set, luscious fudge. I’ve linked my guide to making creamy sauces because consistency is key in cooking, whether it’s savory or sweet!
Preparation and Initial Cooking of the Maple Fudge Base
First things first: get your pan ready. Line an 8×8 inch baking pan with parchment paper, making sure you leave a little overhang on the sides—that’s how we easily lift the fudge out later! Give that paper a light grease. Now, grab your heavy-bottomed saucepan. Combine the sugar, milk (or cream), and all that beautiful maple syrup. Place it over medium heat. You have to stir this part constantly until you *cannot* feel any sugar grains grinding against the bottom of the pan. We need it fully dissolved before we stop stirring!
Achieving the Soft-Ball Stage Temperature
Once the sugar dissolves, stop stirring! Seriously, back away from the spoon. Clip your candy thermometer right onto the side of the pan, making sure the tip is nicely submerged but not touching the metal bottom. Let it come up to a full boil. We are looking for 234 degrees Fahrenheit—that’s the “Soft-Ball Stage.” This takes about 10 to 15 minutes, so watch it, but keep your hands off the mixture. Stirring now can cause crystals to form, and nobody wants grainy fudge!
The Cooling and Beating Process for Creamy Maple Fudge
The second it hits 234°F, pull the pan off the heat right away! Stir in that tablespoon of butter and the salt until the butter melts away completely. Now, this is the second biggest secret to creamy maple fudge: you must let it cool down completely on the stovetop until the temperature drops to exactly 110 degrees Fahrenheit. Don’t rush this cooling! When it hits 110°F, stir in your vanilla, and if you’re using walnuts, toss them in now. Then, you switch gears completely: beat that mixture vigorously, either by hand or using your mixer on medium, for about 3 to 5 minutes. You’ll see it change instantly—it brightens up and loses that shiny gloss. That dull look means it’s ready! Pour it fast into your prepared pan and let it set up for at least four hours or overnight.
Tips for Achieving Best Maple Fudge Texture
Getting that melt in your mouth candy result isn’t just luck; it comes down to respecting a few rules when you’re working with sugar. I learned these the hard way, trying to hurry things along when I was busy! But when you follow these tips, I guarantee you’ll get that beautiful, luxurious texture every single time. It really helps build that trust that you can master any of these traditional sweets.
First off, and this is what Grandma always drilled into me about making any kind of candy: only use pure, high-quality real maple syrup. Seriously, folks, the pancake syrup is full of corn syrup and artificial flavors, and it will totally mess up the crystallization process here. That pure stuff is what gives you that deep, gorgeous flavor profile.

Next, when you get to the boiling stage, be super careful not to scrape the sides of the pan. Those little crystals that form on the edge—they’re temptations!—will fall into your perfect sugar bath and cause the whole thing to crystallize too soon. We want smooth, not sandy!
Finally, while chilling in the fridge works to set the fudge faster, I really recommend letting it set up at room temperature for at least four hours. It might take longer, but that slow setting allows the sugars to settle into that perfect, silky texture. If you need quick inspiration for weeknight meals while you wait, check out some of my quick and easy weeknight dinners!
Storage and Serving Suggestions for Your Maple Fudge
Once your beautiful slabs of homemade maple fudge are fully set, the last hurdle is keeping them perfect! Nobody wants stale or sticky fudge, right? Luckily, this confection is quite resilient if stored properly. If you’re making batches for holiday candy making, you definitely want to know these storage tricks.
Good news: You don’t really need to refrigerate this fudge at all, which is great because cold fudge can sometimes get a little firm and lose that lovely “melt-in-your-mouth” quality we worked so hard to achieve. For everyday enjoyment, just wrap the pieces tightly in plastic wrap or wax paper and keep them in an airtight container at cool room temperature. It stays wonderfully fresh for about two weeks stored this way. If your kitchen is super warm—I’m talking summertime heat—then popping it in the fridge is okay, but let it sit on the counter for 20 minutes before serving so it softens up again.
Since we perfected this simple dessert recipe, I find it pairs perfectly with a strong cup of coffee. The deep maple notes cut through the bitterness of the roast so nicely. If you are looking for other sweet staples to round out your holiday platter, I have a show-stopping Christmas chocolate cream pie recipe that everyone asks for year after year. Do you have a favorite partner for fudge? Let me know in the comments!
Frequently Asked Questions About Maple Fudge
I always get so many great questions when folks start tackling fudge recipes for the first time! Making candy can feel a little intimidating, but once you get the hang of the temperature, it’s surprisingly easy. Here are some things I hear all the time when people are trying to lock down that perfect batch of maple fudge.
Whether you’re prepping these for gifts or just craving a decadent sweet treat, these tips should help you troubleshoot!
Can I make this a no bake maple fudge?
That’s a great thought, especially when you’re busy! If you are absolutely set on a no bake maple fudge, you’ll need a completely different recipe that usually relies on melted white chocolate or condensed milk becoming the base. This particular recipe, which aims for that classic, old-fashioned silky smooth fudge texture, is cooked. We have to hit that soft-ball stage temperature (234°F) to ensure the sugar crystals set correctly when cooled. Cutting the cooking phase usually results in something soft and sticky, not firm fudge. So for *this* recipe, which uses that traditional cooking method, the answer is no, it requires stovetop cooking!
What is the best type of maple syrup for this recipe?
This is probably the most important question if you want a truly phenomenal real maple syrup dessert! You absolutely must use 100% pure maple syrup, not the stuff that just says “pancake syrup.” That imitation stuff is primarily high-fructose corn syrup and artificial flavoring, and it throws off the chemistry completely, resulting in grainy or overly sweet fudge. For the absolute deepest, richest flavor that sings alongside the butter, I always grab Grade A Dark Robust Taste (formerly Grade B). It gives you that fantastic maple punch that makes this the best maple fudge around!
If you’re working on other simple recipes, perhaps you’d like a look at my guide on how to make easy lasagna with ricotta—sometimes you need a satisfying savory dish alongside your sweets!
Nutritional Estimates for Maple Fudge
I know many of you are focused on nourishing your bodies while still enjoying those little moments of joy, and that’s where I love to help out! Treating yourself to something like this creamy maple fudge is totally doable, even when you’re tracking your macros. Remember, since we are working with sugar and pure maple syrup, the values skew toward the sweet side, of course. But as a homemade treat, you know exactly what went into it!
Here is a quick breakdown based on a serving size of one small square from the recipe above. Please keep in mind these are just estimates, like any recipe relying on ingredient brands and specific measurements, things can shift around a bit!
- Serving Size: 1 square
- Calories: Around 165
- Total Fat: About 5g
- Sugar: This one is higher, clocking in around 28g, which is why a little goes a long way!
- Protein: About 1g
- Sodium: Roughly 35mg
See? Not bad for a decadent sweet treat! When I serve these during the holidays, I usually pair them with sparkling water or a cup of unsweetened herbal tea. It balances out the deep maple flavor perfectly. Enjoy every bite!
Share Your Decadent Sweet Treats Experience
Now that you’ve smelled that amazing maple aroma filling your kitchen and have those gorgeous, smooth squares cooling, I truly want to see what you created! Making this best maple fudge recipe becomes a shared experience for me when I hear from you all.
Did you keep it classic, or did you go all out with the walnuts for that maple walnut fudge twist? Don’t be shy! Head down to the comments section below and tell me how it went. If you managed to get a gorgeous photo of your finished candy, please share it so we can all admire your handiwork. Seeing your successes really makes my day!
And while we are chatting about sweet things—because really, who can stop at just one maple dessert idea?—I always love hearing what other simple treats you are loving right now. Are you stocking up on fudge for gifts, or is it getting devoured immediately?
If you run into any last-minute questions or just want to give kudos, you can always reach out directly through my contact page. I love hearing from you and helping out wherever I can. Happy tasting!
PrintEasy, Creamy Maple Fudge Recipe
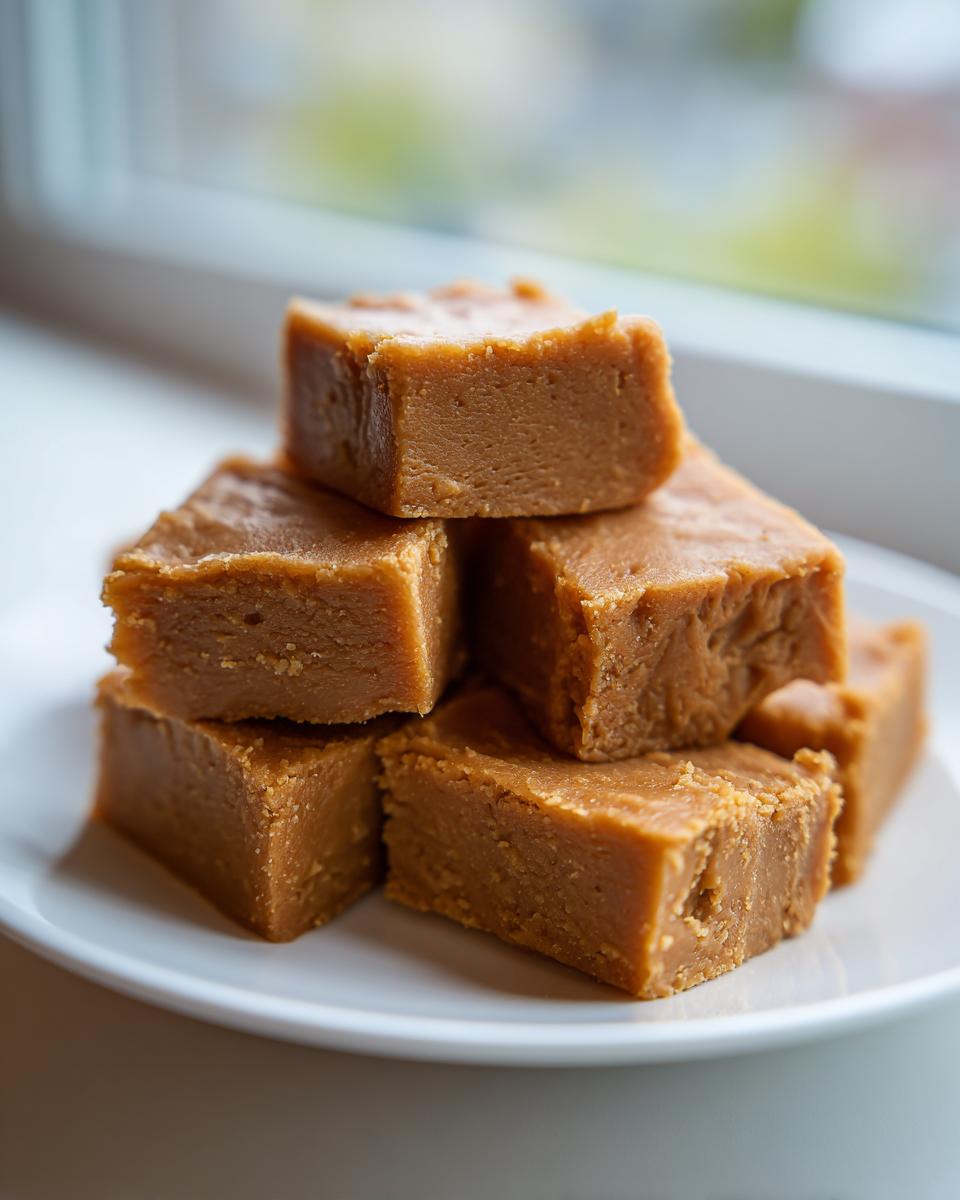
Make this silky smooth, melt-in-your-mouth maple fudge using real maple syrup. This simple recipe delivers decadent sweet treats perfect for holiday candy making or homemade gifts.
- Prep Time: 15 min
- Cook Time: 15 min
- Total Time: 4 hours 30 min
- Yield: About 36 pieces 1x
- Category: Dessert
- Method: Stovetop Cooking
- Cuisine: American
- Diet: Vegetarian
Ingredients
- 2 cups granulated sugar
- 2/3 cup whole milk or heavy cream
- 1/2 cup real maple syrup
- 1 tablespoon unsalted butter
- 1/4 teaspoon salt
- 1 teaspoon vanilla extract
- Optional: 1 cup chopped walnuts for Maple Walnut Fudge
Instructions
- Line an 8×8 inch baking pan with parchment paper, leaving an overhang on the sides for easy removal. Lightly grease the paper.
- Combine the sugar, milk (or cream), and maple syrup in a heavy-bottomed saucepan.
- Stir the mixture constantly over medium heat until the sugar dissolves completely.
- Attach a candy thermometer to the side of the pan, making sure the tip is submerged but not touching the bottom.
- Stop stirring once the mixture boils. Cook until the temperature reaches 234 degrees Fahrenheit (Soft-Ball Stage). This usually takes about 10 to 15 minutes.
- Remove the saucepan from the heat immediately. Stir in the butter and salt until the butter melts completely.
- Let the mixture cool undisturbed on the stovetop until the temperature drops to 110 degrees Fahrenheit. Do not rush this cooling step.
- Once cooled, stir in the vanilla extract. If using walnuts, stir them in now.
- Beat the fudge mixture vigorously by hand or with an electric mixer on medium speed for about 3 to 5 minutes until the fudge thickens slightly and loses its glossy shine. It should become dull.
- Quickly pour the fudge into the prepared pan and spread it evenly.
- Let the fudge cool completely and set at room temperature for at least 4 hours, or chill briefly to speed up setting.
- Once firm, lift the fudge out using the parchment overhang and cut it into small squares.
Notes
- Use only pure, high-quality real maple syrup for the best flavor. Avoid pancake syrup.
- For the creamiest texture, do not scrape the sides of the pan while stirring the boiling mixture.
- If you want a quicker set, you can chill the fudge in the refrigerator, but room temperature setting yields a better texture.
- If you are making Maple Walnut Fudge, toast the walnuts lightly before adding them for deeper flavor.
Nutrition
- Serving Size: 1 square
- Calories: 165
- Sugar: 28g
- Sodium: 35mg
- Fat: 5g
- Saturated Fat: 3g
- Unsaturated Fat: 2g
- Trans Fat: 0g
- Carbohydrates: 30g
- Fiber: 0g
- Protein: 1g
- Cholesterol: 10mg