
Oh, the heartache! You spend hours cutting out perfect shapes, you bake them just right, and then comes the icing. If you’ve ever watched your carefully piped outlines dissolve into a sad, runny puddle across your holiday cookies, you know exactly what I’m talking about. It’s frustrating enough to make me want to just dust everything with powdered sugar and call it a day! But that’s not what we do here at Pure Plate Path. We need icing that works, period. That’s why I’m sharing my ultimate, fail-proof cookie icing recipe. This meringue-based recipe is the one I rely on every single year for Christmas—it dries smooth, holds a glossy finish, and doesn’t run, no matter how complicated my designs get. Trust me, once you have this recipe, you’ll never go back!
- Why This Is The Best Cookie Icing Recipe For Decorating
- Ingredients for Your Perfect Cookie Icing Recipe
- How to Prepare Your Fail Proof Cookie Icing Recipe
- Tips for Success with Your Cookie Decorating Icing Guide
- Making a Corn Syrup Free Cookie Icing Variation
- Storage and Reheating Instructions for Leftover Cookie Icing Recipe
- Frequently Asked Questions About This Cookie Icing Recipe
- Estimated Nutritional Data for Your Cookie Icing Recipe
- Share Your Holiday Cookie Icing Creations
Why This Is The Best Cookie Icing Recipe For Decorating
If you are tired of icing that cracks into a thousand pieces or, worse, never seems to dry at all, this is your solution. Honestly, when I’m busy—and when am I not busy?—I need dependability. Meringue powder is the non-negotiable ingredient that makes this recipe a game-changer. Forget the confusing steps sometimes attached to traditional royal icing; this mixes up in about ten minutes, and you get the payoff immediately.
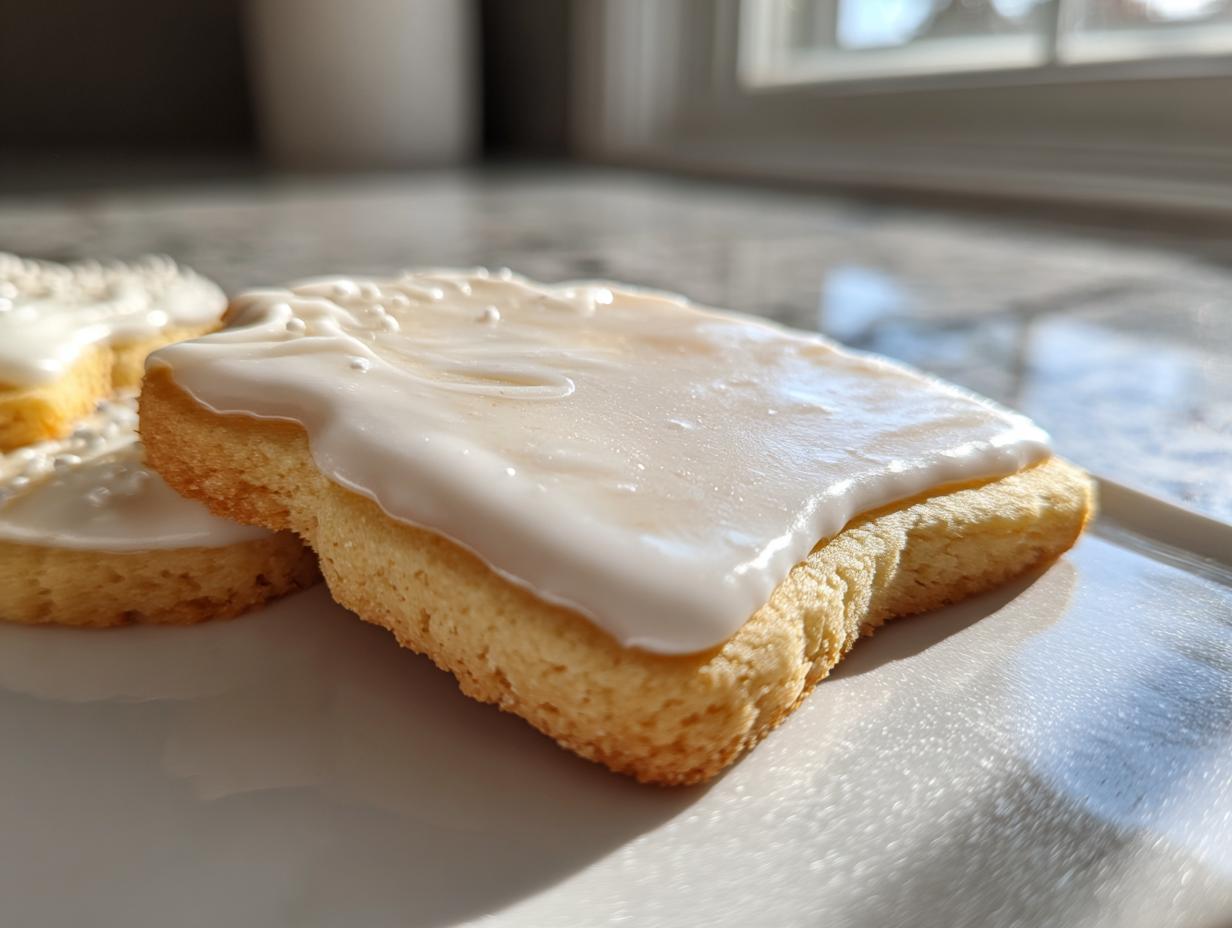
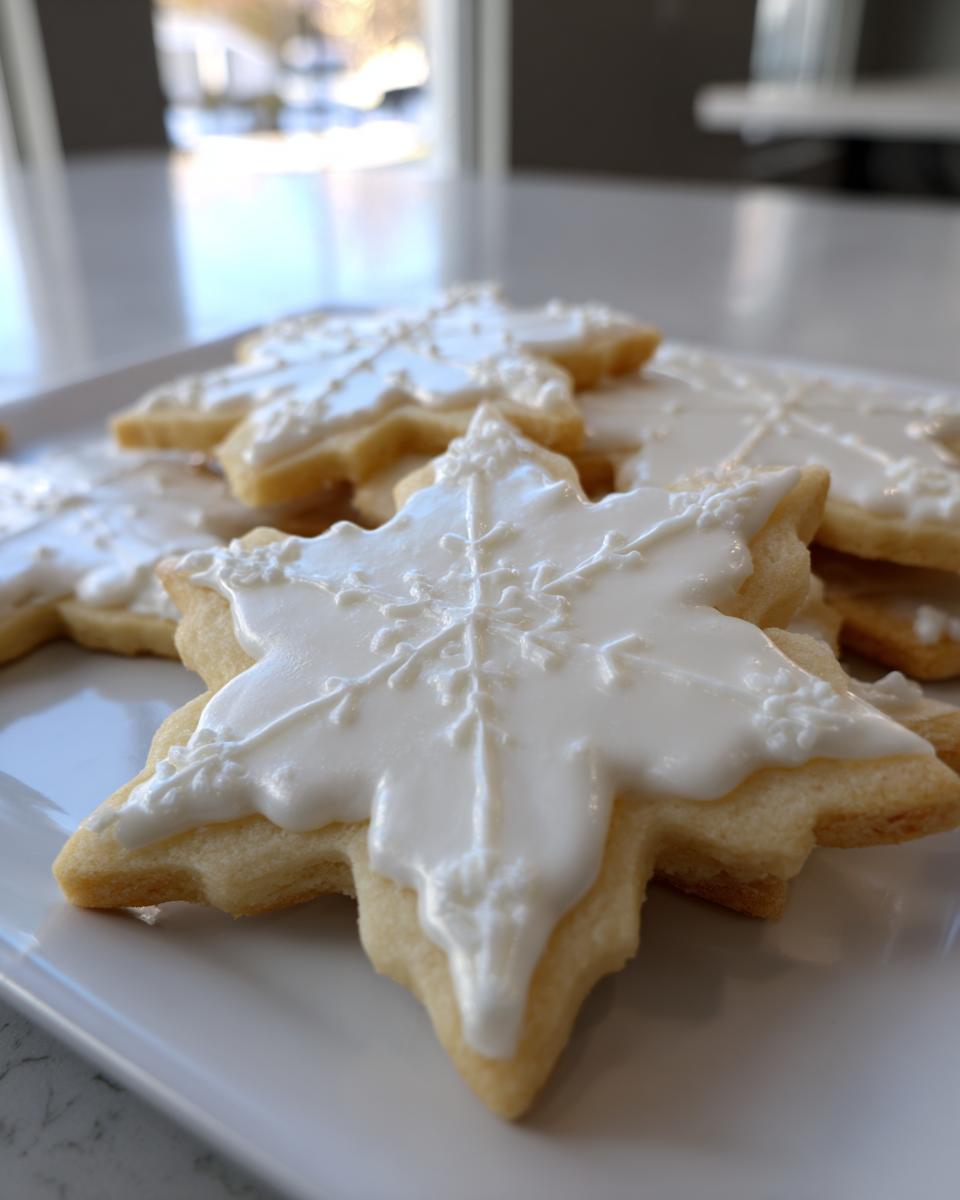
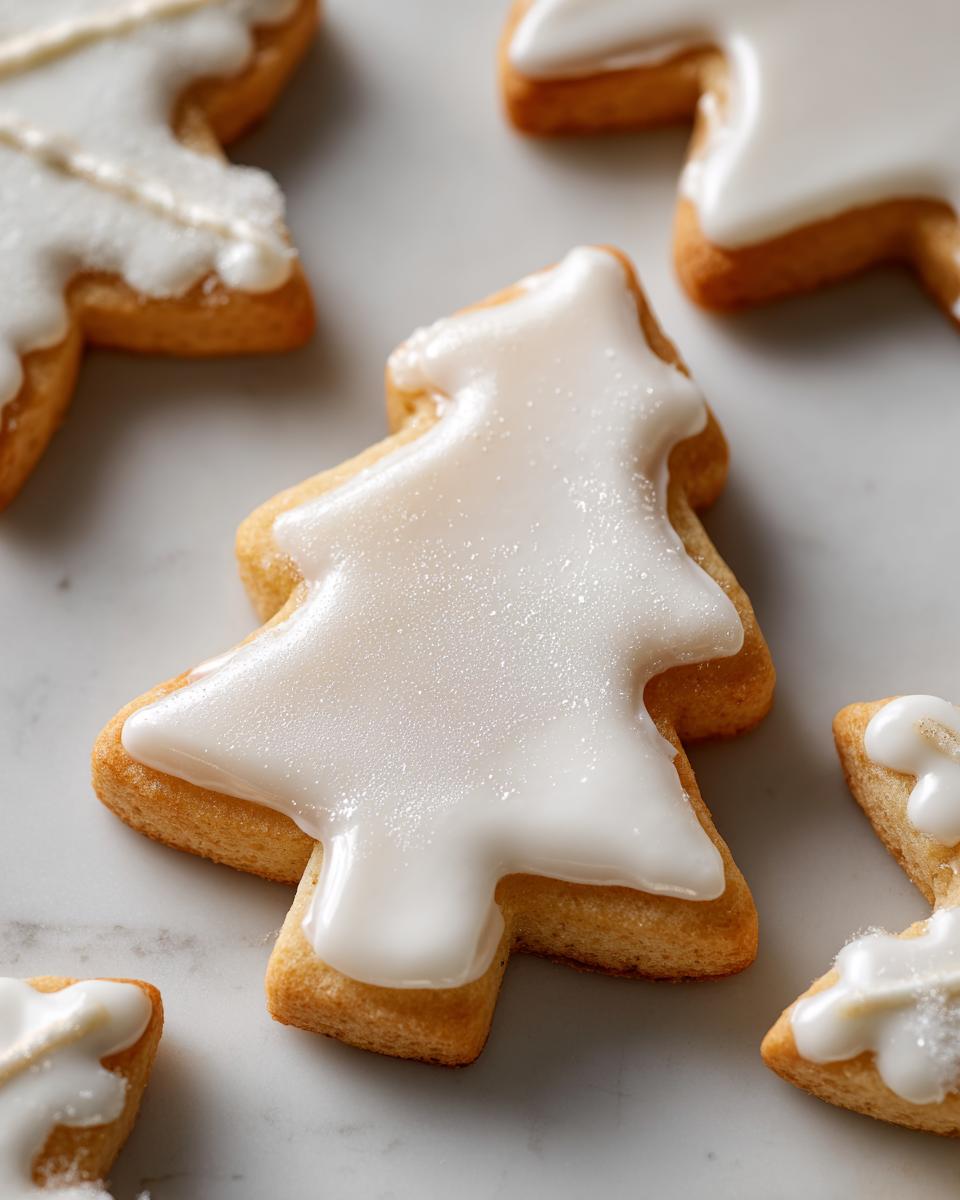
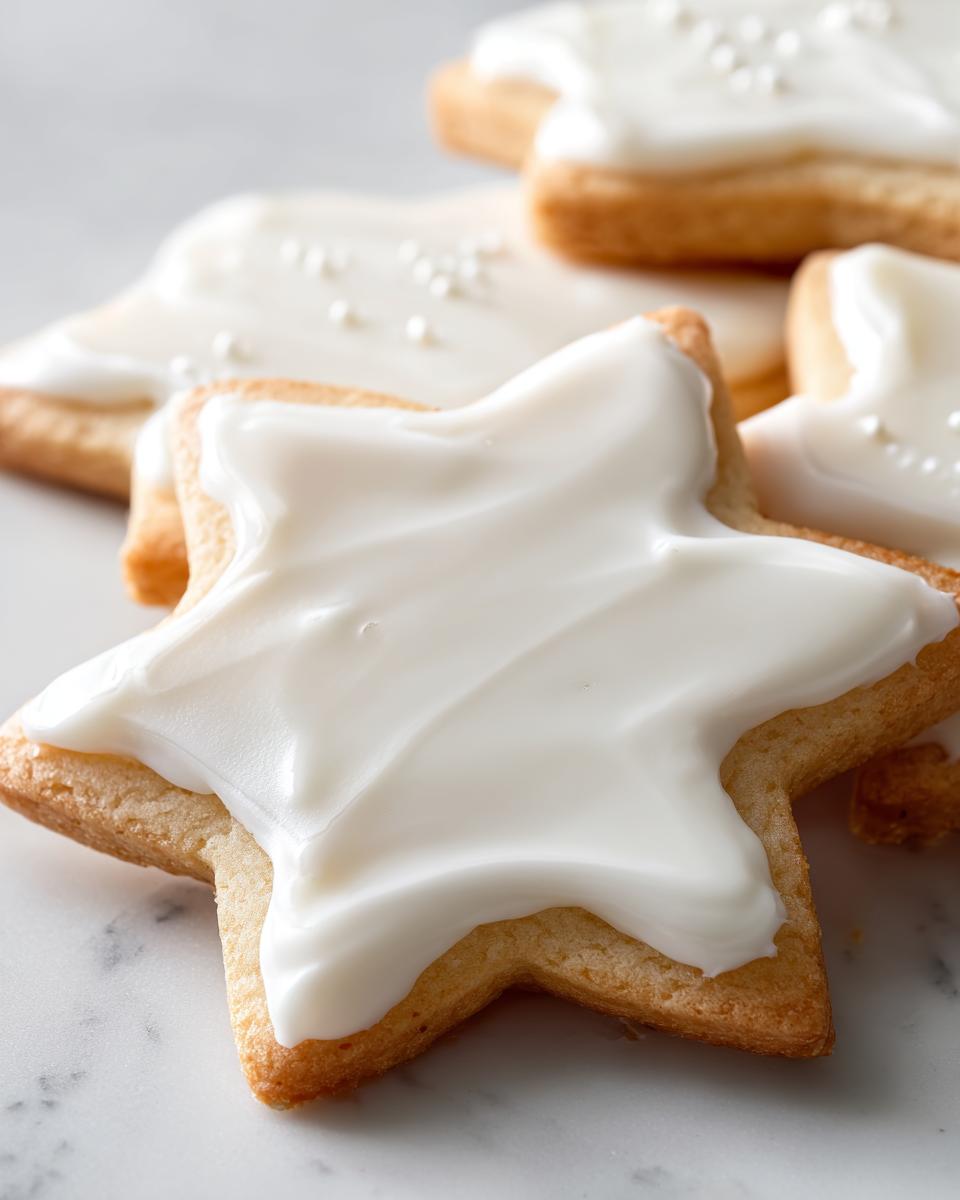
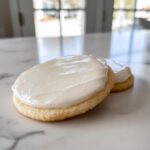
The reason this is my go-to icing that hardens smooth is because of that powder. It sets up firm enough that I can pile my decorated Christmas cookies into airtight containers without them sticking together. Seriously, they hold up for stacking! You are also going to love the finish; it dries to a beautiful, soft sheen. If you follow this simple method, your cookies will look like they came straight from a professional bakery. This really is the ultimate glossy cookie icing tutorial in practice because the results speak for themselves.
Ingredients for Your Perfect Cookie Icing Recipe
This recipe is so straightforward, which I adore! You probably have most of this stuff in your pantry already. We are using meringue powder here because it’s my secret weapon for structure and stability. Remember, you need everything measured accurately because we are going for precision when we talk about the right texture.
- 4 cups confectioners’ sugar, sifted
- 3 tablespoons meringue powder
- 1/2 teaspoon vanilla extract
- 6-8 tablespoons warm water
That’s the whole list! It makes enough icing for about two or three dozen medium-sized cut-out cookies, depending on how thickly you spread it.
How to Prepare Your Fail Proof Cookie Icing Recipe
This is the fun part, and I promise you, it takes almost no time at all! Seriously, you can whip up the base of this amazing cookie icing recipe in about 10 minutes flat before your cookies have even cooled down completely. Before you start, make sure your confectioners’ sugar is sifted—lumps are the enemy of smooth icing. We start by combining the dry elements: sugar and meringue powder. This ensures everything is evenly distributed before we introduce the liquid.
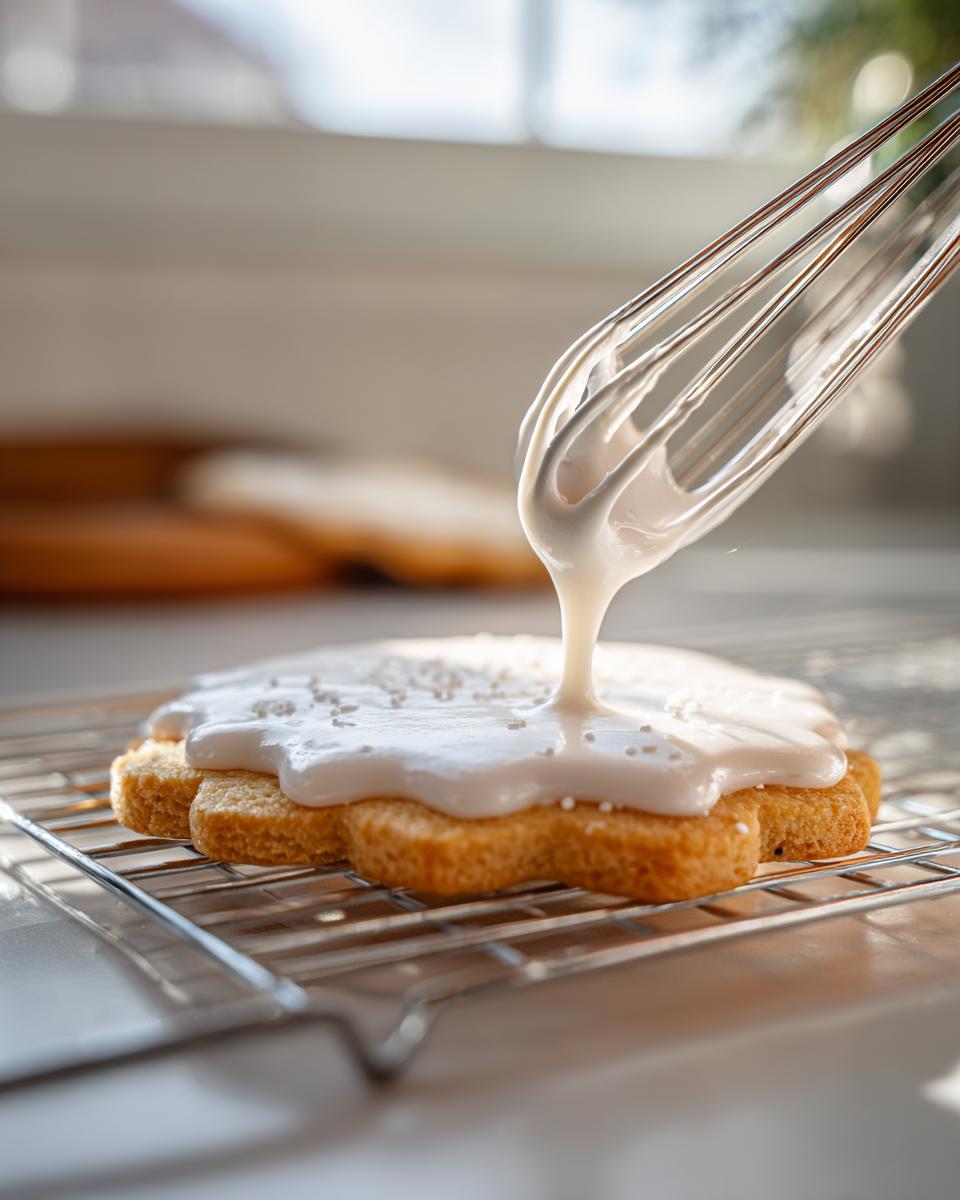
Next, add the vanilla and start drizzling in the warm water, tablespoon by tablespoon. You’ll be whisking constantly, either by hand or low speed on a mixer, until you see it start to look like thick frosting. Now we get to the critical part: adjusting the texture for both piping and flooding. You need two different levels of thickness for detailed work!
Achieving Perfect Flood Consistency Icing
This step separates the beginners from the bakers with beautiful cookies! For piping your outline—those crisp borders that hold everything in—you want the stiffest consistency, using just enough water to make the icing smooth but still hold a sharp peak on your whisk. Once that outline is done, you need to thin the remaining icing for the fill, which is the perfect flood consistency icing. How do you test it? Watch the icing drip off your whisk back into the bowl; it should form a thick ribbon on the surface that vanishes completely after about 10 seconds. If it disappears faster, you need a tiny bit more sugar; if it sits there for ages, add water half a teaspoon at a time. That’s the secret sauce!
Tips for Success with Your Cookie Decorating Icing Guide
Now that you have your colors mixed—pro tip: always use gel food coloring, not liquid, or you’ll ruin your consistency—let’s talk about making sure this whole process goes smoothly. If you find your icing is bleeding past your borders, it usually means the flood consistency is too thin, or you didn’t let that initial border set up long enough. Give that piped outline about 10 to 15 minutes before you even think about flooding it; that structure needs to firm up slightly!
Another major frustration is cracking. This happens when the icing dries too fast from the top layer shrinking before the bottom has set. When you are putting together your cookie decorating icing guide, remember this is my crucial piece of advice: pay attention to the weather! On really humid days, this icing takes ages to dry completely, so resist the urge to stack too soon. If you need a fast drying cookie icing, just put the cookies under a very low-powered fan on a cool setting. It works wonders for speeding up that final set without causing cracks!
Making a Corn Syrup Free Cookie Icing Variation
I hear you! So many people are trying to avoid corn syrup these days, and I totally respect that. The wonderful thing about this particular process is that you don’t have to worry about it! Because we are using meringue powder instead of egg whites or traditional stabilizers, this recipe naturally becomes a fantastic corn syrup free cookie icing option.
When you look at traditional simple vanilla glaze recipes, they often stay soft, right? They taste great, but you can’t stack them, and they definitely don’t give you that clean, sharp edge you want for piping details. That’s where the meringue powder shines. It mimics the structure egg whites provide—which can be intimidating and sometimes sketchy for home bakers—but it creates a way more stable environment for the sugar to bond as it dries.
This meringue powder setup gives you that professional-grade hardness and beautiful gloss without relying on corn syrup. I want you to be able to trust your icing completely, especially when you’re facing a massive holiday baking list! You can see how other bakers approach their options, like what they are doing over at Sugar Cookie Icing, but honestly, the stability you get here is just unmatched for hard-drying decorative work.
Storage and Reheating Instructions for Leftover Cookie Icing Recipe
It rarely happens that I have leftover icing because I usually just make more cookies! But when I do, storage is super important to keep this cookie icing recipe usable for the next batch.
For short-term storage—say, overnight to grab a new color tomorrow—transfer your unused icing into small, airtight containers. Here’s my trick: cut a small square of plastic wrap and press it directly onto the surface of the icing in the container, then seal the lid tightly. This stops air from getting in and forming that hard skin.
If the icing stiffens up overnight, don’t panic! It’s super easy to revive. Start by stirring it gently. If it’s still too stiff for piping or flooding, add a few drops of warm water or even lemon juice—just a drop or two—and whisk until it comes back to that perfect texture. It should stay good like this in the fridge for about three days.
Frequently Asked Questions About This Cookie Icing Recipe
I know sometimes when you are looking for the perfect royal icing recipe for beginners, the details can get muddy. It’s my job to clear that up for you so that your decorating sessions are fun, not frustrating! Here are a few things I hear most often about making sure this icing behaves itself.
Can I use milk instead of water in this cookie icing recipe?
You absolutely can swap milk for the warm water, but I usually advise against it if you are aiming for that super crisp, hard shell. Milk adds fat and sugars that can sometimes keep the icing softer once it dries. If you are just making a simple glaze that only needs a slight crust, milk is fine, but for true decorative icing that you need to stack, stick to the water. It creates a purer, harder set structure, which is what you want for detailed work.
How long does this icing need to dry before stacking cookies?
This is where patience pays off! In a standard, dry house environment, I usually feel safe stacking cookies after they have sat out for about 6 to 8 hours. If you decorated them in the morning, they should be fine to carefully place in containers by bedtime. However, if it’s raining or super humid where you live, that drying time can easily stretch to 12 hours or even overnight. Always trust the touch test—if any part of the icing feels tacky using the pad of your finger, leave them out!
What is the difference between this and a standard vanilla cookie glaze recipe?
This is the core difference between a simple glaze and the workhorse icing for cut-out cookies! A standard vanilla cookie glaze recipe usually finishes soft and chewy, sometimes leaving a slight gummy layer. This meringue-based recipe is specifically designed to dry completely solid, giving you that beautiful, hard, shiny finish that’s essential for intricate designs or stacking your holiday treats miles high!
Estimated Nutritional Data for Your Cookie Icing Recipe
Now, I know what you’re thinking: this delicious cookie icing recipe must be loaded with sugar, and you’d be right! But since this is a powerful decorating component and not meant to be eaten by the bowlful, the serving size is small. These numbers are just estimates based on the proportions in the recipe, remember that brands can slightly alter the final results!
- Serving Size: 1/4 cup
- Calories: 450
- Sugar: 110g
- Protein: 2g
For accuracy, keep in mind that the final nutritional breakdown can shift depending on the brand of confectioners’ sugar or meringue powder you use, but this gives you a good baseline!
Share Your Holiday Cookie Icing Creations
I poured out all my best advice to make sure your next batch of decorated cookies turns out absolutely perfect. From achieving that stunningly smooth finish to making sure the icing hardens perfectly for stacking, this recipe is built for success, even if you’re brand new to this! If you give this a try, especially for your holiday baking projects, I truly want to see what you create!
Please snap a picture and tag me on social media! Seeing your beautiful, vibrant cookies decorated with this glorious, hardened glaze brings me so much joy. It’s exactly what Pure Plate Path is about—taking the simple, rewarding steps to create something beautiful and delicious at home.
And hey, if this royal icing recipe for beginners saved your sanity this year, would you consider leaving a quick 5-star rating on the recipe card? That feedback really helps others who might be struggling with runny icing find this solution. Happy decorating, and enjoy the simple beauty of perfectly iced treats!
PrintThe Best Sugar Cookie Icing Recipe That Dries Smooth and Glossy
Learn how to make the best sugar cookie icing that hardens perfectly smooth for detailed decorating. This easy recipe provides a glossy finish ideal for cut-out cookies and holiday baking.
- Prep Time: 10 min
- Cook Time: 0 min
- Total Time: 10 min
- Yield: Enough icing for 2-3 dozen medium cookies
- Category: Baking
- Method: Mixing
- Cuisine: American
- Diet: Vegetarian
Ingredients
- 4 cups confectioners’ sugar, sifted
- 3 tablespoons meringue powder
- 1/2 teaspoon vanilla extract
- 6–8 tablespoons warm water
Instructions
- In a medium bowl, whisk together the sifted confectioners’ sugar and meringue powder until fully combined.
- Add the vanilla extract to the dry ingredients.
- Gradually add the warm water, one tablespoon at a time, mixing with a whisk or electric mixer on low speed until the icing comes together.
- Continue mixing until the icing is smooth. For outlining consistency, use less water; for flooding consistency, add more water until the icing flows slowly off the whisk in a thick ribbon that disappears into the bowl after about 10 seconds.
- Divide the icing into separate bowls if you plan to color it. Add gel food coloring sparingly and mix until the color is uniform.
- Use the stiff icing for piping borders and details. Let the borders set for 10-15 minutes before flooding the center of the cookie with the thinner consistency icing.
- Allow the iced cookies to dry completely at room temperature for several hours, or until the surface is hard to the touch.
Notes
- For a corn syrup free cookie icing option, substitute the corn syrup (if using a different base recipe) or simply omit it; this meringue powder recipe achieves hardness without it.
- If the icing is too thick for flooding, add water 1/2 teaspoon at a time. If it is too thin, add sifted confectioners’ sugar 1 tablespoon at a time.
- This icing dries firm, making it perfect for stacking holiday cookies.
Nutrition
- Serving Size: 1/4 cup
- Calories: 450
- Sugar: 110
- Sodium: 5
- Fat: 0
- Saturated Fat: 0
- Unsaturated Fat: 0
- Trans Fat: 0
- Carbohydrates: 112
- Fiber: 0
- Protein: 2
- Cholesterol: 0