
Oh, I know that frustration! You’ve worked so hard, nurtured your starter, waited patiently, and then… you slice into your loaf only to find that dense, heavy crumb. It’s okay, I’ve been there too. For so long, sourdough felt purely rustic—big holes, too tangy, and definitely not great for little hands needing a neat school sandwich. But that’s why I’m so thrilled to share this recipe with you today. This is my approach to an incredibly soft sourdough sandwich bread that actually delivers that light, fluffy texture we all crave for everyday toast and easy lunches. Seriously, if you’re a sourdough for beginners baker, this approach is what you need to feel confident right away.
- Why This Soft Sourdough Sandwich Bread is Your New Staple
- Gathering Ingredients for Your Sourdough Sandwich Bread
- Step-by-Step Guide to the Easy Sourdough Bread Recipe
- Baking Your Fluffy Sourdough Loaf Perfectly
- Cooling and Slicing Your Sourdough Sandwich Bread
- Tips for Success with Beginner Sourdough Sandwich Loaf
- Storage and Reheating Instructions for Sourdough Sandwich Bread
- Frequently Asked Questions About Sourdough Sandwich Bread
- Estimated Nutritional Data for Classic Sandwich Loaf Sourdough
Why This Soft Sourdough Sandwich Bread is Your New Staple
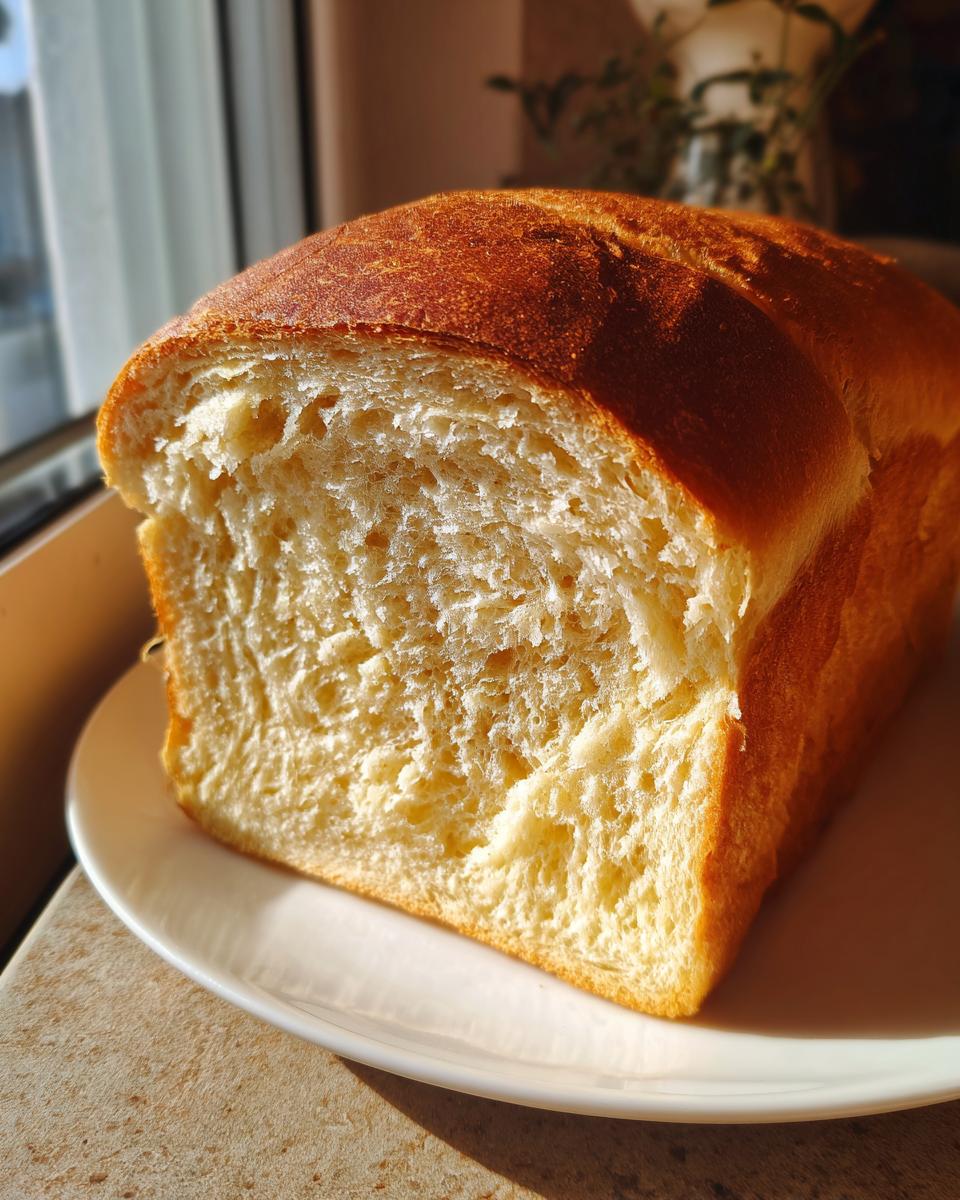
If your past sourdough attempts have resulted in something better suited for doorstops than delicate sandwiches, listen closely. This recipe has been tweaked specifically to overcome that dreaded density. It’s about combining the goodness of wild yeast with ingredients that encourage a soft texture, making it the perfect all-around soft sourdough sandwich bread for daily life.
- The little bit of softened butter we add does wonders for a tender texture.
- We skip heavy kneading for gentle folds, protecting the delicate air bubbles you create.
- The controlled proofing means less tang and more of that mild, buttery crumb sourdough flavor we want!
It’s a loaf designed for real life—toast that doesn’t break apart and sandwiches that hold mayo without collapsing.
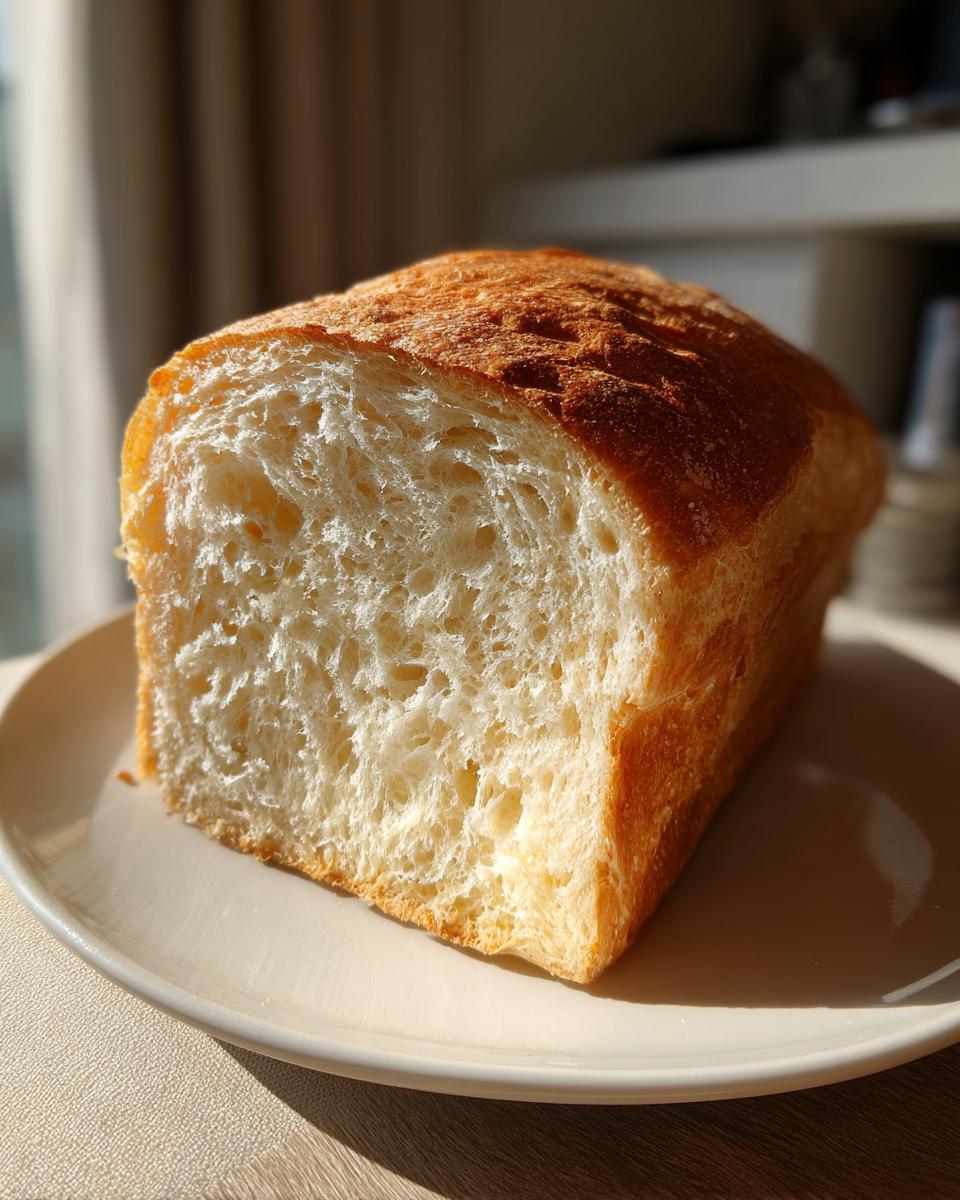
Achieving the Fluffy Sourdough Loaf Texture
The secret weapon here, besides that little bit of butter, is restraint! Traditional rustic loaves need aggressive kneading to build strength for oven spring, but we aren’t aiming for giant tunnels here. We want an even, tight structure.

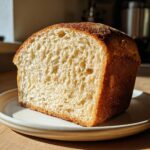
By using our gentle stretch-and-fold method and low-and-slow bulk fermentation, we encourage a beautiful, even lift. This results in a genuine fluffy sourdough loaf that slices perfectly thin, almost like commercial bread, but with all the health benefits of true sourdough. You’ll be amazed!
If you want fluffy results in other baking projects, you have to check out my recipe for amazing fluffy buttermilk pancakes—the technique is surprisingly similar!
Gathering Ingredients for Your Sourdough Sandwich Bread
Okay, this is the fun part where we make sure we have everything ready to roll. Because this is an sourdough sandwich bread recipe aiming for that perfect softness, the quality of your active starter really matters here. We don’t want any guesswork!
You’ll need:
- 100g active sourdough starter (and I mean active—fed 4 to 8 hours before you start mixing!)
- 350g warm water (around 85°F is perfect)
- 500g all-purpose flour or bread flour
- 10g fine sea salt
- 30g unsalted butter, softened—this is essential for that tenderness!
Have those measured out, and we are ready to mix!
Ingredient Notes and Substitutions for Sourdough Sandwich Bread
Let’s talk flour for a second. Bread flour gives you a bit more structure, but honestly, a good quality All-Purpose flour works beautifully for this homemade sandwich bread using starter because we aren’t fighting it with heavy kneading. Keep that water warm, near 85°F, because it really wakes up the starter quickly.
A note on starter: Please use active starter, not just discard. Discard won’t give you the lift we need for this lighter loaf. If your kitchen is chilly, you’ll want to use slightly warmer water; if it’s super hot, use cool water instead to keep things steady!
Step-by-Step Guide to the Easy Sourdough Bread Recipe
This is where the real magic happens! Even though this is an sourdough sandwich bread recipe, we’re keeping things incredibly simple on the mixing front. We don’t want the dense gluten structure that comes from aggressive kneading, so we let technique take over from the effort. Because we are aiming for a loaf that’s accessible even as a same day sourdough sandwich bread, the timing hinges a bit on how happy your starter is that day. Always watch the dough, not the clock!
Once everything is mixed, we move straight into fermentation. Don’t worry about kneading; we’re building strength gently. If you’ve ever wanted an easy sourdough bread recipe that skips the hard work, this is it.
I highly recommend checking out my guide on making easy soft whole wheat bread—it shares some of the same gentle mixing concepts!
Mixing and Bulk Fermentation for Sourdough Sandwich Bread
First, mix your starter and warm water until it looks cloudy. Then, dump in the flour and salt and mix just until you can’t see any dry bits. It will look like a shaggy mess—that’s perfect! Cover it up.
Now for the folds: over the next two hours, perform four sets of stretch and folds, spaced 30 minutes apart. Just grab one side of the dough, gently stretch it high, and fold it over the center. Turn the bowl and repeat three more times for one set. After those four sets, just let it rest. You’re looking for the dough to feel puffier and look like it has increased in volume by about 30% to 50%. It shouldn’t double, just show real life!
Shaping and Pan Proofing for a Sliceable Sourdough Bread
When your bulk ferment looks happy, gently tip the dough onto a lightly floured counter. You want to preserve as much gas as possible! Shape it into a very tight log, almost like you’re tucking it in for a nap. You want it snug for that perfect structure we need for a sliceable sourdough bread.
Generously butter or line your 9×5 loaf pan—we don’t want this sticky one getting stuck! Place the dough in seam-side down. Cover it loosely, and let it rest for about 1 to 2 hours. The key indicator for the final proof is when the dough crown sits about one inch above the rim of the pan. Don’t let it go much further, or it might collapse in the oven!
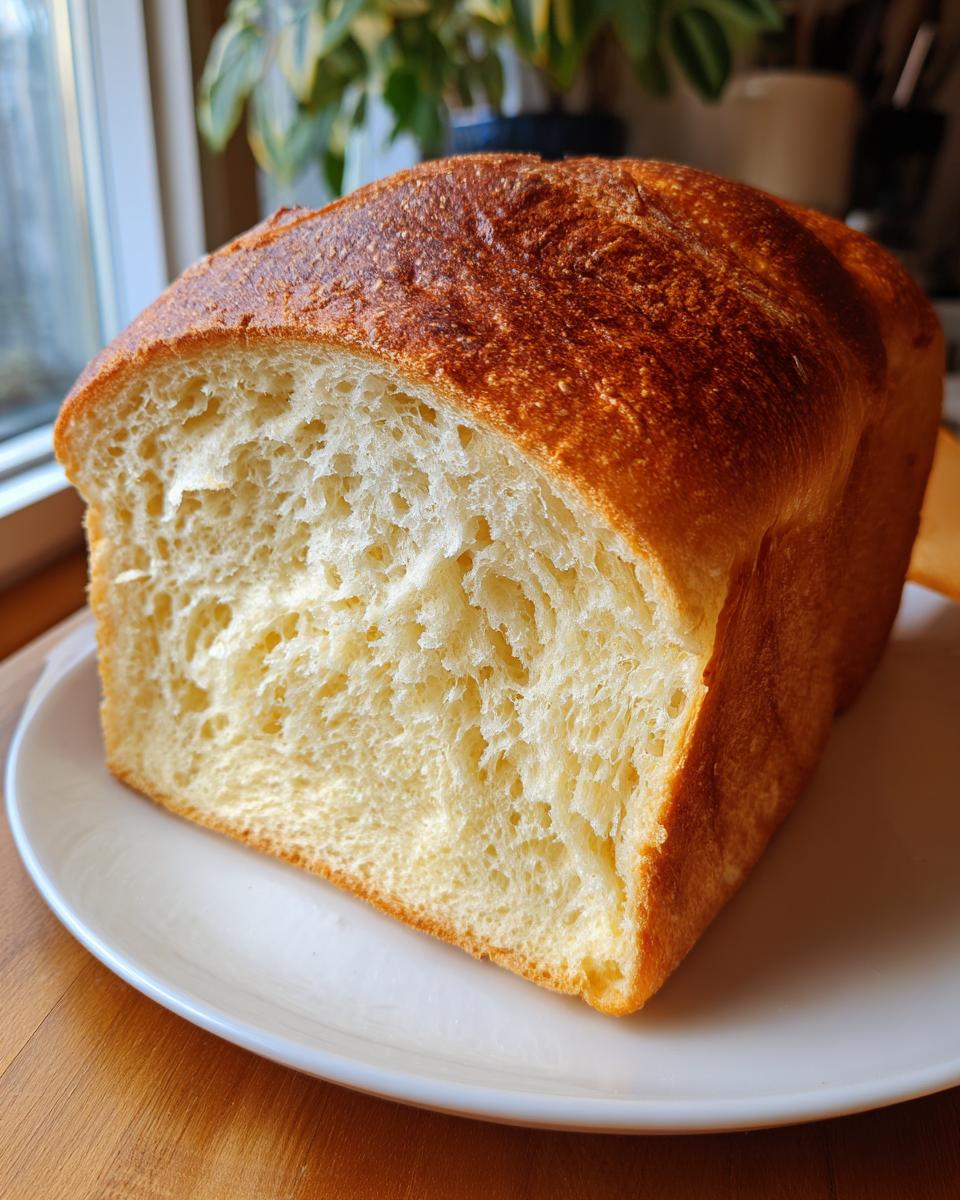
Baking Your Fluffy Sourdough Loaf Perfectly
Alright, the dough is proofed and looking just right—domed beautifully above the pan edge. Now it’s baking time, and we need to keep things gentle to secure that soft crumb. Preheat your oven to 375°F (190°C). That slightly lower temperature compared to rustic loaves helps cook the inside before the outside gets too dark.
Bake this for about 35 to 45 minutes total. But here is my little trick for that perfect golden-brown top that supports your beautiful fluffy sourdough loaf: around the 25-minute mark, if the top is browning too quickly, just throw a loose piece of aluminum foil over it. This shields the crust while the center finishes baking. You want that internal temperature to hit about 205°F, but if you don’t have your thermometer handy, trust the color! It’s worth the extra attention.
When you pull it out, maybe steal a peek at this wonderful apple tart recipe while you wait for your own loaf to cool down!
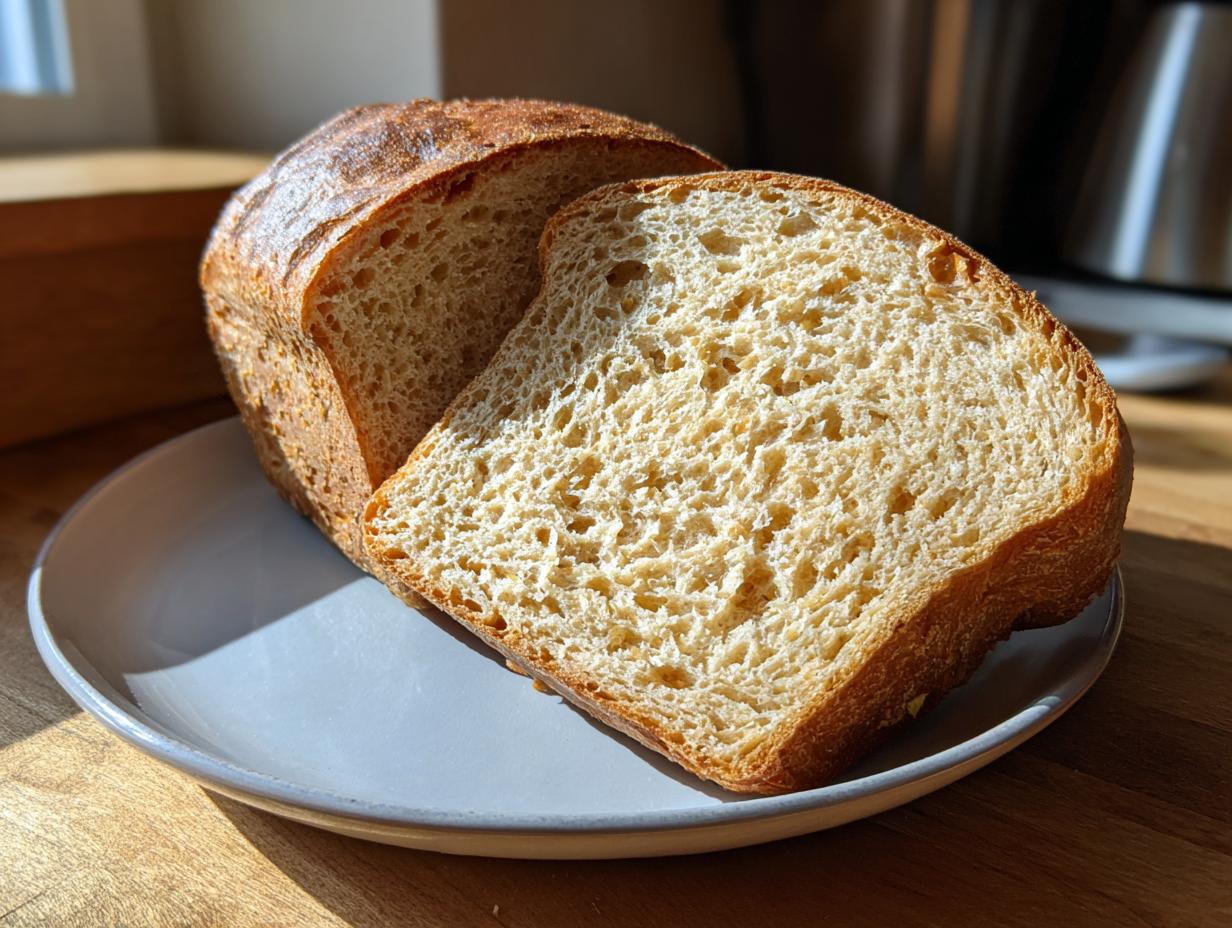
Cooling and Slicing Your Sourdough Sandwich Bread
This next step is non-negotiable if you want that perfect sliceable texture. Seriously, don’t rush it! Even though the smell will be absolutely maddening, you must turn the loaf out onto a wire rack immediately when it comes out of the oven.
If you leave your beginner sourdough sandwich loaf in the hot metal pan for even five minutes, all that lingering heat gets trapped, and you end up with a gummy, wet center. I know, it’s torture! Let it cool completely—I mean, hours!—before you even think about slicing it thin. This cooling process sets the starch, which is what guarantees those neat, thin slices for your next perfect sandwich.
Tips for Success with Beginner Sourdough Sandwich Loaf
Baking sourdough for sandwiches can feel tricky, but let’s make sure this loaf turns out soft and lovely every time. My biggest tip, as you start tackling this beginner sourdough sandwich loaf, is temperature control. Everything reacts differently based on your kitchen!
Make sure your active starter is truly happy—it should have at least doubled in size after feeding before you measure it out. If your kitchen is cool, you might need to let the bulk ferment go a little longer, aiming for that 50% rise rather than just 30%. If you want to see another great soft loaf, check out this amazing soft sourdough sandwich bread recipe for comparison!
And remember that butter? If you forgot to set it out, you can soften it slightly in the microwave in 5-second bursts, but be careful! We want soft, not melted grease going into the dough. Trust me, these small steps cement the difference between a good loaf and a truly soft sourdough sandwich bread that melts in your mouth.
Once you’ve mastered this, I highly recommend trying some simple treats. This easy creamy maple fudge recipe is a wonderful, no-fuss follow-up project!
Storage and Reheating Instructions for Sourdough Sandwich Bread
So you baked a beautiful, soft loaf of sourdough sandwich bread! Congratulations! Now, keeping it that way is key. If you plan to eat it within three days, just wrap it tightly in plastic wrap or put it in a sealed plastic bag right after it has cooled completely. Skip the bread box for this soft loaf; it tends to dry out faster there.
For longer storage, slicing it first makes life so much easier. Wrap the slices tightly, and they freeze beautifully for up to three months! When you want toast, just pop a slice right from the freezer into the toaster. If you want a whole loaf for sandwiches later, you can gently refresh those frozen slices in the oven briefly. Speaking of easy cooking, these easy roasted honey glazed carrots are a great side for any sandwich!
Frequently Asked Questions About Sourdough Sandwich Bread
I know when you’re new to baking with wild yeast, you have a million little questions about technique versus flavor. It’s all about finding that sweet spot where you get great texture without spending days waiting for the rise! Here are some of the things I get asked most often about achieving this perfect soft sourdough sandwich bread.
Do I absolutely need a Dutch oven for this loaf?
Not at all! Because we are baking this in a loaf pan, we don’t need the extreme steam environment a Dutch oven creates. The steam trapped inside the covered loaf pan during the first part of the bake is plenty to keep that crust soft while the interior cooks through. That’s why this is such an easy sourdough bread recipe!
Will this loaf be really sour?
This recipe is specifically designed to minimize that sharp sourdough tang, making it perfect for kids and people who prefer milder flavors. Since we use an active starter and only bulk ferment until the dough is maybe 50% risen, we don’t develop the deeper acids that cause intense sourness. It’s more mildly tangy—just enough character!
Can I use my sourdough discard instead of active starter?
For this specific recipe, I really push for an *active* starter, not just discard. If you use discard, you’ll miss out on the necessary strength (the lift) needed to get that fluffy sourdough loaf structure we are aiming for. If you really must use discard, you might need to add a tiny pinch of instant yeast to help it along, but that defeats the purpose of a true all-sourdough approach!
If you’re looking for great ways to use up your leftover components once you’ve mastered this, check out my easy chicken tacos—they are perfect for a simple weeknight dinner!
Can I use this recipe for same day sourdough sandwich bread?
Absolutely, yes! That’s one of the best features of this recipe—it’s formulated to work beautifully as a same day sourdough sandwich bread. However, remember that proofing times are totally dependent on your kitchen temperature and how active your starter is on that specific day. If it’s cold, plan for a longer final proof!
Estimated Nutritional Data for Classic Sandwich Loaf Sourdough
When you’re baking something this wonderful and wholesome like a classic sandwich loaf sourdough, knowing the basics helps round out the experience. Please remember, these numbers are just estimates based on my standard ingredients and a recipe calculation, so your exact results might vary a little based on how much flour sticks to your counter!
- Serving Size: 1 slice
- Calories: 250
- Fat: 4g
- Carbohydrates: 48g
- Protein: 8g
It’s simple, whole food goodness, which is exactly what we aim for here at the Path! If you want a fantastic, flavorful sauce to pair with your sandwich leftovers, you simply must try my easy creamy garlic sauce recipe!
PrintSoft & Fluffy Sourdough Sandwich Bread: Beginner-Friendly Loaf
Bake a truly soft, sliceable sourdough sandwich bread loaf with a buttery crumb. This easy recipe uses gentle folds to achieve light, fluffy results perfect for everyday toast and sandwiches.
- Prep Time: 30 min
- Cook Time: 45 min
- Total Time: 4 hours 45 min
- Yield: 1 loaf 1x
- Category: Baking
- Method: Baking
- Cuisine: American
- Diet: Vegetarian
Ingredients
- 100g active sourdough starter (fed 4–8 hours prior)
- 350g warm water (about 85°F)
- 500g all-purpose flour or bread flour
- 10g fine sea salt
- 30g unsalted butter, softened
Instructions
- Mix the starter and warm water in a large bowl until combined.
- Add the flour and salt. Mix by hand until a shaggy dough forms and no dry flour remains. Cover the bowl.
- Perform four sets of stretch and folds, spaced 30 minutes apart, over the next two hours. Gently stretch a portion of the dough up and fold it over itself.
- After the final fold, let the dough rest, covered, at room temperature for 1 to 3 hours, or until it has increased in volume by about 30-50%. This timing depends on your starter activity.
- Gently turn the dough out onto a lightly floured surface. Shape the dough into a tight log or oval.
- Grease a standard 9×5 inch loaf pan with butter or line it with parchment paper. Place the shaped dough seam-side down into the prepared pan.
- Cover the pan loosely with plastic wrap or a damp towel. Allow the dough to proof at room temperature for 1 to 2 hours, or until the dough has risen about 1 inch above the rim of the pan.
- Preheat your oven to 375°F (190°C).
- Bake the loaf for 35 to 45 minutes. If the top browns too quickly, loosely tent it with aluminum foil after 25 minutes.
- Remove the bread from the oven and immediately turn it out onto a wire rack to cool completely before slicing. This step is crucial for a non-gummy crumb.
Notes
- For the softest crumb, use room temperature butter mixed into the dough during the final shaping stage.
- If you want a quicker bake, you can use a small amount of commercial yeast along with your starter, but this recipe focuses on true sourdough flavor and texture.
- This loaf slices best when fully cooled, making it ideal for thin sandwich cuts.
Nutrition
- Serving Size: 1 slice
- Calories: 250
- Sugar: 1
- Sodium: 350
- Fat: 4
- Saturated Fat: 2
- Unsaturated Fat: 2
- Trans Fat: 0
- Carbohydrates: 48
- Fiber: 2
- Protein: 8
- Cholesterol: 8