
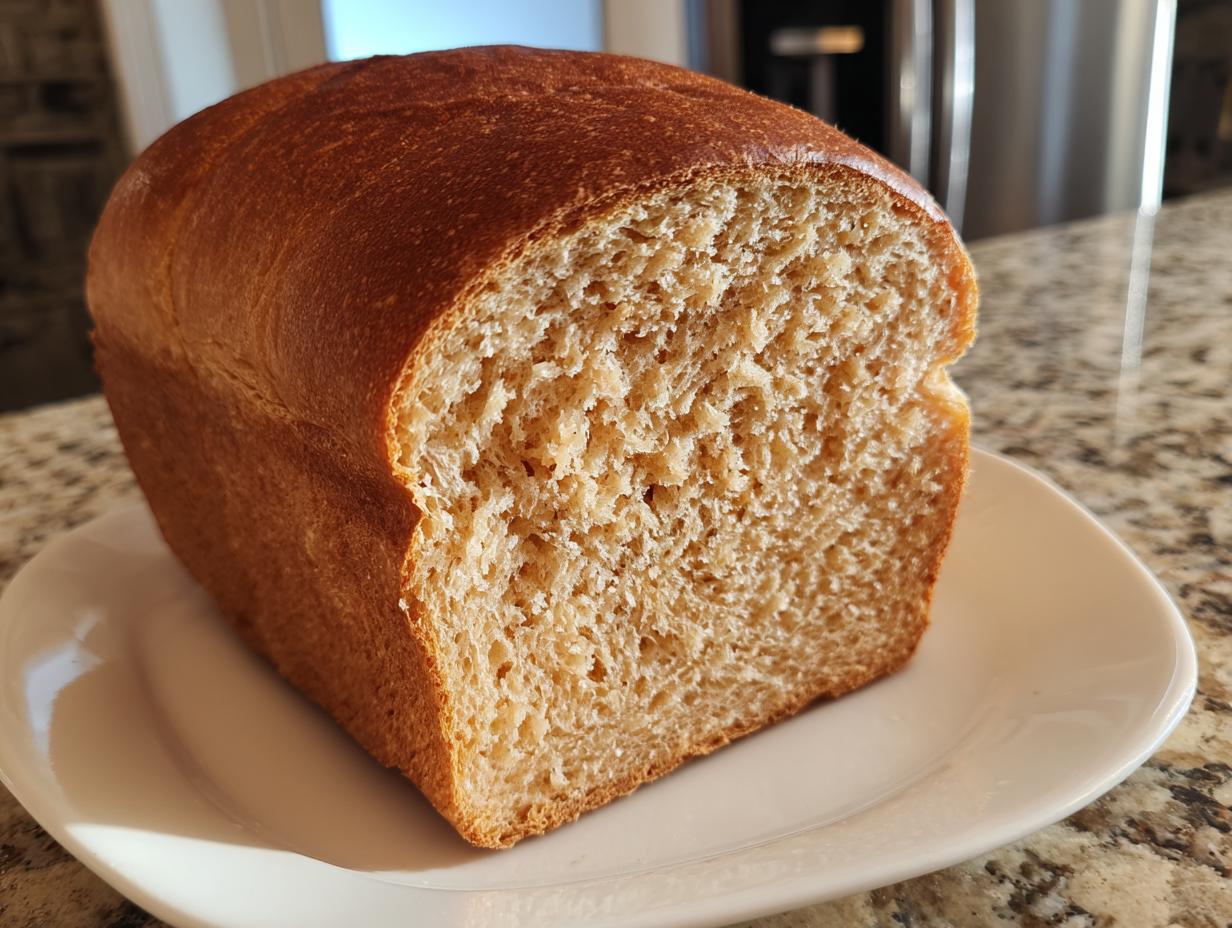
There is just nothing that settles the soul quite like the aroma of fresh baked bread filling your kitchen. When life gets hectic, and it seems like everything is moving too fast, baking something truly wholesome anchors you right where you need to be. That’s why I am so excited to share what I honestly believe is the best recipe for anyone just starting out: the Easy Soft & Fluffy Honey Whole Wheat Sandwich Bread. Honestly, store-bought loaves just can’t touch the texture we achieve here.
Back when I was navigating my demanding marketing schedule, I realized that feeding myself well was one of the first things to go. Reclaiming simple, nourishing acts like mixing up this whole wheat bread recipe made a massive difference for me. This loaf is intentionally straightforward, designed to build your confidence while delivering that soft, perfect slice you crave for daily sandwiches. Trust me, you’re going to want to bake this all the time!
If you’re looking for more simple, life-giving food inspiration to start your day right, you should definitely check out my thoughts on healthy breakfast ideas.
- Why This Easy Soft & Fluffy Honey Whole Wheat Sandwich Bread is Your New Staple
- Gathering Ingredients for Your Whole Wheat Bread From Scratch
- Step-by-Step Whole Wheat Bread Tutorial: Baking Homemade Whole Wheat Bread
- Tips for Success When Baking Homemade Whole Wheat Bread
- Storage & Reheating Instructions for Your Whole Wheat Sandwich Bread
- Serving Suggestions for Soft Whole Wheat Loaf
- Frequently Asked Questions About Making Whole Wheat Bread
- Nutritional Information for This Healthy Sandwich Bread
- Share Your Experience Baking This Whole Wheat Bread
- Nutritional Information for This Healthy Sandwich Bread
- Share Your Experience Baking This Whole Wheat Bread
Why This Easy Soft & Fluffy Honey Whole Wheat Sandwich Bread is Your New Staple
When I set out to create this recipe, I wanted to solve the biggest issue with whole wheat bread: the density! People think baking with whole grains means sacrificing that light, airy feel you get from white bread, but that’s just not true if you use the right technique. This loaf proves you can have both nutrition and texture.
- It’s genuinely built for beginners—it asks for simple action, hands-on time is short, and the results are amazing.
- The honey doesn’t just add flavor; it genuinely helps tenderize the crumb.
- It’s wholesome for your family but sturdy enough for the best lunchtime sandwiches.
You can find more straightforward ways to streamline your evenings through my guide on quick easy weeknight dinners.
Achieving That Perfect Soft Whole Wheat Loaf Texture
That beautiful, springy quality comes from using a blend—that little bit of all-purpose flour gives our dough the structure it needs to lift nicely, preventing that heavy, brick-like result some people get in their whole wheat bread. The honey plays a huge role here too; it keeps moisture locked in, making this one of the best and softest loaves around. If you’ve been intimidated by yeast before, this is your confidence booster; it’s truly one of the most reliable beginner bread recipes out there!
Gathering Ingredients for Your Whole Wheat Bread From Scratch
Okay, let’s talk what you need to get this amazing whole wheat bread happening. You don’t need fancy stuff, but you do need to be exact with a few things, especially the water temperature—that’s important for waking up our yeast friends! We are grabbing warm water, making sure it’s between 105 and 115 degrees Fahrenheit, and two and a quarter teaspoons of our active dry yeast.
Next up, we need the flavor builders: a quarter cup of honey for that subtle sweetness, two tablespoons of unsalted butter that must be softened (don’t melt it!), and one and a half teaspoons of salt. Then we get to the dry star: three cups of whole wheat flour, plus half a cup of regular all-purpose flour. This specific blend is what gives us that soft texture we’re aiming for in our homemade whole wheat bread. Don’t forget the extra flour for dusting later on!
If you happen to love honey flavoring, you might also enjoy my recipe for easy roasted honey glazed carrots!
Ingredient Notes and Substitutions for Wholesome Bread Baking
Now, a little expertise for you on making sure this loaf is perfect every time. A little secret for the softest crust, which I totally recommend, is to brush the top of the loaf—right after it comes out of the oven, while it’s still piping hot—with a little bit of melted butter. Yum! It adds a beautiful sheen and keeps things tender.
If you are trying to make true 100 percent whole wheat bread, you absolutely can switch out that half-cup of all-purpose flour for another half-cup of whole wheat flour. But be warned! If you do that, the dough might feel a tad stiff, so you might need to gently mix in an extra tablespoon or two of water until the dough feels right. Getting that blend perfect is key to successful wholesome bread baking.
Step-by-Step Whole Wheat Bread Tutorial: Baking Homemade Whole Wheat Bread
It’s time to stop being intimidated by yeast! Baking this whole wheat bread is honestly just a series of easy steps, and if you listen to your dough, it will tell you exactly what it needs. First things first, we need to wake up the yeast. In a big bowl, dissolve your yeast in the warm water—remember that 105°F to 115°F range? Let it sit for about five minutes until it gets nice and foamy. If it doesn’t foam up, that water was either too hot or too cold, and you’ll need to try again!
Next, stir in the honey, softened butter, and salt. Then, mix in the whole wheat flour slowly until it’s shaggy, and then start adding that all-purpose flour until the dough just cleans itself off the bowl. Turn it out onto a lightly floured surface and get ready to knead for about six to eight minutes. I always tell people, this dough should feel a little softer and more pliable than standard white bread dough! Remember that the whole process depends on letting the yeast do the work, so cover it up and let it rise for about an hour to an hour and a half until it doubles.
If you are looking for more straightforward techniques that save time without sacrificing flavor, check out my easy egg bites recipe!
Mastering the Yeast Activation and First Rise
That foamy look after mixing the yeast with warm water is your green light—it means your yeast is happy and active and ready to get to work creating those beautiful air bubbles! After adding the liquid and honey, you gradually mix in all that whole wheat flour until it just clumps together. Once it’s covered, you are looking for it to double in size during that first rise. Don’t peek constantly! Just let it sit somewhere warm for about an hour to an hour and a half. This foundational step is crucial for flavor development.
Shaping and Second Rise for a Fluffy Bread Recipe
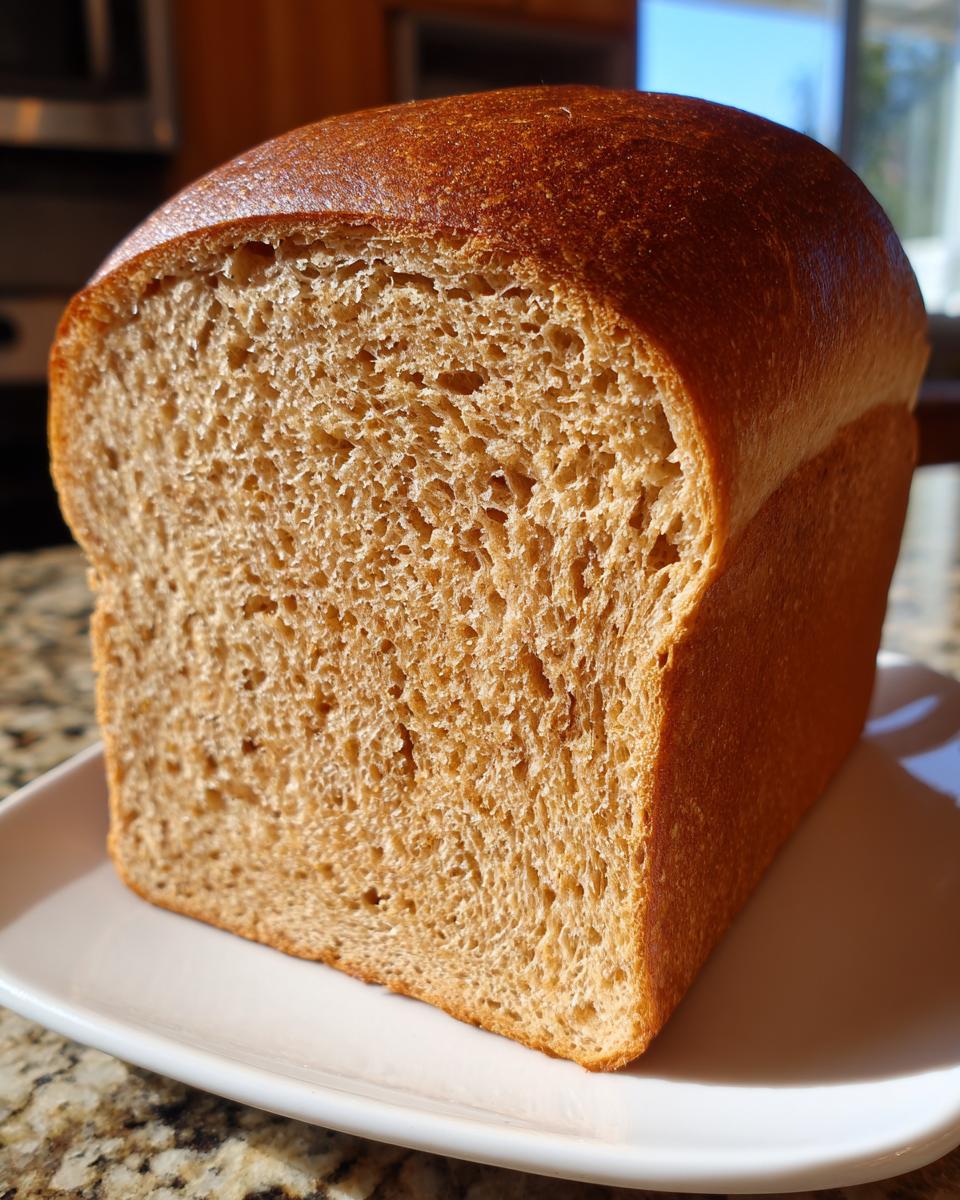
Once it’s doubled, gently punch the air out—we don’t want to crush all those nice gases—and then shape it into a neat log before placing it gently into your greased 9×5 loaf pan. This is where we set ourselves up for that fluffy bread recipe perfection! Cover it loosely and let it rise one more time. The visual cue here is super important for a truly soft loaf: you want the dough to crown itself about one whole inch above the rim of the pan before you preheat your oven to 375°F. If you baked it shorter than that second rise, you might get a denser texture at the bottom of your beautiful whole wheat bread.
For more inspiration on amazing recipes, check out this healthy whole wheat bread idea!
Tips for Success When Baking Homemade Whole Wheat Bread
Baking your own whole wheat bread is such a rewarding thing, and I’ve learned a few little tricks over the years to make sure you get that bakery-quality lift!
First, don’t rush that preheat time. When your oven finally hits 375°F, let it sit for an extra five minutes to ensure the heat is completely stable before placing your loaf in. This helps give you that beautiful oven spring right away!
Don’t just rely on the toothpick test, though! We want that internal temperature to hit 190°F for a fully baked, safe slice. You need a reliable instant-read thermometer for this—it takes the guesswork out completely. Trust me, hitting that golden number means maximum flavor development.

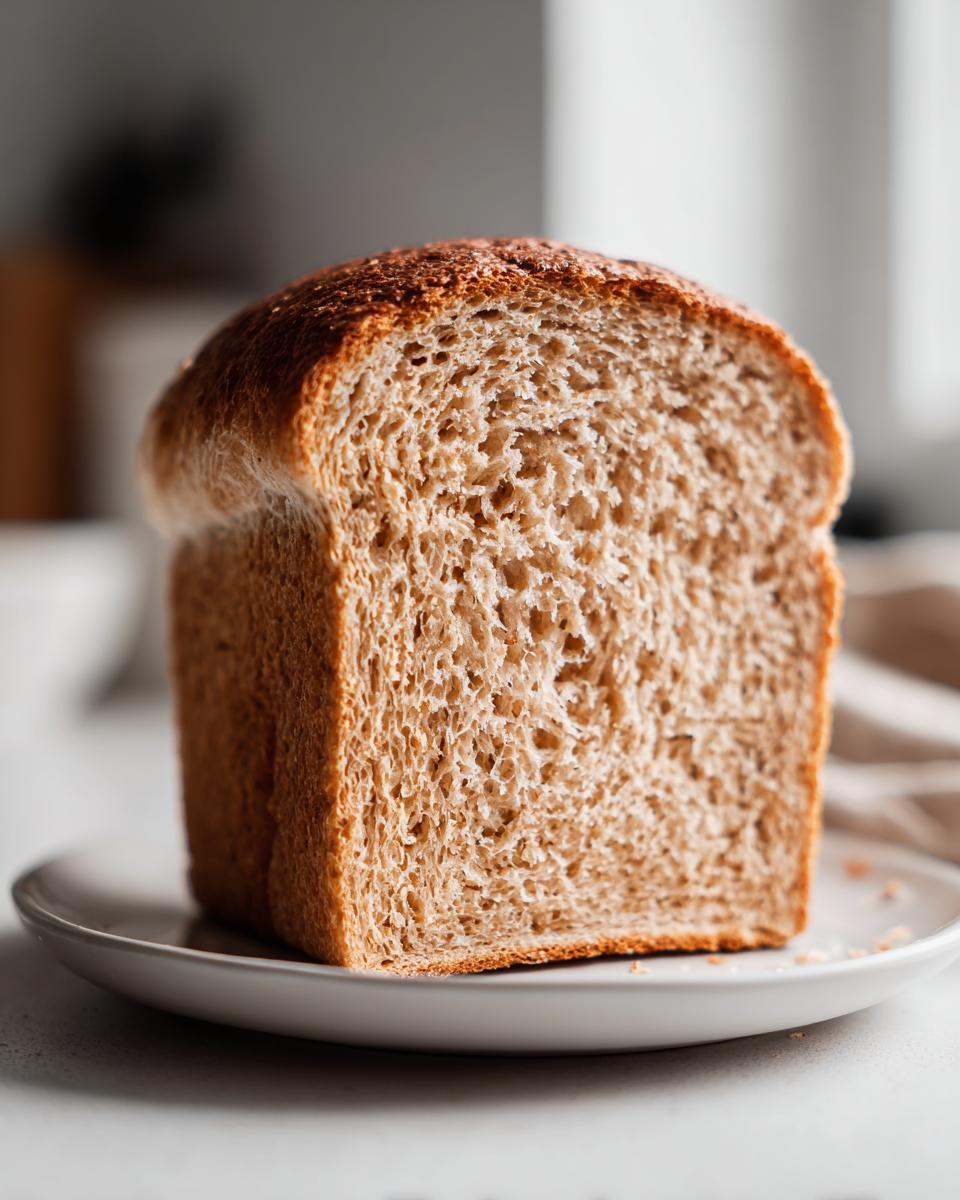
But the hardest part? Waiting for it to cool. You absolutely have to let your homemade whole wheat bread cool completely on a wire rack before you slice it. Slicing it hot, even if it smells incredible, releases steam and compresses that lovely soft crumb we worked so hard to achieve. If you need something quick to snack on while you wait, try this easy creamy garlic sauce recipe!
Storage & Reheating Instructions for Your Whole Wheat Sandwich Bread
Keeping homemade whole wheat bread perfect is almost as important as baking it perfectly! Since this loaf is so wonderfully moist, it tends to stay fresh on the counter, lightly wrapped, for three or four days. But if you know you won’t finish it quickly, the freezer is your best friend!
Make sure the entire loaf is totally cooled down—I mean, stone cold—then wrap it tightly in plastic wrap, followed by a layer of foil or put it in a freezer bag. It freezes beautifully for up to three months.
When you want that incredible fresh baked bread aroma back, just slice off what you need while it’s still partially frozen, and pop it straight into the toaster. It comes out perfectly warmed through and tasting like it just came out of the oven. This makes these loaves fantastic for planning ahead for your simple lunch recipes.
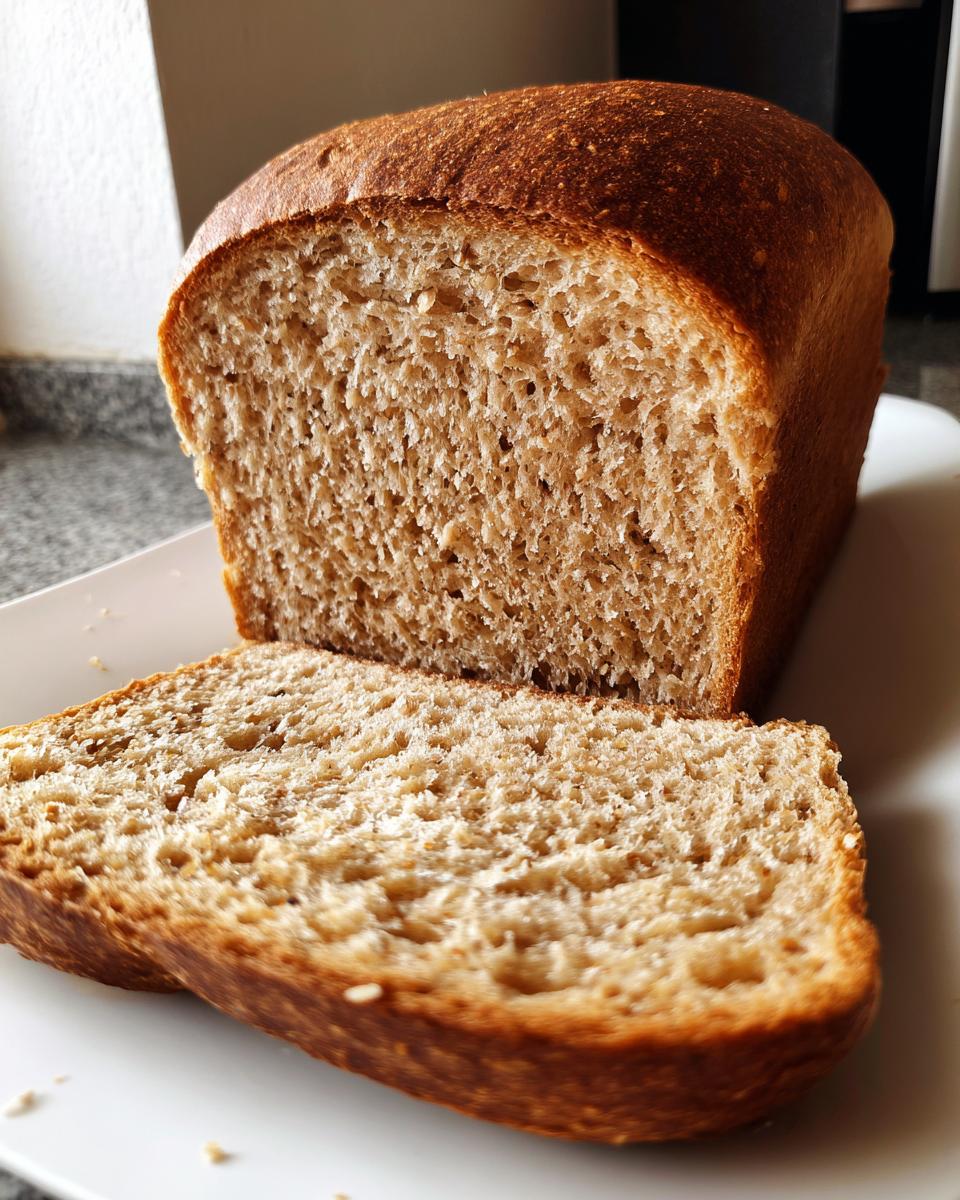
Serving Suggestions for Soft Whole Wheat Loaf
Now that you have managed to wait until your beautiful loaf of soft whole wheat loaf has completely cooled—good job!—it’s time for the payoff! Honestly, the first slice just needs good quality butter that melts right into the crumb. It’s perfection, plain and simple.
But this bread is so versatile. It’s the perfect vehicle for your healthy egg salad or a thick slice dipped into a savory bowl of chicken noodle soup. If you are making something rich like lasagna, this hearty bread is the perfect side to sop up every last bit of sauce. Try it with my recipe for easy lasagna with ricotta!
Frequently Asked Questions About Making Whole Wheat Bread
I know you might have a few lingering questions as you start baking homemade bread. It’s the nature of baking—there’s always a small detail that sounds confusing until someone just explains it simply! Here are some common things people wonder about when making this easy whole wheat bread recipe.
Can I use only whole wheat flour?
Yes, you absolutely can switch to make this 100 percent whole wheat bread! As I mentioned in the ingredient notes, swapping out the all-purpose flour for more whole wheat will give you a slightly denser loaf, but it’s still delicious and wholesome. Just remember to add a little extra water, maybe another tablespoon or two, until the dough feels right in your hands.
Why is my whole wheat dough so sticky?
Whole wheat flour absorbs liquid differently than white flour does, so stickiness is pretty common, especially when following the steps for making a truly fluffy bread recipe. Don’t panic and dump in a ton of extra flour! Instead, trust the initial kneading time, and only add a light dusting of flour to your hands or work surface as needed. The dough should still be soft and slightly tacky by the end of the kneading process.
How long does it actually take from start to finish?
For this whole wheat bread tutorial, the active time is low, but the total time is a couple of hours because the yeast needs to work! Active prep is only about 20 minutes, but you need that first rise (about 1.5 hours) and the second rise (about an hour). So, plan for almost three hours total for a beautiful result, but most of that is just waiting!
Troubleshooting Common Issues in Whole Wheat Bread Baking
If your final loaf often turns out dense, it usually boils down to two things: either the yeast wasn’t active enough (remember the foamy test!) or you skipped giving the dough enough time during its second rise. If you’re baking 100 percent whole wheat bread and it seems impossibly stiff, that means add a touch more water when mixing. We want elasticity, not rigidity, even in a hearty whole grain bread recipe!
If you ever have more burning questions about technique or ingredients, please don’t hesitate to reach out via my contact page!
Nutritional Information for This Healthy Sandwich Bread
When you’re making your commitment to wholesome bread baking, knowing what you’re eating matters. This loaf gives you a good amount of fiber—about 3 grams per slice—which is fantastic for a daily staple! Each slice comes in around 135 calories, with only about 2 grams of fat.
These are just estimates based on the ingredients I listed, but it clearly shows you are getting a much more nutrient-dense choice here than anything pre-packaged. It’s the perfect foundation for making truly healthy sandwich bread.
Share Your Experience Baking This Whole Wheat Bread
I truly hope you fall in love with the process of baking this whole wheat sandwich bread. It’s a wonderfully simple skill to master, and I want to hear all about your success! Did it actually turn out fluffy? Did you nail that golden brown top?
Please leave a rating below and tell me in the comments how this honey wheat loaf worked in your kitchen. For other wholesome ideas to integrate into your week, check out my main About page to see where our journey began!
PrintEasy Soft & Fluffy Honey Whole Wheat Sandwich Bread

Bake a soft, wholesome loaf of homemade whole wheat bread using this simple recipe. It is perfect for beginners and yields a fluffy texture ideal for daily sandwiches and toast.
- Prep Time: 20 min
- Cook Time: 35 min
- Total Time: 2 hours 50 min
- Yield: 1 loaf (about 12 slices) 1x
- Category: Baking
- Method: Yeast Baking
- Cuisine: American
- Diet: Vegetarian
Ingredients
- 1 cup warm water (105-115°F)
- 2 1/4 teaspoons active dry yeast
- 1/4 cup honey
- 2 tablespoons unsalted butter, softened
- 1 1/2 teaspoons salt
- 3 cups whole wheat flour, plus more for dusting
- 1/2 cup all-purpose flour, plus more for dusting
Instructions
- In a large bowl, dissolve the yeast in the warm water. Let it sit for 5 minutes until foamy.
- Stir the honey and softened butter into the yeast mixture. Add the salt.
- Gradually mix in the whole wheat flour until a shaggy dough forms. Add the all-purpose flour gradually until the dough comes together.
- Turn the dough out onto a lightly floured surface. Knead for 6 to 8 minutes until the dough is smooth and elastic. It will feel slightly softer than standard white bread dough.
- Lightly grease a large bowl. Place the dough in the bowl, turning to coat. Cover the bowl with plastic wrap or a clean kitchen towel.
- Let the dough rise in a warm place for 1 to 1.5 hours, or until doubled in size. This is your first rise.
- Gently punch down the risen dough. Shape it into a loaf and place it in a greased 9×5 inch loaf pan.
- Cover the loaf pan loosely and let it rise again in a warm place for 45 to 60 minutes, or until the dough has crowned about 1 inch above the rim of the pan. This is your second rise.
- Preheat your oven to 375°F (190°C) during the last 15 minutes of the second rise.
- Bake for 30 to 35 minutes, or until the top is golden brown and the internal temperature reaches 190°F (88°C).
- Remove the loaf from the pan immediately and cool completely on a wire rack before slicing.
Notes
- For a softer crust, brush the top of the loaf with melted butter immediately after removing it from the oven.
- If you want 100 percent whole wheat bread, substitute the 1/2 cup of all-purpose flour with an additional 1/2 cup of whole wheat flour, but you may need to add 1-2 extra tablespoons of water if the dough seems too stiff.
- This bread is excellent for healthy sandwich bread and freezes well once completely cooled.
Nutrition
- Serving Size: 1 slice
- Calories: 135
- Sugar: 3g
- Sodium: 180mg
- Fat: 2g
- Saturated Fat: 1g
- Unsaturated Fat: 1g
- Trans Fat: 0g
- Carbohydrates: 26g
- Fiber: 3g
- Protein: 5g
- Cholesterol: 3mg