
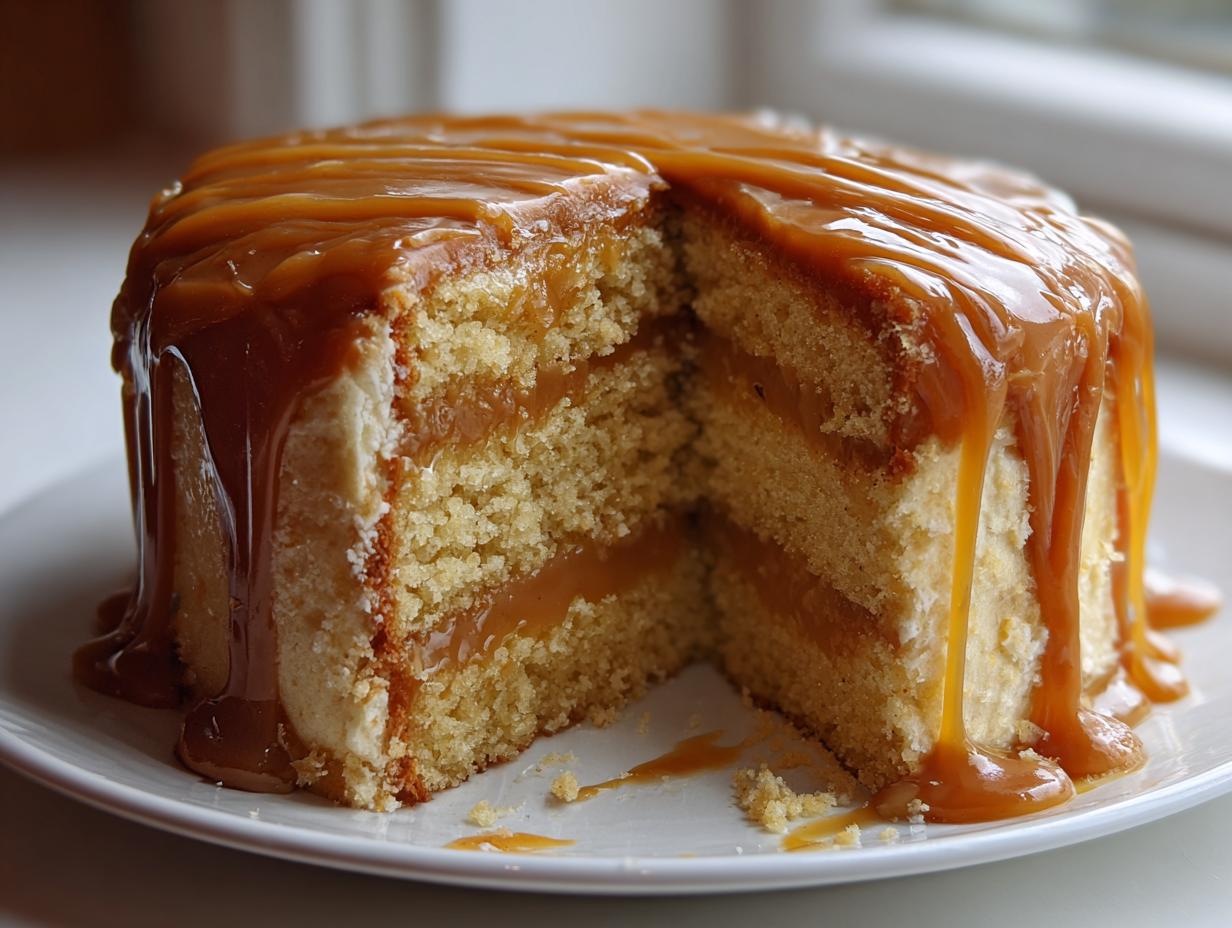
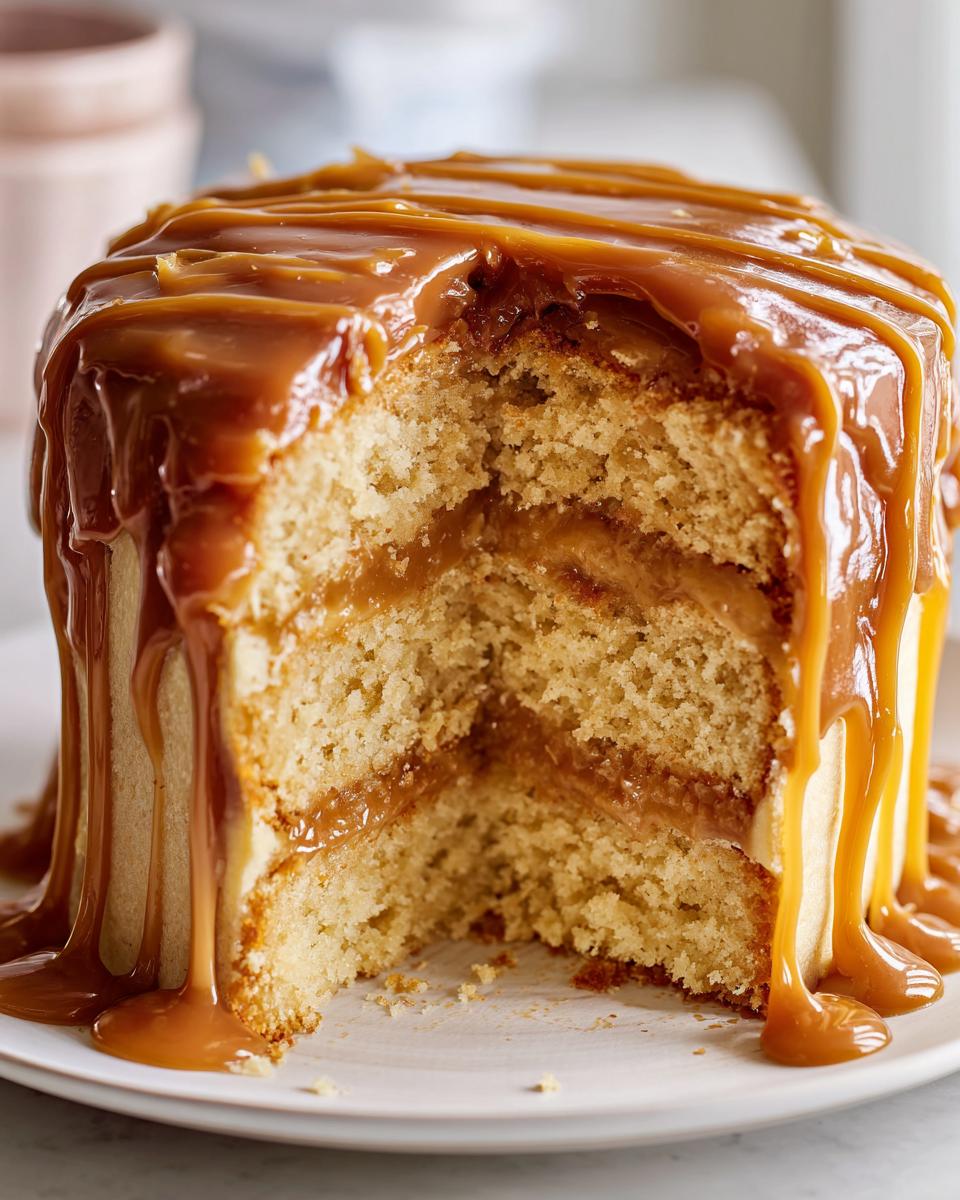
If you’re looking for that one dessert that just stops people in their tracks, the one that tastes like pure nostalgia and celebration all rolled into one, stop scrolling right now. We’re tackling the caramel cake, but we aren’t messing around—this is the Classic Southern Caramel Cake, the kind you dream about when you need a real showstopper. Forget those flimsy, overly sweet versions you find sometimes. I’m giving you the recipe for layers so incredibly moist they almost feel like they’re dripping. This isn’t just a dessert; it’s a tradition, and I’m thrilled to share the keys to making it perfectly on your first try.
- Why This Classic Southern Caramel Cake Recipe Works (E-E-A-T)
- Ingredients for Your Decadent Caramel Cake Recipe
- How to Prepare the Old Fashioned Caramel Layer Cake
- Tips for Success Making Your Caramel Cake
- Variations: Salted Caramel Cake Tutorial and Drizzle Ideas
- Storage and Reheating Instructions for Your Caramel Cake
- Answering Common Questions About This Caramel Cake
- Estimated Nutritional Data for This Comfort Food Dessert Recipe
- Share Your Homemade Caramel Cake Experience
Why This Classic Southern Caramel Cake Recipe Works (E-E-A-T)
You absolutely need a show-stopping caramel cake in your rotation, and this recipe is it. What sets this apart from the usual recipes you see floating around? It comes down to trust, or what the pros call E-E-A-T. We’re building flavor and texture from the ground up. I didn’t just throw things in a bowl; I focused on balancing the wet and dry components so you get that legendary, rich caramel flavor without sacrificing the structure. The frosting, which we’ll get to later, is thick and luscious—not that thin glaze that slides right off. This cake holds together beautifully for serving, which is crucial for a celebration cake!
If you’re obsessed with texture like I am, you’ll want to check out my guide on how I ensure every cake stays impossibly moist, because that’s half the battle (and half the fun!) here.
Achieving the Perfect Moist Homemade Caramel Cake Layers
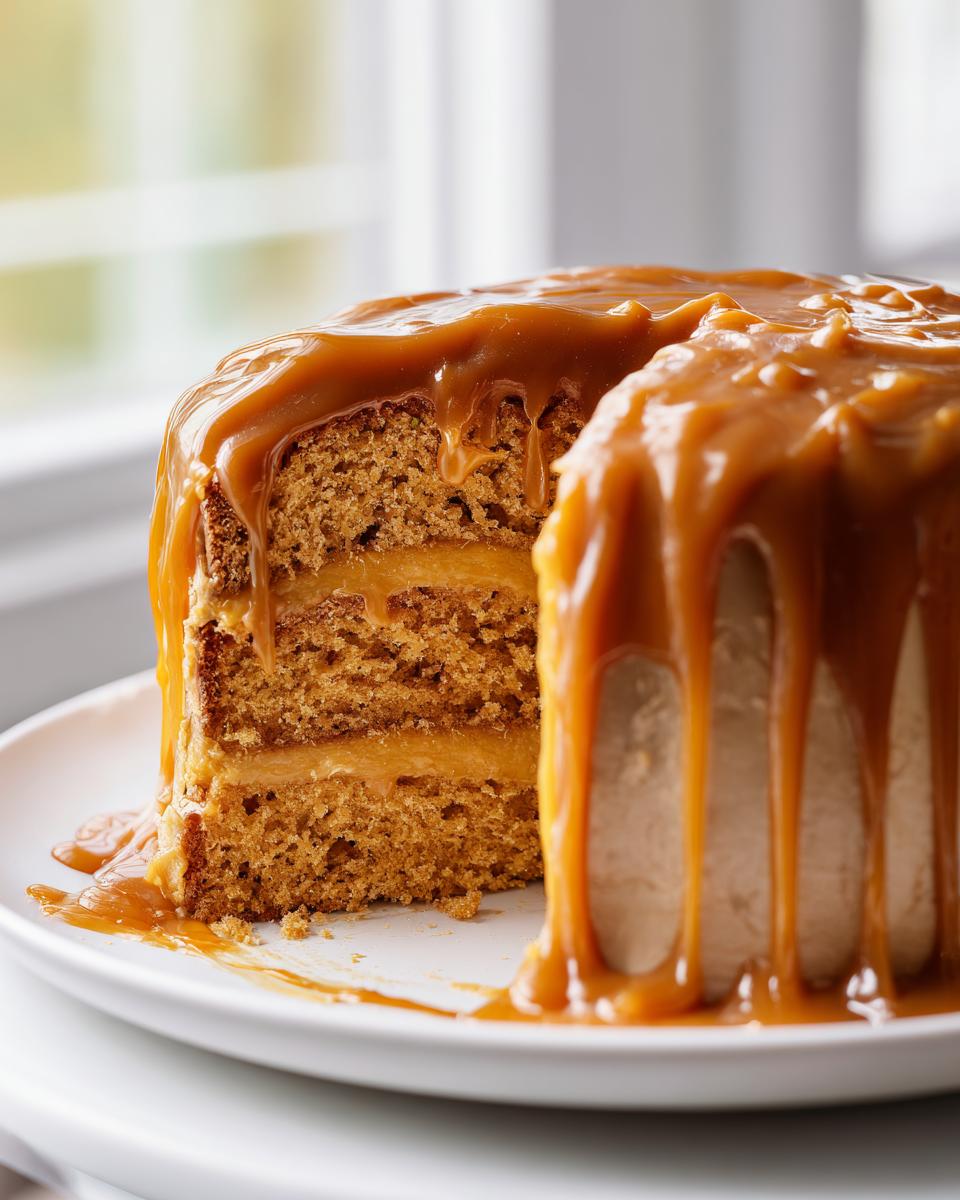
The secret to making this a truly **Moist Homemade Caramel Cake** lies mostly in the layering ingredients. We use a combination of full-fat milk and a good amount of softened butter, of course. But the real magic ingredient you need to watch for is the light brown sugar mixed into the batter. That little bit of molasses in the brown sugar doesn’t just add depth; it pulls and holds moisture better than white sugar alone. This keeps the vanilla layers soft and dreamy, even after they’ve cooled completely.
Ingredients for Your Decadent Caramel Cake Recipe
Okay, buckle up because while this cake looks like it came straight from a fancy bakery—and it tastes like it, trust me—the ingredient list is surprisingly straightforward. We’re using real, whole ingredients here. I’ve broken things down so you can prep your ingredients ahead of time. Getting everything measured out before you start mixing is like having your peace of mind sorted out for baking day! This isn’t a recipe for shortcuts, but every component plays a huge role in why this caramel cake is so amazing.
For the Buttery Caramel Vanilla Cake Layers
For the cake layers, you’ll need what I call your standard wet goodness, plus that little secret brown sugar kick. Make sure your butter is truly soft—we need it to cooperate when we start creaming! You’ll need:
- 1 1/2 cups unsalted butter, softened
- 2 cups granulated sugar
- 4 large eggs
- 1 tablespoon vanilla extract
- 3 cups all-purpose flour
- 1 tablespoon baking powder
- 1/2 teaspoon salt
- 1 cup whole milk
- 1/2 cup packed light brown sugar (this is key!)
For the Best Caramel Frosting Recipe
Now, for the star of the show: that thick, homemade coating! This is where we need to be a tiny bit precise, so pull out that candy thermometer if you have one. That temperature check is what guarantees that gorgeous, melt-in-your-mouth texture for the **Best Caramel Frosting Recipe**. Don’t skip that step!
- 1 cup granulated sugar
- 1/2 cup heavy cream
- 1/2 cup unsalted butter
- 1/4 cup light corn syrup
- 1 teaspoon vanilla extract (for icing)
- Pinch of salt (for icing)
How to Prepare the Old Fashioned Caramel Layer Cake
We are moving into the fun part! This is where your patience pays off. Before we even touch the mixer, get your kitchen ready. Preheat your oven right up to 350°F (175°C) so it’s humming along when you’re ready. Then, grease and flour those three 8-inch round cake pans—I really recommend using parchment circles on the bottom for extra insurance. A beautiful caramel cake deserves a clean release, right?
I’ve broken the process into three clear stages. Trust the technique, especially when we start alternating ingredients. This Old Fashioned way ensures that deep flavor develops perfectly in every single layer. If you mess up the creaming or overmix later, that beautiful texture we talked about vanishes in a puff of dry crumbs. We want show-stopping, not crumbly!
Mixing and Baking the Moist Caramel Cake Layers
First things first: the creaming. Take that big block of softened butter and the main granulated sugar out and beat them until they look pale and fluffy—we’re trying to incorporate air here! Then, add those four eggs in one by one; don’t rush this! After that, mix in the tablespoon of vanilla. Keep your dry stuff (flour, baking powder, salt) separate, and whisk your milk with that crucial brown sugar, making sure it mostly dissolves. If you want practice creaming butter just right for other wonderful bakes, I have a great tip over on my brown butter sugar cookies recipe post!
Now, listen closely! This is the step that keeps your Moist Homemade Caramel Cake layers fluffy. You need to add the dry ingredients and the milk mixture alternately. Start and end with the dry ingredients. For example: a third of the flour mix, then half the milk, then another third of the flour, the rest of the milk, then the final flour. Mix on low until *just* combined. Seriously, stop right when you don’t see white streaks anymore. Overmixing develops gluten, and we want soft cake, not tough bread!
Pour that beautiful batter evenly into your three pans and bake them for about 25 to 30 minutes. The toothpick test is your friend here—it shouldn’t have wet batter, just moist crumbs clinging to it. Let them cool in the pans for about 10 minutes, then flip them out onto a rack to cool completely. They need to be totally cool before the next step, or we’ll have a caramel flood!
Crafting the Caramel Icing From Scratch
Time for the icing that makes this **Caramel Icing From Scratch** legendary! Grab a medium saucepan. We’re cooking the sugar component low and slow. Combine that 1 cup of granulated sugar, the heavy cream, the butter (dedicated for the icing), and the corn syrup. You have to stir this constantly as it heats up until the sugar dissolves. Once it starts boiling, you step back slightly but keep checking it. We are aiming for that soft-ball stage—which means you need that candy thermometer pointed right at 240°F. It takes about 8 to 10 minutes, so don’t wander off!
Once you hit the temperature, pull it right off the heat. Stir in the final vanilla and that pinch of salt. This is important: You have to let it cool and thicken! Keep stirring it every few minutes while it cools down. If you try to frost with it piping hot, it’ll just run everywhere. We want it thick enough to spread like, well, thick caramel.
Assembling Your Showstopper Celebration Cake
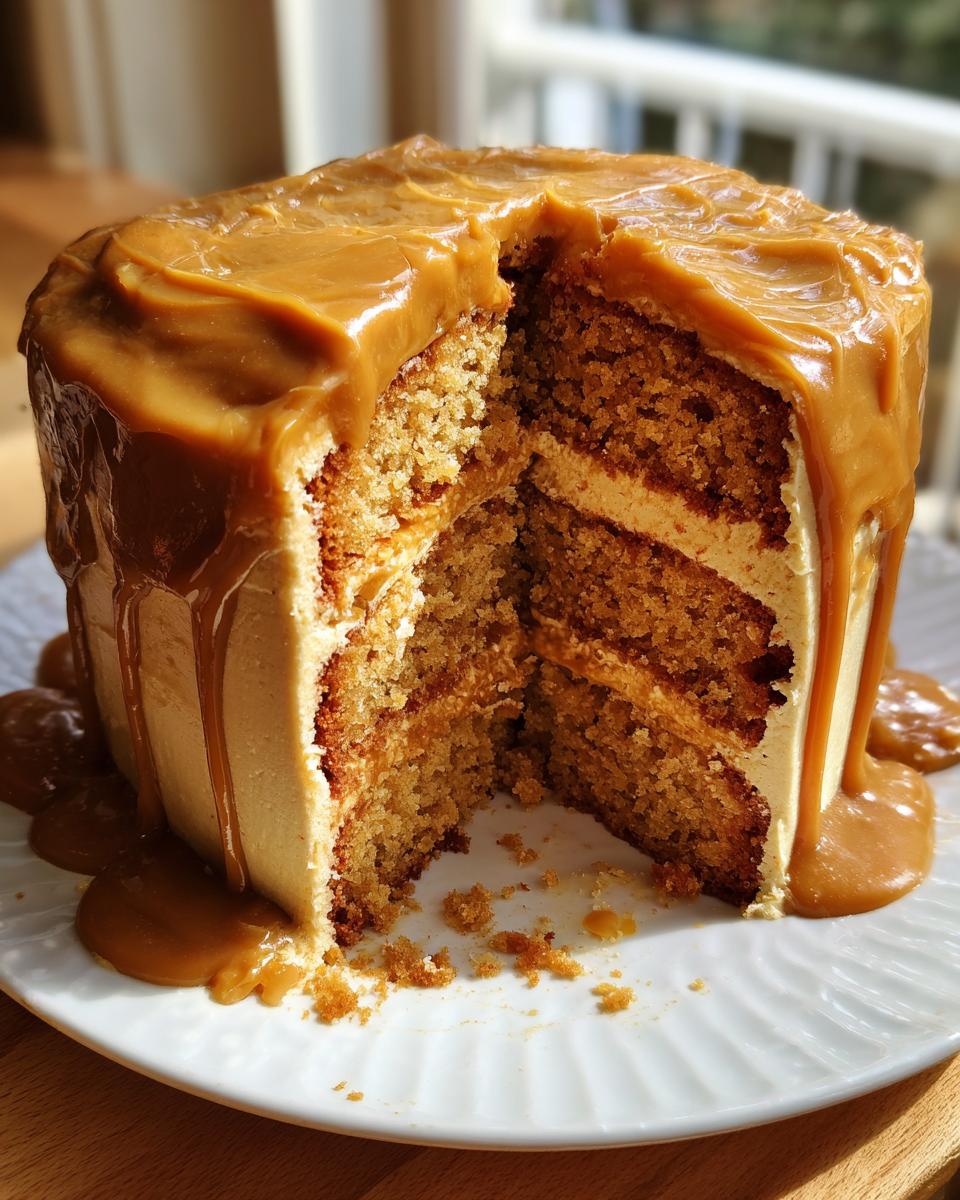
Now that your layers are cool—I mean *totally* cool—it’s time to build this masterpiece. Place your first cake layer down on your serving plate or cake stand. Scoop up a generous mountain of that thick, beautiful caramel icing and spread it evenly across the top. Carefully top it with your second layer and repeat the process. Some of that icing might ooze out the sides, and honestly, that’s a good sign for a classic Southern cake!
Once the top layer is on, use the rest of the icing to frost the top and the sides of your entire Showstopper Celebration Cake. Don’t stress about perfection here; these classic Southern cakes look best when the frosting has a slightly rustic, thick look to it. You did the hard work creating those moist layers, so now just enjoy slathering that rich caramel goodness everywhere!
Tips for Success Making Your Caramel Cake
Look, making a legendary caramel cake takes a little forethought, but it doesn’t have to be stressful! Since we put so much effort into those moist layers and that gorgeous homemade icing, we want to make sure we treat them right once the beauty is assembled. I’ve gathered the few non-negotiable tips I always follow to ensure this cake comes out perfect every single time. If you nail these points, you’ll have folks asking for this recipe at every family event!
The biggest thing I learned over the years is that you want to keep the moisture *inside* the cake, which means handling that icing carefully. Also, don’t be afraid to tweak the flavor just a touch to make it truly yours!
- Moisture Insurance: Simple Syrup Trick. If you baked your layers and they seem just a hair drier than you’d like—don’t panic! Before you even touch the frosting, gently brush the tops of the cooled layers with a spoonful or two of simple syrup. You just boil equal parts water and sugar until it dissolves, let it cool, and brush it on. This locks in moisture like a dream and no one will ever know!
- Make it Salted Caramel Optional. If you, like me, love that salty-sweet contrast, this is the easiest adjustment you can make, and it feels so gourmet! After your caramel icing has cooled down to that spreadable consistency (right before you frost the cake), stir in about half a teaspoon of flaky sea salt. It cuts through the sweetness perfectly and makes your caramel cake taste like it came from a high-end shop.
- Keep It Cool, Keep It Room Temp. This is vital for the look and the melt-in-your-mouth texture! I know it’s tempting to stick a big, gorgeous cake like this in the fridge to “set” the frosting, but please resist! Refrigeration can make the cake layers firm up and sometimes make the homemade caramel icing grainy. This frosting sets up beautifully at room temperature. If your kitchen is super hot, just pop it in the fridge for 30 minutes to firm it slightly, but always bring it back out before serving so it’s soft again. For more thoughts on keeping baked goods tender, you might enjoy my tips on soft and chewy dessert bars!
Variations: Salted Caramel Cake Tutorial and Drizzle Ideas
Now that you’ve mastered the Classic Southern Caramel Cake, we can talk about having a little fun with it! After all, baking should be your own adventure. If you’re craving a little more complexity in flavor, turning this into a **Salted Caramel Cake Tutorial** is the easiest move you can make. Remember what I showed you in the tips section? Just stir in that flaky sea salt right before the frosting sets up, and *boom*, instant gourmet flavor upgrade!
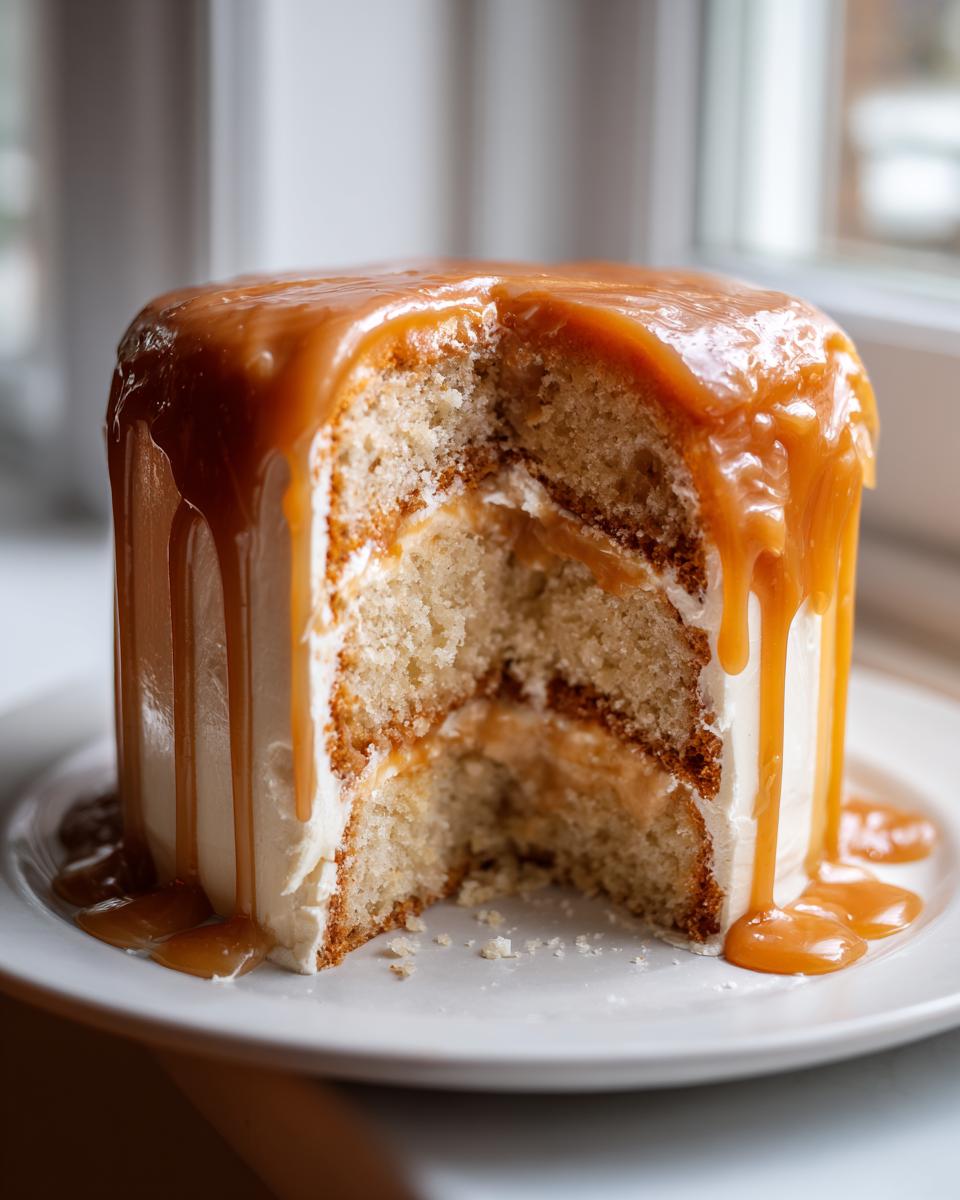
But what if you want that amazing, dripping look? That’s where the **Gooey Caramel Drizzle Cake** comes in. You have a little bit of that homemade caramel icing leftover, right? Or maybe you just want something extra shiny on top? Don’t bake a whole new batch.
Here’s my trick for that irresistible drizzle element: Take a small spoonful or two of your leftover icing—or just quickly whip up a tiny saucepan batch if you need more.
- Let it cool down just slightly more than the frosting stage. You want it runny enough to drip beautifully down the sides, but thick enough that it doesn’t vanish completely.
- Use a spoon to slowly drizzle it over the top edge of the finished cake, letting gravity pull those gorgeous ribbons down the sides. It just looks so impressive!
- If you want even more inspiration on how truly decadent desserts can look when you want them to feel bakery-style, check out my tips for sugar cookie cheesecake—it’s another showstopper!
If you want to see how another amazing baker handles their glaze, I really recommend looking at the different versions floating around online, like this one I always bookmark: Caramel Cake with Caramel Icing Recipe. It shows you just how versatile this southern classic can be!
Storage and Reheating Instructions for Your Caramel Cake
You’ve just created a masterpiece, a true Southern gem, and now you have leftovers—which is a lovely problem to have! The wonderful thing about this caramel cake is that those moist layers and that rich frosting actually hold up really well, provided you treat them right. My biggest piece of advice? Try to keep this cake out of the refrigerator if you can manage it, especially if you have a cooler kitchen. The low humidity and cold tend to stiffen up the vanilla cake layers and make that gorgeous caramel icing a bit too firm.
When it comes to storage, airtight is your mantra. If you’re planning to eat the whole showstopper celebration cake within two or three days, keeping it at room temperature is best. Find a good cake carrier or cover the cake plate tightly with plastic wrap. This helps seal in that moisture we worked so hard to create. Seriously, the texture stays perfect when it’s just sitting on the counter.
Now, if you *must* refrigerate it—maybe your kitchen is just too warm, or you need it to last close to a week—there’s a way to do it without ruining the experience. Wrap each individual layer, once cooled completely and before frosting, tightly in plastic wrap and then foil. Store them this way. Once frosted, if you have to chill it, move it to the fridge for 24 hours max, but remember that crucial step before serving: Let it sit out on the counter for at least two hours before slicing!
That resting time allows the butter in the frosting to soften back up slightly and lets the cake layers breathe again. If, for some reason, a slice does seem a little stiff after coming out of the cold, I sometimes give a quick 10-second zap in the microwave—just the individual slice, mind you!—to bring that buttery aroma and softness right back. It’s a perfect little trick for enjoying your homemade caramel cake the next day!
Answering Common Questions About This Caramel Cake
It’s funny how much I bake this caramel cake, and I still get the same questions every time someone tries it for the first time! That’s why I put together this little Q&A section. I want you to feel just as confident making this as you would whipping up a batch of my easy fluffy vanilla buttercream. Getting that *bakery style* result is totally achievable, even if you’ve never made candy before!
Can I use store-bought frosting instead of making this icing from scratch?
Oh, sweet friend, you *can*, but I sincerely hope you don’t! Remember how we talked about the homemade caramel icing being one of the main reasons this is the **Best Caramel Frosting Recipe** out there? That cooked sugar icing is what gives this showstopper celebration cake its signature rich, almost buttery texture that melts in your mouth. Store-bought stuff is usually just heavy sugar glaze; it doesn’t have that deep, cooked caramel flavor. If you’re making a classic Southern recipe like this, trust me, the homemade icing is worth those extra ten minutes of stirring over the stove!
What if I only want to make one layer instead of three for this Old Fashioned Caramel Layer Cake?
That’s a perfectly valid question if you’re just testing the recipe or don’t need a huge cake! If you halve the recipe, you could bake it in a single 9-inch round pan, or even two 6-inch pans. If you go with one 9-inch pan, you’re looking at potentially increasing that bake time significantly—maybe 40 to 50 minutes, depending on your oven. Always start testing with a toothpick around the 40-minute mark. If you do make a single layer, you can treat the extra icing you made as a glorious dipping sauce! Or, you can just halve the icing recipe too, which is probably cleaner!
What makes this recipe the go-to for a truly moist cake?
It’s the trifecta of moisture! First, we use butter and milk, which are fantastic carriers for flavor and keep things tender. Second, we use brown sugar in the cake layers, which holds onto moisture beautifully. And third? We don’t overmix! If you mix that flour too long, you develop gluten, which makes a tough, dry cake. Keep it minimally mixed until just combined after alternating the wet and dry, and you get that unbelievably tender crumb every single time. It’s the secret to this **Incredibly Moist Cake Recipe**!
Can I use a recipe like this for other desserts, maybe a Gooey Caramel Drizzle Cake?
Absolutely! After you finish assembling and frosting your main layer cake, you can absolutely turn it into a **Gooey Caramel Drizzle Cake** element. Just take any leftover cooked caramel icing—or make a tiny reserve batch—and let it cool just a little bit longer than the frosting stage. You want it super pourable. Then, just drizzle it artistically over the top of the finished cake, letting those thick, beautiful ribbons cascade down the sides. It adds great texture contrast!
If you want to see how another baker tackled a classic version of this dessert, you can always check out results from popular recipe sites, like this one on Allrecipes, just to see what other techniques are out there!
Estimated Nutritional Data for This Comfort Food Dessert Recipe
Alright, let’s peek at the numbers for this slice of heaven. When you’re making something as decadent as this homemade caramel cake, you know it’s not exactly a low-calorie snack, but that’s okay! This is a celebration dessert, meant to be savored. We’re talking about a slice that delivers rich flavor because it’s loaded with real butter and that glorious cooked sugar icing.
Here are the estimates for a single serving based on how I calculated the ingredients. Now, remember what I always say about home baking: exact details really depend on what brand of flour you use, how thick you cut your slice, and how much of that glorious frosting you pile on! These numbers are a guideline for enjoying this wonderful **Comfort Food Dessert Recipe** responsibly.
- Serving Size: 1 slice
- Calories: 550
- Sugar: 65g (Yes, that’s high, but that’s the caramel calling!)
- Fat: 32g
- Saturated Fat: 19g
- Carbohydrates: 68g
- Protein: 5g
- Cholesterol: 105mg
Just consider this a snapshot! If you’re skipping the glaze or using reduced-fat cream in the icing, those numbers will shift. The important part is the joy this Old Fashioned Caramel Layer Cake brings to your table, not stressing over every gram. Bake it, enjoy it, and put those wonderful memories on your plate!
Share Your Homemade Caramel Cake Experience
Well, we made it! We created a truly Showstopper Celebration Cake together, and now comes the part I love the most: hearing from you! Baking, for me, has always been about connection—it’s how I show love and care, and I really hope you felt that while making this Classic Southern Caramel Cake.
I put everything I know about creating that unbelievably moist texture and that rich, decadent caramel icing into this recipe, but the final touch comes from you. Did it make your family gather around the table? Did you find a favorite new way to use up leftover icing? I desperately want to know!
Please, if you loved this caramel cake as much as my family does, take a second and leave a rating right below this. A five-star rating helps other home cooks who might be on the fence decide to tackle this showstopper! If you snapped a picture of your finished cake—maybe you added a sprinkle of flaky salt or let the drizzle run perfectly—please tag me or send it over through the contact page. Sharing your success makes my whole week!
Remember, this recipe is about bringing simple joy back to your kitchen table. Let’s keep that connection going, one delicious slice of homemade caramel cake at a time!
PrintClassic Southern Caramel Cake with Rich Homemade Icing
Make this showstopper Southern Caramel Cake featuring incredibly moist vanilla brown sugar layers and a thick, decadent caramel frosting. This recipe delivers bakery-style results perfect for special occasions.
- Prep Time: 35 min
- Cook Time: 30 min
- Total Time: 65 min
- Yield: 12 servings 1x
- Category: Dessert
- Method: Baking
- Cuisine: American
- Diet: Vegetarian
Ingredients
- 1 1/2 cups unsalted butter, softened
- 2 cups granulated sugar
- 4 large eggs
- 1 tablespoon vanilla extract
- 3 cups all-purpose flour
- 1 tablespoon baking powder
- 1/2 teaspoon salt
- 1 cup whole milk
- 1/2 cup packed light brown sugar (for cake layers)
- 1 cup granulated sugar (for caramel icing)
- 1/2 cup heavy cream
- 1/2 cup unsalted butter (for caramel icing)
- 1/4 cup light corn syrup
- 1 teaspoon vanilla extract (for icing)
- Pinch of salt (for icing)
Instructions
- Preheat your oven to 350°F (175°C). Grease and flour three 8-inch round cake pans.
- In a large bowl, cream together the 1 1/2 cups of softened butter and 2 cups of granulated sugar until light and fluffy.
- Beat in the eggs one at a time, mixing well after each addition. Stir in 1 tablespoon of vanilla extract.
- In a separate bowl, whisk together the flour, baking powder, and salt.
- In a small bowl, whisk the milk and the 1/2 cup of brown sugar until the sugar dissolves slightly.
- Gradually add the dry ingredients to the wet ingredients, alternating with the milk mixture, beginning and ending with the dry ingredients. Mix until just combined.
- Divide the batter evenly among the prepared cake pans. Bake for 25 to 30 minutes, or until a toothpick inserted into the center comes out clean.
- Let the cakes cool in the pans for 10 minutes before inverting them onto a wire rack to cool completely.
- Prepare the caramel icing: In a medium saucepan, combine 1 cup granulated sugar, heavy cream, 1/2 cup butter, and corn syrup.
- Cook over medium heat, stirring constantly until the sugar dissolves and the mixture boils. Reduce heat slightly and cook, stirring occasionally, until the mixture reaches 240°F (soft-ball stage) on a candy thermometer, about 8 to 10 minutes.
- Remove from heat. Stir in 1 teaspoon vanilla extract and a pinch of salt. Let the icing cool and thicken slightly, stirring occasionally, until it reaches a spreadable consistency.
- Assemble the cake by placing one cooled layer on a serving plate. Spread a generous layer of caramel icing over the top. Place the next layer on top and repeat. Frost the top and sides of the entire cake with the remaining icing.
Notes
- For an extra moist cake, you can gently brush the cooled cake layers with a simple syrup made from equal parts water and sugar before frosting.
- If you prefer a salted caramel flavor, add 1/2 teaspoon of flaky sea salt to the finished caramel icing.
- This homemade caramel icing sets up best at room temperature. Avoid refrigerating the finished cake unless necessary for storage.
Nutrition
- Serving Size: 1 slice
- Calories: 550
- Sugar: 65g
- Sodium: 250mg
- Fat: 32g
- Saturated Fat: 19g
- Unsaturated Fat: 13g
- Trans Fat: 0.5g
- Carbohydrates: 68g
- Fiber: 1g
- Protein: 5g
- Cholesterol: 105mg