
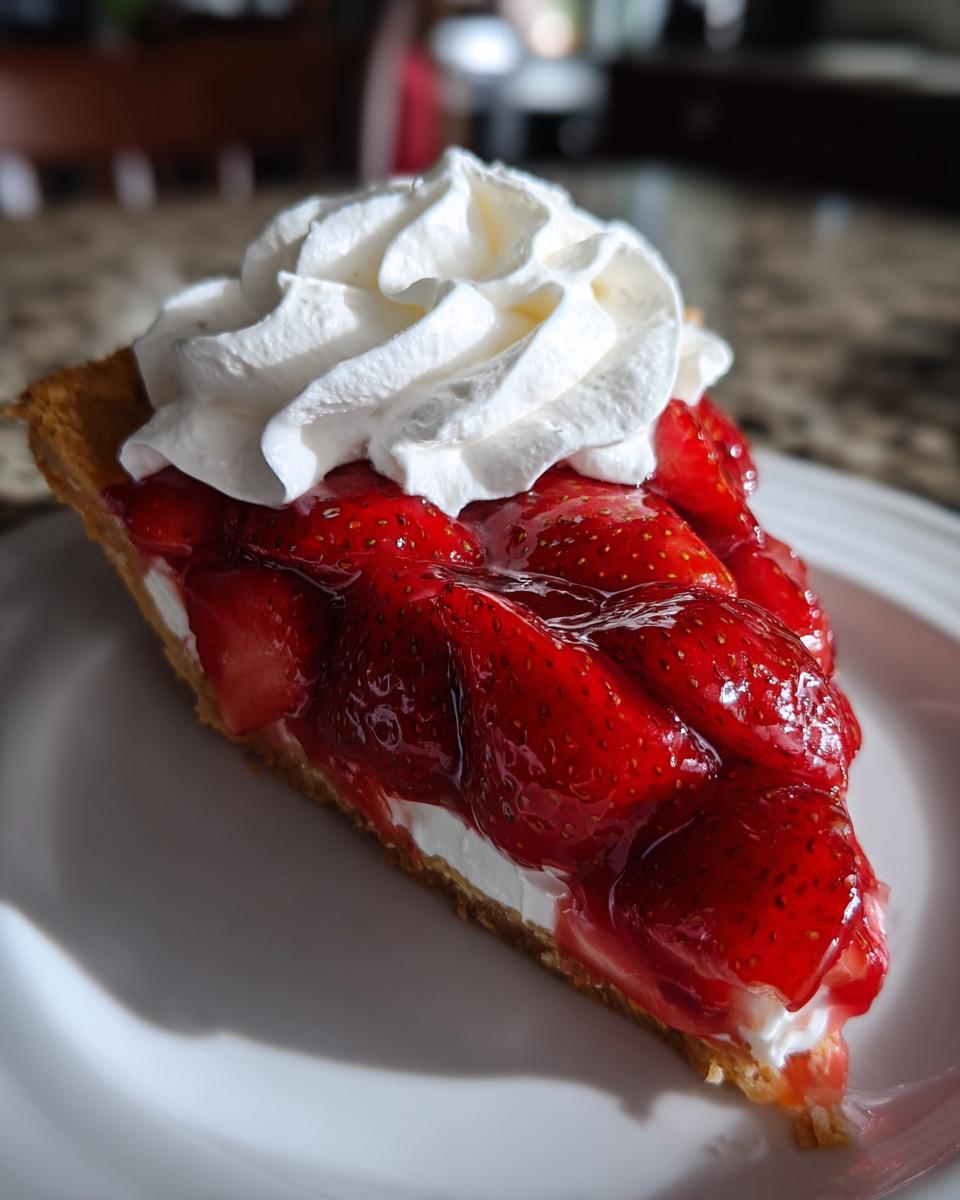
When those bright, juicy strawberries are at their peak, there’s simply nothing better than a classic summer dessert, right? Forget those pale, wobbly fillings you sometimes see. I’m passing along what I truly believe is the best old-fashioned fresh strawberry pie recipe—the one that delivers that deep, rich berry flavor we all crave. My favorite part is that this classic strawberry pie uses a cooked glaze, not gelatin, which tackles that annoying runny filling problem head-on. Here at Pure Plate Path, our goal, thanks to Sarah Miller’s philosophy, is making sure simple, real food works for your busy life, and this pie is proof you don’t need fussy steps for perfection.
- Why This Fresh Strawberry Pie Recipe is the Best Strawberry Pie Ever
- Ingredients for Your Old-Fashioned Strawberry Pie
- How to Prepare the Best Strawberry Pie with Cooked Glaze
- Finishing Touches: Whipped Cream Topping for Your Strawberry Pie
- Tips for Success Making the Best Fresh Strawberry Pie Recipe
- Variations on the Classic Strawberry Pie
- Storage and Serving Suggestions for Your Strawberry Pie
- Frequently Asked Questions About Making Strawberry Pie
- Share Your Homemade Strawberry Pie Creation
Why This Fresh Strawberry Pie Recipe is the Best Strawberry Pie Ever
When you bite into this, you’ll understand why folks call it the best strawberry pie they’ve ever made. It’s all about getting that perfect balance of sweet fresh berries and a filling that actually stays put. I learned that skipping the shortcuts—especially the ones that lead to a watery mess—is critical for a truly old fashioned strawberry pie experience. These are the reasons this recipe always wins at my summer gatherings:
- It is packed with perfectly ripe, fresh berries, not that mushy canned stuff.
- We get that beautiful, glossy finish without relying on Jello packets—purely from scratch!
- The flavor captures that nostalgic, homemade taste everyone searches for in a homemade strawberry pie.
We even have a specific trick for making sure that glaze sets up beautifully. You can find more of my favorite simple indulgences over here if you’re looking for another easy bake!
Achieving the Perfect Thick Strawberry Pie Filling
The secret to saying goodbye to the runny filling curse is simple: heat and cornstarch. We’re cooking the sugar, water, and cornstarch mixture until it reaches a full boil and we let it boil hard for a solid minute. That boiling action is what activates the cornstarch completely, transforming the liquid into a thick sauce that can generously coat those gorgeous fresh berries. Trust me, this cooking step is the key difference between good and truly great strawberry pie filling.
Ingredients for Your Old-Fashioned Strawberry Pie
You don’t need a massive ingredient list for a show-stopping dessert, and that’s what I love about this classic strawberry pie. Since we’re celebrating those berries, quality matters most! Make sure your crust is ready and cooled before you start the glaze. I also have a super simple tip for a savory side you might want to try next time right here.
- One (9-inch) flaky pie crust, already baked and totally cool.
- Six cups of the best, freshest strawberries you can find! We need them hulled and halved.
- One cup granulated sugar and two tablespoons powdered sugar (for the topping, don’t mix those up!).
- One-quarter cup cornstarch—this makes our thick glaze work!
- One cup water and one-quarter cup fresh lemon juice for that zing.
- One tablespoon real butter and one teaspoon pure vanilla extract for richness.
- One cup cold heavy whipping cream—it has to be cold for the topping to whip up right.
How to Prepare the Best Strawberry Pie with Cooked Glaze
Okay, grabbing your pre-baked crust is crucial here. We can’t have that pretty shell getting soggy! You’ll want your flaky pie crust completely cooled down—I usually let mine sit on a rack for ages. While that’s happening, we get busy prepping the fruit. This is where we build layers of flavor before we even turn on the stove so we can make that incredible, thick glaze.
If you need a refresher on making your own perfect foundation, check out my go-to flaky pie crust recipe. It’s worth the effort!
Preparing the Crust and Berries for Your Strawberry Pie
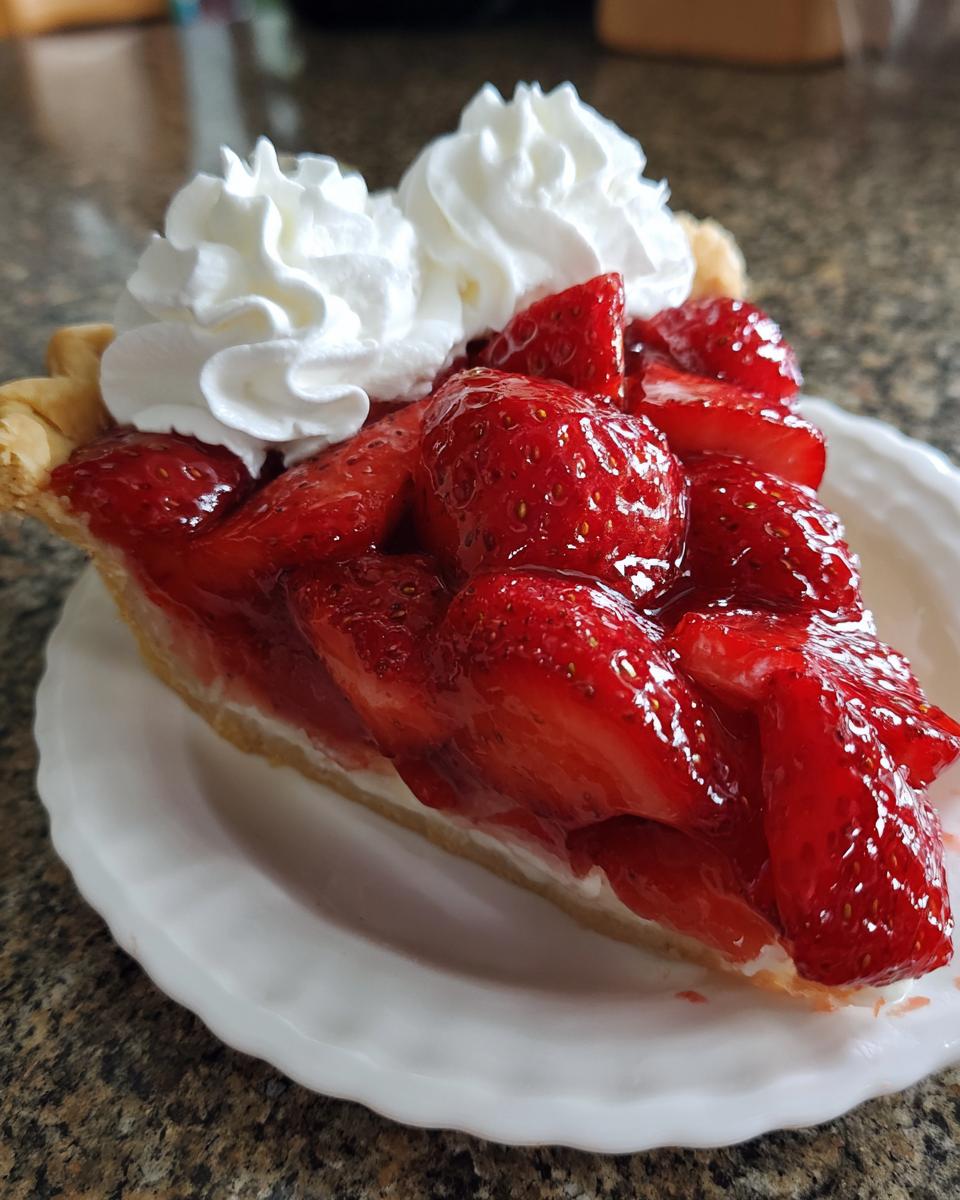
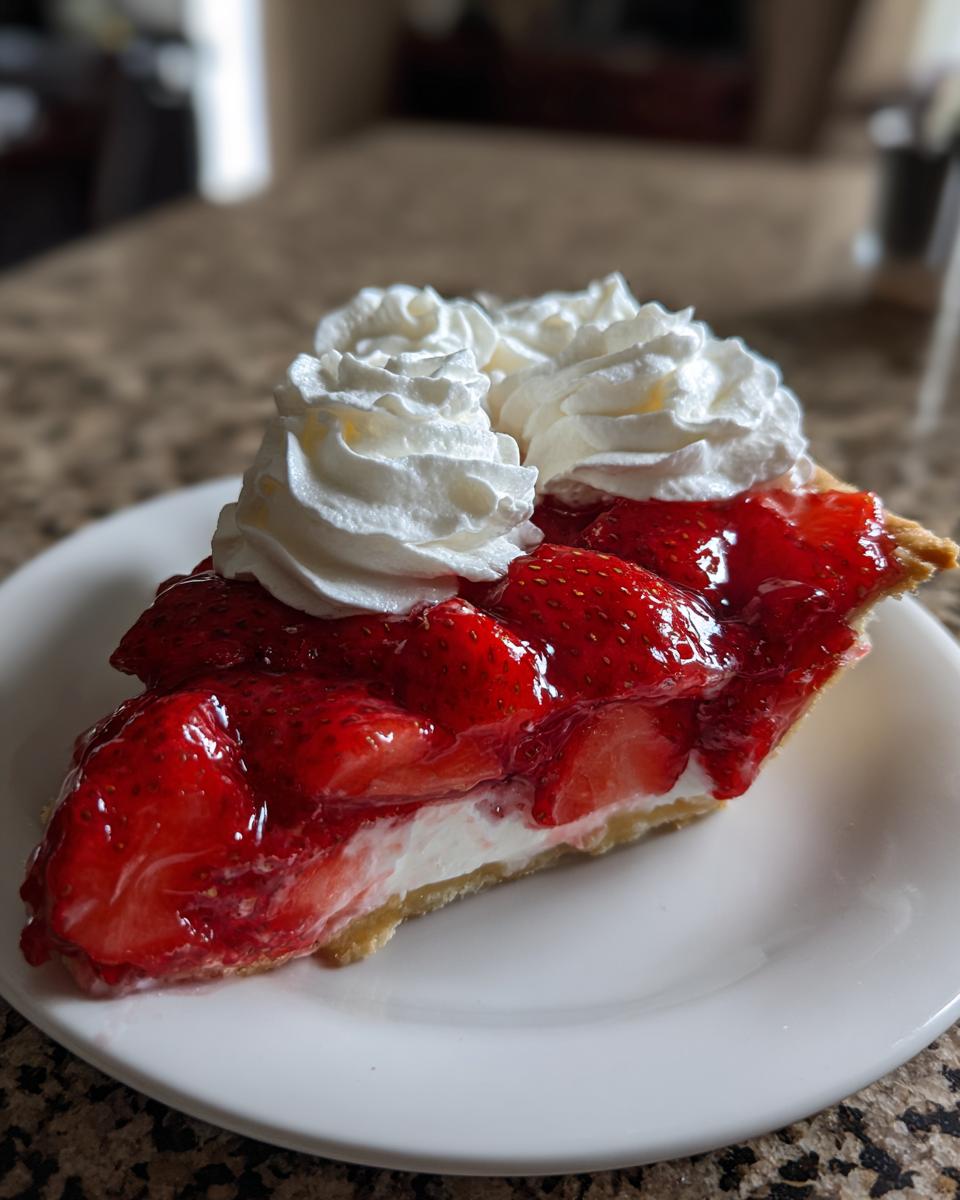
First things first: your crust needs to be stone cold. You want to hull and slice about five cups of your beautiful fresh strawberries and put them right into a large bowl. Now, pick out the absolute prettiest handful—maybe a cup’s worth—and set those aside. We’re saving those stunning berries to decorate the top later, so don’t crush them!
Mastering the Thick Strawberry Pie Filling Glaze
Next up is the magic: the glaze. In a saucepan, whisk the sugar and cornstarch together first—no lumps allowed! Then whisk in the water, lemon juice, and salt. Put that on medium heat and stir constantly. When it gets thick, you absolutely *must* let it boil, and I mean truly boil, for one full minute while stirring. That cooking time develops the cornstarch so your filling sets up firm. Once off the heat, stir in that butter and vanilla until smooth.
Assembly and Chilling: Setting the Strawberry Pie
Let that cooked glaze cool for about ten minutes—it needs to be warm, but not scalding hot. Now listen close: this is Sarah’s big tip—gently fold the warm glaze into the five cups of sliced berries. Be so gentle; we don’t want to smash our fruit! Pour that perfect mixture into your cooled crust and arrange your reserved gorgeous berries on top. Then, you have to be patient! This needs a minimum of four hours in the fridge to set up perfectly before we add the final fluffy layer.
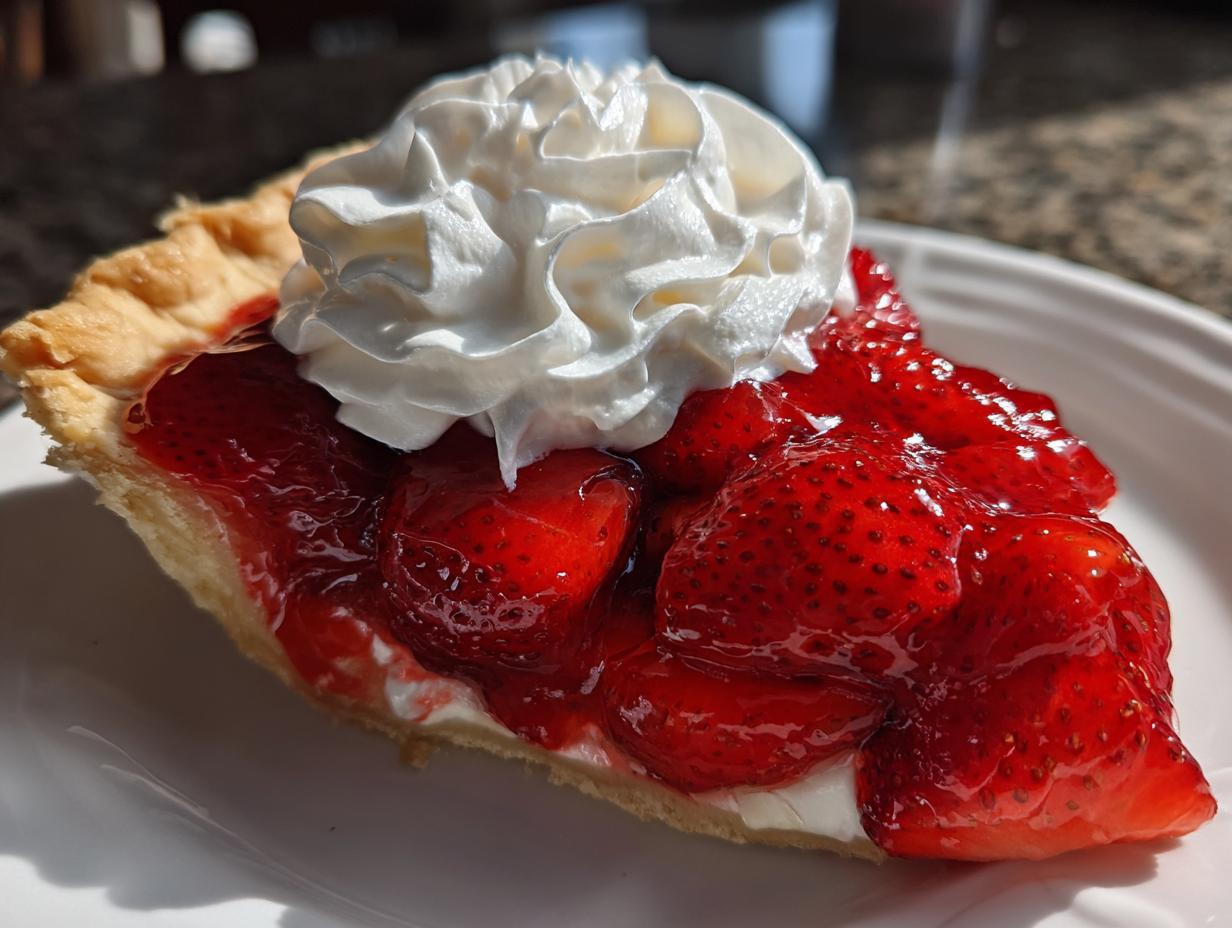
Finishing Touches: Whipped Cream Topping for Your Strawberry Pie
After all that patience chilling the pie, we get to the best part! That final swirl of homemade whipped cream really makes this an old fashioned strawberry pie masterpiece. You’ll whip one cup of heavy cream with two tablespoons of powdered sugar until you get those gorgeous stiff peaks. My little trick for super sturdy cream is making sure my bowl and beaters were in the freezer for about fifteen minutes beforehand—cold stuff whips up faster!
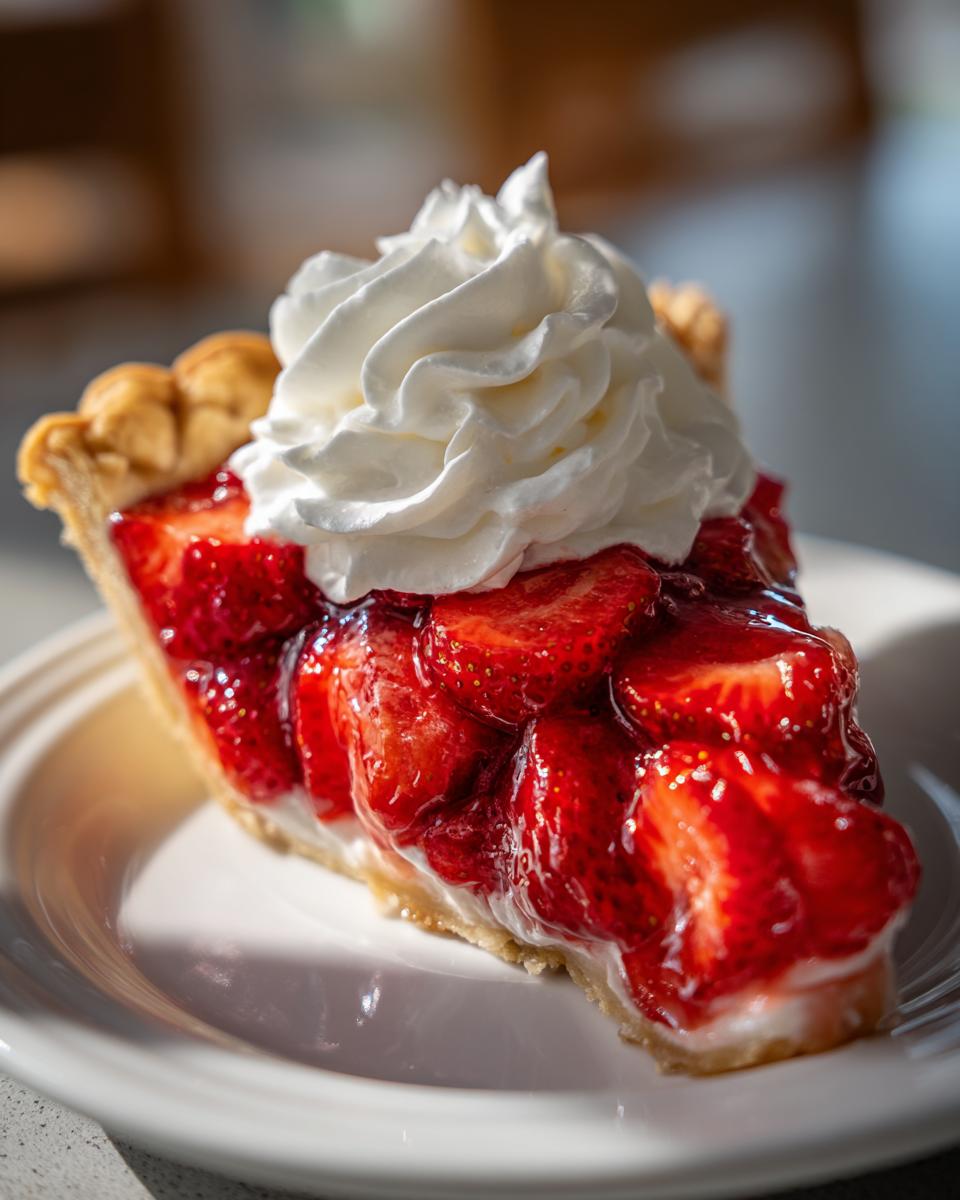
Gently spread that fluffy cloud over your perfectly set filling. This creamy layer contrasts so beautifully with the tart sweetness of the berries. It truly finishes off the best strawberry pie ever. If you need help getting the perfect frosting texture, I shared some tips for a lovely frosting consistency that works for cream, too!
Tips for Success Making the Best Fresh Strawberry Pie Recipe
Look, I know we’re aiming for the best strawberry pie ever, and sometimes pie-making feels stressful. But honestly, success in this recipe comes down to honoring a couple of key moments we discussed earlier. Getting the glaze right is number one; remember, that full minute of boiling for the cornstarch is non-negotiable for a super thick filling that won’t weep.
Another little trick for elevation is thinking about layers. If you happen to love that creamy tanginess that shows up in other popular recipes? You can totally add an easy layer of flavor right onto that cooled crust—just spread about 8 ounces of softened cream cheese mixed with a touch of powdered sugar across the bottom before adding the strawberries. It gives you that gorgeous creamy strawberry pie texture beneath the fruit! If you’re interested in more creamy delights, I dive deep into making a classic base for those textures over here.
Also, promise me you’ll serve this the day you make it. Fresh berries are amazing, but they look their absolute prettiest and taste their best when that glaze hasn’t had time to soak in too long. This homemade strawberry pie truly shines brightest the day after assembly.
Variations on the Classic Strawberry Pie
Now, I’m all about this old fashioned strawberry pie because it’s pure tradition, but I totally get it—sometimes you see something else that catches your eye, like a strawberry pretzel pie or a super rich version. Since this recipe uses a cooked glaze base, it’s actually pretty adaptable!
If you were hoping for a creamy strawberry pie, remember that cream cheese layer I mentioned? That’s your easiest route—just make sure that layer is chilled firm before you gently spoon the fruit mixture on top. You could even try adapting this glaze over a graham cracker crust instead of pastry if you prefer that texture. People also go wild for a Shoneys copycat pie, which is usually just a classic structure with maybe a specific whipped topping blend. This recipe gives you the best homemade foundation to tweak to your heart’s content. Need an idea for another showstopper pie after this one? My recipe for French Silk Pie is an amazing contrast!
Storage and Serving Suggestions for Your Strawberry Pie
Because we are prioritizing that vibrant, fresh flavor of the berries, my honest advice for this strawberry pie is: eat it the day you make it! Seriously, it’s the ultimate summer strawberry dessert when it’s perfectly chilled and the whipped cream is pristine.
If you have leftovers, you can cover it loosely and store it in the fridge for maybe a day, but that glorious glaze will start to weep a little bit. Don’t even think about microwaving it; that ruins the cream and the texture right away. For serving at your next big gathering, a scoop of vanilla ice cream or a side of fresh, tart slaw keeps things bright!
Frequently Asked Questions About Making Strawberry Pie
I know you probably have a few questions buzzing around after reading all about this glorious strawberry pie! When you’re aiming for the absolute best result, details matter. Here are a few things folks often ask me when they’re ready to make this true taste of summer.
Can I make this easy strawberry pie recipe ahead of time?
Honestly, for the best texture and appearance, no. This is one of those easy fruit pie recipes that shines brightest the day it’s assembled. Because we are using fresh, juicy berries, they start to break down a bit once they’re coated in the glaze, even when chilled. If you absolutely must prep ahead, bake the crust and make the glaze the day before, store them separately, and assemble everything the morning of serving. Keep it cold, but aim to eat it that day!
What is the difference between this and a Jello strawberry pie?
This is my favorite question! The main difference is that lovely, thick shine. A no jello strawberry pie like mine uses cornstarch, sugar, and heat to create a jammy, glossy glaze that really showcases the fruit. Jello pies use gelatin, which sets quickly but gives you a much softer, almost jiggly result. My cooked glaze method guarantees a firmer, richer filling that holds its shape beautifully when you slice it.
If you’re looking for more simple baking inspiration after you conquer this pie, you might enjoy looking at my general guide for easy fruit pie recipes!
Share Your Homemade Strawberry Pie Creation
I truly hope you loved making this homemade strawberry pie as much as I do! Now it’s your turn to tell me all about it. Did the glaze set up perfectly? Drop a comment below and let me know how it tasted—your feedback means the world to me and helps others feel confident grabbing their apron! If you snapped a photo of your beautiful summer dessert, show it off! You can always learn a little more about the philosophy behind Pure Plate Path over on my About Page.
PrintThe Best Old-Fashioned Fresh Strawberry Pie (No Jello)

Make a classic, old-fashioned strawberry pie using fresh berries and a thick, glossy cooked glaze. This recipe avoids runny filling and delivers a deeply satisfying summer dessert.
- Prep Time: 30 min
- Cook Time: 10 min
- Total Time: 4 hours 40 min
- Yield: 8 servings 1x
- Category: Dessert
- Method: Chilling
- Cuisine: American
- Diet: Vegetarian
Ingredients
- 1 (9-inch) pre-baked flaky pie crust
- 6 cups fresh strawberries, hulled and halved
- 1 cup granulated sugar
- 1/4 cup cornstarch
- 1 cup water
- 1/4 cup lemon juice, fresh squeezed
- 1/4 teaspoon salt
- 1 tablespoon butter
- 1 teaspoon vanilla extract
- 1 cup heavy whipping cream, cold
- 2 tablespoons powdered sugar (for topping)
Instructions
- Prepare your 9-inch flaky pie crust and let it cool completely on a wire rack.
- Gently wash and hull the fresh strawberries. Slice them in half. Set aside 1 cup of the nicest looking berries for the top layer. Place the remaining 5 cups of strawberries in a large bowl.
- In a medium saucepan, whisk together the granulated sugar and cornstarch until fully combined.
- Whisk in the water, lemon juice, and salt until smooth.
- Cook the mixture over medium heat, stirring constantly, until it thickens significantly and comes to a boil. Let it boil for one full minute while continuing to stir. This step is key for a thick glaze.
- Remove the saucepan from the heat. Stir in the butter and vanilla extract until the butter melts completely.
- Let the glaze cool for about 10 minutes. It should still be warm, but not hot enough to cook the fresh berries.
- Gently pour the warm glaze over the 5 cups of sliced strawberries in the bowl. Fold carefully to coat all the berries without crushing them.
- Pour the coated strawberries into the cooled, pre-baked pie crust. Arrange the reserved 1 cup of whole or halved berries attractively on top of the filling.
- Chill the pie in the refrigerator for at least 4 hours, or until the filling is completely set.
- Just before serving, whip the heavy whipping cream with the powdered sugar until stiff peaks form. Spread or pipe the whipped cream over the top of the chilled pie.
Notes
- For the thickest, non-runny glaze, ensure you boil the cornstarch mixture for a full minute after it thickens.
- If you prefer a cream cheese layer, spread 8 ounces of softened cream cheese mixed with 1/4 cup powdered sugar over the bottom of the cooled crust before adding the strawberries.
- This pie is best served the day it is made for the freshest flavor and texture.
Nutrition
- Serving Size: 1 slice
- Calories: 350
- Sugar: 35g
- Sodium: 210mg
- Fat: 18g
- Saturated Fat: 8g
- Unsaturated Fat: 10g
- Trans Fat: 0g
- Carbohydrates: 45g
- Fiber: 2g
- Protein: 4g
- Cholesterol: 25mg