
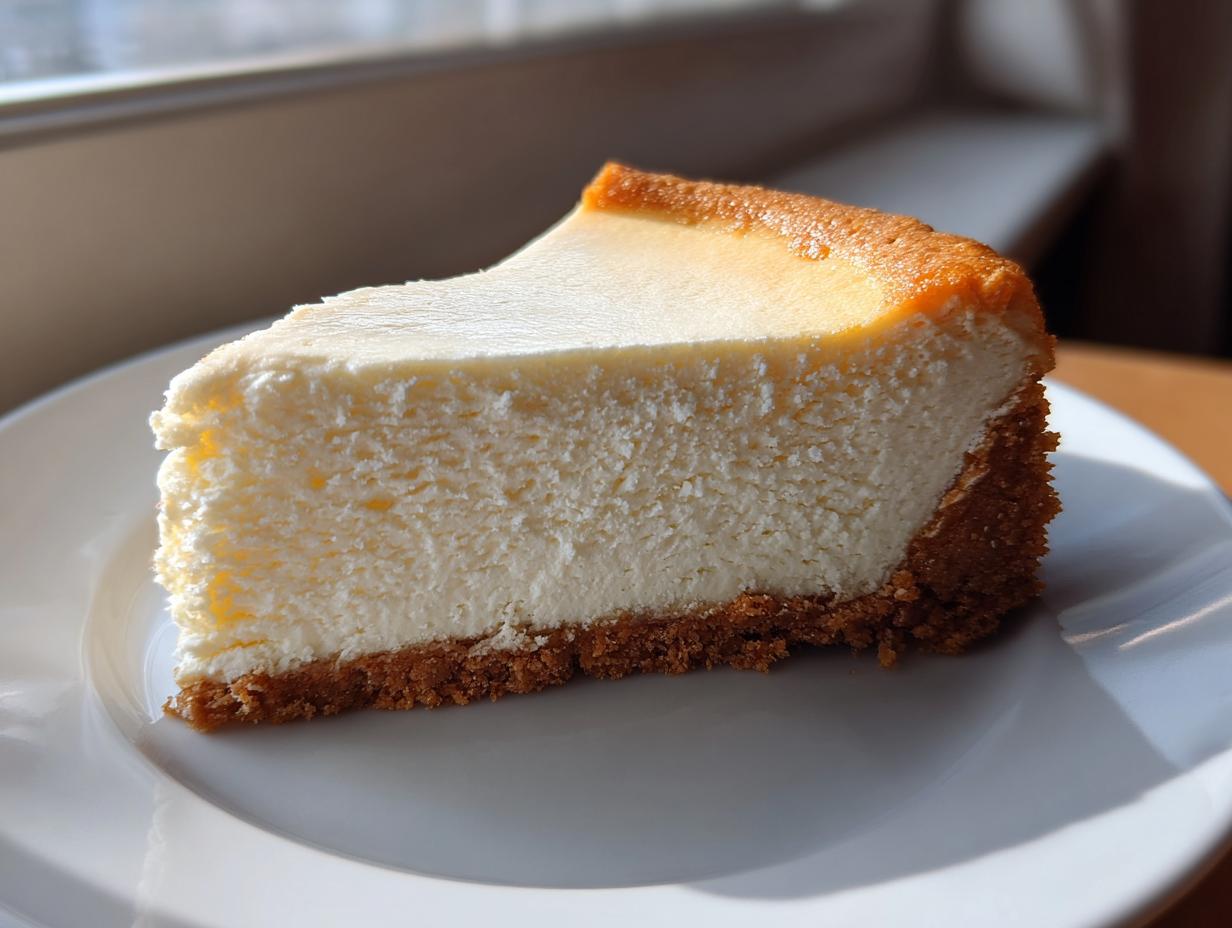
Oh, the craving hits hard sometimes, doesn’t it? That deep, irresistible pull toward something rich, tangy, and utterly decadent. We are talking about the king of desserts: the perfect cheesecake. I totally get why so many people shy away from making what feels like a gourmet dessert at home. But listen to me—reclaiming that joy in a simple, rewarding bake is exactly what Pure Plate Path is about. And I promise you, this cheesecake recipe will change your mind. This New York Style dream is unbelievably creamy, that dense, velvety texture you want, and the very best part? We are skipping the fussy water bath entirely. Yes, you read that right. This is your go-to, foolproof guide for the Easy Homemade Cheesecake you always thought required a culinary degree. If you love this cheesecake, you absolutely have to check out my soft and creamy cheesecake cookies too!
- Why This Classic Cheesecake Recipe Delivers Creamy Perfection
- Gathering Ingredients for Your Ultimate Cheesecake Recipe
- Step-by-Step Instructions for This Simple Cheesecake Baking
- Tips for Success: Mastering the Beginner Cheesecake Recipe
- Ingredient Notes and Substitutions for Your Cheesecake Recipe
- Serving Suggestions for Your Classic Cheesecake Recipe
- Storage and Reheating Instructions for This Homemade Dessert
- Frequently Asked Questions About Making a Great Cheesecake Recipe
- Estimated Nutritional Data for This Rich Cream Cheese Dessert
Why This Classic Cheesecake Recipe Delivers Creamy Perfection
When you’re aiming for that ultimate creamy Cheesecake, you want reliability. This Classic Cheesecake Recipe isn’t just good; it’s designed to give you that sought-after rich texture without the usual baking drama. It honestly rivals anything you’d get at a fancy bakery!
- We use full-fat cream cheese and *both* sour cream and heavy cream. That fat content is non-negotiable for that rich mouthfeel!
- Room temperature ingredients are treated like gold here—no lumps allowed.
- We are making sure we treat the batter gently once the eggs go in.
I also know the water bath is where most people check out. We worked hard to perfect this process so you can skip that mess. If you’re also looking for a great frosting recipe, check out my secrets for icing that hardens fast!
Achieving a Smooth Cheesecake Filling Without a Water Bath
The secret to skipping the water bath is all about temperature control during cooling, not just baking. We bake it until the edges are firm but the center still has that famous, slight jiggle. Then, we let it cool down slowly, right inside the turned-off oven with the door cracked open. This gentle transition prevents sudden temperature drops that cause shrinkage and those dreaded cracks. It keeps the filling beautifully set and smooth, giving you a perfectly dense result every single time!
Gathering Ingredients for Your Ultimate Cheesecake Recipe
Alright, before we even think about mixing, we need to talk ingredients. For this Rich Cream Cheese Dessert to sing, you can’t just grab anything. Having everything ready—softened, melted, room temp—makes the difference between a lumpy mess and that luxurious texture we are going for. Seriously, do not rush the softening stage; it’s essential for that Smooth Cheesecake Filling!
For the Graham Cracker Crust
This is quick, crunchy perfection that sets the foundation for everything. We need:
- 1 1/2 cups graham cracker crumbs
- 1/4 cup granulated sugar
- 6 tablespoons unsalted butter, melted
For the Rich Cream Cheese Dessert Filling
Here’s where the magic happens. Make sure your mainstays are truly at room temperature—it’s the secret weapon for a flawless bake!
- 4 (8 ounce) packages full-fat cream cheese, softened to room temperature
- 1 1/2 cups granulated sugar
- 1 teaspoon vanilla extract
- 1/4 cup heavy cream
- 1/4 cup sour cream
- 3 large eggs, room temperature
Step-by-Step Instructions for This Simple Cheesecake Baking
Okay, deep breath! We are going to tackle this incredible cheesecake recipe one piece at a time. I know baking might feel intimidating, but trust me, if you follow these steps for the crust, the filling, and—most importantly—the cooling, you are going to end up with the most delightfully creamy dessert. It’s all about process, not panic!
Preparing and Pre-Baking the Graham Cracker Crust
First things first, let’s get that base sorted out. Preheat your oven to 325°F (160°C) and make sure you’ve lightly greased your 9-inch springform pan. In a bowl, you’ll combine your graham cracker crumbs, that 1/4 cup of sugar, and the melted butter until it looks like wet sand—you want it to hold together when you squeeze it. Press this mixture down super firmly and evenly onto the bottom of your pan. We bake this crust for just 10 minutes to set it up beautifully. Then, pull it out and let it cool while you mix the amazing filling.
Mixing the Creamy Cheesecake Filling
This is where we treat our ingredients gently! Start by beating that softened cream cheese until it’s totally smooth—no lumps! Then, slowly add the 1 1/2 cups of sugar and beat until just combined. Next, stir in the vanilla, heavy cream, and sour cream. Now, here is the most important part for that perfect cheesecake texture: add the eggs one at a time, mixing on *low* speed only until the yellow disappears. Seriously, stop mixing immediately once the yolk is gone. Overbeating once the eggs are in introduces air, and air is what causes cracks! Ditch the mixer and gently tap the pan on the counter a few times to coax out any big air bubbles hiding in your Simple Baked Dessert.
Baking and Slow Cooling for a Perfect Cheesecake Texture
Pop that beautiful thing into the oven for 60 to 75 minutes. You’re looking for the edges to be set, but if you gently nudge the pan, the inner 2 inches should still have a slight, delicate jiggle. This means it’s done! Now, for the no-crack magic: turn the oven off, prop the door open slightly (I use the handle of a wooden spoon), and let it cool inside for a full hour. That slow cool-down is your best defense against cracking. After that hour, take it out and let it cool completely on the rack before it gets its long chill time!
If you’re serving this soon, I highly recommend drizzling it with a homemade sauce, like my amazing chocolate sauce that’s better than store-bought!
Tips for Success: Mastering the Beginner Cheesecake Recipe
You’ve got the process down, but baking this truly creamy cheesecake is about mindful steps, not just following a checklist. Since we want that unbelievably smooth texture, I have two non-negotiable rules I follow every single time. Seriously, these are the things that separate a good cheesecake from the Best Cheesecake Recipe you’ve ever made.
First, take your time with the cream cheese and eggs. If they’re cold, your filling *will* look sad and lumpy, no matter how long you mix! Make sure they’ve sat on the counter for at least an hour so they are perfectly soft. This makes incorporating the sugar so much easier.
Second, and this is huge: once those eggs are in the mixer, keep it on low and stop the second they disappear. Overbeating whips tons of air in there. That air tries to escape while it bakes, causing sinking and cracking. We want density from the cream cheese, not air pockets! If you want another simple bake for later, check out my easy pear butter Canning Instructions!
Ingredient Notes and Substitutions for Your Cheesecake Recipe
Let’s drill down into exactly *why* we use what we use here. Creating that ultimate Rich Cream Cheese Dessert quality means sticking close to the full-fat ingredients. If you start cutting corners here, you’re just asking for trouble—and a texture that’s closer to cottage cheese than velvety silk!
The cream cheese *must* be the full-fat brick style. Please, please, please don’t substitute that with the lighter, spreadable tub stuff. That tub version has added air and water, which messes up the structure completely, making it soupy when baked. Similarly, the sour cream and heavy cream aren’t just for flavor; they contribute necessary fats that keep the baking environment stable, which really helps us avoid cracks!
Now, if you’re absolutely dying to change the crust—maybe you have a gluten allergy or just don’t like graham crackers—you can. I’ve had success making this into a Bakery Style Cheesecake at Home using crushed vanilla wafers or finely ground shortbread cookies instead. Just keep the butter and sugar ratios the same for the crust base, and you’ll still get that buttery crunch you need!
Serving Suggestions for Your Classic Cheesecake Recipe
Once you’ve successfully navigated the chill time—which takes patience, but trust me, it’s worth it—the real fun begins: deciding how to dress up this gorgeous, Timeless Dessert Recipe! A perfect New York style cheesecake is rich enough to stand beautifully on its own, but who can resist a little pizzazz? If you want to make it a real showstopper, adding a topping is the way to go. Think about complementing that creamy tanginess with something bright or deeply flavorful!
I love having options ready, especially when unexpected guests pop over. If you’re ready to bake something else fruity and fantastic after tackling this cheesecake, my recipe for easy cherry pie bars is a wonderful, quicker alternative!
Simple Cheesecake Toppings
You don’t need complicated layers of frosting or glaze to make this fantastic. Here are the three things I pull out when I serve this cheesecake recipe:
- Fresh Berry Medley: Honestly, nothing beats the bright color and slight tartness of fresh raspberries, blackberries, and sliced strawberries piled right on top just before serving. It just pops!
- Simple Cherry Sauce: If you want something cooked, a quick, thick cherry sauce is heaven. You just simmer frozen cherries with a little sugar and lemon juice until it thickens slightly. It pools perfectly around the edges.
- A Light Dusting Only: Sometimes, I just let the cheesecake shine! A fine, even dusting of powdered sugar, applied through a sifter right before slicing, gives it that incredibly professional, bakery look without adding extra sweetness.
Storage and Reheating Instructions for This Homemade Dessert
Okay, you’ve survived the bake, you’ve waited through the slow cool, and now you’re staring at this gorgeous, perfectly creamy thing. Don’t ruin it by cutting into it too soon! The chilling time is absolutely critical. You need to give this Homemade Dessert time to firm up completely, otherwise, it’s going to be a slouchy mess when you slice it. I know you want to taste it right now, but resist!
The absolute minimum cooling time? Six hours in the fridge. Seriously, if you can manage it, aim for overnight. Chilling allows the dairy structure to completely set, locking in that incredible, dense texture that makes this a Classic Cheesecake Recipe. Wrap that springform pan loosely with plastic wrap—make sure the wrap isn’t touching the top surface, or it could mess up your perfect top.
When it comes to storage, keep it covered tightly in the fridge for up to five days. It really holds up well! If you want to freeze leftovers (yes, there can be leftovers!), which is a great idea for having a last-minute *Rich Cream Cheese Dessert* standby, here’s how I do it:
- Make sure the cheesecake is fully chilled first.
- Remove the outer ring of the springform pan, then wrap the entire bottom and sides securely in plastic wrap, followed by a layer of aluminum foil.
- It keeps beautifully in the freezer for about a month.
When you’re ready to eat your frozen slice, just transfer it, still wrapped, to the fridge and let it thaw slowly overnight. It comes back to life perfectly creamy! You don’t even need to reheat it, of course—cheesecake is always best served cold!
Frequently Asked Questions About Making a Great Cheesecake Recipe
I know you’ve got questions! Whenever I share my personal cheesecake recipe, people always want to nail those tricky bits. It’s totally normal to wonder about substitutions or techniques, especially when you’re aiming for a truly incredible, creamy homemade cheesecake. Here are the things I get asked the most when I’m trying to get that flawless result!
Can I use low-fat cream cheese instead of full-fat?
Oh gosh, please don’t! I really advise against it. For this New York Style Cheesecake, the high fat content is what creates that dense, smooth texture. Low-fat versions have more water, and that water turns into steam or separates during baking, which results in a grainy or watery filling. Stick to the full-fat bricks, trust me!
What exactly is the ‘jiggle test’ for this simple baked dessert?
This is key for our No Water Bath Cheesecake! When you gently nudge the springform pan after the baking time is up, you want the outer edges to look completely set, like they aren’t moving. But the very center—about a two-inch circle right in the middle—should still have a slight wobble, like soft gelatin. It shouldn’t be runny batter, but it shouldn’t be firm rock either. It finishes cooking during the cooling process!
What happens if I skip the mandatory chilling time?
Look, I know waiting is the hardest part of this whole Simple Cheesecake Baking process, but skipping the chill ruins the texture. If you cut into a warm cheesecake, it’ll be too soft and fall apart. You need those minimum six hours, preferably overnight, for the structure to fully set into that perfect dense slice. It’s the final, vital step for a Perfect Cheesecake Texture!
Are there any good variations if I want to try something different next time?
Absolutely! This neutral base is perfect for so many things. Once you master this Classic Cheesecake Recipe, you can easily swirl in homemade sauces like raspberry or blueberry right before baking, or even fold in crushed Oreos or peanut butter when mixing the filling. It’s a fantastic foundation for so many Cheesecake Variations. Speaking of variations, if you want something super fudgy next time, you simply must dive into my fudgy brookie recipe!
Estimated Nutritional Data for This Rich Cream Cheese Dessert
Now, I know we aren’t baking this Rich Cream Cheese Dessert for health reasons—it’s meant to be a decadent treat, after all! But for those who like to keep track, here is the estimated nutritional breakdown for one slice of this incredible cheesecake. Remember, since we’re starting from scratch with full-fat ingredients, these numbers reflect true indulgence. These are just estimates, mind you, based on the ingredients listed, so think of them as a fun guideline!
- Serving Size: 1 slice
- Calories: Approximately 450
- Sugar: Around 35g
- Fat: About 30g
- Protein: Roughly 8g
It’s a generous slice that packs a punch, which is why a little goes a long way! Enjoy every bite!
PrintClassic New York Cheesecake Recipe: Creamy and Simple for Home Bakers

Follow this straightforward recipe to create a rich, creamy New York Style Cheesecake with a buttery graham cracker crust. This guide provides clear steps for achieving a perfect texture without needing a water bath.
- Prep Time: 25 min
- Cook Time: 75 min
- Total Time: 9 hours 40 min
- Yield: 12 servings 1x
- Category: Dessert
- Method: Baking
- Cuisine: American
- Diet: Vegetarian
Ingredients
- 1 1/2 cups graham cracker crumbs
- 1/4 cup granulated sugar (for crust)
- 6 tablespoons unsalted butter, melted
- 4 (8 ounce) packages full-fat cream cheese, softened to room temperature
- 1 1/2 cups granulated sugar (for filling)
- 1 teaspoon vanilla extract
- 1/4 cup heavy cream
- 1/4 cup sour cream
- 3 large eggs, room temperature
Instructions
- Preheat your oven to 325°F (160°C). Lightly grease a 9-inch springform pan.
- Prepare the crust: Mix graham cracker crumbs, 1/4 cup sugar, and melted butter in a bowl until combined. Press the mixture firmly and evenly into the bottom of the prepared springform pan. Bake the crust for 10 minutes. Remove from the oven and let it cool while you prepare the filling.
- Prepare the filling: In a large bowl, beat the softened cream cheese with an electric mixer until completely smooth. Scrape down the sides of the bowl.
- Gradually add the 1 1/2 cups of sugar to the cream cheese mixture and beat until just combined and smooth. Do not overmix.
- Beat in the vanilla extract, heavy cream, and sour cream until incorporated.
- Add the eggs one at a time, mixing on low speed after each addition only until the yolk disappears. Stop mixing as soon as the last egg is incorporated to prevent incorporating excess air.
- Pour the filling over the cooled crust in the springform pan. Gently tap the pan on the counter a few times to release any large air bubbles.
- Bake for 60 to 75 minutes. The edges should look set, but the center 2 inches should still have a slight jiggle when gently nudged.
- Turn off the oven, crack the oven door open slightly, and let the cheesecake cool inside the oven for 1 hour. This slow cooling helps prevent cracks.
- Remove the cheesecake from the oven and let it cool completely on a wire rack.
- Once fully cooled, cover the pan loosely with plastic wrap and chill in the refrigerator for at least 6 hours, or preferably overnight, before serving.
- Run a thin knife around the edge of the pan before releasing the springform side. Serve plain or with your favorite fruit topping.
Notes
- Use room temperature ingredients for the filling; this is key for a smooth, lump-free texture.
- Do not overbeat the batter once the eggs are added; overmixing introduces air, which causes cracking during cooling.
- If you prefer a fruit topping, a simple strawberry sauce or fresh berries work well with this rich cream cheese dessert.
Nutrition
- Serving Size: 1 slice
- Calories: 450
- Sugar: 35g
- Sodium: 350mg
- Fat: 30g
- Saturated Fat: 18g
- Unsaturated Fat: 12g
- Trans Fat: 0.5g
- Carbohydrates: 40g
- Fiber: 1g
- Protein: 8g
- Cholesterol: 120mg