
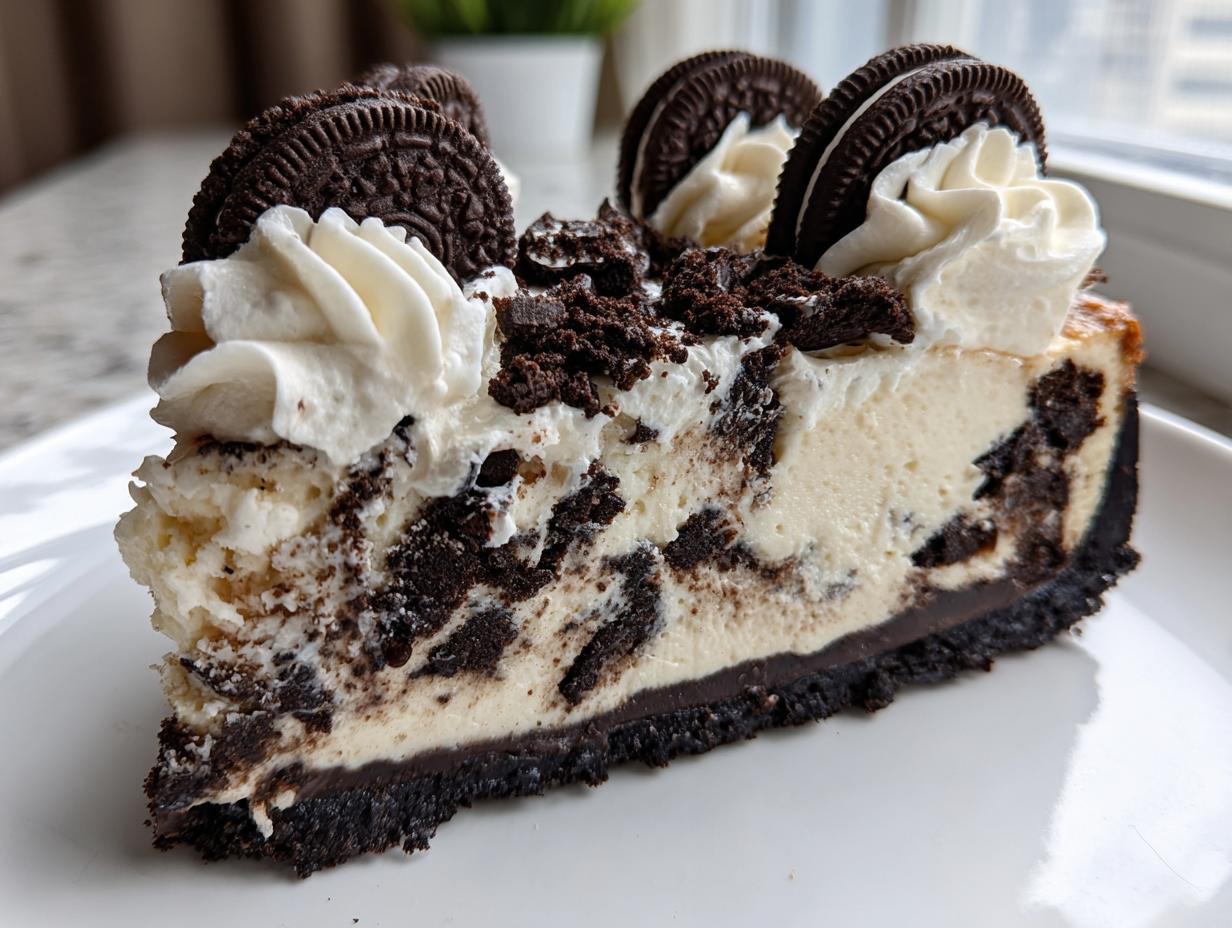
When you need a truly decadent chocolate dessert that stops traffic, you skip the flimsy shortcuts and go straight for the real deal. That’s why I’m sharing what I call The Ultimate Baked Oreo Cheesecake Recipe. I know life is busy—believe me, Sarah Miller gets it; balancing a demanding schedule with the desire to create something deeply nourishing is a constant challenge—but sometimes you just need that rich, creamy satisfaction only a cheesecake can offer. This baked oreo cheesecake delivers that velvety texture and deep chocolate crunch every single time. It’s the kind of recipe I developed to prove that even on a chaotic week, incredible food is accessible to everyone. You can read more about our mission to simplify wellness over at the About Page.
- Why This Baked Oreo Cheesecake is Your New Go-To Recipe
- Gathering Ingredients for Your Oreo Cheesecake
- Step-by-Step Instructions for Baked Oreo Cheesecake
- Tips for a Perfect, Crack-Free Oreo Cheesecake
- Ingredient Notes and Variations for Your Homemade Oreo Dessert
- Serving Suggestions for This Ultimate Oreo Cheesecake
- Storage and Reheating Instructions for Leftover Oreo Cheesecake
- Frequently Asked Questions About Oreo Cheesecake
- Share Your Ultimate Oreo Cheesecake Experience
Why This Baked Oreo Cheesecake is Your New Go-To Recipe
Look, I know there are hundreds of no bake Oreo treats out there promising quick results, but when you want that true, deep indulgence? You need to bake it. This recipe is specifically engineered to give you that thick, luxurious mouthfeel that rivals any Cheesecake Factory style dessert you’ve ever had. Trust me, my non-negotiable steps are the difference between a good dessert and the absolute best, smooth cheesecake filling you can imagine. If you love this concept, you should check out our recipe for the Sugar Cookie Cheesecake, too!
- This method delivers that signature decadent chocolate dessert result without the sinking sinking feeling of a collapsed cake.
- You get unbeatable flavor by using high-quality, full-fat ingredients right from scratch.
- It’s surprisingly straightforward once you understand the crucial cooling technique.
Achieving the Ultimate Oreo Cheesecake Texture
The absolute secret weapon here, darling, is the water bath. A water bath, or *bain-marie*, is what creates gentle, steamy heat around your 9-inch springform pan. This prevents the edges from setting too fast while the middle is still liquid. That temperature difference is what causes those terrible cracks! When the heat is even and humid, your creamy cheesecake recipe bakes slowly and evenly, resulting in that ultra-smooth cheesecake texture we are chasing. Also, if your cream cheese and eggs aren’t completely room temperature, you’ll get lumps no matter how perfect your oven setup is. It’s worth the wait!
Gathering Ingredients for Your Oreo Cheesecake
Getting ready for this homemade Oreo dessert means making sure you have everything out before you start mixing. Remember, we want smooth perfection, which means respecting the temperature of our dairy and eggs! Don’t substitute the full-fat cream cheese; it’s what guarantees that rich, creamy texture we talked about. If you ever want to try another flavor profile, my recipe for Brown Butter Sugar Cookies also requires everything to be prepped and ready to go!
For the Buttery Oreo Crust
- 1 3/4 cups finely crushed Oreo cookies (you’ll need about 30 cookies!)
- 1/4 cup unsalted butter, melted
For the Smooth Cheesecake Filling
- 3 (8 ounce) packages full-fat cream cheese, softened completely to room temperature
- 1 1/2 cups granulated sugar
- 1 teaspoon vanilla extract
- 1/4 teaspoon salt
- 4 large eggs, always room temperature
- 1 cup crushed Oreo cookies (these go *into* the filling!)
For the Whipped Cream Topping and Garnish
- 1/2 cup heavy whipping cream
- 2 tablespoons powdered sugar
- 4 whole Oreo cookies for that final pretty touch
Step-by-Step Instructions for Baked Oreo Cheesecake
Okay, now for the fun part! We’ve gathered our creamy ingredients, and now it’s time for the show. Don’t be intimidated by the baking process; remember, this is an easy cheesecake baking project if you follow my timing. Once prep is done (about 25 minutes total), the actual baking takes around 75 minutes, but the cooling time is where the magic happens for that perfect, crack-free finish. Trust me on dedicating some time to slow cooling! If you’re looking for other simple desserts, be sure to check out our guide on easy cheesecake baking methods.
Preparing the Crust and Oven Setup
First things first, we need to set up the environment for success. Preheat your oven to 325°F (160°C). Now, grab that 9-inch springform pan—this is crucial! You need to wrap the outside bottom of it absolutely tightly with heavy-duty aluminum foil. I usually do three layers because water baths can be sneaky little tricksters, and we don’t want any seepage ruining our crust recipes for cheesecake. In a bowl, mix those finely crushed Oreos with the melted butter until it looks like wet sand. Press that mixture firmly and evenly into the bottom of your foil-wrapped pan. Pop that crust into the oven for just 8 minutes to set it up. Take it out and let it cool just a smidge while we make the filling.
Mixing the Creamy Cheesecake Filling
This is where you must be gentle! Grab your softened cream cheese and beat it with your mixer until it is gloriously smooth—I mean, *absolutely* no lumps visible. Then, slowly mix in the sugar, vanilla, and salt. Once that’s perfect, add your room-temperature eggs, one at a time. This is important: mix only until each one is *just* incorporated. Seriously, stop mixing the second it disappears! Over-beating adds too much air, which leads to cracks later. Finally, take your spatula and gently fold in that cup of crushed Oreos. Don’t use the electric mixer here; we want a beautifully integrated, smooth cheesecake filling, not an aerated mousse.
Baking the Oreo Cheesecake with a Water Bath
Time to embrace the water bath! Take your foil-wrapped springform pan and set it inside a larger roasting pan. Carefully pour hot water into the roasting pan until it comes about halfway up the sides of your springform pan. This creates that beautiful, steamy environment. Slide the whole assembly carefully into the oven. Bake for 60 to 75 minutes. You’ll know it’s almost ready when the edges look totally set, but if you nudge the pan *very* gently, the center two inches should still have a slight wobble, like thick jelly. That jiggle means moisture!
The Essential Slow Cooling Process
This is my #1 tip for avoiding a cracked top on your ultimate Oreo cheesecake. Once the baking time is up, turn the oven OFF. Do not open the door yet! Crack the oven door open just a tiny bit (I use the wooden handle of a spoon to keep it wedged open). You have to let it cool in that warm, humid environment for a full hour. This gradual temperature drop is everything! After the hour, carefully remove the pan from the water bath and take off the foil. Then, let it cool completely on a wire rack—maybe another hour. Only then can you cover it and put it in the fridge for at least 6 hours, but honestly? Overnight is best for the firmest, creamiest results.
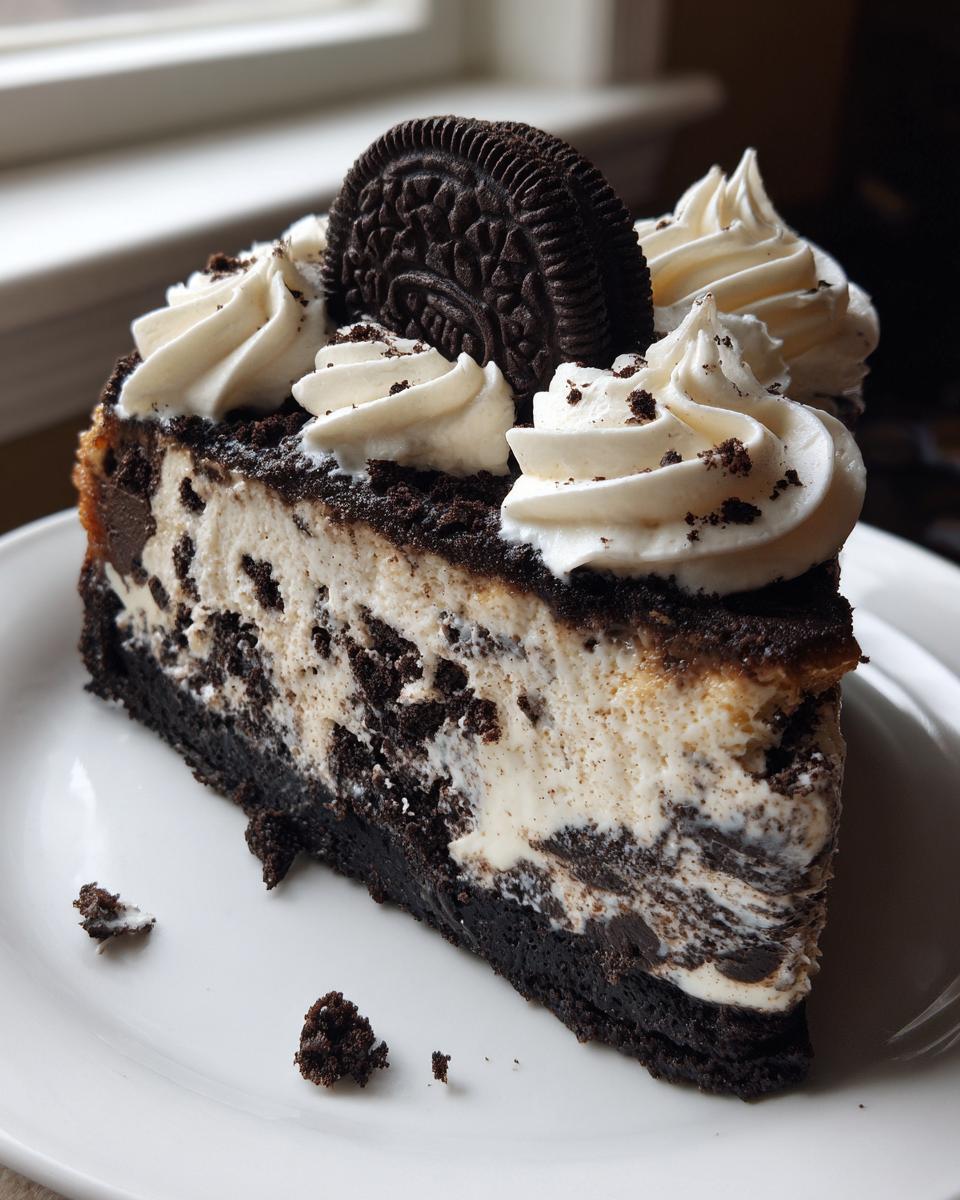
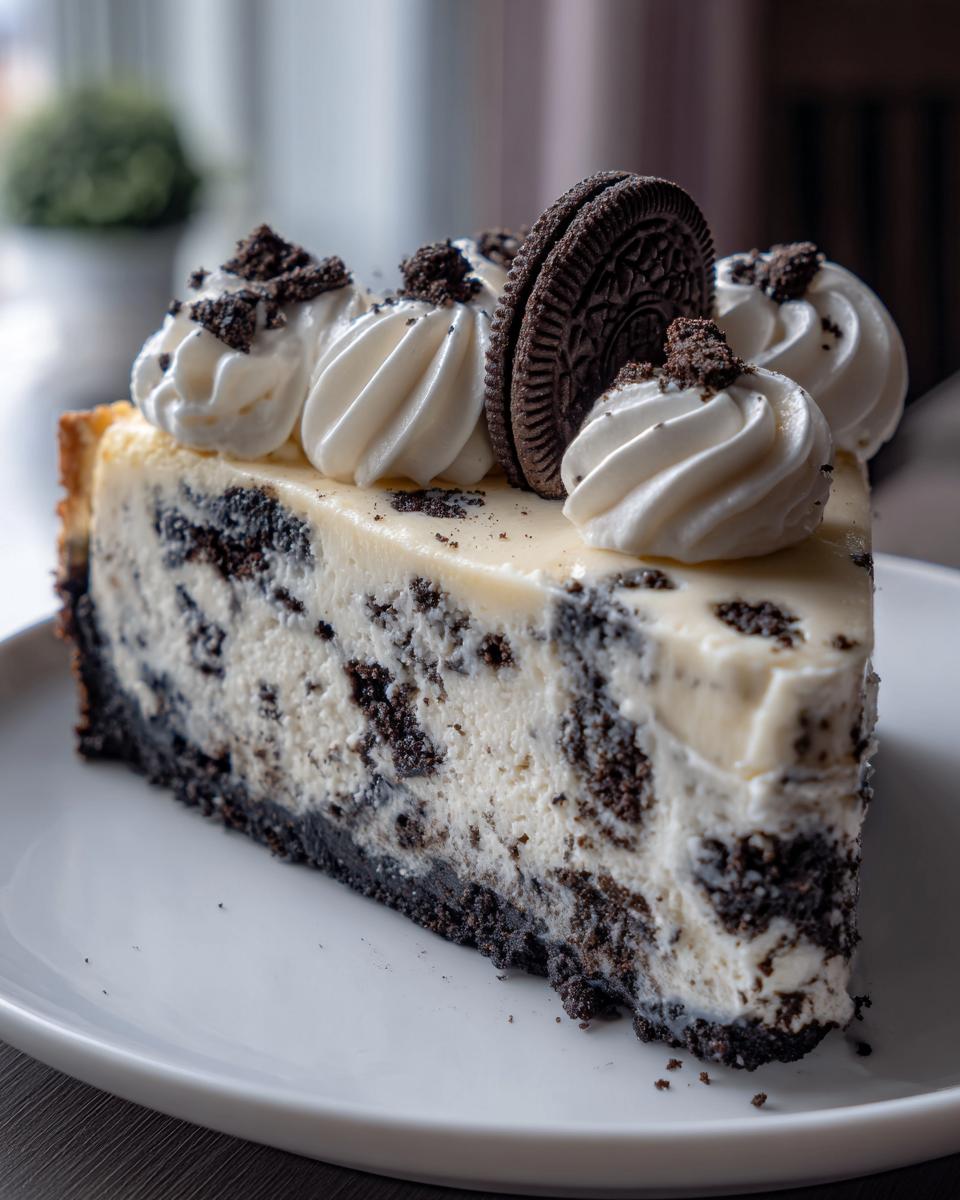
Finishing Touches: Topping the Oreo Cheesecake
We waited patiently, and now it’s time to serve! Since we baked this beauty, we want a light, soft contrast to the rich filling. Just before serving, grab your heavy whipping cream and cold powdered sugar. Beat them together until you get lovely stiff peaks. Spread that fresh whipped cream generously over the chilled cheesecake. Pop those four whole Oreos right on top for garnish, and congratulations—you’ve just made a spectacular, professional-level oreo cheesecake that tastes better than anything store-bought!
Tips for a Perfect, Crack-Free Oreo Cheesecake
Making an oreo cheesecake that looks as good as it tastes is all about minimizing stress on the batter, especially during the transition from hot to cold. Since you put so much work into sourcing quality ingredients for this homemade Oreo dessert, let’s make absolutely sure it stays gorgeous! These small tweaks are how I guarantee a crack-free surface every time, rivaling any fancy bakery creation. If you’re feeling extra adventurous after mastering this, you absolutely have to try my chocolate chip cheesecake cookies next!
Ingredient Temperature and Mixing Technique
I can’t stress this enough: your cream cheese and eggs need to be completely at room temperature! If they are cold, you will end up with little cheesy lumps that baking won’t fix, messing up that beautiful, smooth cheesecake filling. When you add the eggs, mix gently until they disappear—that’s it. Once the eggs are in, you’re just blending; you are not whipping air in anymore. Too much air trapped inside is a recipe for a dome that collapses and cracks when it cools down. For more science on keeping things smooth, check out this great reference.
Water Bath and Gradual Cooling for Your Oreo Cheesecake
The water bath isn’t just for moisture; it acts like insulation for your pan! It keeps the sides from cooking much faster than the center. Then, the gradual cooling—turning the oven off and letting it sit for an hour—is your non-negotiable cooling step. Rapid temperature drops make the cheesecake structure contract too quickly, pulling apart the surface. Slow cooling lets that structure relax gently. It’s like tucking your cheesecake into bed instead of throwing it out into the cold!
Ingredient Notes and Variations for Your Homemade Oreo Dessert
So, you’ve made the ultimate Oreo cheesecake, but maybe you want to tweak it for the next party, or perhaps you’re just missing one key ingredient. Don’t panic! This base recipe is so sturdy, it handles variations like a champ. This is the time to get creative with your toppings, especially if you’re looking to amp up that rich, decadent chocolate dessert factor beyond the simple whipped cream. If you’re looking for another dense, cocoa-heavy treat, you must try my recipe for fudgy Oreo brownies—they have the best shiny top!
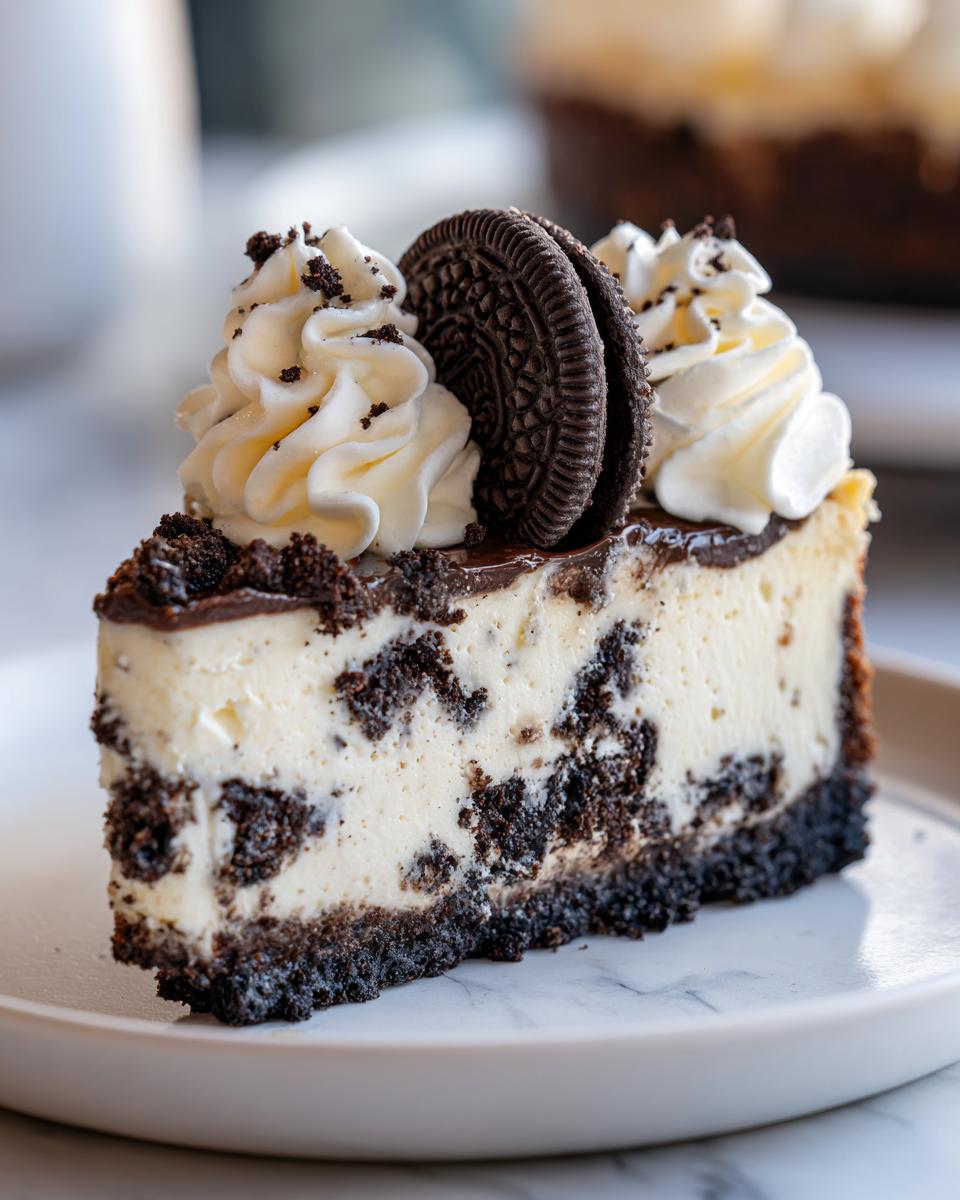
Making a Cheesecake Factory Style Dessert
If you’re trying to replicate that famous restaurant version, I have a little secret for you. Instead of making the light, fresh whipped cream topping, skip it altogether! For an extra layer of richness that screams luxury, you can make a simple chocolate ganache to pour over the top once the cheesecake is chilled completely. You just need equal parts good quality semi-sweet chocolate chips and heavy cream heated until smooth. Let it cool just slightly so it thickens up, and then pour it right over that beautiful, smooth cheesecake filling. It sets up beautifully and gives you that intense, chocolatey punch.
Crust Recipes for Cheesecake Alternatives
While the Oreo crust is iconic for this recipe—let’s be real, it’s half the fun—you can certainly experiment if you’re running low on midnight sandwich cookies! For a slightly less intense chocolate experience, you can swap out the Oreos for delicious graham crackers. You’ll use the same amount of crumbs and butter, and it works perfectly well for a sturdier base. If you want something a little more buttery and delicate, you could even use crushed shortbread cookies. Just remember, that deep, dark chocolate flavor of the Oreo crust is what really kicks this cookie dessert up a notch, so use the substitutes sparingly!
Serving Suggestions for This Ultimate Oreo Cheesecake
This ultimate Oreo cheesecake is so rich and decadent that it hardly needs anything else, which is why it’s one of my absolute favorite party dessert recipes. Seriously, when I make this for a gathering, I barely bring out any other sweets because everyone gravitates straight to the chocolate and cream cheese goodness! When you’re serving something this intensely flavored, the right drink pairing can balance everything out perfectly. It’s all about contrast, right? When serving a crowd, I always use my standard recipe for party dessert recipes as a backdrop, but this cake always steals the show.
Pairing with Coffee or Dessert Drinks
Because this cake has such deep cocoa notes from the Oreos, it begs for something that can cut through that richness. My first recommendation for any coffee lover is a strong, dark roast. Skip the flavored syrups; you want the pure, slightly bitter intensity of a good coffee to complement the sweetness of the cheesecake filling and the topping. It’s just gorgeous!
For those evenings when you want to keep the indulgent feeling going, think about a simple, creamy liqueur. A small side pour of something cool and smooth, like an Irish cream or a good quality Kahlua, works wonders alongside a slice of this indulgent cookie dessert. It just doubles down on the creamy factor! Don’t overthink it; keep the drinks simple so the star of the show—your magnificent homemade oreo cheesecake—gets all the attention it deserves.
Storage and Reheating Instructions for Leftover Oreo Cheesecake
Oh, the eternal struggle: eating the whole perfect oreo cheesecake in one sitting or saving some for later! Since this is a rich, creamy, baked dessert, storage is simple, but you must be careful how you handle it, especially if you used that lovely whipped cream topping. We want to keep that texture silky smooth, just like when it came out of the fridge!
For refrigeration, you need an airtight seal. If you made this for a party and have leftovers, cover that entire springform pan with plastic wrap or foil. If you’ve already sliced it, transfer the slices to an airtight container. Stored properly in the fridge, your homemade Oreo dessert should stay absolutely fantastic for about 4 to 5 days. The crust might soften just a tiny bit over time, but the filling holds up beautifully.
Now, a quick note on reheating—and maybe this is a hard truth for some of you: we absolutely do not reheat cheesecake! Cheesecake is meant to be served chilled. Applying heat again after all that careful cooling actually ruins the structure and introduces moisture where we don’t want it. If you’re craving it, just pull a slice out of the fridge about 15 minutes before eating to let the flavors warm up slightly, but keep it cool!
If you’re trying to save some for a future date—maybe you made this for a holiday gathering and want to enjoy the remainder later—freezing works wonderfully! See, even though we are focusing on quick easy weeknight dinners sometimes, there’s always room for a planned-ahead dessert. You’ll want the cheesecake completely chilled (or even frozen solid) before wrapping. Wrap the whole cake or individual slices tightly in a layer of plastic wrap, followed by a layer of heavy-duty aluminum foil. This double layer keeps freezer burn far away! It keeps perfectly for up to two months cold, and to thaw, just move it back into the fridge overnight. Take it out of the foil and plastic before serving, of course! You can find more great tips for fitting delicious food into a busy schedule on our Quick and Easy Weeknight Dinners page.
Frequently Asked Questions About Oreo Cheesecake
I always get so many questions after people try this recipe for the first time! It’s wonderful seeing so many people tackle a baked cheesecake now, which is fantastic because it truly is worth the effort compared to some of those no bake Oreo treats you see floating around. We want the best results possible, right? So, let’s clear up the main concerns people have before they serve up their masterpiece. If you enjoy making smaller items, you might also love checking out my favorites for Mini Banana Bread Loaves!
Can I make this Oreo Cheesecake without a water bath?
Oh, I really, really advise against it, sweet friend. I truly stress the water bath because that gentle steam insulation is the entire reason why you get that smooth, crack-free surface we’ve been working towards. When you skip it, the hot air in the oven cooks the outside edges of the cheesecake way faster than the middle. That rapid setting causes the structure to pull apart as it cools, leading to cracks! If you are in a genuine bind and absolutely cannot figure out a setup, the *least* you can do is place a shallow pan filled with hot water on the rack setting *below* your cheesecake. It won’t be as effective as wrapping the springform pan and placing it inside, but it will add a touch of humidity. Still, for this creamy cheesecake recipe, the water bath is mandatory for the best outcome!
How long does the homemade Oreo dessert need to chill?
This is one of the hardest parts: waiting! The minimum chilling time for your homemade Oreo dessert is a solid 6 hours, but honestly? If you can hold out, I strongly, strongly suggest letting it chill overnight. Why? Cheesecake is all about structure and flavor melding. During those extra hours in the cold, the flavors deepen—that chocolate gets richer, the spices settle in—and the texture firms up perfectly. When you go overnight, the filling will be dense, unbelievably smooth, and slice into beautiful, clean wedges that don’t sag. You want that perfect slice, right?
Can I freeze this baked cheesecake?
Yes, you absolutely can freeze your baked oreo cheesecake! It freezes beautifully as long as you handle it correctly. The most important rule here is to do this BEFORE you add the topping. Make sure the cheesecake is fully chilled first, then wrap it like you’re protecting a precious baby! Use a layer of plastic wrap tightly around the cake itself, then wrap it again with aluminum foil. Remove it from the fridge and let it thaw slowly overnight in the refrigerator. Never thaw it on the counter at room temperature—that can compromise the texture. Once it’s thawed and slightly cool to the touch, then you can apply your cloud of whipped cream topping and enjoy your saved slice of heaven!
Share Your Ultimate Oreo Cheesecake Experience
Now it’s your turn! I’ve shared all my secrets for conquering that perfectly creamy, crack-free oreo cheesecake, and I truly hope you feel confident enough to try this indulgent recipe at home. When you pull that beautiful, chilled dessert out of the pan and show it off—especially if you managed to avoid *any* cracking (thanks to that water bath!)—I want to hear all about it! That’s how we build this community together, testing and celebrating these homemade versions of our favorite treats.
Did you go with the simple whipped cream topping, or did you indulge in that richer, Cheesecake Factory style dessert ganache variation we talked about? Did it survive long enough to actually taste the leftovers the next day? Please hop down below and leave me a star rating, and tell me your experience in the comments. Your feedback helps me know what simple, yet satisfying, recipes to share next! If you need to send me a picture of your amazing creation, you can always reach out via the contact page!
PrintThe Ultimate Baked Oreo Cheesecake Recipe
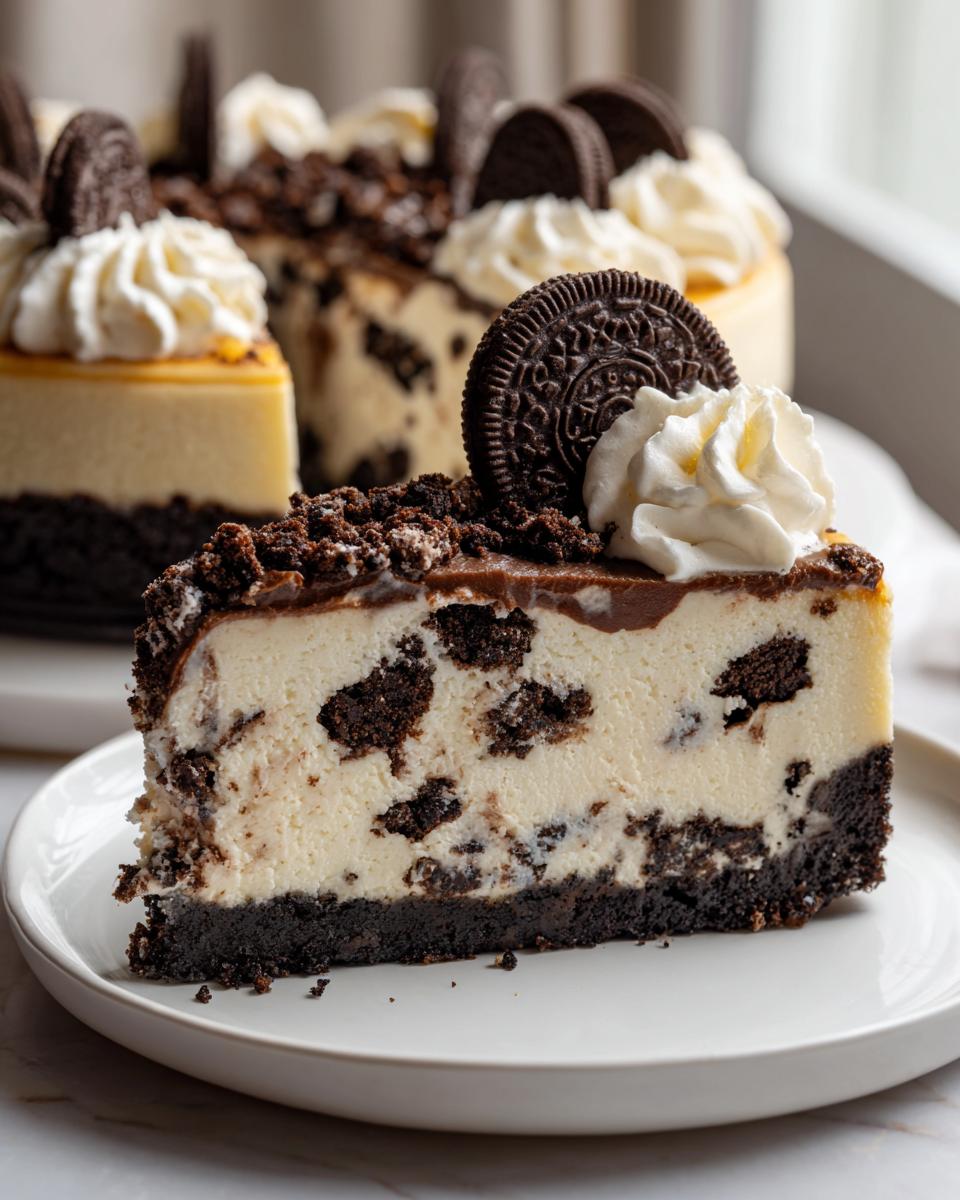
Make this rich, creamy Oreo Cheesecake from scratch. This recipe features a buttery Oreo crust and a velvety filling studded with chocolate cookies, resulting in a decadent dessert perfect for any gathering.
- Prep Time: 25 min
- Cook Time: 75 min
- Total Time: 120 min
- Yield: 12 servings 1x
- Category: Dessert
- Method: Baking
- Cuisine: American
- Diet: Vegetarian
Ingredients
- 1 3/4 cups finely crushed Oreo cookies (about 30 cookies)
- 1/4 cup unsalted butter, melted
- 3 (8 ounce) packages full-fat cream cheese, softened to room temperature
- 1 1/2 cups granulated sugar
- 1 teaspoon vanilla extract
- 1/4 teaspoon salt
- 4 large eggs, room temperature
- 1 cup crushed Oreo cookies (for filling)
- 1/2 cup heavy whipping cream (for topping)
- 2 tablespoons powdered sugar (for topping)
- 4 whole Oreo cookies (for garnish)
Instructions
- Preheat your oven to 325°F (160°C). Wrap the outside bottom of a 9-inch springform pan tightly with heavy-duty aluminum foil to prevent water seepage during the water bath.
- Prepare the crust: In a medium bowl, combine the finely crushed Oreo cookies and melted butter. Press the mixture firmly and evenly into the bottom of the prepared springform pan. Bake the crust for 8 minutes. Remove from the oven and let it cool slightly.
- Prepare the filling: In a large bowl, use an electric mixer to beat the softened cream cheese, granulated sugar, vanilla extract, and salt until the mixture is completely smooth and no lumps remain. Scrape down the sides of the bowl as needed. This step is key for a smooth cheesecake.
- Beat in the eggs one at a time, mixing only until just combined after each addition. Do not overmix once the eggs are added. Gently fold in the 1 cup of crushed Oreo cookies using a spatula.
- Pour the filling over the cooled crust in the springform pan.
- Create a water bath: Place the foil-wrapped springform pan inside a larger roasting pan. Carefully pour hot water into the roasting pan until the water reaches about halfway up the sides of the springform pan.
- Bake for 60 to 75 minutes. The edges should look set, but the center 2 inches should still have a slight jiggle when gently nudged.
- Turn off the oven, crack the oven door open slightly, and allow the cheesecake to cool inside the oven for 1 hour. This slow cooling helps prevent cracking.
- Remove the cheesecake from the water bath and carefully remove the foil. Let it cool completely on a wire rack. Once cool, cover and refrigerate for at least 6 hours, or preferably overnight, before serving.
- Prepare the topping: Just before serving, beat the heavy whipping cream and powdered sugar until stiff peaks form. Spread or pipe the whipped cream over the chilled cheesecake. Garnish with whole Oreo cookies.
Notes
- Use room temperature ingredients for the cream cheese and eggs; this prevents lumps in your filling.
- For the best, silkiest texture, mix the cream cheese until perfectly smooth before adding the sugar and eggs.
- If you prefer a Cheesecake Factory style dessert, skip the whipped cream topping and instead drizzle a thin layer of chocolate ganache over the top before chilling.
Nutrition
- Serving Size: 1 slice
- Calories: 450
- Sugar: 35g
- Sodium: 320mg
- Fat: 30g
- Saturated Fat: 18g
- Unsaturated Fat: 12g
- Trans Fat: 0.5g
- Carbohydrates: 40g
- Fiber: 1g
- Protein: 7g
- Cholesterol: 95mg