
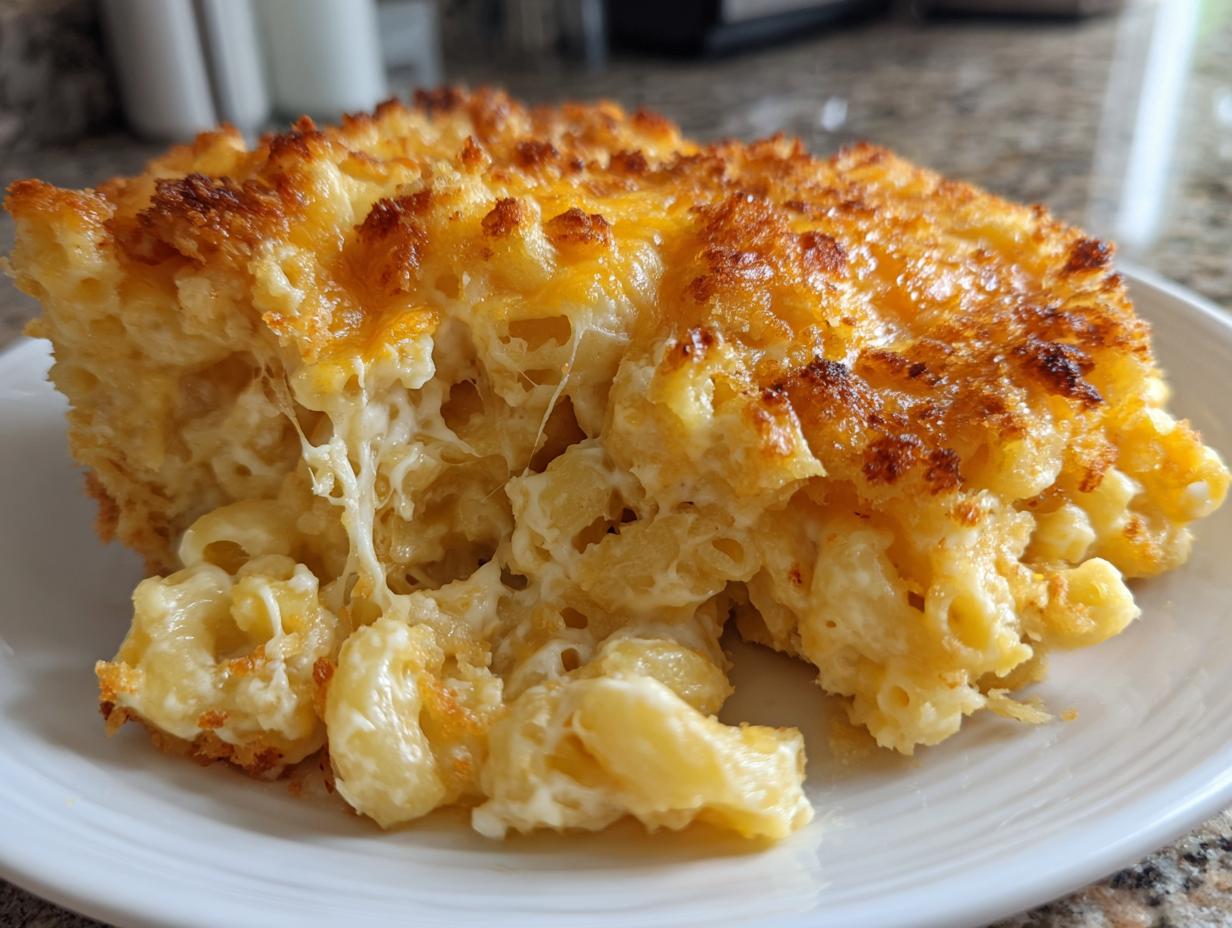
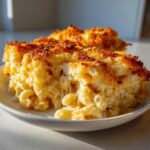
There’s just something about pulling a bubbling, golden dish out of the oven that tells your soul it’s time to slow down. In our world where everything moves so fast, few things pack the same powerful punch of comfort as truly decadent, homemade mac and cheese. Forget the stuff from the box, friends! Today, we’re diving deep into the *best baked mac and cheese recipe* you’ll ever need: the Ultimate Creamy Baked Mac and Cheese with Crispy Panko Topping. We’re talking ridiculously gooey, rich interior paired with that shatteringly crisp top layer—it’s perfection.
The goal here at Pure Plate Path is always to deliver food that’s both deeply nourishing and completely practical, even when life gets hectic. Here at the site, Sarah Miller has absolutely poured her real-world experience found over at our story creating comforting meals work for busy schedules into crafting this specific dish. It’s designed to be easy enough for a weeknight win, but impressive enough to anchor any holiday table. Trust me, once you try this cheesy baked pasta recipe, you’ll never look back!
- Why This Is the Best Baked Mac and Cheese Recipe
- Gathering Ingredients for Your Baked Mac and Cheese Recipe
- How to Prepare the Easy Baked Mac and Cheese Recipe
- Tips for Success with Your Baked Mac and Cheese Recipe
- Storage and Reheating Instructions for Family Favorite Mac and Cheese
- Serving Suggestions for This Cheesy Baked Pasta Recipe
- Frequently Asked Questions About the Baked Mac and Cheese Recipe
- Nutritional Estimates for This Ultimate Comfort Food Pasta
- Share Your Experience Making This Baked Mac and Cheese Recipe
Why This Is the Best Baked Mac and Cheese Recipe
I’ve tried so many versions over the years, juggling work schedules and kids’ football practices, and I can tell you honestly: this combination is what makes it the best baked mac and cheese recipe. It nails that tricky balance between rich and manageable. For me, the goal when making any ultimate comfort food pasta is total satisfaction, and that means texture is everything. You need that gorgeous, gooey interior without it turning into a cheese brick once it cools down!
It’s easy to make, but it tastes like you spent all day stirring, which is a win in my book. It’s one of my go-to quick, easy weeknight dinners that feels totally decadent.
Achieving the Creamy Baked Macaroni and Cheese Interior
That unbelievably smooth, creamy baked macaroni and cheese sauce? That starts with the roux—that little bit of butter and flour cooked together first. Don’t skip that step; it’s what stops the sauce from being grainy later! We use a blend here: sharp cheddar for that necessary, tangy bite, and Gruyère because honestly, nothing melts better. When you add the cheese slowly to the warm liquid base, it emulsifies beautifully, guaranteeing you a pull that will make everyone at the table smile.

The Secret to a Perfect Macaroni and Cheese with Crispy Topping
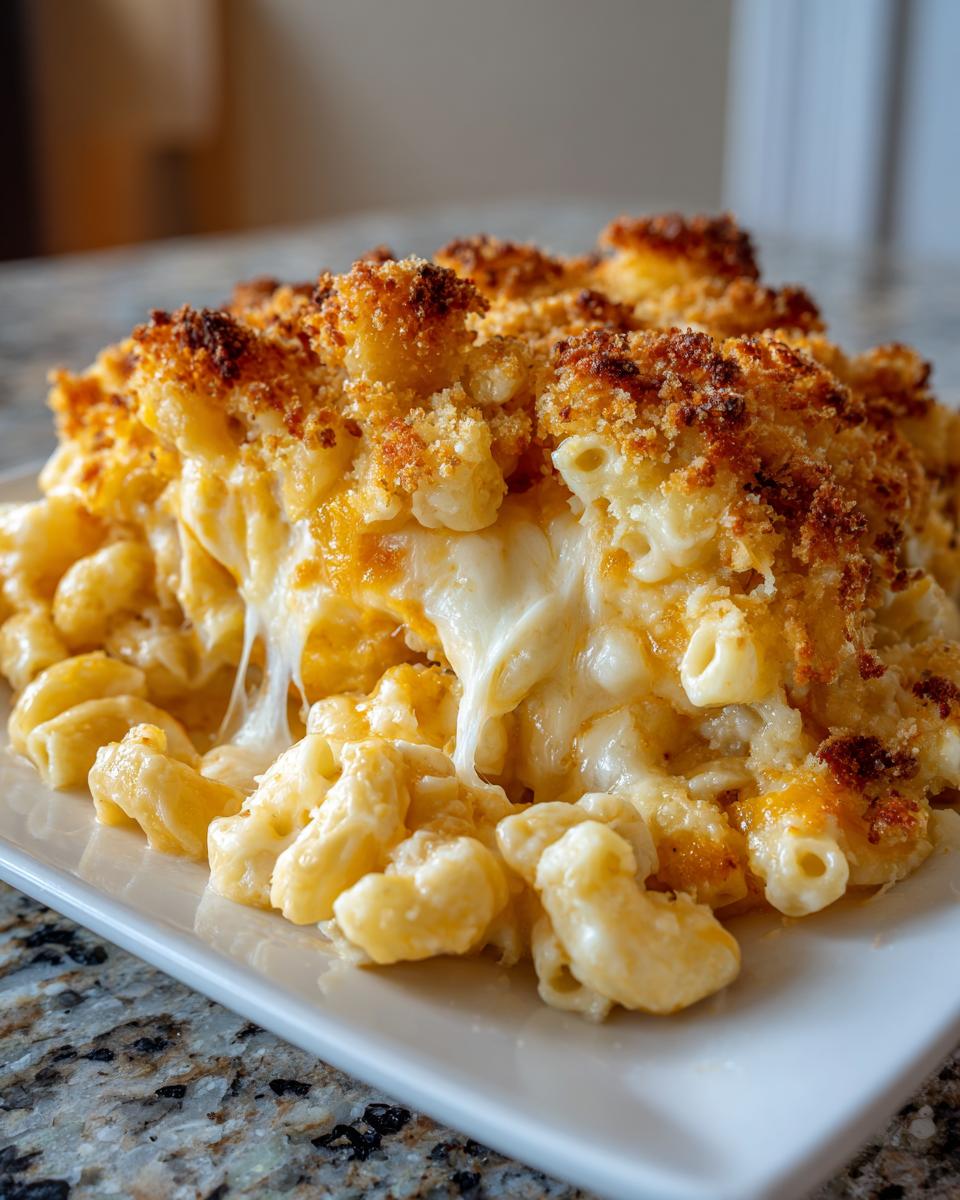
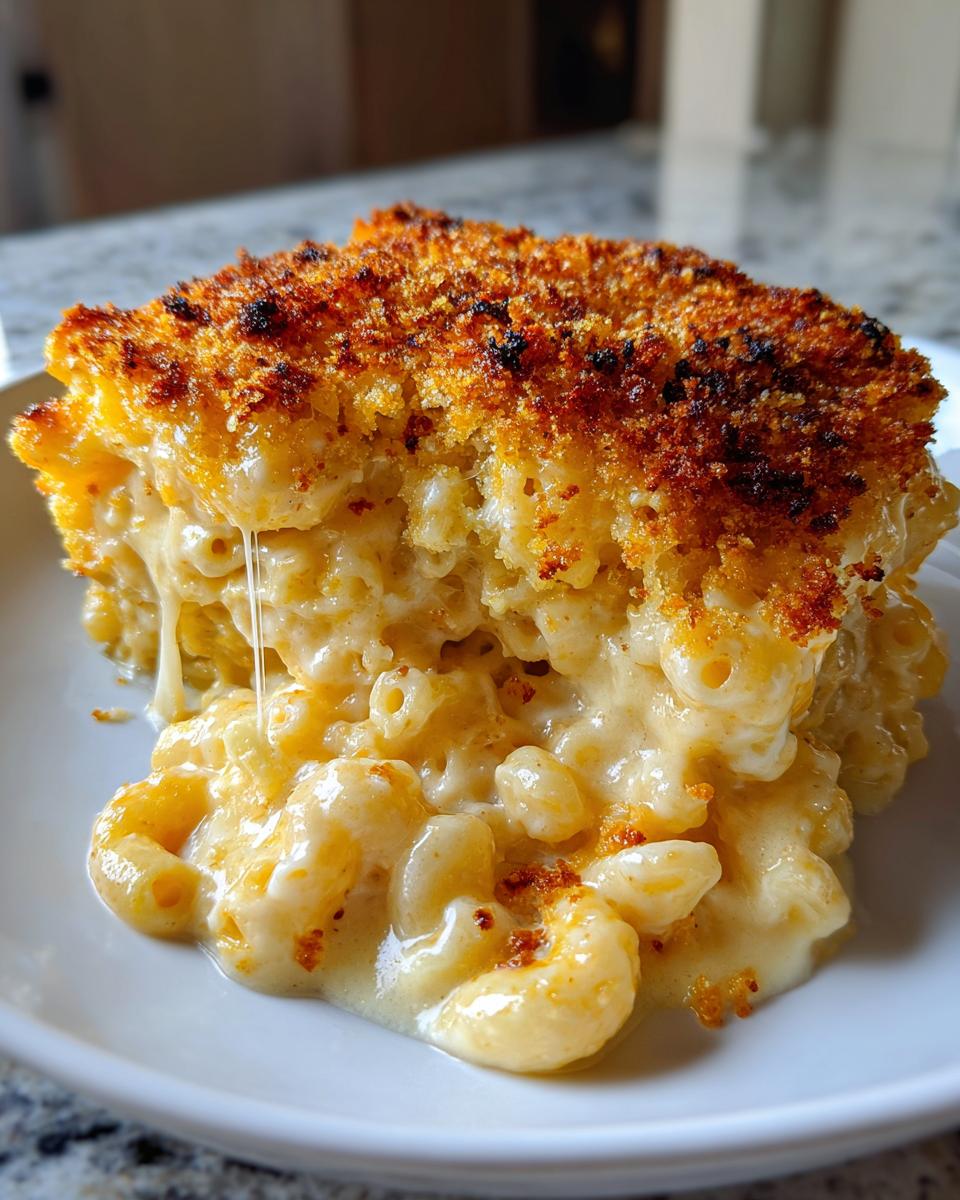
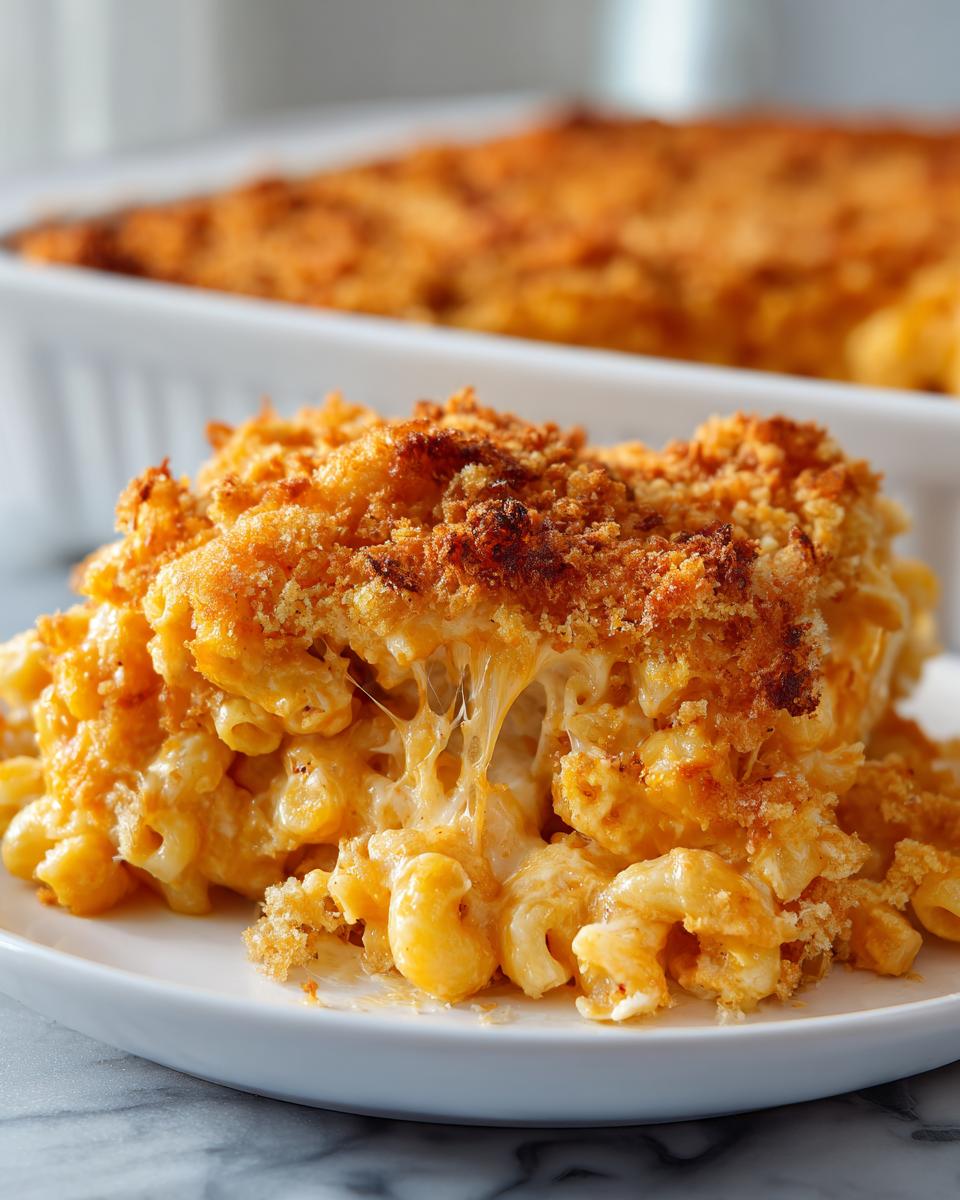
If you want that crackle, you have to step up your crumb game. We are skipping plain breadcrumbs here, team! The secret is using Panko, which are just flakier Japanese breadcrumbs. But here’s the kicker: you must toast them first in a little bit of melted butter until they’re golden brown. Trust me on this—toasting them before they hit the oven guarantees you get a shatteringly crisp macaroni and cheese with crispy topping instead of just soft, soggy crumbs. It adds such a fantastic contrast to how soft the pasta is underneath!
Gathering Ingredients for Your Baked Mac and Cheese Recipe
Okay, let’s talk ingredients! Getting this cheesy baked pasta recipe right starts way before you even turn on the stove. You’ll need good quality basics, and I mean good quality. Since we are aiming for that ultimate gooey texture, paying attention to the dairy details really pays off. We need butter, flour for the roux, and whole milk—don’t try to swap that for skim if you want that real comfort factor! You can check out my tips for making creamy sauces if you want to get nerdy about milk fat!
This recipe is ready to go, but prep work is key. Grab your boxes and measuring cups now so you can fly through the steps later.
Cheese Selection for Ultimate Flavor
This is Non-Negotiable Alert: you absolutely must grate your cheese fresh! Pre-shredded bags are coated with starches to keep them from clumping in the bag, and those starches fight against creating a smooth sauce when melted. We are using a healthy heap of sharp cheddar cheese because I love that necessary tang that cuts through the richness. Then we add Gruyère—this Swiss cheese is my secret weapon for unbelievable melt quality. It turns that sauce into pure silk!
Panko Topping Components
For that crunch we obsessed over earlier, you only need two things: Panko breadcrumbs and a couple of tablespoons of butter. That’s it! Melting the butter and toasting the Panko separately before sprinkling it on top is what gives you that perfect, golden, textural finish. It’s the final layer protecting that gooey magic underneath.
How to Prepare the Easy Baked Mac and Cheese Recipe
This is where the magic happens, and I promise you, it really is an easy baked mac and cheese recipe! You might think making a homemade sauce is scary, but honestly, once you master the roux, you’re golden. We’re moving through this quickly because the whole process, besides the baking time, flies by. We are aiming for a perfect, gooey texture, so stick with me on these steps! If you’re looking for other easy, cheesy wins, you have to check out my creamy Mexican street corn dip—it uses similar sauce magic!
Step 1: Pasta Preparation and Oven Setup
First things first, get that oven preheating to 375°F (190°C)—it needs time to catch up. Also, grab your 9×13 inch baking dish and give it a quick grease treatment. Now for the macaroni! You need to cook your elbow macaroni according to the package directions, but here’s the big secret: pull it out about a minute earlier than it says. We want it just barely al dente, because it’s going to keep cooking in that rich sauce in the hot oven. Drain it really well and set it aside. Don’t rinse it; we want that little bit of starch clinging to it!
Step 2: Building the Creamy Cheese Sauce Base
We start the sauce in a big saucepan over medium heat. Melt 4 tablespoons of that butter until it’s shimmering. Then, whisk in the flour—this makes our roux. It’s going to look like a thick paste, and you need to cook it, stirring constantly, for a full minute. This cooks out that raw flour taste. Once that minute is up, start adding your warm milk very slowly, whisking non-stop until everything is smooth as silk. You know it’s ready when the sauce is thick enough to coat the back of a spoon—if you run your finger across the coated spoon, the line should hold clearly. It’s thickening up beautifully!
Step 3: Melting Cheese and Seasoning the Gooey Baked Macaroni
This is crucial for achieving that gooey baked macaroni texture: take the saucepan totally off the heat! If the sauce is boiling when you add the cheese, you risk it seizing up and getting grainy. Once it’s off the burner, whisk in all your seasonings—the dry mustard, paprika, pepper, salt, and that optional kick of cayenne. Now, add your grated cheddar and Gruyère cheeses, but only a handful at a time. Wait until the first batch is totally melted and incorporated before you toss in the next. Keep stirring until everything melts into one gorgeous, unified, unbelievably smooth sauce. Taste it now! Does it need more salt? This is your last chance to make it perfect.
Step 4: Assembly and Creating the Macaroni and Cheese with Crispy Topping
Drape that sauce over your drained pasta and fold gently. Remember we want to coat every single noodle! Scoop this whole mixture into your prepared baking dish and spread it out evenly. Okay, step away from the pan for just a second and handle the topping: In a tiny skillet, melt the final 2 tablespoons of butter. Toss in your Panko breadcrumbs and toast them over medium heat for about 3 to 4 minutes until they smell nutty and look golden brown. Scatter those toasted crumbs right over the top of the pasta mixture. Don’t press them down! They need to stay loose to get that amazing crispiness. Now, slide it into your preheated oven for 20 to 25 minutes until it’s bubbling hot all around the edges and the top is deeply golden. Let it sit for just five minutes when it comes out—it’s worth the wait!
Tips for Success with Your Baked Mac and Cheese Recipe
We are past the basics now, so let’s level up! Getting a truly stellar, restaurant-quality result from your baked mac and cheese recipe isn’t just about following the steps; it’s about those little tweaks that prevent disaster and maximize flavor. I learned these tricks the hard way—like when my sauce split because I got too hasty with the burner! Check out these pointers to ensure your dish is always a win, especially if you’re aiming for a show-stopping holiday side dish mac and cheese.
These tips help us maintain that melt-in-your-mouth texture with a crunchy crown. If you want another cheesy side that guarantees smiles, check out my recipe for cream cheese corn casserole—it’s another staple at my table!
Making This a Southern Style Baked Mac and Cheese
If you are aiming for that deeper, richer, more decadent texture that people associate with Southern style baked mac and cheese, I have one major adjustment for you. The recipe calls for 4 cups of whole milk, which is already pretty rich, but for that extra layer of pure creaminess that feels almost custard-like, you can substitute half of that milk (2 cups) with heavy cream. You do this during the sauce building phase. Wow, does it make a difference! It’s heavier, yes, but for a special occasion or when you really need that ultimate comfort food pasta hug, you treat yourself. It makes the resulting dish incredibly rich and satisfying.
Expert Tip on Cheese Grating
I know grating cheese is annoying. It sticks to your knuckles, it takes time, and honestly, sometimes grabbing that bag that says “Mexican Blend” seems like the only way to get dinner on the table. But please, please, for the love of creamy sauce, grate it yourself! Those pre-shredded bags? They are coated in cellulose or potato starch to keep the pieces from sticking together in the bag. When you melt that cheese into your sauce, that starch interferes with the beautiful emulsion we worked so hard to create with the roux, and it causes your sauce to get stiff, clumpy, or even grainy. Using a block of sharp cheddar mac and cheese and grating it yourself ensures the proteins and fats melt evenly, giving you that dreamy, smooth texture we are after in this homemade baked macaroni recipe.
Storage and Reheating Instructions for Family Favorite Mac and Cheese
Listen, this family favorite mac and cheese is so good that everyone will still want seconds the next day, assuming there are any leftovers left! Storing it properly is nearly as important as baking it right. If you plan on saving some, make sure you let it cool down slightly on the counter first—don’t put a huge, piping hot dish straight into the fridge, as that can mess with your fridge temperature.
You can definitely keep this in the fridge for about three to four days, covered tightly with plastic wrap or foil. After that, the texture starts to change, and the sauce can tighten up too much, which leads us to reheating!
Reheating is where most people go wrong, turning that beautiful, gooey pasta into dry disappointment. If you’re reheating a big chunk, the oven is your best friend. Scoop the portion you want into an oven-safe dish, splash just a tiny bit of extra milk or even a tablespoon of cream over the top—just enough to wake up that sauce—and cover it loosely with foil. Pop it back into a 350°F oven for about 15 to 20 minutes until it’s heated through. If you’re just doing a single serving and in a huge rush, you can use the microwave, but you *have* to add that splash of milk first, or you’ll end up with hard pasta.
If you want to save time during a busy week, you can assemble the whole dish right up until baking (Step 7 in the instructions), cover it tightly, and leave it in the fridge for up to two days! Remember, if you bake it straight from the fridge, you need to add about 10 to 15 minutes extra onto that baking time we listed in the main recipe. You want it bubbling hot all the way to the middle before you serve up this cheesy baked pasta recipe.
For those times when you need a weeknight comfort meal that feels gourmet but is actually just leftovers, you might want to bookmark my recipe for Cajun Chicken Creamy One-Pan Rice Skillet—another winner in the comfort department that holds up great in the fridge!
Serving Suggestions for This Cheesy Baked Pasta Recipe
Listen, as amazing as this baked mac and cheese recipe is—and trust me, it’s amazing—it’s so rich and decadent that it really needs something bright sitting next to it on the plate. This isn’t the kind of dish you just eat by itself unless you plan on napping right after, ha! If you’re taking this to a gathering, having a couple of complementary sides makes your whole contribution feel much more thoughtful. It works perfectly for potluck pasta dishes because it pairs well with almost anything!
When I make this for a big meal, like Thanksgiving where it shines as a stellar holiday side dish mac and cheese, I always try to balance the heavy richness of the cheddar and cream with something fresh or something acidic. You want to cut through that fat just a little bit!
If you want a simple, slightly sweet side that really sings alongside the savory cheese, you must try my recipe for brown sugar glazed roasted sweet potatoes. The slight caramelization and sweetness are just divine next to the sharp edge of the cheddar!
Here are a few of my favorite ways to round out the perfect plate:
- For Color and Crunch: A simple, crisp green salad dressed with a sharp vinaigrette (lemon or red wine-based works best). The acidity wakes up your palate after a bite of cheese.
- For Heat Balance: Steamed or roasted green beans or broccoli. Roast them with a little garlic until they are just tender-crisp.
- If You Need More Substance: This is fantastic paired with slow-cooked pulled pork or turkey. It soaks up any extra sauce beautifully!
The key is texture contrast. You’ve got ultra-soft pasta and a creamy sauce; make sure your side dish gives you something to chew!
Frequently Asked Questions About the Baked Mac and Cheese Recipe
It’s totally normal to have questions when you’re making a classic comfort food like this—you want it to be perfect every time, right? I get loads of questions about substitutions and timing, especially when people are trying to fit this incredible baked mac and cheese recipe into a busy week. Here are the things I hear most often!
If you’re looking for another quick, cheesy option after you’ve mastered this one, you have to check out my one-pot cheesy taco pasta!
Can I make this creamy baked macaroni and cheese ahead of time?
Yes, absolutely! That’s one of the best parts about making this dish for a crowd or a holiday—you can totally prep ahead. You assemble everything right up to the point of baking (that’s step 7 in the instructions). Cover the dish tightly with plastic wrap or foil and stick it in the fridge. If you bake it straight from the cold fridge, though, you need to give it some extra love in the oven. I usually add about 10 to 15 minutes to the baking time listed in the main recipe so that it gets hot and bubbly all the way through.
What if I don’t have Gruyère cheese for this homemade baked macaroni recipe?
Oh, that’s an easy fix! If you can’t find Gruyère or maybe it’s just not in the budget that week, don’t sweat it. The Gruyère is there mainly because it melts like a dream and adds a lovely nutty note. For a fantastic substitute in this homemade baked macaroni recipe, look for something that melts well. Monterey Jack is a great, straightforward option. Fontina is also wonderful; it’s very creamy and has a slightly earthy flavor that pairs well with cheddar. The main goal is just to use a cheese that won’t get oily or separate when melted into your sauce!
How do I prevent my baked mac and cheese from drying out?
This is the #1 fear when baking anything with pasta, but thanks to our method, it should be rare! To keep this creamy baked macaroni and cheese lush and gooey, there are three things we did deliberately. First, we used whole milk and a good amount of butter in that sauce base. Second, remember how I told you to cook the pasta a minute shy of al dente? That unfinished cooking time gets soaked up in the oven without turning the pasta mushy. Finally, and this is crucial: once it comes out of the oven golden brown, let it rest for a solid five minutes before you serve it. That resting time lets the sauce settle and redistribute, so you don’t serve up a watery mess or a dry disaster!
Nutritional Estimates for This Ultimate Comfort Food Pasta
I always try to be transparent about what goes into our favorite dishes here at Pure Plate Path. While this ultimate comfort food pasta is definitely an indulgence, knowing the rough breakdown can help you fit it into your balanced life. Because we use rich ingredients like butter and sharp cheddar, we aren’t going to pretend this is a low-calorie meal—it’s meant to nourish the soul, after all!
However, please remember that these are just estimates based on the exact ingredients listed in the recipe above. If you swap whole milk for cream, or use a different blend of cheeses, your final numbers will shift. Think of this as a ballpark guide for helping you plan your week!
- Serving Size: 1 serving
- Calories: 550
- Fat: 32g
- Saturated Fat: 18g
- Trans Fat: 1g
- Carbohydrates: 48g
- Fiber: 2g
- Sugar: 5g
- Protein: 25g
- Cholesterol: 90mg
- Sodium: 650mg
When you’re cooking from scratch, you have 100% control over ingredients, which is a huge plus for transparency and trust, wouldn’t you agree? Enjoy every bite of this baked mac and cheese recipe!
Share Your Experience Making This Baked Mac and Cheese Recipe
Now it’s your turn to jump into the kitchen and make some joy! Seriously, seeing all your beautiful bowls of bubbling, cheesy goodness is what keeps me going. This is more than just a recipe; it’s a tradition in the making, and I want to see how you make it your own.
Did you decide to ramp up the spice? Maybe you tried an entirely different cheese blend than the sharp cheddar and Gruyère? Or perhaps you used it as the star of your holiday table? Drop a comment below and let me know! Sharing makes the cooking experience so much richer, and it helps others who are looking for that perfect comfort food too.
If you loved how easy this came together, please give the recipe a little rating at the top of the page! And if you ever need to get in touch with me directly about substitutions or have a quick question, you can always find the contact form over on the Contact Us page. Happy cooking, and I can’t wait to hear how much cheese you ended up using!
PrintUltimate Creamy Baked Mac and Cheese with Crispy Panko Topping
Prepare this ultimate creamy baked mac and cheese featuring a rich, gooey interior and a perfectly golden, crispy panko topping. This recipe is simple to execute and serves as the best baked mac and cheese for family dinners or potlucks.
- Prep Time: 15 min
- Cook Time: 30 min
- Total Time: 45 min
- Yield: 8 servings 1x
- Category: Side Dish
- Method: Baking
- Cuisine: American
- Diet: Vegetarian
Ingredients
- 1 pound elbow macaroni
- 6 tablespoons unsalted butter, divided
- 1/2 cup all-purpose flour
- 4 cups whole milk, warmed
- 1 teaspoon dry mustard powder
- 1/2 teaspoon smoked paprika
- 1/4 teaspoon ground black pepper
- 1/2 teaspoon salt, plus more for pasta water
- 1/4 teaspoon cayenne pepper (optional)
- 4 cups (about 16 ounces) sharp cheddar cheese, freshly grated
- 1 cup (about 4 ounces) Gruyère cheese, freshly grated
- 1 cup panko breadcrumbs
Instructions
- Preheat your oven to 375°F (190°C). Lightly grease a 9×13 inch baking dish.
- Cook the elbow macaroni according to package directions until just al dente (about 1 minute less than recommended). Drain well and set aside.
- While the pasta cooks, prepare the cheese sauce. In a large saucepan over medium heat, melt 4 tablespoons of the butter.
- Whisk in the flour and cook for 1 minute, stirring constantly, to create a roux.
- Gradually whisk in the warm milk until the mixture is smooth. Continue cooking, stirring frequently, until the sauce thickens enough to coat the back of a spoon (about 5-7 minutes). Do not let it boil rapidly.
- Remove the saucepan from the heat. Whisk in the dry mustard, smoked paprika, pepper, salt, and cayenne pepper, if using.
- Add the grated cheddar and Gruyère cheese to the sauce in handfuls, stirring until completely melted and smooth before adding the next batch. Taste and adjust salt if needed. This creates your creamy baked macaroni and cheese sauce.
- Add the drained pasta to the cheese sauce and stir gently until every piece is coated. Pour the mixture into the prepared baking dish.
- In a small skillet, melt the remaining 2 tablespoons of butter over medium heat. Add the panko breadcrumbs and toast, stirring often, until they are golden brown (about 3-4 minutes).
- Sprinkle the toasted panko evenly over the top of the macaroni and cheese.
- Bake for 20 to 25 minutes, or until the sauce is bubbly and the topping is golden brown. Let it rest for 5 minutes before serving this ultimate comfort food pasta.
Notes
- For the best flavor and melt, always grate your cheese fresh instead of using pre-shredded varieties.
- If you prefer a Southern style baked mac and cheese, you can substitute half of the milk with heavy cream for extra richness.
- To make this recipe ahead of time, assemble everything through step 7, cover, and refrigerate. Add 10-15 minutes to the baking time if baking directly from the refrigerator.
Nutrition
- Serving Size: 1 serving
- Calories: 550
- Sugar: 5
- Sodium: 650
- Fat: 32
- Saturated Fat: 18
- Unsaturated Fat: 14
- Trans Fat: 1
- Carbohydrates: 48
- Fiber: 2
- Protein: 25
- Cholesterol: 90