
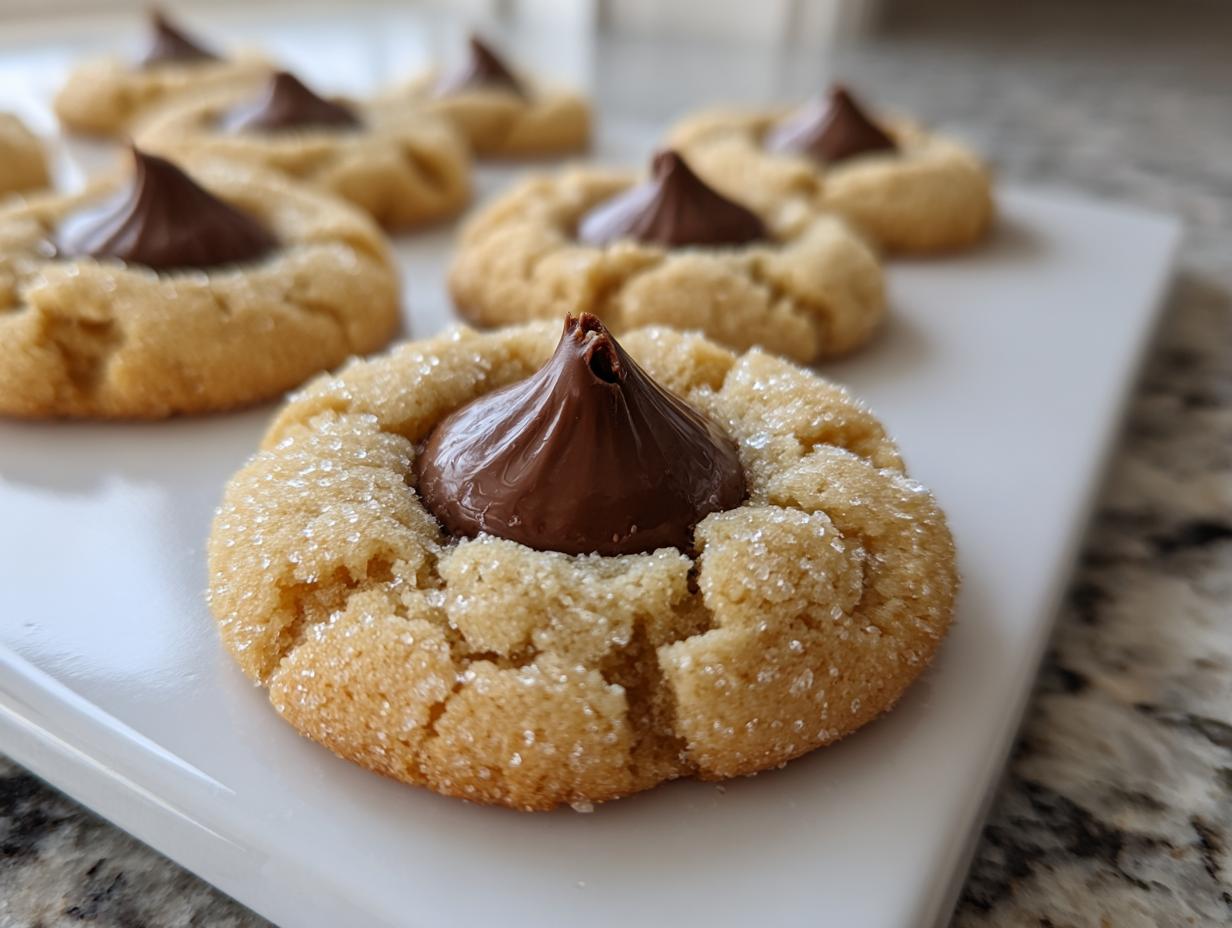
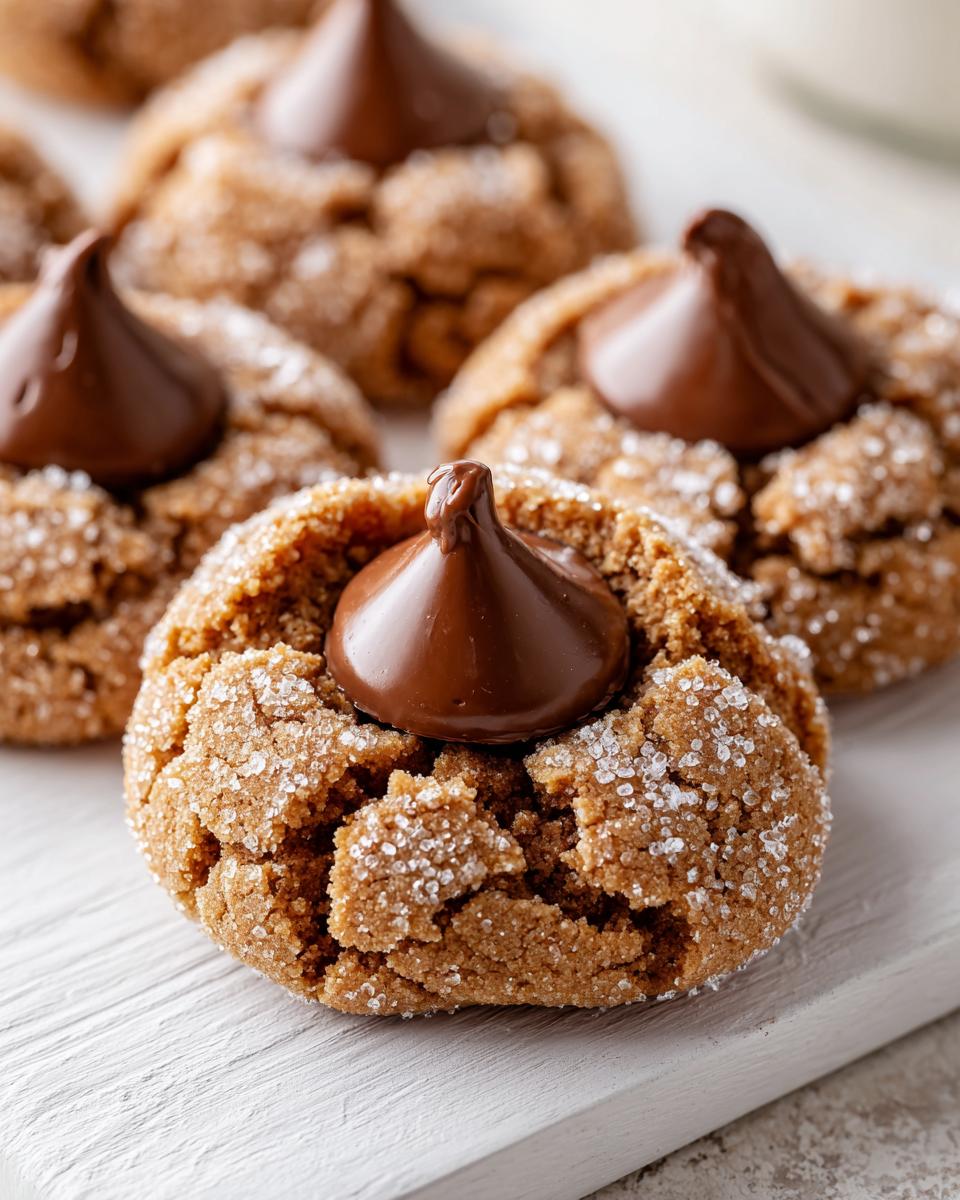
Oh, the sheer nostalgia packed into one little cookie! If you are hunting for that perfect, throwback treat—the one that signals the holidays are truly here—you’ve found it. Forget dry, crumbly messes; I’m sharing my absolute, can’t-mess-it-up recipe for the ultimate soft and chewy peanut butter blossoms. Trust me, these are guaranteed winners. I’m Sarah Miller, and my expertise comes from years of real-life kitchen chaos, not fancy culinary school. I developed this recipe while navigating my own busy life, turning simple ingredients into something truly iconic. You’re going to love how easy these classic peanut butter blossoms are!
- Why This Best Peanut Butter Blossom Recipe Delivers Soft Chewy Cookies
- Ingredients for Perfect Peanut Butter Blossoms
- How to Prepare Classic Peanut Butter Cookies Step-by-Step
- Tips for Success with Your Peanut Butter Blossoms
- Storing and Reheating Your Festive Dessert Recipes
- Variations on the Iconic American Cookies
- Serving Suggestions for Peanut Butter and Chocolate Treats
- Frequently Asked Questions About Peanut Butter Blossoms
- Understanding the Nutrition of These Simple Dessert Ideas
Why This Best Peanut Butter Blossom Recipe Delivers Soft Chewy Cookies
Listen, there are a million recipes out there, but I promise you, this is the Best Peanut Butter Blossom Recipe you’ll ever need. We focus primarily on texture here—I want you biting into a cookie that’s soft and chewy, not some brittle cracker. That signature sugary crackle on top comes from using both granulated and brown sugar combined. It’s a trick I learned early on to keep that classic look without sacrificing tenderness.
We treat this dough delicately, which is key for making truly Soft Chewy Cookies. This method is totally straightforward and perfect for beginner holiday bakers, but it respects the integrity of the dough, too. If you’re planning for cookie exchanges, you need reliability, and that’s what this recipe gives you.
Achieving the Signature Soft and Chewy Texture
The secret weapon in the texture department is that sugar combo I mentioned. The brown sugar brings molasses, which keeps everything moist underground, so to speak, while the granulated sugar helps create those beautiful, crackled peaks when it bakes. It’s a gentle balance. When you mix in your flour, you’ve got to stop *just* when you can’t see white streaks anymore. Overmixing flour wakes up the gluten, and gluten equals tough cookies. For these blossoms, tender is the name of the game!
Ingredients for Perfect Peanut Butter Blossoms
You only need a few pantry staples to pull off these iconic treats. I always measure everything out right before I start creaming things together—freshness really matters here! Make sure your butter is soft; this is non-negotiable for a good cookie base.
Here’s exactly what you need for about three dozen perfect Christmas Cookie Favorites:
- 1 cup unsalted butter, softened to room temperature
- 3/4 cup creamy peanut butter (the regular kind works best!)
- 3/4 cup granulated sugar, plus another 1/2 cup set aside just for rolling
- 3/4 cup packed light brown sugar—and make sure it’s packed tight!
- 2 large eggs
- 1 teaspoon vanilla extract
- 2 1/4 cups all-purpose flour
- 1 teaspoon baking soda
- 1/2 teaspoon baking powder
- 1/2 teaspoon salt
- 1 package (12 ounces) of milk chocolate kisses, don’t forget to unwrap them all beforehand!
How to Prepare Classic Peanut Butter Cookies Step-by-Step
Okay, now that we have everything measured out, it’s time to put this show on the road! When I’m making these for a holiday gathering, I like to have my unwrapped chocolate kisses lined up in a bowl right beside my oven. This is one of those recipes where speed matters right at the end, so being prepared makes all the difference when turning out these beautiful Classic Peanut Butter Cookies.
Mixing the Dough for Your Peanut Butter Blossoms
First things first, your oven needs to be at 375 degrees Fahrenheit, and get those baking sheets lined with parchment paper now. In your big mixing bowl, cream the softened butter, peanut butter, and both sugars together until it gets nice and fluffy—think light yellow, not heavy sludge. Next, drop in the eggs one at a time, mixing well after each one, then swirl in the vanilla. In a separate bowl, whisk your flour, baking soda, baking powder, and salt. Start adding this dry mix into the wet stuff slowly, using the lowest speed on your mixer. You stop mixing the moment you don’t see any more flour streaks. Seriously, stop right there!
Rolling and Baking These Chocolate Kiss Cookies Recipe
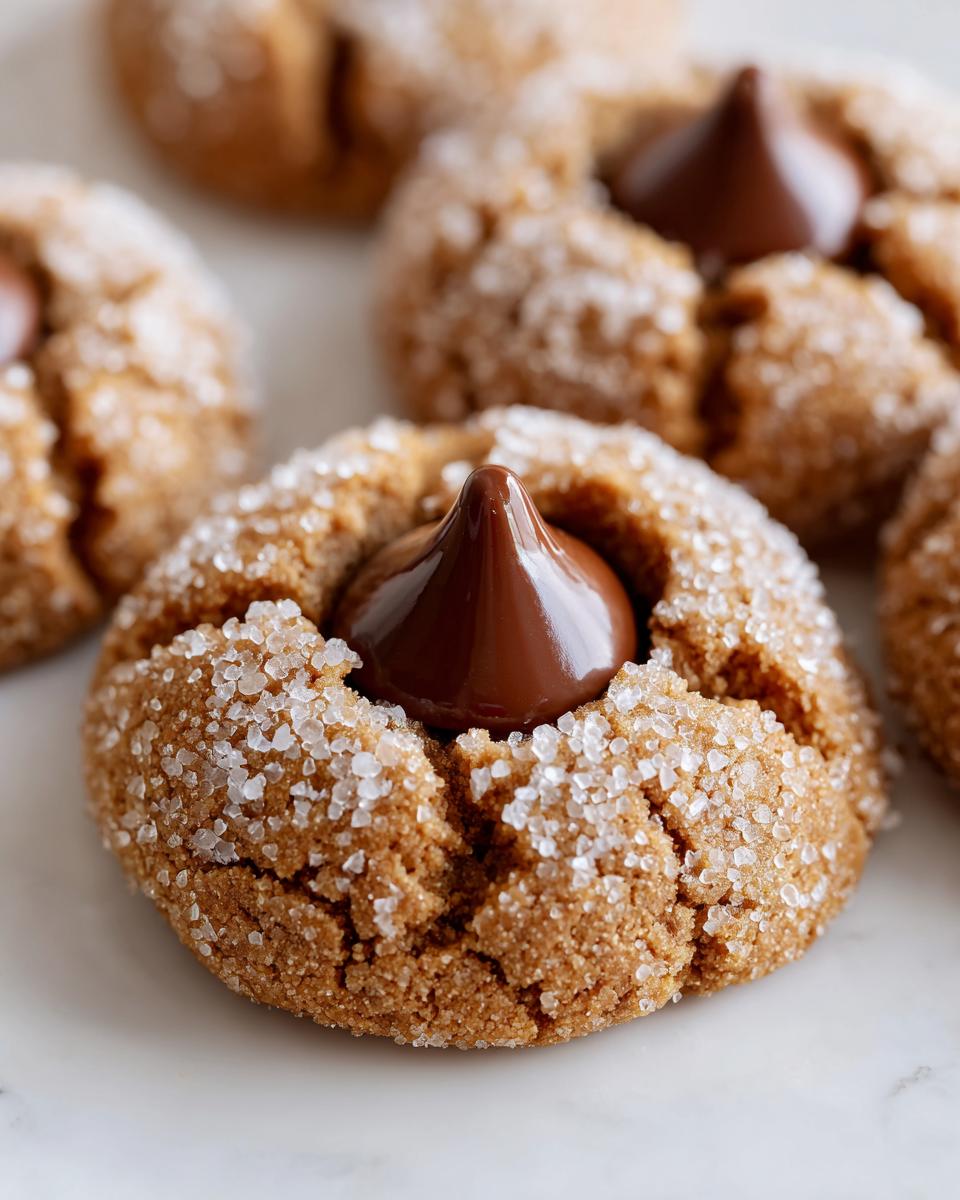
Pour that last 1/2 cup of granulated sugar into a shallow dish. Scoop your dough into nice little 1-inch balls and then roll them around in the sugar until they look fully frosted. Give them about two inches of space on the baking sheet. Pop them in the preheated oven for only about 8 to 10 minutes. I know it feels early, but this is crucial: the edges should look set, but the centers need to look just a little soft. If you wait until they look totally done, they’ll be dry later.
The Crucial Step: Pressing in the Chocolate Kiss
This part cannot wait! As soon as those sheets come out of the oven, you need to gently press one chocolate kiss right into the center of every warm cookie. The residual heat is what melts the chocolate just enough to sink it in perfectly, giving you that iconic look and feel. If they cool down even a little bit, the chocolate won’t stick right, so move fast! Let them rest on the hot sheet for five minutes before moving them to a cooling rack. That little moment of rest sets everything up beautifully.
Tips for Success with Your Peanut Butter Blossoms
We’ve nailed the mixing and the baking, but sometimes even the best recipe needs a little nudge to go from great to legendary. Trust me, understanding the science behind these classic Peanut Butter and Chocolate Treats makes all the difference, especially when aiming for those Perfectly Cracked Cookies!
The biggest struggle people have is flatness or a kiss that just slides off. We can fix both of those right here with a couple of simple checks on ingredient temperature and a little patience.
Ingredient Temperature and Dough Chilling for Peanut Butter Blossoms
Remember how I emphasized using softened butter? That’s because room temperature ingredients cream together properly, creating those tiny air pockets that give you the chewiness we are aiming for. If your butter is too cold, you’ll end up with chunks in the butter/sugar phase, and that leads to a denser, flatter cookie later on.
Now, if you find your dough is spreading way too much in the oven—poof, they disappear—try chilling the dough balls for about 15 minutes before you roll them in the sugar. It’s not mandatory for this recipe, but a quick chill firms everything up. This small step forces the dough to hold its shape a bit longer in the heat, resulting in that gorgeous crackle design you see in great photos. Just don’t chill them too long, or the chocolate kiss won’t adhere!
Storing and Reheating Your Festive Dessert Recipes
These cookies are honestly the best because they taste even better the next day! Since they are so soft and chewy, they hold up really well. You just need to make sure they’re sealed up tight. I keep mine in an airtight container at room temperature, and they stay wonderfully fresh for about a week. That’s perfect for making ahead of time for all your Festive Dessert Recipes! If you’re baking cookies for a big crowd, you should definitely check out my recipe for easy peppermint fudge recipe too; they make a great pair!
There’s really no need to reheat them if you bake them right, but if you happen to freeze them for future dessert emergencies, just let them thaw slowly on the counter. Don’t try to microwave them; you don’t want to melt that beautiful chocolate up top before serving them properly. I love making big batches because they never stick around long enough to worry about storage anyway!
Variations on the Iconic American Cookies
These Iconic American Cookies are fantastic just the way they are, but sometimes you want to mix things up a tiny bit without turning the whole recipe on its head, right? Since this whole philosophy here at Pure Plate Path is about keeping things simple and accessible, I keep my variations super straightforward. Swapping out the standard milk chocolate kiss is the easiest change you can make!
If that sweet milk chocolate isn’t your favorite, try pressing in a dark chocolate kiss instead. It gives the cookie a slightly richer, more grown-up flavor that pairs perfectly with the salty peanut butter. Or maybe you want a little crunch? Go ahead and use peanut butter chips or even butterscotch chips instead of the kisses!
You can also experiment with your nuts if you don’t mind straying from the core recipe. While traditional ones use plain creamy peanut butter, using crunchy peanut butter adds a wonderful textural element. Just remember, if you use a natural or oil-separated peanut butter, you might need an extra tablespoon of flour to keep those balls from spreading too much. For more simple, comforting ideas, you can always check out my recipe for classic old-fashioned apple crisp!
Serving Suggestions for Peanut Butter and Chocolate Treats
These Peanut Butter and Chocolate Treats are incredibly satisfying on their own, but pairing them right elevates the whole snack experience! Since they are so rich and classic, I usually stick to simple accompaniments. A tall, cold glass of milk is my go-to pairing, let’s be honest—it cuts through the richness perfectly.
If you’re serving these as part of a larger dessert spread for the holidays, they look amazing next to something bright and acidic, like a lemon bar or maybe even my creamy homemade eggnog recipe if you’re feeling extra festive. They truly shine as the star of any cookie platter, though, so don’t overcomplicate the presentation!
Frequently Asked Questions About Peanut Butter Blossoms
We always get questions when we tackle a classic like this! It’s natural when you’re trying to produce the very best Simple Dessert Ideas for your holiday tray. Folks want to know how to lock in that perfect soft texture and ensure they look exactly like the picture. This recipe really is great for gifting to friends, which is why it’s one of my favorite Christmas Cookie Favorites to share.
Do I need to chill the dough for these peanut butter blossoms?
That’s a great question because chilling can make or break a cookie! For this specific soft and chewy recipe, no, chilling isn’t required—you can make a batch of these cookies from start to finish in under an hour! However, if you notice your dough seems a little too soft when you roll the balls, popping them in the fridge for about 15 minutes before coating them in sugar will help them hold their shape just a little better and enhance that signature crackle. It’s optional, but helpful if your kitchen is warm!
Can I make these cookies ahead of time for holiday baking?
Absolutely! I often make these a couple of days before a big event because they store like a dream. Just make sure they are completely cooled before you store them. Keep your Peanut Butter and Chocolate Treats in an airtight container at room temperature. They stay soft for a full week, which takes so much pressure off the day you host your party! If you want more tips on making large batches, I actually wrote a little piece on baking for cookie exchanges!
Understanding the Nutrition of These Simple Dessert Ideas
We focus on flavor and ease here at Pure Plate Path, but I know some of you are keeping a close eye on the details when you pull together your table. For those of you who want to know, here are the estimates for these delicious Simple Dessert Ideas, based on one standard cookie.
Just remember, these numbers are estimates—they change based on the exact brand of peanut butter or size of your Hershey’s Kiss! What matters most is that these are homemade, made with love, and part of a balanced life right?
- Serving Size: 1 cookie
- Calories: ~160
- Sugar: 12g
- Fat: 9g
Ultimate Soft & Chewy Peanut Butter Blossoms Recipe
Make the classic Peanut Butter Blossom cookies that stay soft and chewy for days. This easy recipe guarantees the signature crackled top and a perfect chocolate kiss center, ideal for holiday baking or cookie exchanges.
- Prep Time: 20 min
- Cook Time: 10 min
- Total Time: 30 min
- Yield: About 3 dozen cookies 1x
- Category: Dessert
- Method: Baking
- Cuisine: American
- Diet: Vegetarian
Ingredients
- 1 cup unsalted butter, softened
- 3/4 cup creamy peanut butter
- 3/4 cup granulated sugar, plus 1/2 cup for rolling
- 3/4 cup packed light brown sugar
- 2 large eggs
- 1 teaspoon vanilla extract
- 2 1/4 cups all-purpose flour
- 1 teaspoon baking soda
- 1/2 teaspoon baking powder
- 1/2 teaspoon salt
- 1 package (12 ounces) milk chocolate kisses, unwrapped
Instructions
- Preheat your oven to 375 degrees Fahrenheit. Line baking sheets with parchment paper.
- In a large bowl, cream together the softened butter, peanut butter, granulated sugar, and brown sugar until the mixture is light and fluffy.
- Beat in the eggs one at a time, mixing well after each addition. Stir in the vanilla extract.
- In a separate bowl, whisk together the flour, baking soda, baking powder, and salt. Gradually add the dry ingredients to the wet ingredients, mixing on low speed until just combined. Do not overmix the dough.
- Place the remaining 1/2 cup of granulated sugar in a shallow dish. Roll the dough into 1-inch balls. Roll each ball thoroughly in the sugar until fully coated.
- Place the sugared dough balls about 2 inches apart on the prepared baking sheets.
- Bake for 8 to 10 minutes. The edges should look set, but the centers should still look slightly soft.
- Immediately upon removing the cookies from the oven, gently press one chocolate kiss into the center of each warm cookie. The residual heat will soften the chocolate slightly.
- Let the cookies cool on the baking sheet for 5 minutes before transferring them to a wire rack to cool completely.
Notes
- For the softest cookies, do not overbake. Remove them when the edges are just starting to set.
- Press the chocolate kiss into the cookie right away. If the cookies cool too much, the chocolate will not adhere properly.
- If you prefer a more pronounced crackle, chill the dough balls for 15 minutes before rolling them in sugar and baking.
- These cookies store well in an airtight container at room temperature for up to one week.
Nutrition
- Serving Size: 1 cookie
- Calories: 160
- Sugar: 12g
- Sodium: 85mg
- Fat: 9g
- Saturated Fat: 4g
- Unsaturated Fat: 5g
- Trans Fat: 0g
- Carbohydrates: 19g
- Fiber: 1g
- Protein: 3g
- Cholesterol: 20mg