
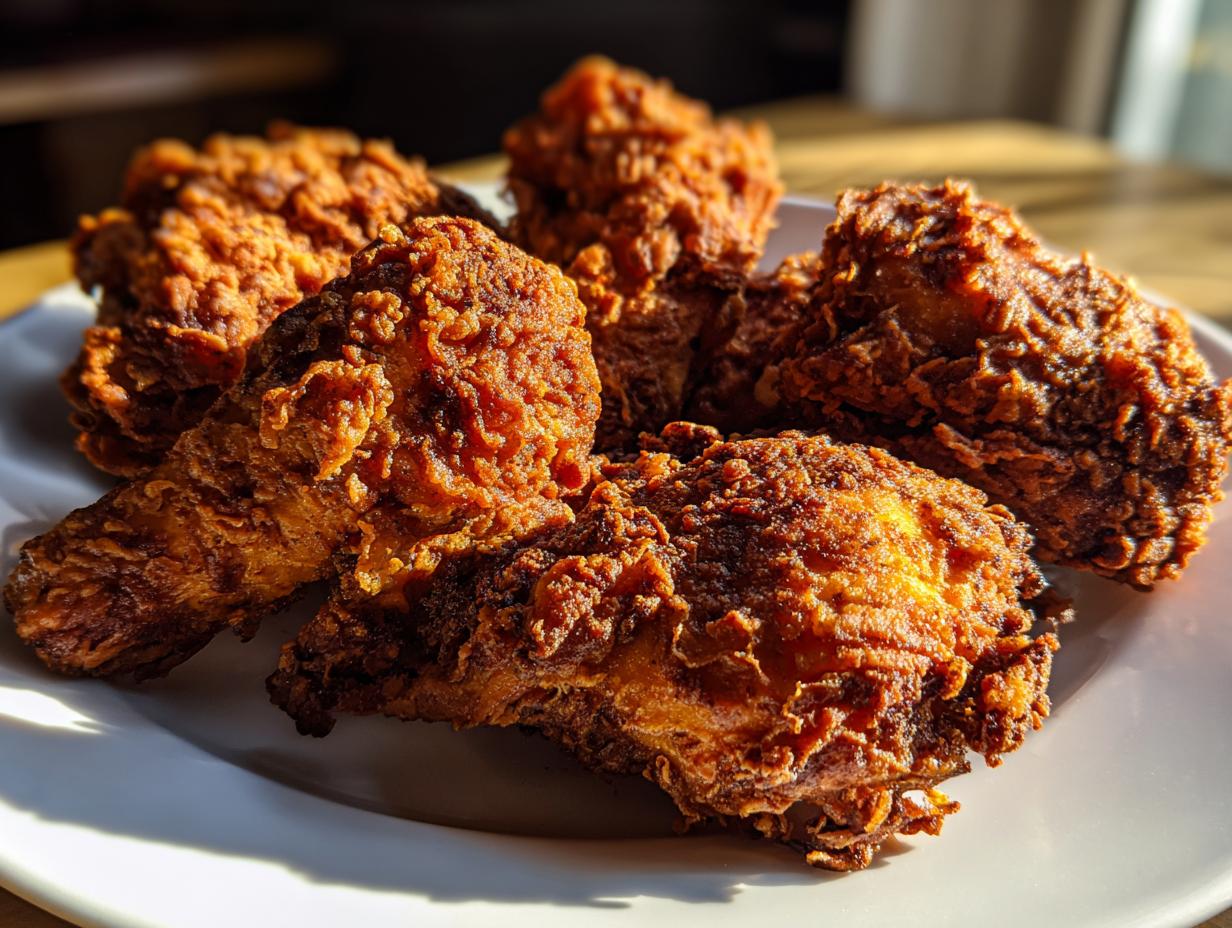
There is nothing quite like the nostalgic comfort that comes from a plate piled high with perfectly cooked fried chicken. You know the kind—that shatteringly crisp, golden exterior that gives way to the most tender, succulent meat imaginable. For me, achieving that classic Southern style at home was a real quest when I first started Pure Plate Path. I spent months trying different marinades and coatings until I landed on this specific method. Trust me, this recipe nails the ultimate combination of moisture retention and that incredible crunch. It’s truly the cornerstone of my comfort food dinner ideas.
We want this fried chicken to feel like a weekend treat, even if you’re making it on a Tuesday. That’s why I simplified the steps without cutting any corners on flavor or texture. If you’re looking to bring that unmistakable Southern goodness right to your own kitchen table, you are absolutely in the right place. You can see our approach to making meals nourishing yet practical over on our page dedicated to quick and easy weeknight dinners, but this recipe is worth the little bit of extra time!
- Why This Crispy Fried Chicken Recipe Delivers Comfort Food Perfection
- Ingredients for Classic Southern Fried Chicken
- How To Make Perfect Fried Chicken: Step-by-Step Instructions
- Tips for Achieving Restaurant Style Fried Chicken at Home
- Serving Suggestions for Your Classic Fried Chicken
- Storage and Reheating Instructions for Leftover Fried Chicken
- Frequently Asked Questions About Making Fried Chicken
- Estimated Nutritional Data for This Fried Chicken Recipe
- Share Your Homemade Fried Chicken Experience
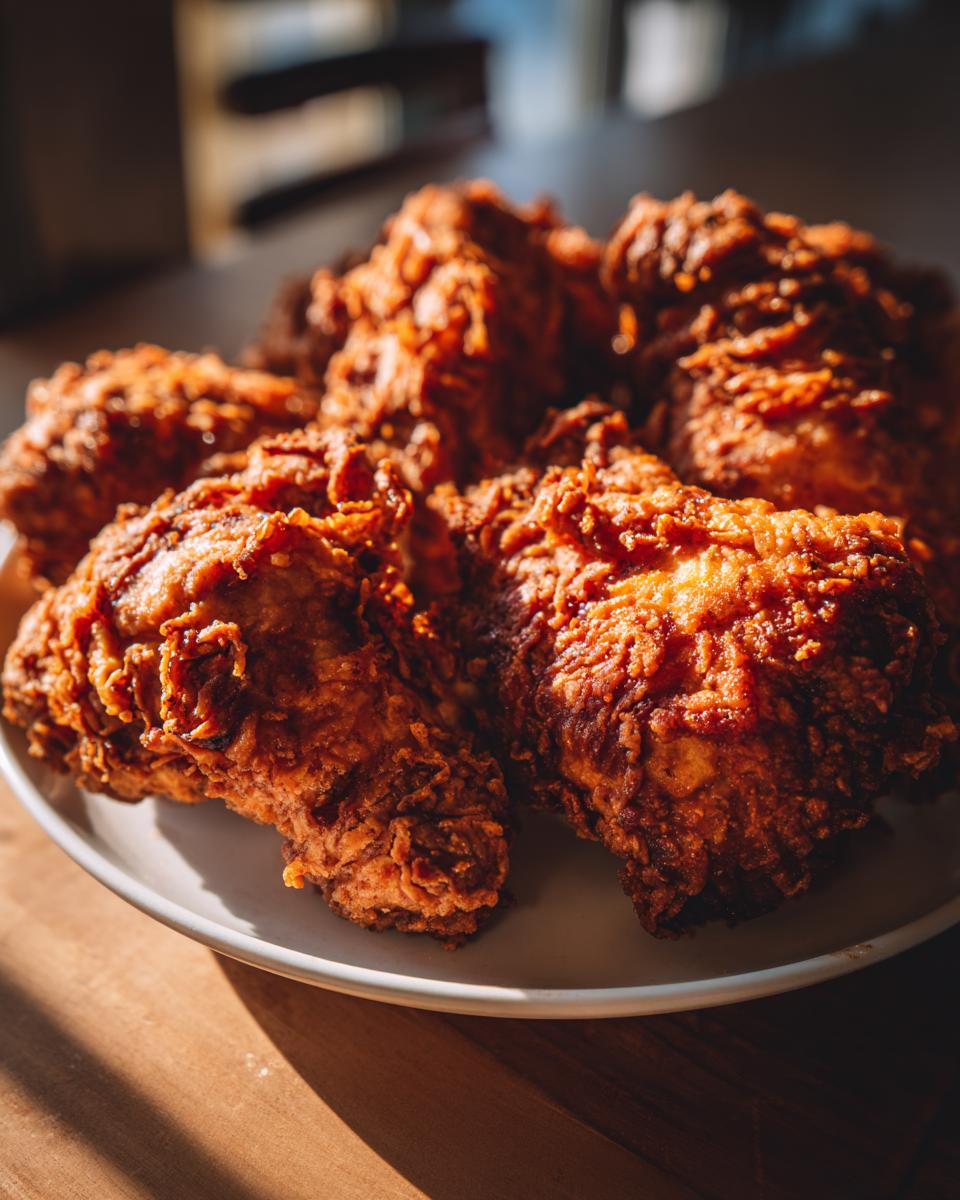
Why This Crispy Fried Chicken Recipe Delivers Comfort Food Perfection
I know there are a million recipes out there claiming to be the best, but this one sticks around year after year in my family. It’s not just fried chicken; it’s an experience. We hit all the right notes here, balancing the richness of the fat with seasoning so every savory bite is perfect. When you master these few core steps, you unlock that magic combination home cooks dream about.
- It delivers unbelievably Juicy Fried Chicken even in the thicker pieces.
- The coating creates an honest-to-goodness Crunchy Chicken Coating that doesn’t get soggy right away.
- The flavor profile is deeply savory, hitting that classic Southern profile beautifully.
The Buttermilk Magic for Juicy Fried Chicken
You absolutely cannot skip the soak time, folks. Buttermilk isn’t just for flavor, though it brings a lovely tang! The natural acids in the buttermilk work slowly to break down the muscle fibers in the chicken. This tenderizing action is what keeps the meat incredibly soft and moist when it hits that hot oil. Plus, that slightly thick, acidic coating helps the dry flour mixture stick firmly to the chicken piece as we dredge it later. It’s the first step toward truly juicy fried chicken.
Achieving the Ultimate Crunchy Chicken Coating
Here’s where we separate the okay coating from the spectacular, crackly one! It’s all thanks to what we toss in with the regular flour. That little bit of cornstarch is my secret weapon—it absorbs moisture and creates a crisper shell that holds up better against the steam coming off the meat. And don’t forget the baking powder! It’s tiny, but it helps create those beautiful little air bubbles right under the crust, guaranteeing that satisfying *crunch* whenever you bite into your homemade fried chicken.
Ingredients for Classic Southern Fried Chicken
Alright, let’s talk about what you need to pull off the best fried chicken at home. Getting the right stuff is half the battle, and using quality ingredients makes such a huge difference in the final deep-fried masterpiece. Don’t worry, everything here is easy to find!
We need enough chicken pieces—I always go for bone-in, skin-on, you get better flavor and juiciness that way—and enough oil to let them swim comfortably. Seriously, don’t skimp on the oil depth; you’ll end up with sad, unevenly cooked chicken if you crowd the pan or use too little. We are aiming for about 1.5 to 2 inches of vegetable or peanut oil in a heavy skillet for that perfect, even fry.
The Buttermilk Marinade Components
This part is super important for tenderizing! Gather these items up and get that chicken soaking. I cannot stress enough: let this sit for at least 4 hours in the fridge. If you can manage overnight, even better! That time allows the buttermilk to work its magic on making the meat tender.
- 3 lbs bone-in, skin-on chicken pieces (a mix of thighs, drumsticks, and breasts works great).
- 2 cups buttermilk (full-fat is best, I think).
- 1 tablespoon hot sauce (I use Frank’s, but use whatever brings you joy!).
- 1 tablespoon salt.
- 1 teaspoon black pepper.
- 1 teaspoon paprika.
- 1 teaspoon garlic powder.
- 1 teaspoon onion powder.
The Dredge Mixture for Perfect Fried Chicken
This is our power coating, the secret to that crunchy chicken coating nobody can resist. Make sure you whisk everything deeply together so the leavening and the cornstarch are evenly distributed throughout the flour. This ensures every piece of chicken gets that ultimate texture that makes this the Best Fried Chicken At Home.
- 2 cups all-purpose flour.
- 1/2 cup cornstarch (this is the crunch factor!).
- 1 teaspoon baking powder (for just a little lift).
- 1 teaspoon salt.
- 1/2 teaspoon black pepper.
How To Make Perfect Fried Chicken: Step-by-Step Instructions
Alright, it’s time to take that beautifully marinated chicken and turn it into the legendary fried chicken you’ve been dreaming about. The process hinges on being decisive and paying close attention to the heat. Remember, this is where we build that gorgeous crust and lock in all the juices from the buttermilk bath!
Marinating and Preparing the Chicken for Frying
First things first, get your chicken out of the fridge after that long soak. You want to lift each piece out of the buttermilk mix, but here’s a key step: let the excess buttermilk drip back into the bowl. We don’t want gloppy chicken going into the flour! A little bit clinging on is good because it’s our glue, but too much will steam the coating rather than crisp it up. This quick drain is non-negotiable for truly crispy fried chicken recipe results.
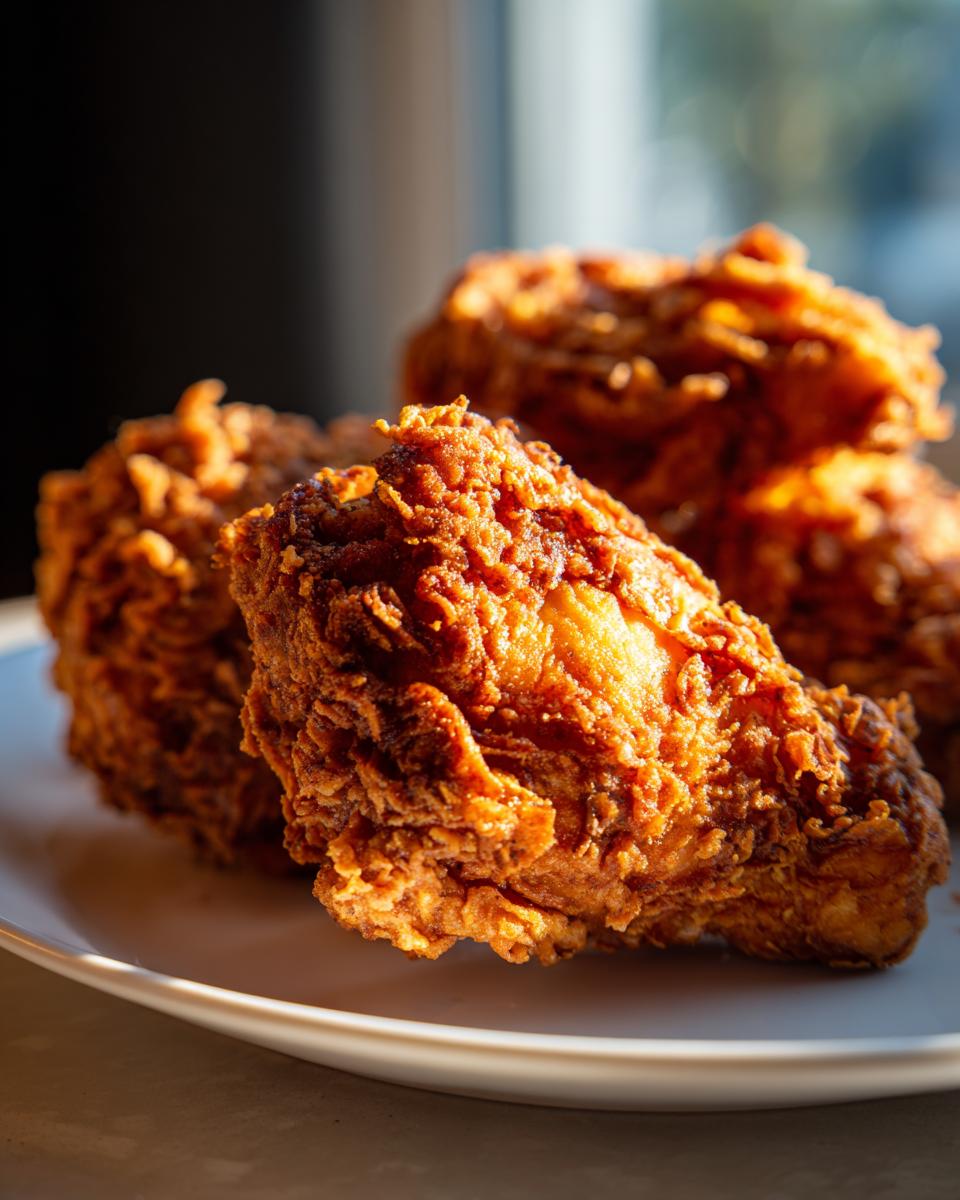
The Double-Dredge Technique for Extra Crispiness
This technique is what guarantees that amazing, craggy, crunchy chicken coating. Take your well-drained chicken piece and dredge it completely in that flour mixture we made. Press down firmly! Then, dunk it *quickly* back into the buttermilk—like a quick splash—and immediately back into the flour for a second, harder coating. I always press the coating onto the chicken with my fingers, making sure every nook and cranny is covered. This layering builds the texture you see at those great roadside diners.

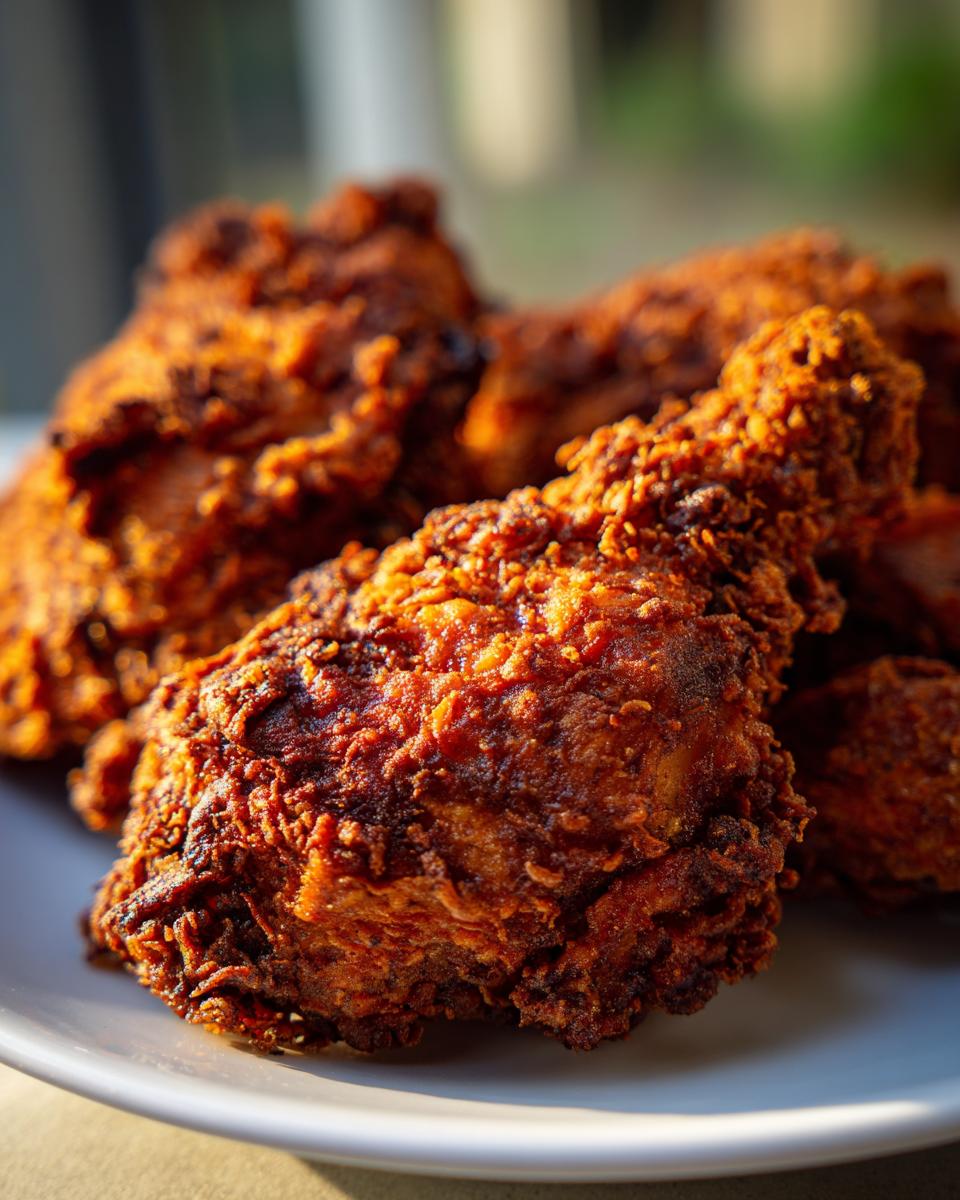
Frying to Golden Brown Chicken Perfection
Time for the sizzle! Pour your oil into your heavy pan and bring that temperature up to a steady, non-negotiable 325 degrees Fahrenheit. I learned the hard way that a thermometer is your best friend here, because if the oil drops even ten degrees, you’re suddenly boiling the meat instead of frying it. Once it’s hot, carefully set your chicken pieces in batches—do not overcrowd the pan, or the temperature will crash! Let them fry for about 6 to 8 minutes per side until they hit 165 degrees inside and turn that deep, beautiful shade of golden brown chicken. When they come out, put them straight onto a wire rack set over a baking sheet to drain. That lets air circulate and keeps the bottom crust perfectly crisp! You can find some helpful related frying ideas over here at our crispy latkes post, which uses a similar approach to oil management. Don’t forget to check out the wisdom shared over at The Girl Inspired for other great tips on making fried chicken.
Tips for Achieving Restaurant Style Fried Chicken at Home
Now that you’ve got the technique down, let’s talk about leveling up your fried chicken game so it tastes like you grabbed it straight from a classic Southern kitchen. These little secrets are what I learned after burning a few batches early on—oops! Getting that restaurant style crunch consistently is all about controlling the environment in your skillet.
Oil Temperature Control: The Secret to Juicy Fried Chicken
If I could tattoo one thing on your brain, it would be the number 325°F. Seriously! If the oil is too hot, you’ll get a beautiful, dark crust in five minutes, but the inside will still be pink and gummy. That’s not juicy fried chicken; that’s a fire hazard! Conversely, if the oil is too cool—say, 275°F—the coating soaks up tons of oil before it sets, resulting in greasy, floppy skin. Keep that thermometer handy; a steady temperature is your ticket to the juiciest meat and the crunchiest crust. For more great ideas on making things taste absolutely amazing, check out my recipe for easy creamy garlic sauce—perfect for dipping your crispy pieces!
Choosing the Right Cut for Your Fried Chicken
When preparing any type of fried chicken, I always reach for bone-in, skin-on pieces. Why? Because the bone acts like a natural insulator, meaning the meat closest to it cooks slower and stays incredibly moist. The skin, of course, renders its fat and gets gloriously crisp. Boneless chicken is fine in a pinch, but it cooks so fast you often overcook the meat just trying to get the coating golden. For that classic, hearty satisfaction, stick to the bone-in cuts, just like they do over at Best Chicken Recipes.
Serving Suggestions for Your Classic Fried Chicken
You’ve done the hard work: the soaking, the dredging, the carefully managed frying. Now comes the best part—building that amazing Southern spread around your masterpiece! Honestly, this fried chicken is the star, but it really shines when it has great supporting dishes next to it. I always aim for that perfect balance of fresh tang and creamy comfort to go alongside the salty crunch.
When I serve this, I feel like I’m bringing my whole heart to the table. It’s the ultimate comfort food dinner idea, so I lean into those traditional pairings that just feel right. Save room on that plate, because you’re going to want a little bit of everything!
Here are a few simple things that always make an appearance when we sit down to enjoy this crispy treat:
- Creamy mashed potatoes with plenty of gravy—you need something soft to soak up those pan drippings!
- A sharp, vinegary coleslaw to provide that bright, acidic contrast to the richness of the chicken.
- Fluffy, hot biscuits. You can never have too much bread for scooping up sides.
- For veggies, I keep it classic but bright. Something green that snaps, like fresh green beans. I actually have a wonderful way to prepare sweet carrots that cuts through the richness perfectly; you should take a look at my recipe for easy roasted honey-glazed carrots. They are surprisingly light!
Whatever you decide to serve, make sure it’s made with love. That’s the real side dish that pulls the whole meal together.
Storage and Reheating Instructions for Leftover Fried Chicken
If you’re lucky enough to have any fried chicken left over—which, honestly, is rare in my house—you need to store it right so that crunch lasts! The absolute biggest no-no is the microwave. Don’t even try; it turns that beautiful, crispy coating instantly soggy because it steams the crust. Instead, let the pieces cool down completely, then store them in a single layer in an airtight container lined with a dry paper towel.
When you’re ready to reheat, ditch the microwave and go straight for the oven or an air fryer! Set your oven to about 375°F. Arrange the chicken on a wire rack set over a baking sheet, and pop it in for about 10 to 15 minutes. That little bit of air circulating underneath, combined with the dry heat, revives that fantastic crunch perfectly. You’ll have crunchy, near-fresh chicken again!
Frequently Asked Questions About Making Fried Chicken
I get so many messages asking about little tweaks and timing for this recipe, which is wonderful! It means you all are diving right into making the best fried chicken at home. Getting these details right is what separates a good batch from a truly legendary one. Here are the top questions I hear all the time about mastering this classic dish. If you want to know more about my journey and why I focus on simple, nourishing food, you can always head over to my About Me page!
Can I bake or air fry this fried chicken recipe instead?
You certainly can try! If you’re cutting back on oil, baking or air frying will work, but you have to set your expectations correctly. That deep-fried texture—that rich, thick, craggy coating that shatters when you bite it—that only happens with hot oil immersion. Baking will give you a crispier exterior than roasting, for sure, but it won’t achieve that true, hearty crunch. Use heavy spray oil and flip them halfway through if you bake them, but know it’s a delicious alternative, not an exact match for this fried chicken recipe.
What is the best oil to use for making crispy fried chicken?
For achieving that ultimate crunch and keeping that oil from breaking down too fast, you need something with a high smoke point. My go-to for the best fried chicken at home is always peanut oil, because it has a high smoke point and a very neutral flavor. Vegetable oil or canola oil works great too, if peanut oil isn’t available. The key thing is to use oil that can handle 325°F without smoking right away. Basically, avoid anything olive oil-based or unrefined oils for this deep frying adventure!
How long can the chicken safely marinate in buttermilk?
This soaking time is flexible, but you can’t leave it forever! The buttermilk is fantastic for making that juicy fried chicken we all love, but since it contains acid and dairy, safety is important. I always recommend a minimum of 4 hours because that’s when the real tenderizing starts. However, you can safely let the chicken soak in the fridge for up to 24 hours. If you go nearer to that 24-hour mark, the meat will be incredibly tender, but just make sure your container is tightly sealed. It’s a great technique if you prep your chicken the night before you plan to serve your amazing fried chicken!
Estimated Nutritional Data for This Fried Chicken Recipe
When we talk about enjoying a classic, hearty meal like this, I always feel it’s important to be transparent about what goes into satisfying that craving. Knowing the nutritional breakdown helps you plan the rest of your day, right?
I ran the numbers based on the bone-in pieces, using standard vegetable oil for frying. Now, remember, this is real, deep-fried comfort food, so these figures reflect that deliciousness! Please treat these values as estimates, because honestly, how much oil your chicken truly absorbs can shift things around drastically depending on the size of your pieces.
- Calories: Roughly 450 per serving piece.
- Fat (Total): About 28g. Remember, a lot of that is the healthy unsaturated fat from the oil we use for frying!
- Protein: A whopping 30g, making this a super satisfying meal.
- Carbohydrates: Around 15g, mostly coming from that beautiful, crunchy flour coating.
- Sodium: Approximately 650mg, thanks to that wonderfully seasoned dredge we worked so hard on.
- Saturated Fat: Aiming for around 7g.
- Cholesterol: Estimated at 110mg.
It’s a filling dish, no doubt about it! But served alongside some fresh veggies, it makes for a wonderful, balanced meal that really proves that home cooking is always the best choice for flavor and care.
Share Your Homemade Fried Chicken Experience
Wow, you made it! I am so thrilled you decided to give this recipe a try. This is honestly my heart on a platter, and knowing that you’re out there enjoying this fried chicken with your own family is just the best feeling in the world. That’s what Pure Plate Path is all about—sharing those moments!
I’d absolutely love to hear how it turned out for you. Did you notice that amazing crunch? Did your kids ask for seconds? Seriously, let me know in the comments below!
If you tweaked the spices—maybe added a pinch of cayenne for extra heat—or if you used a different cut of chicken, please drop those details! We home cooks learn so much from each other, and sharing little modifications helps everyone make this recipe their own personal favorite comfort food dinner idea.
Rate the recipe with stars if you can, and don’t be shy about sharing photos if you post them online! Happy eating, and thank you for joining me on this culinary journey.
PrintGrandma’s Crispy Southern Fried Chicken: Juicy Inside, Golden Crunch Outside

This recipe brings the classic taste of Southern fried chicken to your table. You achieve an ultra-tender, juicy interior and a perfectly seasoned, golden, crunchy coating using a simple buttermilk marinade and a specific dredging technique.
- Prep Time: 20 min
- Cook Time: 35 min
- Total Time: 55 min
- Yield: 4 servings 1x
- Category: Dinner
- Method: Deep Frying
- Cuisine: American
- Diet: None
Ingredients
- 3 lbs bone-in, skin-on chicken pieces (thighs, drumsticks, breasts)
- 2 cups buttermilk
- 1 tablespoon hot sauce
- 1 tablespoon salt
- 1 teaspoon black pepper
- 1 teaspoon paprika
- 1 teaspoon garlic powder
- 1 teaspoon onion powder
- 2 cups all-purpose flour
- 1/2 cup cornstarch
- 1 teaspoon baking powder
- 1 teaspoon salt
- 1/2 teaspoon black pepper
- Vegetable oil or peanut oil, for frying (about 4-6 cups)
Instructions
- Place the chicken pieces in a large bowl. Pour the buttermilk over the chicken, ensuring all pieces are submerged. Add the hot sauce, 1 tablespoon salt, 1 teaspoon pepper, paprika, garlic powder, and onion powder to the buttermilk. Mix well. Cover the bowl and refrigerate for at least 4 hours, or preferably overnight, to tenderize the meat.
- In a separate shallow dish, whisk together the flour, cornstarch, baking powder, 1 teaspoon salt, and 1/2 teaspoon pepper. This mixture creates the best fried chicken coating.
- Remove the chicken from the marinade, letting excess buttermilk drip off, but do not rinse.
- Dredge each piece of chicken thoroughly in the flour mixture, pressing the coating firmly onto the meat to create a thick crust. For extra crunch, dip the floured chicken back into the remaining buttermilk for a second, quick dip, and then coat it again in the flour mixture, pressing firmly.
- Pour enough oil into a large, heavy-bottomed skillet or Dutch oven to reach a depth of about 1.5 to 2 inches. Heat the oil over medium-high heat until it reaches 325 degrees Fahrenheit. Use a thermometer to monitor the temperature; maintaining this heat is key for juicy meat and a crispy crust.
- Carefully place the chicken pieces into the hot oil, ensuring you do not overcrowd the pan. Fry in batches.
- Fry the chicken for about 6 to 8 minutes per side, turning carefully with tongs, until the internal temperature reaches 165 degrees Fahrenheit and the crust is deep golden brown and crunchy. Adjust the heat as necessary to keep the oil temperature steady.
- Remove the cooked chicken from the oil and place it on a wire rack set over a baking sheet to drain excess oil. Do not place it directly on paper towels, as this can steam the bottom crust.
- Serve your crispy fried chicken immediately as a classic comfort food dinner.
Notes
- The cornstarch in the dredge is essential for achieving that restaurant-style, extra crunchy chicken coating.
- For the juiciest results, use bone-in, skin-on pieces, as they retain moisture better during frying.
- If you are frying larger pieces like breasts, you may need to reduce the heat slightly after the initial sear to finish cooking the inside without burning the exterior.
Nutrition
- Serving Size: 1 piece
- Calories: 450
- Sugar: 1
- Sodium: 650
- Fat: 28
- Saturated Fat: 7
- Unsaturated Fat: 21
- Trans Fat: 0
- Carbohydrates: 15
- Fiber: 1
- Protein: 30
- Cholesterol: 110