
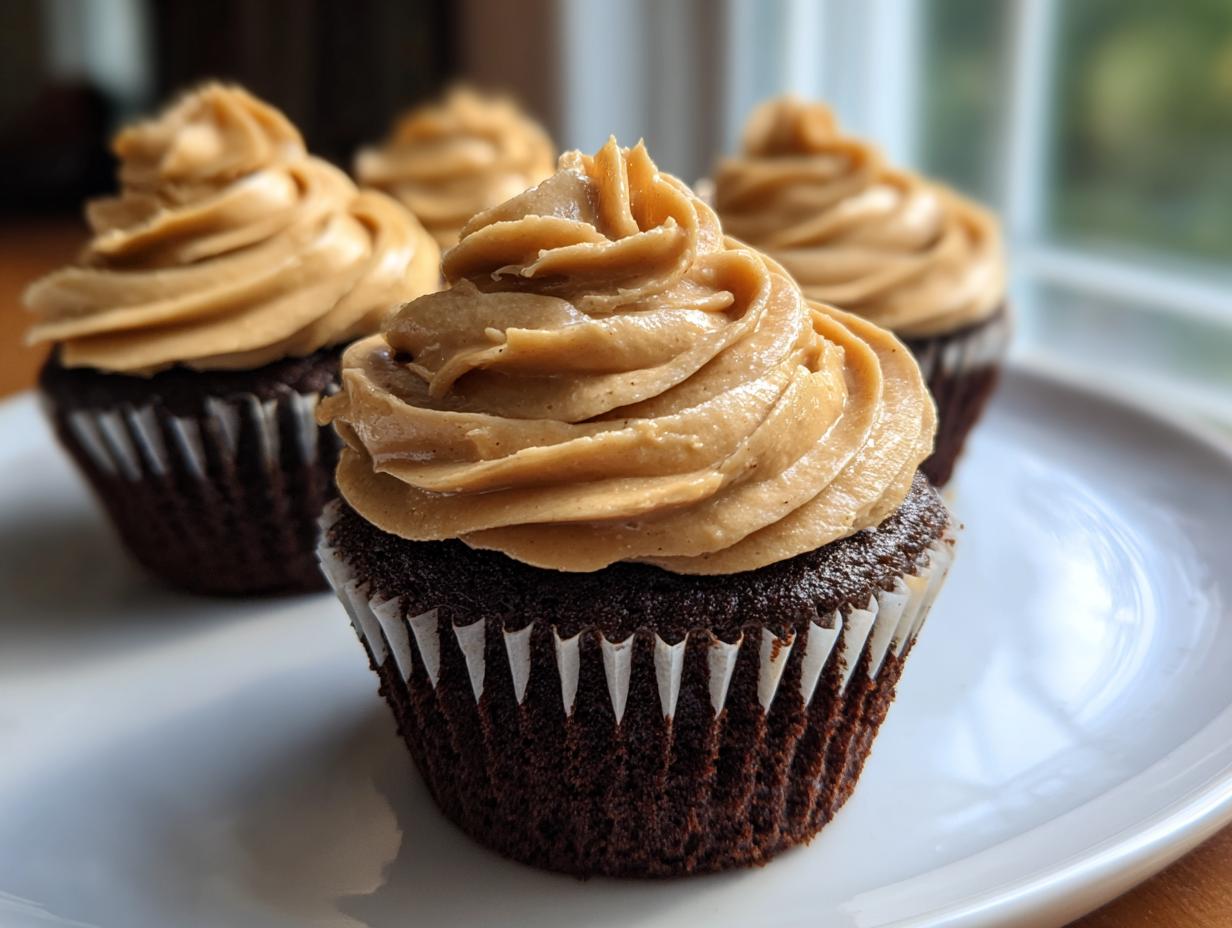
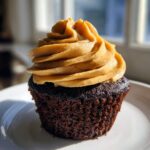
You know those flavor duos that just *belong* together? Chocolate and peanut butter are at the very top of that list, aren’t they? I’m here today because I cracked the code on mixing those two cravings into one perfect, bite-sized indulgence: these decadent chocolate peanut butter cupcakes. Forget those bland, dry chocolate cakes you’ve had before; my goal here is to give you a moist, bakery-style chocolate cupcake crowned with the creamiest peanut butter frosting you’ll ever meet. It’s all about achieving that perfect sweet and salty cupcake flavor profile without needing a whole afternoon in the kitchen! Here at Pure Plate Path, Sarah believes that making something truly rewarding shouldn’t be a source of stress. We focus on simple, powerful flavors that make home baking feel joyful again, and these cupcakes are proof of that philosophy. If you want to learn more about why we champion this practical approach to wellness in the kitchen, check out our story here on our About page.
- Why This Chocolate Peanut Butter Cupcakes Recipe Works (Expert Tips)
- Ingredients for Decadent Chocolate Peanut Butter Cupcakes
- How to Prepare Your Chocolate Peanut Butter Cupcakes
- Tips for Success with Your Chocolate Peanut Butter Cupcakes
- Variations for Gourmet Peanut Butter Cupcakes
- Storage and Reheating Instructions for Chocolate Peanut Butter Cupcakes
- Frequently Asked Questions About These Desserts
- Estimated Nutritional Information for Your Sweet Treat
- Share Your Homemade Chocolate Peanut Butter Cupcakes
Why This Chocolate Peanut Butter Cupcakes Recipe Works (Expert Tips)
Honestly, I think the reason so many people struggle with this combo is failing to treat the chocolate base and the peanut butter topping as two separate stars. When you get them right, though? Wow. These chocolate peanut butter cupcakes are genuinely next level. They deliver that coveted sweet and salty cupcake flavor perfectly balanced, meaning neither flavor overpowers the other. Trust me, this formula just works every single time.
- The Cake: It’s almost impossibly moist because we use hot liquid to “bloom” the cocoa powder, intensifying that deep chocolate taste.
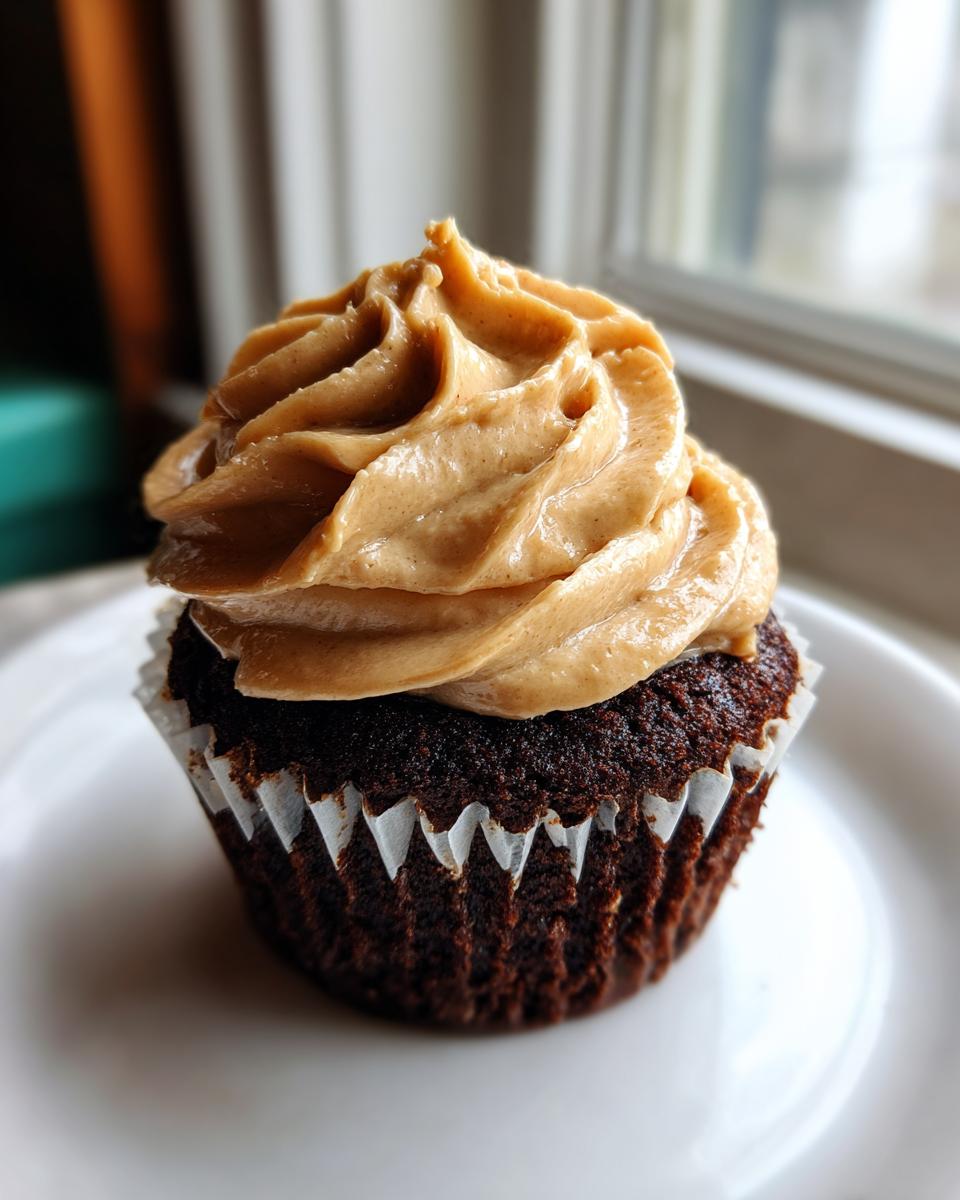
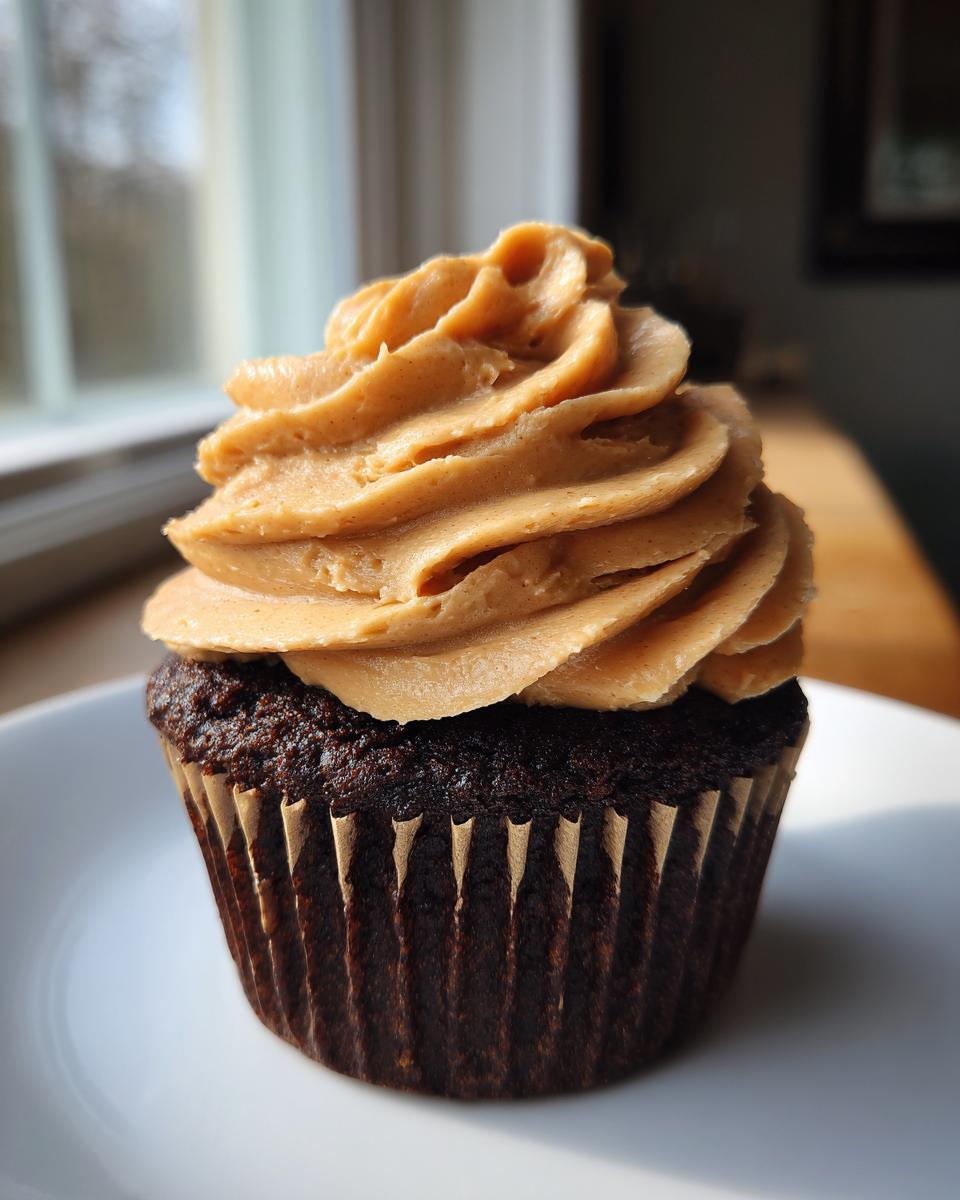
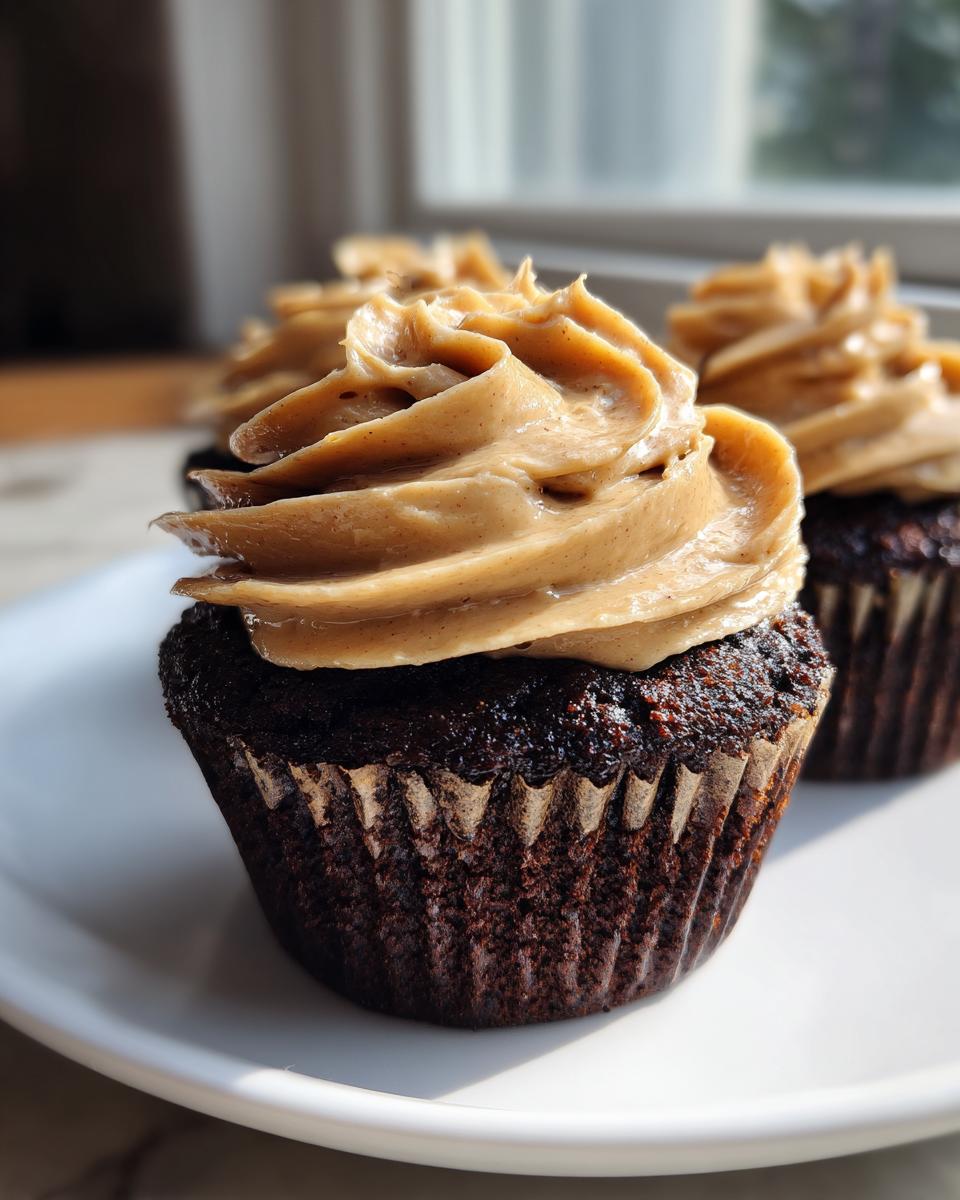
- The Frosting: We rely on a simple creaming method that keeps the peanut butter light, fluffy, and unbelievably spreadable. No gritty surprises here!
- The Flavor Profile: Using just a touch of salt in both the cake and frosting cuts through the richness, creating that addictive, sophisticated profile you usually only find at a bakery. If you need help with a basic frosting, check out my guide to easy chocolate frosting for reference!
Achieving the Moist Chocolate Cupcake Recipe Texture
This is the secret weapon for any incredible moist chocolate cupcake recipe. When you have boiling water—or better yet, hot coffee—and you stir it right into the cocoa, the cocoa releases its full, dark potential. It also changes the starch structure just enough so the crumb stays tender and never dry, even on day two. It feels wild pouring hot liquid into batter, but you absolutely have to embrace that thin consistency!
Crafting the Best Peanut Butter Frosting Recipe
When aiming for the best peanut butter frosting recipe, the butter temperature is everything. It *must* be perfectly softened—not melted, not cold from the fridge. This lets us incorporate air when we beat it with the peanut butter first, creating that beautiful, light texture. We slow-down the sugar addition dramatically to achieve that smooth, creamy peanut butter topping you want for piling high on your chocolate peanut butter cupcakes.
Ingredients for Decadent Chocolate Peanut Butter Cupcakes
Okay, gathering your supplies is half the battle, right? I’ve laid out exactly what you need below. Remember, using the exact measurements, especially for the cake, is key when you’re aiming for a truly moist chocolate cupcake recipe. Baking is a science before it’s an art, so measure twice!
The Chocolate Cake Base Ingredients
- 1 3/4 cups all-purpose flour
- 1 3/4 cups granulated sugar
- 3/4 cup unsweetened cocoa powder
- 1 1/2 teaspoons baking soda
- 1 1/2 teaspoons baking powder
- 1 teaspoon salt
- 2 large eggs
- 1 cup buttermilk
- 1/2 cup vegetable oil
- 2 teaspoons vanilla extract
- 1 cup hot water or hot brewed coffee
If you want a deeper dive into why the coffee works so well in chocolate bases, I cover that in my guide to ultimate moist chocolate cupcakes.
For the Creamy Peanut Butter Topping
- 1 cup creamy peanut butter
- 1/2 cup (1 stick) unsalted butter, softened
- 3 cups powdered sugar, sifted
- 1/2 teaspoon salt
- 1/4 cup milk or heavy cream
How to Prepare Your Chocolate Peanut Butter Cupcakes
Alright, let’s get down to business! This isn’t complicated at all, but we do need to follow the steps in order so we don’t mess with that beautiful texture we talked about. First things first: get your oven preheated to 350°F (175°C). While that’s warming up, line your 12-cup muffin tin with those cute paper liners. It makes cleanup a breeze!
Mixing the Thin Chocolate Cake Batter
Usually, you have a wet bowl and a dry bowl, but for this moist chocolate cupcake recipe, it’s super simple. Start by whisking all your dry cake ingredients—flour, sugar, cocoa, baking soda, baking powder, and salt—in one big bowl. Don’t skip whisking; it acts like a quick sift! Next, you add your eggs, buttermilk, oil, and vanilla. Mix that with your electric mixer on medium speed for about two minutes until it looks okay. Now here’s the magic twist: carefully stir in that cup of hot water or coffee. Yes, it seems wrong, but trust me, this step ensures you get the lightest crumb possible. It also blooms that cocoa beautifully, which is a trick I also use in my easy chocolate frosting recipe guide! The batter will look surprisingly thin—don’t panic! This is how we get that gorgeous, damp interior. Fill those cups about two-thirds full. Bake them for 18 to 20 minutes. Once done, let them chill out in the pan for five minutes before moving them to a wire rack to cool completely. This part is so important, especially for that perfect frosting application later!
Whipping Up the Creamy Peanut Butter Topping
While those chocolate beauties are cooling, it’s frosting time! We want that creamy peanut butter topping, so start by beating your softened butter and all that peanut butter together until they are totally smooth and light—this is where we introduce air for fluffiness. Then, on low speed, slowly add in your sifted powdered sugar and salt. You have to go slow, or you’ll wear powdered sugar! Once it’s mostly combined, crank the speed up and add your milk or cream just a tablespoon at a time until the frosting is perfectly spreadable. I usually beat it for a full minute on high speed after everything is incorporated just to get it super light. Once the cupcakes are totally cool, you can finally pipe or spread this glorious topping high!
Tips for Success with Your Chocolate Peanut Butter Cupcakes
If you want these to rival anything you’d buy at a high-end bakery, listen up! A few little tweaks can take your chocolate peanut butter cupcakes from good to absolutely unforgettable. First, please use that hot brewed coffee instead of hot water in the batter. It doesn’t make them taste like coffee; it just makes the chocolate flavor ridiculously deep and pronounced—it’s my little expert secret for amazing, bakery-style chocolate cupcakes.
Also, timing is everything. Make sure those cakes are completely cool before even thinking about frosting them, or you’ll end up with a melted chocolate PB soup on your counter! And finally, when mixing the frosting, resist the urge to rush the powdered sugar addition. Going slow ensures you don’t have gritty pockets in your otherwise perfect, creamy peanut butter topping. You can find more quick wins for easy chocolate baking on our dedicated recipe index.
Variations for Gourmet Peanut Butter Cupcakes
Now that you’ve mastered the classic pairing, it’s time to play dress-up! These are fantastic as is, but if you want to elevate them into truly gourmet peanut butter cupcakes, you have so many fun options. My favorite trick is incorporating that Reese’s magic.
For an extra salty kick, press one miniature peanut butter cup right into the center of the frosting on each cupcake right after you pipe it on. It looks gorgeous and adds that satisfying chocolate/peanut butter crunch. Another really neat trick for presentation is reserving about a quarter cup of that thin chocolate batter and swirling it lightly into the tin before baking. It gives you those cool, marbled cupcakes!
If you’re feeling extra adventurous and want to avoid the topping altogether, try swirling a spoonful of creamy peanut butter directly into the cooled cupcake tops right before serving. It looks so decadent! If you love peanut butter desserts but need a break from baking, check out my recipe for easy no-bake peanut butter bars—they are seriously addictive!
Storage and Reheating Instructions for Chocolate Peanut Butter Cupcakes
Because we worked so hard to get that unbelievably moist chocolate cupcake recipe base, storing them correctly is crucial! Honestly, the best way to keep these chocolate peanut butter cupcakes is at room temperature, loosely covered, for about two to three days. The humidity inside an airtight container is your enemy here, and covering them too tightly can sometimes make the paper liner stick badly.
If you absolutely need to store them longer, go ahead and refrigerate them, but you have to be careful. Cold air dries out cake fast, even moist ones like these. If you chill them, let them sit out on the counter for at least an hour before you plan on serving them. This lets the cake soften up again.
Now, the frosting might get a little firm if it chills. If that happens, don’t panic! Just pop the frosted cupcakes out on the counter, and give the frosting a quick fluff with a fork or a tiny dollop of extra milk if it looks too stiff. It should come right back to that creamy peanut butter topping consistency again as it warms up!

Frequently Asked Questions About These Desserts
I always get so many great questions once you all start whipping up these decadent chocolate treats! It’s totally normal to need a little substitution advice or clarification, especially when trying to nail that perfect texture for your chocolate peanut butter cupcakes. Here are a few things I hear most often:
Can I use regular milk instead of buttermilk?
That’s a common substitution! True buttermilk reacts with the baking soda in the recipe, which helps give the cake its lift and its perfectly tender crumb. If you don’t have any buttermilk on hand for this moist chocolate cupcake recipe, no sweat. You can make your own substitute! Just take one cup of regular milk and stir in one tablespoon of white vinegar or lemon juice. Let it sit on the counter for about five minutes until it looks slightly curdled. That’s your buttermilk substitute, and it works great for these homemade chocolate peanut butter desserts!
What if I don’t have coffee? Will hot water still work?
Yes, absolutely! The hot water works perfectly fine. The reason I push for hot coffee is that it deepens the richness of the cocoa powder, making the chocolate taste even more intense—it’s a fantastic trick for bakery style chocolate cupcakes. If you skip the coffee, just use hot water. Seriously, don’t let coffee stop you from making these! They will still be incredible, dark, and moist.
Can I make the cake batter ahead of time?
For the best results, I really advise against making the cake batter too far in advance. Because this recipe relies on a chemical reaction between the baking soda, the buttermilk, and the hot liquid right before baking, leaving the batter sitting around can cause the leavening power to weaken. You want that lift right when it hits the oven for the fluffiest result! The frosting, however, is great to make a day ahead. If you check out my tips on storage, you’ll see how to keep that creamy peanut butter topping in tip-top shape. For more ways to incorporate healthier choices into your sweets, take a peek at my guide to healthy desserts!
How can I make these into Reese’s inspired cupcakes without the extra effort?
If you’re looking for that full, satisfying blend of sweet and salty flavor without adding a whole peanut butter cup on top, try this: when you fill your cupcake liners two-thirds full, drop one small teaspoon of peanut butter right into the middle of the batter before baking. It will sink slightly and bake right into the center, giving you a surprise filling in every bite of your gourmet peanut butter cupcakes!
Estimated Nutritional Information for Your Sweet Treat
I always get comments asking about the breakdown, and while I’m not a certified nutritionist, I want to be as transparent as possible about what goes into these amazing chocolate peanut butter cupcakes. These numbers are based on a single standard cupcake following the recipe exactly as written, including the generous amount of that fluffy frosting.
Keep in mind that these are just estimates, especially since the exact nutritional makeup of your peanut butter or the exact size of your eggs can shift things slightly. But hey, this is about joy and connection, not counting every single gram, right? Even our most decadent chocolate treats can fit into a balanced life!
- Serving Size: 1 cupcake
- Calories: Approximately 450
- Total Fat: Around 25g (with about 8g being saturated fat)
- Carbohydrates: About 55g
- Sugar: Around 45g (that beautiful dark brown sugar and powdered sugar add up!)
- Protein: Roughly 7g
If you happen to be looking for ways to make your occasional sweet treat a bit lighter—not that I recommend messing with this recipe for perfection!—you might want to check out some of my general tips for healthier desserts over on the site. But for these homemade chocolate peanut butter desserts? Go ahead and enjoy every drop of that creamy peanut butter topping!
Share Your Homemade Chocolate Peanut Butter Cupcakes
Now that you’ve successfully navigated the mixing and baking to create these stunning chocolate peanut butter cupcakes, I truly want to see what you’ve made! Sharing in the kitchen is such a huge part of what we do here at Pure Plate Path. It’s that connection, seeing how your kitchen looks, and knowing we’re all finding joy in these simple, rewarding recipes together.
Please, once you’ve frosted them up perfectly—especially if you went wild with those peanut butter cup toppings—tag us on social media! Your feedback honestly helps me shape future recipes too, so don’t be shy about leaving a rating right below this section. Did your family love the salty-sweet punch? Did you try the coffee trick? Letting me know is how we build this wonderful community.
If you run into any snags along the way, or if you have a brilliant variation for a creamy peanut butter topping that I haven’t even thought of yet, feel free to reach out directly through my contact page. Happy baking, and enjoy every single bite of that amazing, decadent chocolate and peanut butter goodness!
PrintDecadent Chocolate Peanut Butter Cupcakes
Make moist, bakery-style chocolate cupcakes topped with a creamy, rich peanut butter frosting. This recipe balances sweet and salty flavors for a crowd-pleasing dessert.
- Prep Time: 20 min
- Cook Time: 20 min
- Total Time: 40 min
- Yield: 12 servings 1x
- Category: Dessert
- Method: Baking
- Cuisine: American
- Diet: Vegetarian
Ingredients
- 1 3/4 cups all-purpose flour
- 1 3/4 cups granulated sugar
- 3/4 cup unsweetened cocoa powder
- 1 1/2 teaspoons baking soda
- 1 1/2 teaspoons baking powder
- 1 teaspoon salt
- 2 large eggs
- 1 cup buttermilk
- 1/2 cup vegetable oil
- 2 teaspoons vanilla extract
- 1 cup hot water or hot brewed coffee
- 1 cup creamy peanut butter (for frosting)
- 1/2 cup (1 stick) unsalted butter, softened (for frosting)
- 3 cups powdered sugar, sifted (for frosting)
- 1/2 teaspoon salt (for frosting)
- 1/4 cup milk or heavy cream (for frosting)
Instructions
- Preheat your oven to 350°F (175°C). Line a 12-cup muffin tin with paper liners.
- In a large bowl, whisk together the flour, sugar, cocoa powder, baking soda, baking powder, and salt for the cake.
- Add the eggs, buttermilk, oil, and vanilla extract to the dry ingredients. Beat with an electric mixer on medium speed for two minutes.
- Carefully stir in the hot water or coffee until the batter is smooth. The batter will be thin.
- Divide the batter evenly among the 12 cupcake liners, filling each about two-thirds full.
- Bake for 18 to 20 minutes, or until a wooden pick inserted into the center comes out clean.
- Let the cupcakes cool in the pan for 5 minutes before transferring them to a wire rack to cool completely.
- To make the peanut butter frosting, beat the softened butter and peanut butter together in a large bowl until smooth.
- Gradually add the powdered sugar and salt, mixing on low speed until combined.
- Add the milk or cream one tablespoon at a time until the frosting reaches a creamy, spreadable consistency. Beat on medium-high speed for 1 minute until light and fluffy.
- Once the cupcakes are completely cool, pipe or spread the creamy peanut butter topping onto each cupcake.
Notes
- For a richer chocolate flavor, use hot brewed coffee instead of hot water in the batter.
- For a Reese’s inspired treat, press a miniature peanut butter cup into the top of each frosted cupcake.
- To achieve a moist chocolate cupcake, do not overmix the batter once the wet and dry ingredients are combined.
- If you want a peanut butter swirl effect, reserve 1/4 cup of the chocolate batter and swirl it into the filled cupcake liners before baking.
Nutrition
- Serving Size: 1 cupcake
- Calories: 450
- Sugar: 45
- Sodium: 350
- Fat: 25
- Saturated Fat: 8
- Unsaturated Fat: 17
- Trans Fat: 0
- Carbohydrates: 55
- Fiber: 2
- Protein: 7
- Cholesterol: 45