
There’s just nothing that says “special occasion” quite like cutting into a warm, decadent dessert and watching molten chocolate ooze out onto the plate. For years, I thought those incredible moments were reserved only for fancy restaurants, but I needed to bring that indulgence into my own hectic life. That’s why this recipe for the classic chocolate lava cake became one of my absolute go-to solutions! When I was navigating my marketing career and feeling drained, rediscovering how simple it was to create something so impressive—a true restaurant style dessert at home—was a turning point for me. This rich chocolate indulgence proves you don’t need a huge time commitment to feel like you’re treating yourself completely. If you love simple, powerful flavors, you’ll also want to check out my recipe for easy 3-ingredient chocolate mousse!
- Why This Chocolate Lava Cake Recipe Works Every Time
- Ingredients for the Classic Chocolate lava cake
- Essential Equipment for Making Individual Chocolate Cakes
- Step-by-Step Instructions for Your Molten Chocolate Cake
- Tips for Success with Your lava cake Recipe
- Serving Suggestions for This Decadent Chocolate Dessert
- Storage and Reheating Instructions for Leftover lava cake
- Frequently Asked Questions About Making a lava cake
- Nutritional Estimate for One Chocolate lava cake Serving
Why This Chocolate Lava Cake Recipe Works Every Time
I want you to feel totally confident pulling this out of the oven, knowing you’re going to get that spectacular result. This lava cake recipe isn’t just pretty; it’s incredibly reliable. I’ve tweaked it over the years to ensure you get truly impressive results with lightning-fast prep time. Seriously, you mix it, bake it, and done!
- It delivers that show-stopping, oozing gooey center every single time.
- Prep is ridiculously fast—we’re talking under 10 minutes to get them into the oven.
- They look like they came from one of those super fancy bakeries!
For more reliable chocolate magic, you should check out my recipe for ultimate moist chocolate cupcakes.
Achieving the Perfect Molten Center in Your lava cake
This is the most important part! The secret to that runny center isn’t magic; it’s pure science and timing. We intentionally underbake the cake slightly. The high oven temperature cooks the outside edges firm very quickly, but the middle batter stays liquid gold. You need to trust your eyes: if the edges look baked and slightly lifted, but the center still jiggles just a tiny bit when you nudge the ramekin, take it out! That jiggle is your delicious reward.
Ingredients for the Classic Chocolate lava cake
When you’re making something this decadent, you want the ingredients to be good, but honestly, the list here is so short and simple—you probably have everything right now! Remember, quality chocolate makes a huge difference here. Skip the chips if you can and use good quality baking chocolate. It just melts better and tastes richer, giving you that luxurious mouthfeel.
- 100g dark chocolate (the better the quality, the better the result!)
- 1/2 cup unsalted butter
- 1/2 cup powdered sugar
- 2 large eggs, plus 1 large egg yolk (that extra yolk is important for richness!)
- 3 tablespoons all-purpose flour
- 1/2 teaspoon vanilla extract
- Pinch of salt
If you are feeling extra inspired after this, you can always whip up a batch of easy chocolate frosting to top any leftovers!
Essential Equipment for Making Individual Chocolate Cakes
Since these are baked as perfect little single-serving desserts, you need the right dishware to make sure they come out beautifully. Don’t worry, this isn’t a list of fancy gadgets you’ll use once! These are the basics that help us keep things streamlined and ensure we get that impressive clean release from the pan.
You are definitely going to want four 6-ounce ramekins. These hold the batter perfectly for that iconic shape. If you don’t have them, you could use a standard muffin tin, but your bake time will change dramatically, so I highly recommend sticking to the ramekins if you can find them! I always feel so much more professional when I use them.

Here’s my quick list of what you need on hand:
- Four (4) 6-ounce ramekins
- Bowls for melting and mixing (one small for the chocolate, one medium for the batter)
- A good whisk, or even an electric mixer if you’re feeling lazy!
- A silicone spatula for gently folding the ingredients—we don’t want to deflate anything!
Having everything ready to go makes the 10-minute prep fly by. If you are prepping for a crowd, you can make a big batch of my easy 5-minute bread dip to serve alongside the dessert!
Step-by-Step Instructions for Your Molten Chocolate Cake
Okay, deep breath! This is where the magic happens, and I promise it’s so much easier than you think. We are racing against time slightly, so get organized first. First things first: crank that oven up to 220°C (425°F). You need that high heat to set the outside fast!
Now, the ramekins. Don’t skip this prep step! Grease them really well, and then dust them lightly with cocoa powder instead of flour. Flour leaves white streaks, and who wants that on their dark, rich cake? The cocoa powder gives you that beautiful, clean release when you flip them out.
Once they are prepped, you just follow the flow. Mix, fold, bake for a super short time, and then serve immediately. Honestly, if you need some tasty vegetables to balance out all this chocolate indulgence, you have to try my easy crunchy refrigerator pickled carrots!
Melting the Chocolate Base for the lava cake
This is the foundation of our rich chocolate indulgence. You have two options for melting the chocolate and butter together: either use a double boiler (a heatproof bowl set over barely simmering water—make sure the water doesn’t touch the bottom of the bowl!) or use the microwave in 20-second bursts, stirring well between each one. You want it silky smooth and totally combined.
Crucial step here! Once it’s melted, pull it off the heat and let it cool down for just a minute or two. If you dump screaming hot chocolate into your whisked eggs, you’re going to get scrambled eggs, not a beautiful batter. Just slightly cooled is perfect before you fold it into the egg mixture.
Baking Time: The Secret to the Recipe for Molten Center Cake
This is the make-or-break moment for your lava cake! You are looking for 10 to 12 minutes, tops. Don’t be tempted to leave it in longer because you worry the center looks too wobbly. The goal for a perfect recipe for molten center cake is that moment where the edges look firm and set, maybe even slightly pulling away from the sides of the ramekin, but when you gently shake it, the center still jigsaws. If you wait until the center looks firm, you’ve gone too far, and you’ll end up with a slightly under-done chocolate cake instead of a true molten delight.
Tips for Success with Your lava cake Recipe
We’ve nailed the ingredients and the bake time, but a couple of little habits can make the difference between a good lava cake and a show-stopping experience. First, never skip that one minute of rest after they come out of the oven. That tiny pause helps them solidify just enough so they don’t completely collapse when you flip them out onto the plate.
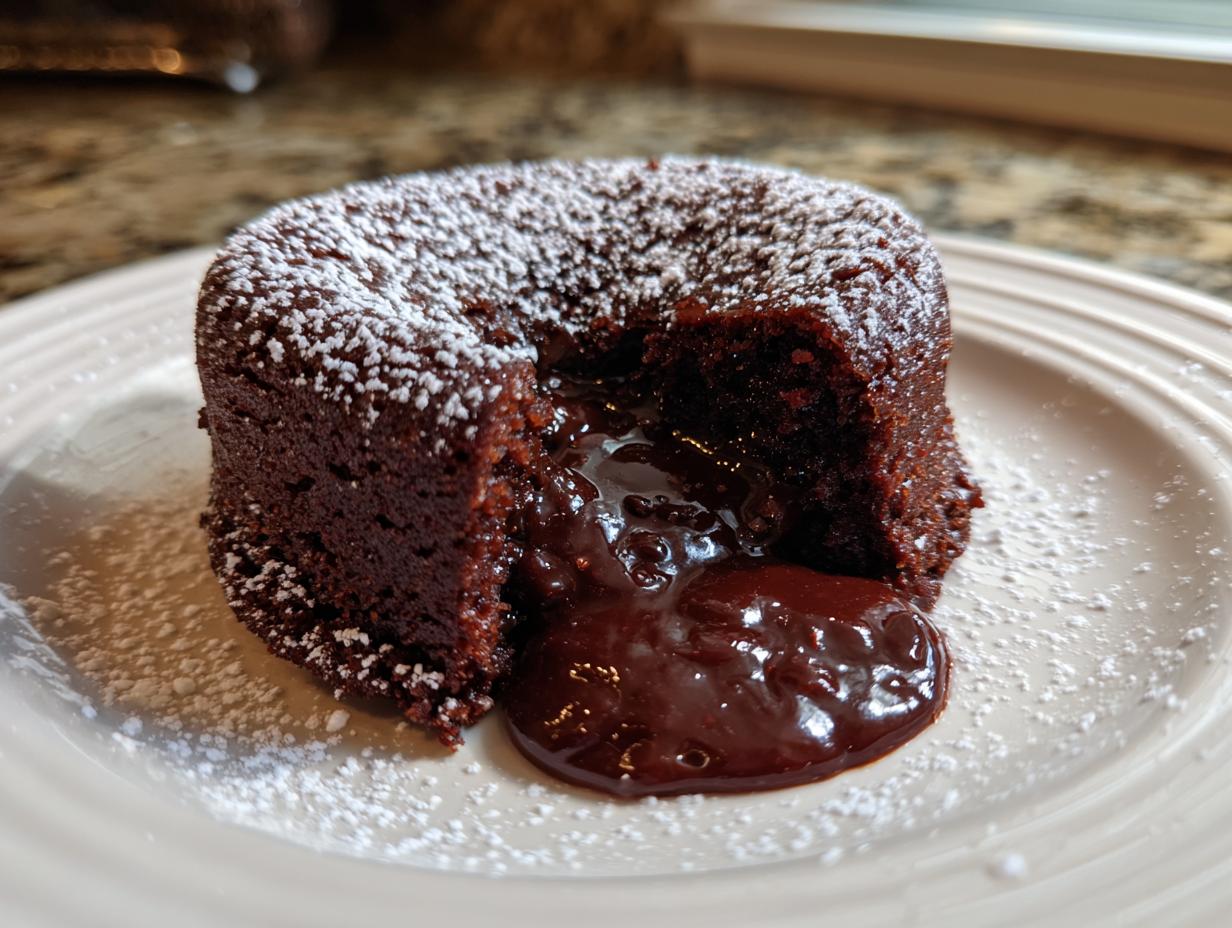
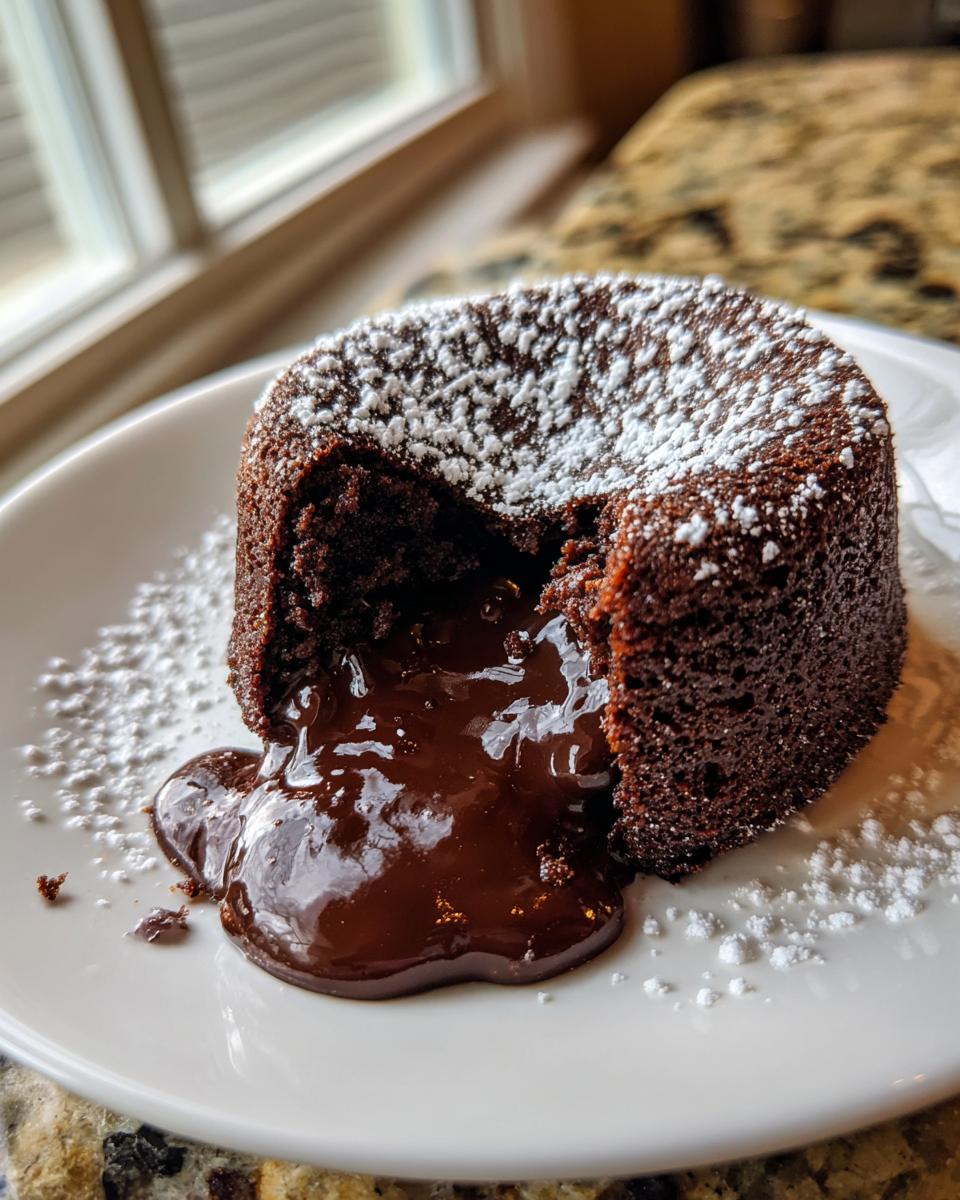
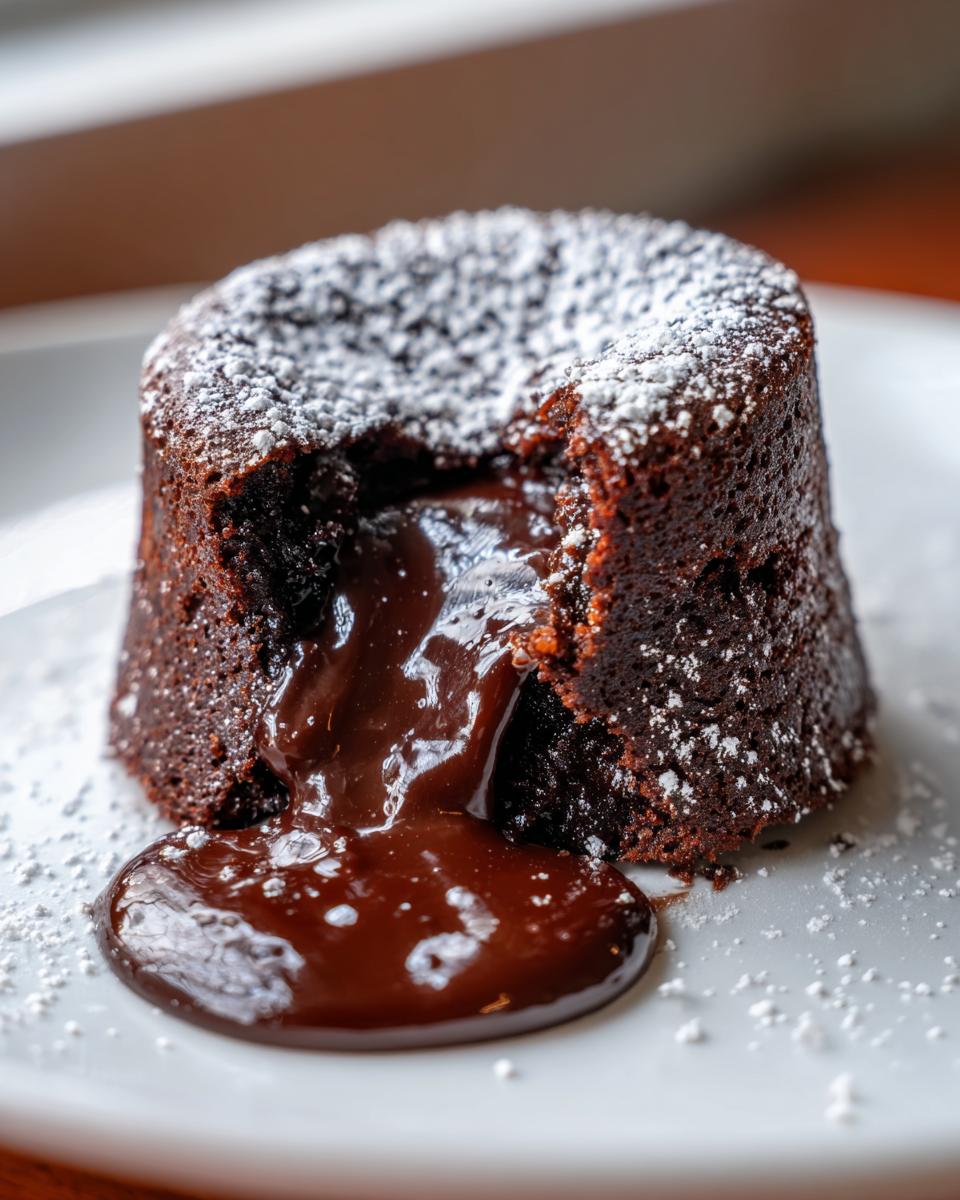
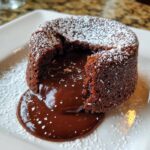
When you serve them, they must be warm! If they cool too much, that beautiful center will firm up, and poof—no ooze. Dusting them with powdered sugar right before they hit the table adds that elegant, restaurant-style finish we are aiming for. It contrasts the dark chocolate so nicely. For a savory counterpoint to all this richness, you absolutely have to try my easy creamy garlic aioli recipe sometime!
And just one last thought: use very good quality dark chocolate. Since there are so few ingredients in this recipe, every single flavor note shines through. Trust me on this one!
Serving Suggestions for This Decadent Chocolate Dessert
Okay, the cake is baked, perfectly gooey, and sitting warm on your plate. Now we have to make it look as amazing as it tastes! While a scoop of vanilla ice cream is always a classic partner—that hot/cold contrast is legendary—we can do a little better to elevate this into a true event.
I love using fresh fruit to cut through the intensity of that rich chocolate flavor. Bright red raspberries or sliced strawberries are my absolute favorites. Their tartness is the perfect counterpoint to all that fudge and sugar. Just a small handful artfully placed next to the cake looks stunning, especially if you sprinkle them with a tiny bit of sugar.
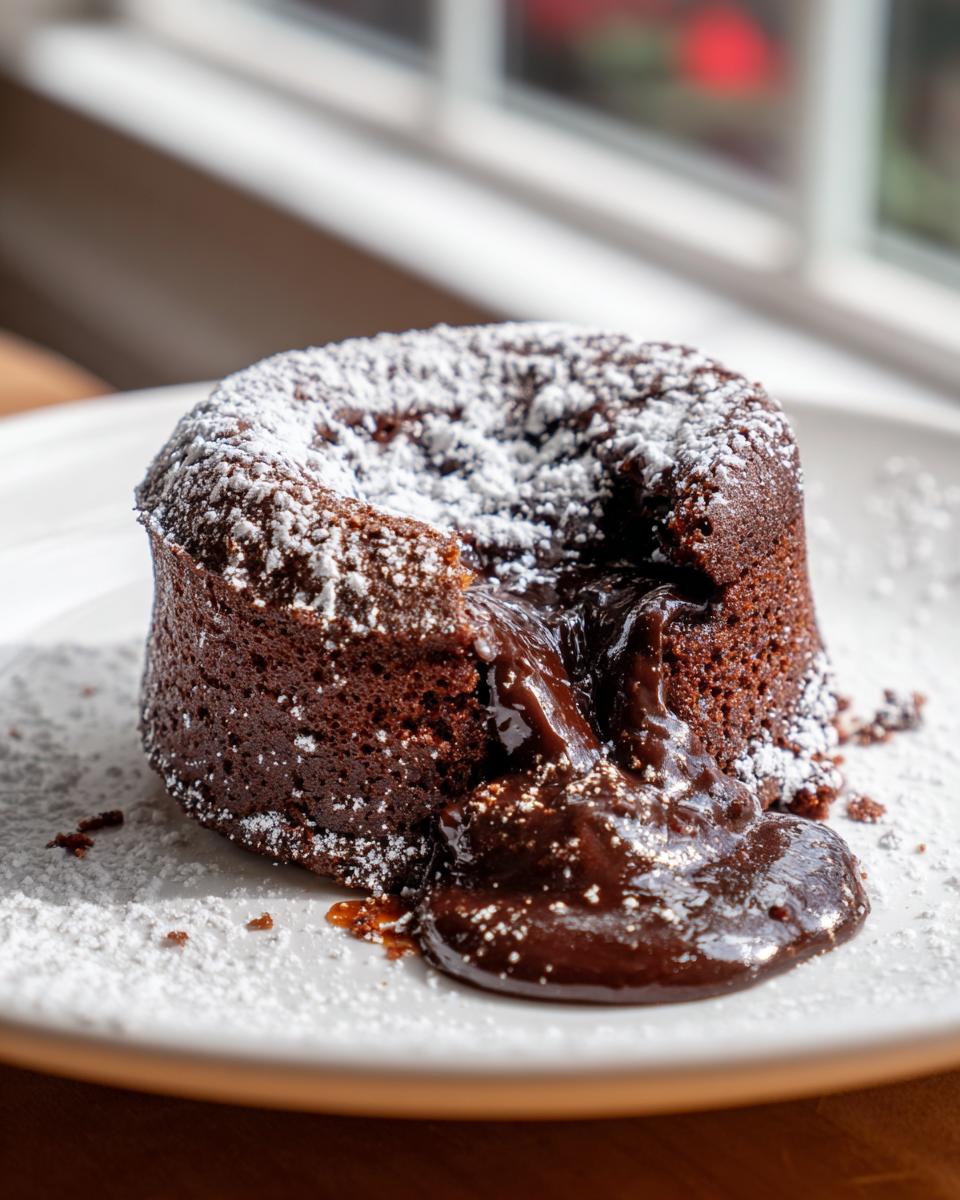
If you want some height and airiness, a light dollop of freshly whipped cream makes the whole plate feel luxurious. Don’t bother with the stuff from a can; whipping heavy cream takes two minutes! Add just a splash of vanilla extract while you beat it. That finished presentation, maybe with a light dusting of powdered sugar over the top, really seals the deal. It’s simple, but it feels incredibly thoughtful.
If you ever need another easy, impressive appetizer to serve alongside your dessert course, you should try my recipe for the easy creamy dill dip recipe. It’s a total crowd-pleaser!
Storage and Reheating Instructions for Leftover lava cake
First off, let’s be real: if you have leftovers of this lava cake, you’re beating the odds, because these disappear faster than anything else I bake! But hey, maybe you baked a double batch for a party, or maybe you just want a little indulgent treat for tomorrow. That’s totally fine!
If you managed to save any, you need to treat them gently. Store the individual cakes, uncovered or loosely covered, in the refrigerator. They will definitely firm up in the cold, and that gorgeous gooey center will solidify. Don’t panic, though! This is completely fixable. That’s the beauty of these single serving desserts.
To bring that satisfying molten flow back, we use a quick burst of heat. The best way, in my opinion, is giving it about 7 to 10 minutes in a low oven, maybe 350°F (175°C). This lets the outside cake warm up gently while the inside melts back into that perfect liquid center. If you are truly in a pinch, a quick zap in the microwave (15 to 20 seconds) will work, but I find the oven gives it a better texture overall.
If you’re planning ahead and want more fantastic no-bake chocolate ideas, make sure you check out my recipe for the easy no-bake Biscoff cheesecake recipe. Sometimes you just need a dessert that doesn’t require turning the oven on at all!
Frequently Asked Questions About Making a lava cake
I know sometimes when you’re aiming for perfection, a few little questions pop up right when you need them answered. Since we want you to nail that perfect ooze every time you attempt this Quick Chocolate Dessert, I pulled together the things I get asked most often about achieving that glorious Molten Chocolate Cake result at home.
Can I make this lava cake batter ahead of time?
Yes, you absolutely can! This is great news for dinner parties, right? I usually mix up the batter and keep it covered in the fridge for up to 24 hours. Just remember two things: First, when you take it out of the fridge, let it sit on the counter for about 20 minutes to warm up slightly before you put it in the oven. Second, because it’s starting colder, you might need to add 1 or 2 extra minutes to the baking time to ensure the edges set correctly. Don’t let it sit out too long, though—we don’t want those precious air bubbles deflating!
What type of chocolate is best for a rich chocolate indulgence?
Go for quality here, please! Since there are only a handful of ingredients, the chocolate is really the star, so you want something bittersweet or dark, generally between 60% and 70% cacao. I find that anything lower in cacao percentage tends to make the cakes too sweet and keeps them from setting up right on the edges. Definitely avoid standard chocolate chips if you can; they have stabilizers in them that stop them from melting as smoothly as baking bars do. A good quality bar beats everything!
If you’re looking for other delicious treats that don’t require turning on the oven, you have to scroll down and check out my recipe for easy no-bake peanut butter bars. They are fantastic!
Nutritional Estimate for One Chocolate lava cake Serving
Now, I know what you’re thinking: something this decadent and rich can’t possibly be good for me, right? Well, in the spirit of keeping things balanced here on Pure Plate Path, I always like to provide a rough estimate for one serving of this lava cake. Since this is such an indulgent treat, these numbers reflect the richness of the dark chocolate and butter, which is what makes it so special!
Keep in mind, these figures are just an estimate based on the ingredients listed. Whenever you make something homemade, your exact numbers might look a little different, especially if you use a different percentage of chocolate. But it gives you a good idea of what you’re getting into with this delicious, warm chocolate cake.
- Serving Size: 1 cake
- Calories: 400
- Sugar: 25g
- Fat: 28g
- Protein: 7g
We aren’t making this every day, but when we make it, we make it count! If you’re wanting more ideas that lean into the *healthy desserts* category, make sure you explore the dedicated section on the site here. Balance is key, but so is pure, glorious chocolate sometimes!
PrintDecadent Chocolate Lava Cake: Restaurant-Style Dessert at Home
Make this rich chocolate lava cake for an indulgent dessert with a warm, gooey molten center. This recipe delivers impressive, restaurant-quality results using simple ingredients.
- Prep Time: 10 min
- Cook Time: 12 min
- Total Time: 22 min
- Yield: 4 servings 1x
- Category: Dessert
- Method: Baking
- Cuisine: American
- Diet: Vegetarian
Ingredients
- 100g dark chocolate
- 1/2 cup unsalted butter
- 1/2 cup powdered sugar
- 2 large eggs
- 1 large egg yolk
- 3 tablespoons all-purpose flour
- 1/2 teaspoon vanilla extract
- Pinch of salt
Instructions
- Preheat your oven to 220°C (425°F). Grease four 6-ounce ramekins and dust them lightly with cocoa powder.
- Melt the dark chocolate and butter together in a heatproof bowl set over simmering water, or in short bursts in the microwave, stirring until completely smooth. Set aside to cool slightly.
- In a separate bowl, whisk the eggs, egg yolk, and powdered sugar until the mixture is light in color and slightly thickened.
- Gently fold the slightly cooled melted chocolate mixture into the egg mixture until just combined.
- Fold in the flour, vanilla extract, and salt until no streaks of flour remain. Do not overmix.
- Divide the batter evenly among the prepared ramekins.
- Bake for 10 to 12 minutes. The edges should look set, but the center must remain soft and jiggly for the molten effect.
- Let the cakes rest in the ramekins for exactly 1 minute.
- Carefully run a thin knife around the edge of each ramekin. Invert each cake onto a serving plate. Serve immediately while warm.
Notes
- For the best molten center, watch the baking time closely; underbaking slightly is better than overbaking.
- Serve this decadent chocolate dessert with fresh raspberries or a scoop of vanilla ice cream for contrast.
- Dust the inverted cakes with powdered sugar just before serving for an elegant presentation.
Nutrition
- Serving Size: 1 cake
- Calories: 400
- Sugar: 25g
- Sodium: 150mg
- Fat: 28g
- Saturated Fat: 17g
- Unsaturated Fat: 11g
- Trans Fat: 0.5g
- Carbohydrates: 30g
- Fiber: 2g
- Protein: 7g
- Cholesterol: 180mg