
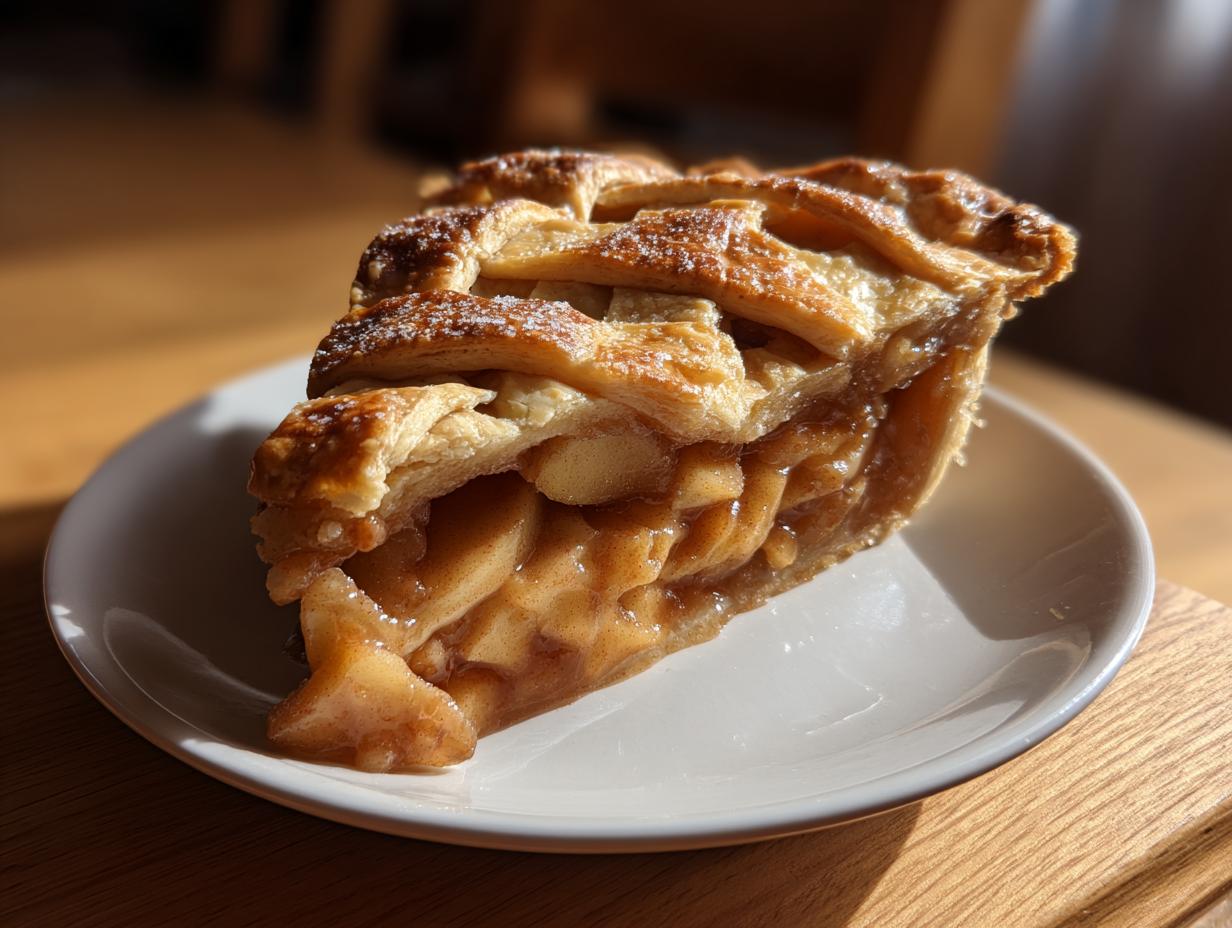
There is just nothing in the world that signals cozy, happy comfort quite like the smell of a perfect dessert baking. And when we talk about comfort, we have to talk about the reigning champion: the classic homemade apple pie. I’m Sarah Miller, and baking is the language of love I learned at my mother’s knee. Forget those complicated, stressful baking projects for a minute; this recipe is the ultimate celebration of that tradition, and trust me, we are going to create the most incredible, flaky double crust apple pie you’ve ever imagined. I made sure this recipe strips away all the fuss so you can achieve that stunning, rustic bakery look right in your own kitchen.
For me, the perfect apple pie is about honoring time-tested methods while keeping things simple enough for your busy weeknight. We are blending the tartness of Granny Smith apples with the sweetness of Honeycrisp to get the absolute best texture and flavor combination. You deserve a little slice of Americana, and I’m here to show you how to make it happen, even if you’ve never rolled out dough before!
- Why This Classic Apple Pie Recipe Stands Out
- Ingredients for the Best Apple Pie Recipe
- How to Make a Classic Apple Pie From Scratch
- Tips for Success with Your Apple Pie
- Storing and Reheating Your Apple Pie
- Variations on the Classic Apple Pie
- Frequently Asked Questions About Apple Pie
- Nutritional Estimates for This Apple Pie
- Share Your Classic Homemade Apple Pie Experience
Why This Classic Apple Pie Recipe Stands Out
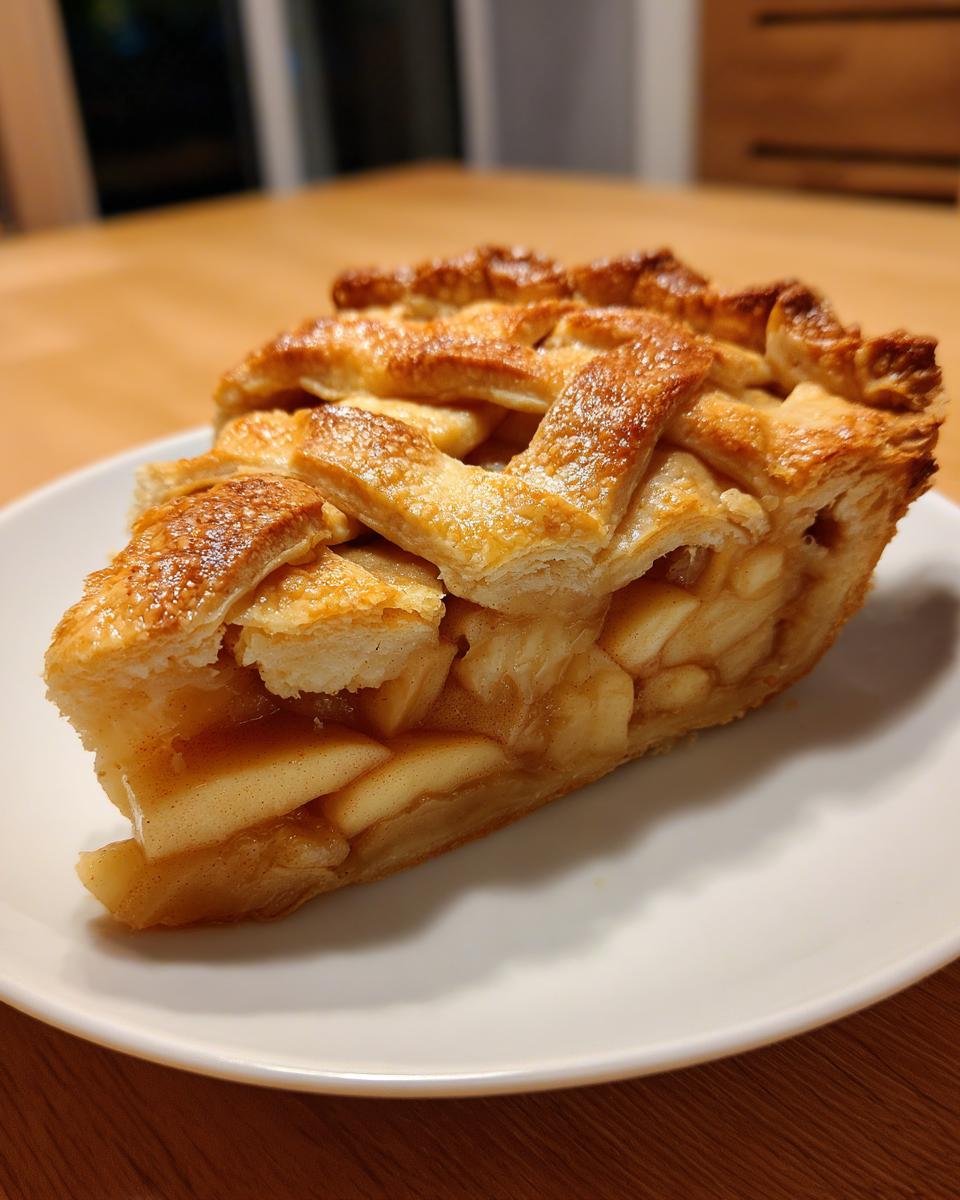
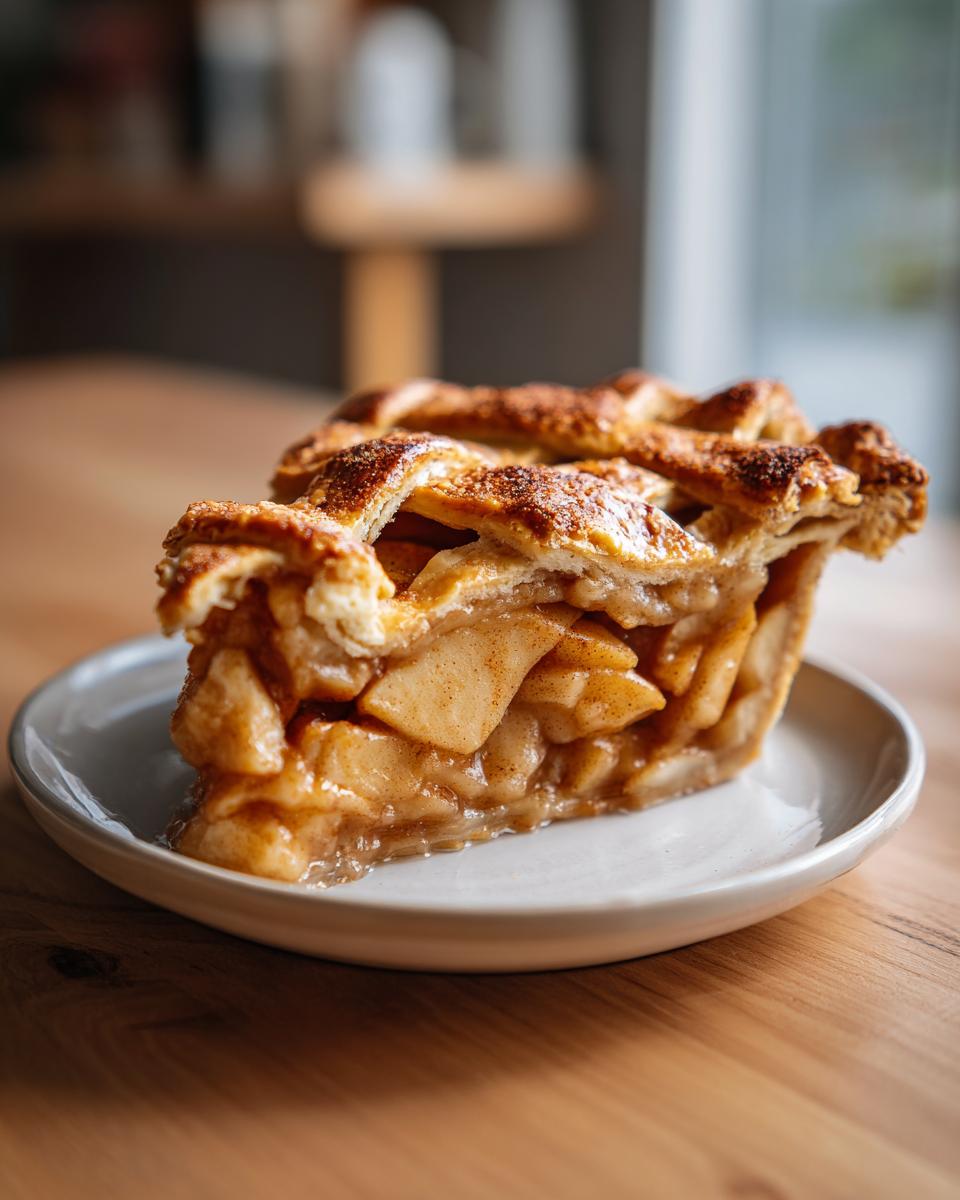
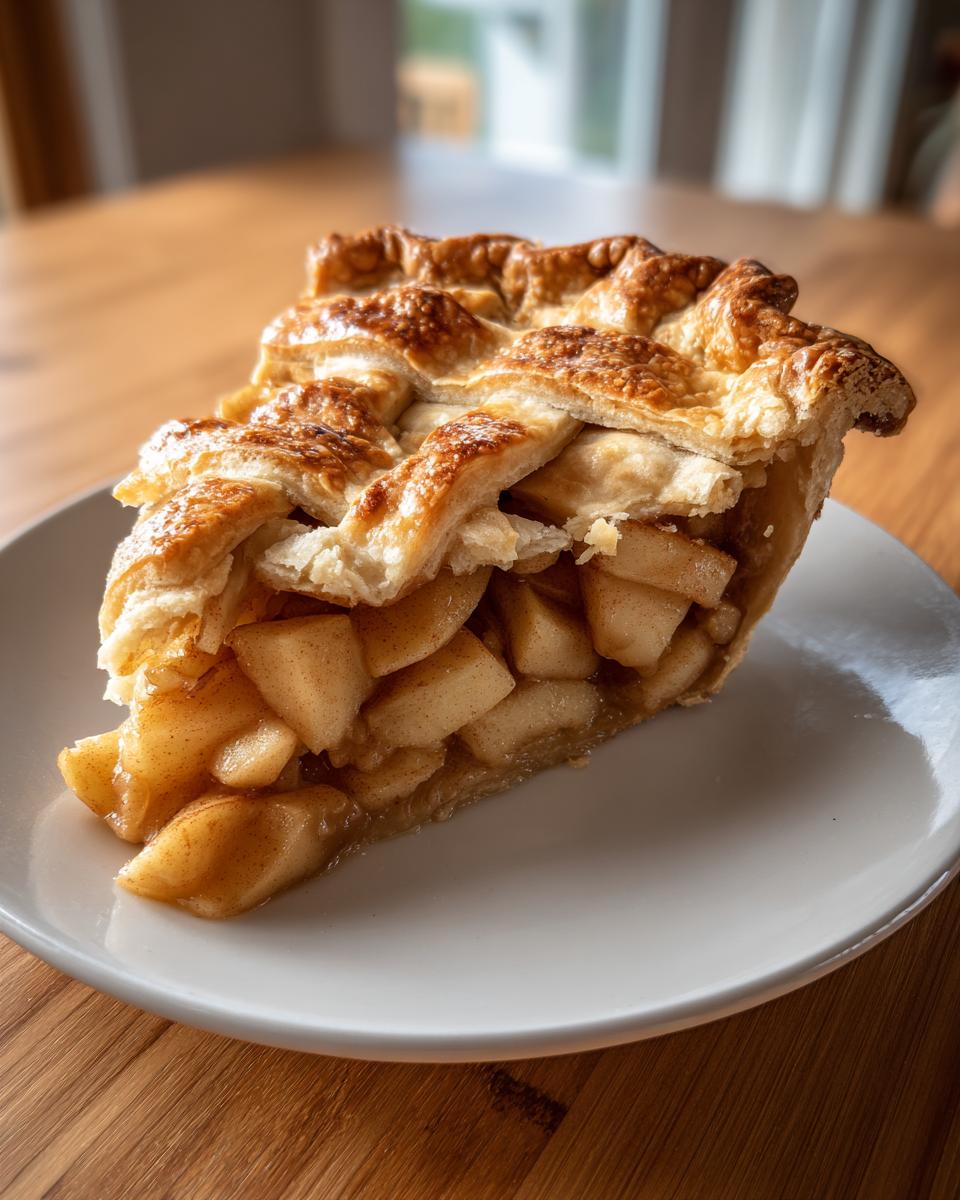
So many of the recipes out there give you an apple pie that’s either too sweet or turns into mush. Not this one! This is hands-down the absolute best apple pie recipe because of two main game-changers. First, we use a blend of tart Granny Smith apples and sweet, crisp Honeycrisp apples. It’s the only way to guarantee your filling holds its shape beautifully instead of collapsing into applesauce. That balanced texture is one of the major apple pie filling secrets I discovered after years of testing.
And wait until you hear about the second secret—it’s something I learned from my grandmother’s old spice rack: a tiny pinch of black pepper! Don’t panic! It doesn’t make it spicy; it just deepens the cinnamon and nutmeg notes, making the whole thing taste richer, more complex, and totally unforgettable. That little touch elevates this from good to truly exceptional for any fall dessert recipe.
Achieving the Flaky Pie Crust Tutorial Every Time
Honestly, the filling is only half the battle. The real star of this show, and what makes it a true classic apple pie, is that crust. If you want that shatteringly crisp, flaky pie crust, you HAVE to pay attention to temperature. We’re not gentle, we’re *cold*. Keeping that butter super chilled is the absolute foundation for success here. I walk you through the entire dough process in detail later on, but just know that respecting the cold temperature in this step is how you nail that perfect flaky pie crust tutorial.
Ingredients for the Best Apple Pie Recipe
Alright, let’s get down to the real business—the stuff that turns into amazing, warm apple pie. When you’re aiming for the best flavor, you can’t skimp here. I’ve written out everything below clearly, because messy measurements lead to messy fillings, and we want perfect results! Remember, this recipe is for a full double-crust pie, so we need ingredients for both the crust and that glorious filling.
Don’t forget that small, dark secret in the filling list—that dash of black pepper! It really makes the spices sing in this classic apple pie!
For the Flaky Double Crust
This is where you need to be prepared. Pull your butter out an hour before you start mixing, but only so you can cube it easily—it needs to go into the mixer *cold*. Seriously, very cold butter and ice water are non-negotiable for that flaky texture we love.
- 2 1/2 cups all-purpose flour
- 1 teaspoon salt
- 1 cup (2 sticks) cold unsalted butter, cut into cubes
- 1/2 cup ice water, plus more if needed
For the Cinnamon Apple Dessert Filling
We’re combining two types of apples here, which is key for texture and taste. Make sure those apples are sliced evenly, about 1/4-inch thick, so they cook nicely together inside your perfect cinnamon apple dessert.
- 6 large Granny Smith apples, peeled, cored, and sliced 1/4-inch thick
- 4 large Honeycrisp apples, peeled, cored, and sliced 1/4-inch thick
- 3/4 cup granulated sugar
- 1/4 cup packed light brown sugar
- 1 teaspoon ground cinnamon
- 1/4 teaspoon ground nutmeg
- 1/8 teaspoon ground black pepper (Don’t skip this little flavor booster!)
- 2 tablespoons all-purpose flour (This is your thickener!)
- 1 tablespoon lemon juice
- 1 large egg, beaten with 1 teaspoon water (for egg wash)
- 1 tablespoon coarse sugar (for sprinkling on top)
How to Make a Classic Apple Pie From Scratch
Okay, deep breaths! This is the part where we turn your chilled ingredients into the most comforting, gorgeous apple pie you’ve ever made. Making a classic apple pie from scratch takes a little time, but I promise you, waiting for that golden crust to emerge from the oven is worth every single minute. We’re going step-by-step, focusing on technique over speed, which is the only way to guarantee that signature flaky crust.
Preparing the Homemade Apple Pie Dough (Chilling is Key)
Start with your crust dough, because this needs time to chill and relax. Gather your flour and salt into a big bowl. Now, take your *super cold* cubed butter and cut it in. You don’t want mush! I always stop when the mixture looks like coarse cornmeal, but you still see some buttery, pea-sized chunks scattered throughout. Those butter chunks are your steam pockets—they explode in the heat and make the crust flaky!
Next, dribble in that ice water, just a tablespoon at a time. Stir it with a fork until the dough barely holds together when you squeeze a bit. If you have to add a tiny splash more water, go for it, but please, stop mixing the second it comes together. Don’t knead it! Divide that dough into two disks, wrap them tightly in plastic, and tell them to chill in the fridge for at least one full hour. This chilling step is non-negotiable if you want the flakiest crust possible!
Mixing the Perfect Apple Pie Filling Secrets
While that dough is getting frosty, we handle the delicious inside! Get your Granny Smith and Honeycrisp apples sliced about 1/4-inch thick. Evenness matters here, so try to stay consistent. In a *huge* bowl—you need room to toss without bruising them—toss the apples gently with your pre-mixed sugar/spice blend (remember that secret black pepper!).
Once the sugars look evenly distributed, drizzle in the lemon juice and toss again. That lemon brightens up the whole apple flavor profile! I always tell people finishing this step: be gentle! Bruised apples get mushy, and we are aiming for tender but firm pieces in our homemade apple pie.
Assembling and Baking Your Apple Pie
Time to roll out! Preheat your oven to 425°F (220°C). On a lightly floured surface, roll one chilled disk into a 12-inch circle. Ease it into your 9-inch pie plate. Let it hang over the edge a bit; we’ll trim later. Now, pile in that spectacular apple filling! Pile it high in the middle, because apples cook down a ton.
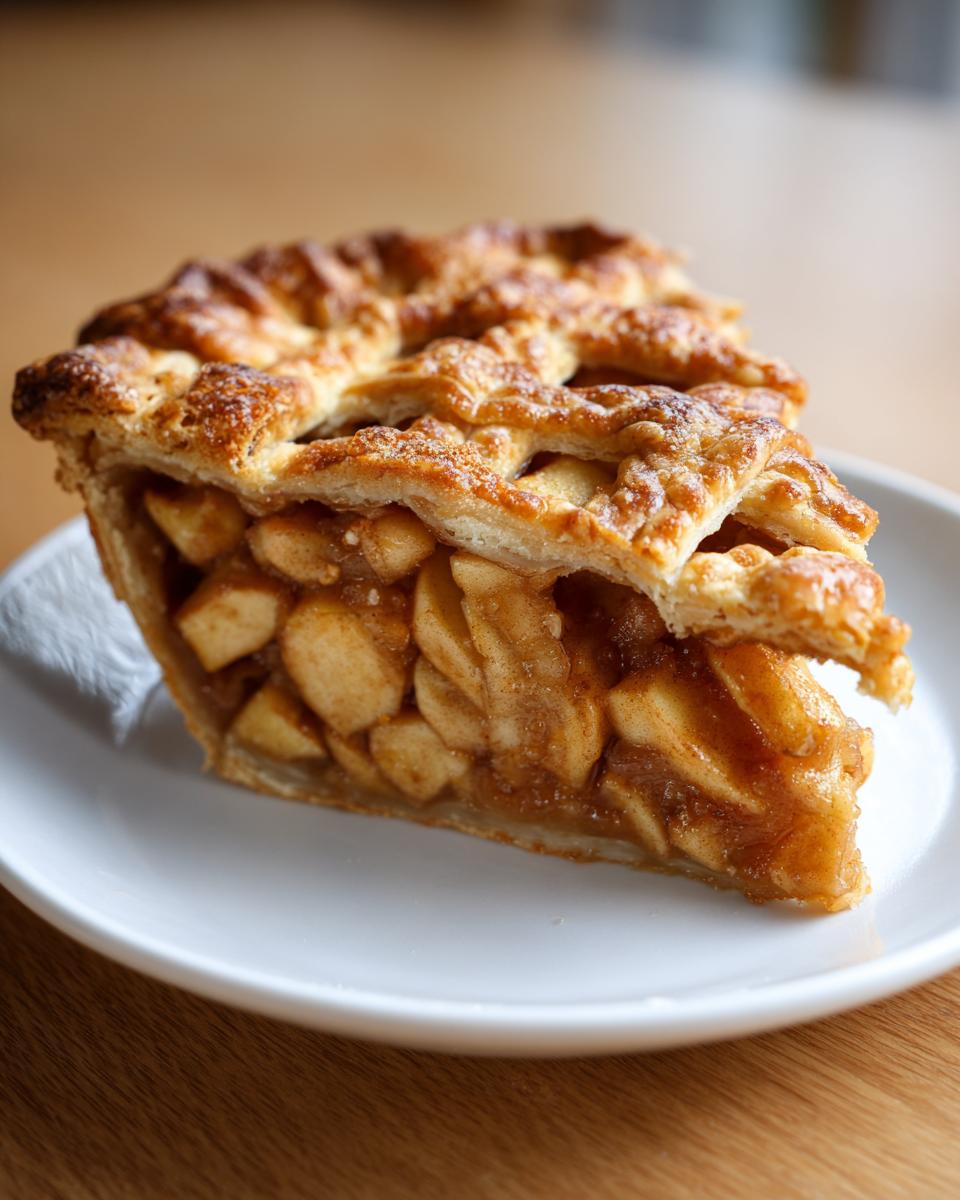
Roll out your second disk. You can slap the whole thing over the top and cut vents, or you can make a pretty lattice. Either way, seal those edges together beautifully, crimping them however you like. Brush the entire top surface with that egg wash—it gives you that gorgeous golden shine—and sprinkle it generously with coarse sugar for crunch.
Here’s the technique: Bake hot first! Get it in at 425°F (220°C) for 15 minutes. That initial burst of heat sets the bottom crust and starts the flaking process. Then, immediately turn the temperature down to 375°F (190°C) and bake for another 45 to 55 minutes. If you see those crust edges getting dark too fast—and they often do on a classic apple pie—just grab a small piece of foil and loosely tent the edges for the remainder of the baking time. We want golden brown, not burnt!
Finally, the hardest part of all: cooling. You must let this gorgeous apple pie rest on a wire rack for at least three hours. If you cut it right out of the oven, the filling will run everywhere! Patience, friend! This rest time lets that flour thickener set everything up perfectly.
Tips for Success with Your Apple Pie
Baking a truly outstanding apple pie isn’t about luck; it’s about having a few non-negotiable rules in your back pocket. I’ve made enough pies to know exactly where things can go wrong, which is why I want to share my go-to baking tips for pie so you can skip the mistakes and sail right to dessert glory. Follow these tricks, and you’ll nail that flaky crust and perfectly set filling every single time.
- Keep It Cold, Especially the Butter: Seriously, I can’t say this enough for the crust. If you feel the dough starting to get soft or sticky while you’re rolling it out, stop immediately! Toss the dough back into the fridge for 15 minutes. Warm butter melts into the flour, causing a tough, cracker-like crust instead of that beautiful flaky texture we worked so hard for.
- Apple Uniformity is Your Friend: Remember I stressed slicing the apples to about 1/4-inch thick? This is for texture consistency, but also for even cooking. If you have some slices that are super thin and some that are half an inch thick, the thin ones turn to mush before the thick ones are even tender! Strive for consistency for the best homemade apple pie texture.
- Baking Surface Matters: If you’ve ever ended up with a soggy bottom—we all have—it’s time to get strategic. Placing your pie dish directly onto a preheated metal baking sheet (when you put it in the oven) helps conduct intense, immediate heat to the underside of the crust. It essentially flash-bakes the bottom, ensuring it sets up firm and crisp while the filling cooks.
- Use A Good Pie Dish: While I love glass pie dishes for showing off the crust, I find that heavier ceramic or metal pans tend to distribute heat more evenly and help cook the bottom crust through better. If you use glass, leave it on the baking sheet for the entire bake time to maximize that bottom heat we talked about.
- Don’t Rush the Cooling: I know the temptation is strong when that amazing cinnamon apple dessert aroma is wafting through your house. But if you cut that pie hot, all that wonderful thickening power (the flour we added) won’t have time to set up. Let the pie cool and rest completely. Trust me, it tastes even better once the juices have settled!
Storing and Reheating Your Apple Pie
I wish I could tell you this beautiful classic apple pie would last forever on the counter, but we need to store it properly to keep that filling happy and prevent the crust from getting soggy. Good news: leftover apple pie is one of the best things ever.
For short-term storage—say, serving leftovers over the next two days—you can leave your cooled, fully set apple pie wrapped loosely on the counter at room temperature. Just make sure it’s covered so little hands (or pets!) don’t sneak bites.
If you need it to last longer, especially if you’ve added cream or if your kitchen is really warm, pop it into the fridge. Wrap it tightly in plastic wrap or place it in an airtight container. It should be perfectly fine in there for up to four days. It gets a little firm straight out of the fridge, but don’t you dare eat it cold!
This is where the magic happens for those leftover slices because we bring back that fresh-baked crunch. You absolutely need to reheat it to revitalize that flaky crust! Don’t even bother with the microwave; it turns the crust rubbery. Instead, pop a slice onto a small baking sheet and heat it in a 350°F (175°C) oven or toaster oven for about 8 to 10 minutes.
This little blast of dry heat warms the apples just enough and gives you back that crisp, golden texture on the edges. That smell when you warm up leftover apple pie? Pure heaven. Seriously, it tastes almost better the next day!
Variations on the Classic Apple Pie
I absolutely adore this traditional double-crust apple pie, but one of the best parts of baking is making a recipe truly *yours*, right? Once you master the crust (and I know you will!), you can start playing around with toppings and fillings. You don’t need a whole new recipe; just a few tweaks turn this into something completely new. It’s all about keeping that amazing base filling we perfected.
If you’re looking for a different texture up top, sometimes I skip the top lattice crust entirely and go straight for the crumble. Everyone loves a good apple pie with crumb topping, and it’s so much faster if you’re in a rush!
For a proper Dutch apple pie recipe feel, what you need is a streusel topping made from combining flour, brown sugar, cold butter, and maybe a little rolled oat for texture. You just scatter that generously over the filling—no need for an egg wash or cutting vents. It gets beautifully crisp and buttery crunchy while baking. It’s a whole different experience, honestly!
You can also play with the spice profile inside. If you want something that feels extra cozy, lean heavily into the nutmeg, or maybe even add just a teaspoon of ground cardamom. Cardamom works wonders with baked apples! For a more autumnal taste, try swapping out some of the sugar for maple syrup or adding a tablespoon of bourbon to the apples when you toss them with the spices. That subtle warmth really shines through in the final bite of your apple dessert idea.
And just a quick note on the apples? While Granny Smith and Honeycrisp are my favorites for baking stability, if you find a haul of McIntosh that look fantastic, go for it, but maybe add an extra half teaspoon of flour to the filling, since McIntosh break down faster. These little adjustments are what move you from following a recipe to becoming a true baker!
Frequently Asked Questions About Apple Pie
When you’re tackling a project this classic, it’s natural to have a few lingering questions before you even preheat the oven. I know I did when I first started trying to perfect my apple pie! Here are some of the things folks ask me most often about getting this recipe right, especially if you are trying to make an easy apple pie recipe feel completely from scratch.
What is the best apple for making apple pie?
This is truly my favorite question! For the absolute best results—where the apples are tender but still hold their shape, and the flavor isn’t just one-note sweet—you need a blend. That’s why I use both Granny Smith apple pie apples and Honeycrisp in this recipe. Granny Smiths provide that essential tartness that cuts through the richness of the crust and sugar, preventing the pie from tasting flat. The Honeycrisp apples are sweeter and slightly firmer, so they hold up during that long bake time without turning to complete liquid. Mixing tart and sweet, firm and tender, is the secret architecture of a perfect filling!
Can I make this easy apple pie recipe ahead of time?
Yes, you totally can, and I often do it when I’m planning for big events! If you are making this ahead, I recommend keeping the components separate until the last minute, or at least keeping the assembly simple. The dough is perfect to make up to two days ahead, just keep those disks wrapped well in the fridge. You can even mix the filling ingredients together (apples and spices) a day early, cover it tightly, and store it in the fridge. However, don’t stir in the lemon juice or flour until just before you assemble.
For the best, crispiest crust, I really suggest you assemble the whole, raw pie right before baking, or bake it fresh that day. If you assemble it the night before and refrigerate it, that moisture from the filling slowly starts working on your perfect crust—and that’s how bottoms get soggy! If you must prep ahead, assemble it, but leave the egg wash off, and bake it right before serving the next day, maybe adding 5-10 minutes to the lower temperature bake time since the filling will be cold.
Is there a way to use store-bought crust and still make a good apple pie?
Look, we all have those days where baking from scratch feels like too much, and that’s totally okay! I use store-bought crust sometimes too! The crust is only half the battle compared to making sure your filling bakes up right. If you choose to use store-bought, please still use our amazing, spice-heavy filling recipe. That filling is truly what makes this dessert sing, whether it’s sitting beneath a lattice you made or one that came in a foil tin. Just thaw the crust according to the package directions, and you’re golden. It won’t be quite as flaky as our from-scratch version, but it’s still a delicious easy apple pie recipe!
Nutritional Estimates for This Apple Pie
Listen, when you are pulling a glorious, buttery, cinnamon-spiced apple pie out of the oven, you’re not really thinking about the macros! And you shouldn’t be! This is comfort food, meant to be savored, especially around the holidays or as a big, cozy finish to a fall dinner.
However, because I want you to feel completely confident about everything you bring to your table here at Pure Plate Path, I’ve added the estimated nutritional breakdown below. Please remember these numbers are just guidelines! They estimate one slice based on using the exact ingredients listed for this classic apple pie recipe, standard ingredient sizes, and dividing it perfectly into 8 servings. Your actual numbers will vary based on the exact brand of butter, the amount of sugar absorbed by the apples, and how thick your slice is!
It’s a traditional fruit pie, so while it’s packed with real fruit, it does have butter and sugar, which adds up! Enjoy it guilt-free with a scoop of vanilla ice cream!
- Serving Size: 1 slice
- Calories: 450
- Fat: 25g (Note: A good chunk of this is the butter needed for that amazing flaky crust!)
- Saturated Fat: 15g
- Trans Fat: 0g
- Carbohydrates: 58g
- Fiber: 3g
- Sugar: 35g (Mostly from the fruit and added sugars, naturally!)
- Protein: 5g
- Sodium: 300mg
- Cholesterol: 60mg
See? Real food made with real ingredients—that’s the Pure Plate Path promise. Now ditch the calculator and grab a fork!
Share Your Classic Homemade Apple Pie Experience
Well, friend, we did it! You’ve navigated the cold butter, you’ve mixed those gorgeous spices (and hopefully added that dash of black pepper!), and you have a glorious, bubbly apple pie cooling on the rack right now. That feeling when you cut that first perfect, non-runny slice? There’s nothing else like it. This recipe is meant to become part of *your* family’s tradition.
I truly, deeply want to know how it turned out for you! Did the lattice look perfect? Did your partner ask if you bought it from a fancy bakery? Don’t hold back your results! Head down to the comments section below and tell me all about it. Leaving a star rating is super helpful for other home cooks just starting out on their baking journey, too, especially when they are looking for reliable fall dessert recipes.
If you snap a photo of your golden-crusted beauty, tag me on social media! I absolutely love seeing your creations come to life. Sharing these simple, rewarding recipes is exactly why I started this whole path. Use this recipe the next time you need a show-stopping holiday baking idea, and know that you’ve just mastered one of the greatest comfort foods out there. Happy baking!
PrintClassic Homemade Apple Pie with Flaky Double Crust

Follow this straightforward recipe to make a classic homemade apple pie featuring a tender, flaky double crust and a cinnamon-spiced filling. This recipe is designed to give you perfect results for a comforting fall dessert or holiday treat.
- Prep Time: 45 min
- Cook Time: 70 min
- Total Time: 115 min
- Yield: 8 servings 1x
- Category: Dessert
- Method: Baking
- Cuisine: American
- Diet: Vegetarian
Ingredients
- 2 1/2 cups all-purpose flour
- 1 teaspoon salt
- 1 cup (2 sticks) cold unsalted butter, cut into cubes
- 1/2 cup ice water, plus more if needed
- 6 large Granny Smith apples, peeled, cored, and sliced 1/4-inch thick
- 4 large Honeycrisp apples, peeled, cored, and sliced 1/4-inch thick
- 3/4 cup granulated sugar
- 1/4 cup packed light brown sugar
- 1 teaspoon ground cinnamon
- 1/4 teaspoon ground nutmeg
- 1/8 teaspoon ground black pepper (secret ingredient for flavor)
- 2 tablespoons all-purpose flour (for thickening)
- 1 tablespoon lemon juice
- 1 large egg, beaten with 1 teaspoon water (for egg wash)
- 1 tablespoon coarse sugar (for sprinkling)
Instructions
- Prepare the Pie Crust: In a large bowl, whisk together the flour and salt for the crust. Cut in the cold butter using a pastry blender or your fingers until the mixture resembles coarse crumbs with some pea-sized pieces of butter remaining. Gradually add the ice water, one tablespoon at a time, mixing until the dough just comes together. Do not overmix. Divide the dough in half, flatten each half into a disk, wrap in plastic, and chill for at least 1 hour.
- Prepare the Apple Filling: In a very large bowl, gently combine the sliced Granny Smith and Honeycrisp apples. In a separate small bowl, whisk together the granulated sugar, brown sugar, cinnamon, nutmeg, black pepper, and 2 tablespoons of flour. Pour the sugar mixture over the apples and toss gently to coat. Stir in the lemon juice.
- Assemble the Pie: Preheat your oven to 425°F (220°C). On a lightly floured surface, roll out one disk of dough into a 12-inch circle. Carefully transfer the dough to a 9-inch pie plate. Trim the edges, leaving a 1-inch overhang. Pour the apple filling into the crust.
- Top the Pie: Roll out the second disk of dough. You can place it over the filling as a solid top crust (cutting vents) or cut strips to create a lattice top for that classic apple pie aesthetic. Crimp the edges of the top and bottom crusts together to seal.
- Bake: Brush the top crust with the egg wash and sprinkle evenly with coarse sugar. Place the pie on a baking sheet to catch any drips. Bake at 425°F (220°C) for 15 minutes. Then, reduce the oven temperature to 375°F (190°C) and continue baking for 45 to 55 minutes, or until the crust is golden brown and the filling is bubbly. If the edges brown too quickly, cover them loosely with foil.
- Cool: Let the apple pie cool on a wire rack for at least 3 hours before slicing. This allows the filling to set properly.
Notes
- For the flakiest pie crust, keep all your butter and water extremely cold. Do not let the butter melt before it hits the oven.
- If you want a deeper caramel flavor, substitute 1 tablespoon of the granulated sugar with maple syrup.
- If you are new to baking, using store-bought crust is acceptable, but homemade crust makes this classic apple pie truly special.
Nutrition
- Serving Size: 1 slice
- Calories: 450
- Sugar: 35g
- Sodium: 300mg
- Fat: 25g
- Saturated Fat: 15g
- Unsaturated Fat: 10g
- Trans Fat: 0g
- Carbohydrates: 58g
- Fiber: 3g
- Protein: 5g
- Cholesterol: 60mg