
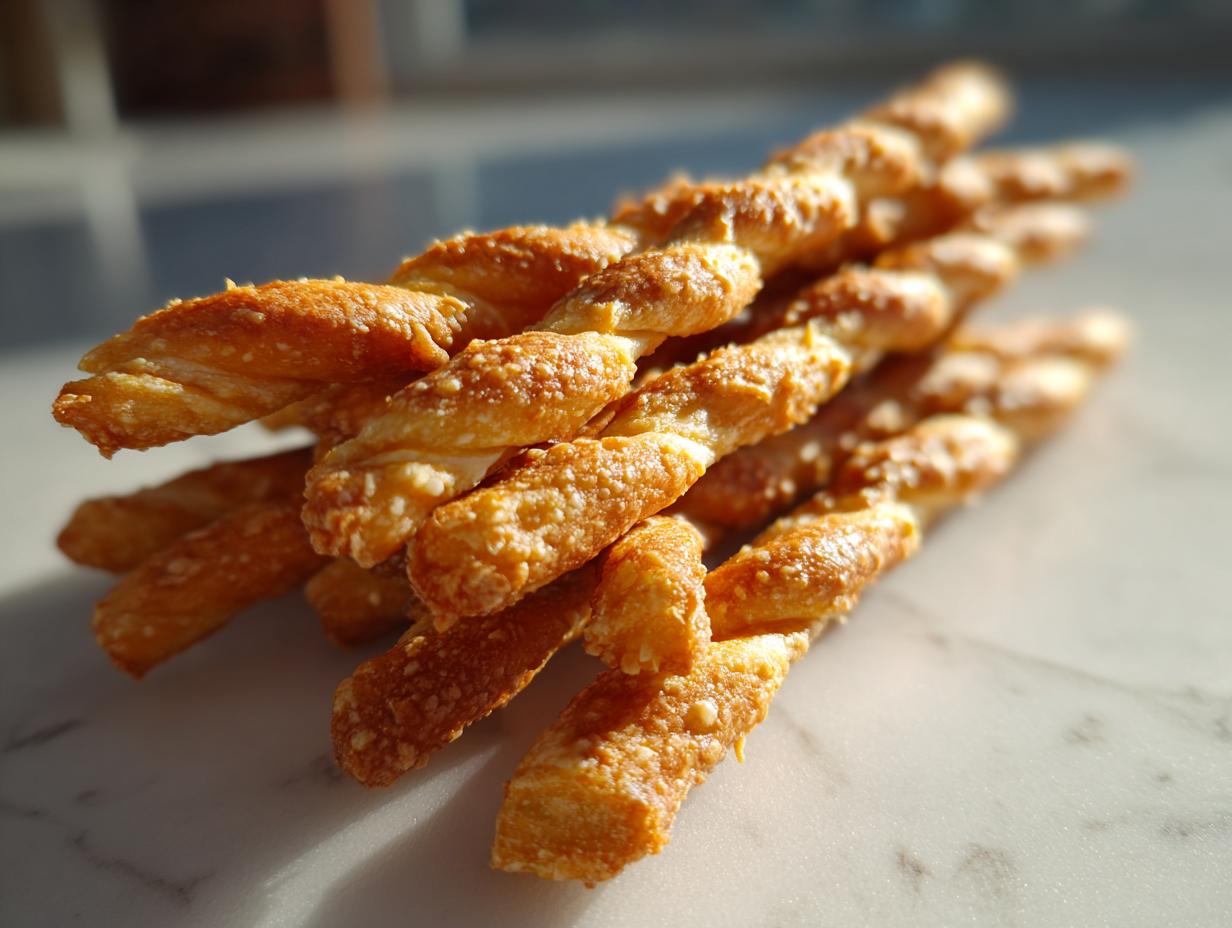
When you’re hosting—and I know how much pressure that can be when you’re balancing life just like I do—you need appetizers that just *work*. We’ve all been there: assembling a beautiful spread only to watch half the dip evaporate and the crackers turn soft before the guests even arrive. That’s why I’m obsessed with bringing back the classics that actually deliver, and nothing says reliable party snack like homemade cheese straws. These aren’t those puffy, pale versions you sometimes see; we are making the authentic Southern style, packed with sharp cheddar that delivers a savory punch. Trust me, these shatteringly crisp bites are exactly what your next gathering needs to feel truly special, and they come together faster than you think for a truly satisfying quick and easy bake.
- Why These Are the Best Crispy Cheddar Cheese Straws You Will Ever Make
- Gathering Ingredients for Your Classic Southern Cheese Straws
- Step-by-Step Guide to Perfect Cheese Straws
- Expert Tips for Achieving the Flakiest Cheese Straws
- Variations on Classic Cheese Straws
- Serving Suggestions for Your Homemade Cheese Crackers
- Storage and Keeping Your Cheese Straws Crispy
- Frequently Asked Questions About Savory Cheese Snacks
- Nutritional Estimates for These Appetizers
Why These Are the Best Crispy Cheddar Cheese Straws You Will Ever Make
If you’re searching for the absolute best Savory Cheese Straws Recipe, I can tell you right now: this is the one that makes the cut every single time. I learned so much about texture when I was getting my own cooking back on track, and crispiness is everything here. We don’t do soft or chewy; we are aiming for that addictive shatter!
What makes these the Best Cheese Straw Technique? It really boils down to using ingredients straight from the fridge:
- Cold butter cut precisely into the flour creates necessary layers for that flaky effect.
- Sharp cheddar cheese is non-negotiable—it brings the perfect savory flavor profile to these Buttery Cheese Snacks.
- The minimal water keeps the dough lean, guaranteeing they bake up crunchy rather than cakey.
This recipe is steeped in that great Southern heritage, and it’s so much easier than you think to get these perfect for your table. I used to rely on store-bought mixes, but never again! You can learn more about my philosophy on simple, wholesome food over at the About Page.
Gathering Ingredients for Your Classic Southern Cheese Straws
You don’t need a pantry full of fancy items for truly amazing Homemade Cheese Crackers. We keep things simple here, focusing on quality where it counts. The whole recipe comes together with just flour, butter, cheese, and a few spices for that signature kick. You’ll be amazed how fast you throw this together!
The one spot you absolutely cannot cut corners? The cheese. Please, please use freshly grated sharp cheddar. Pre-shredded bags have additives that block melting and prevent that beautiful, crispy texture we are after. Good cheese equals great flavor in these Sharp Cheddar Appetizer Recipe staples.
Here is exactly what you need:
- 2 cups all-purpose flour
- 1 teaspoon salt
- 1/2 teaspoon cayenne pepper (only if you like a little heat!)
- 1/4 teaspoon paprika (for color, mostly)
- 1 cup (2 sticks) cold unsalted butter, cut into small pieces
- 1 1/2 cups freshly grated sharp cheddar cheese
- 1/4 cup ice water
- 1 large egg, beaten (this is just for brushing the top before baking)
Having everything ready to go makes the mixing process so much smoother. If you’re looking for other simple staple ideas, check out my thoughts on quick breakfast ideas while you measure out your flour!
Step-by-Step Guide to Perfect Cheese Straws
Okay, now for the fun part! This is where we turn those lovely ingredients into the most addictive, savory sticks you’ve ever tasted. Don’t stress about making them look *perfectly* uniform; the homemade look is part of their charm, especially for great Game Day Snacks. Just follow these steps, and you are golden. If you need other fast baking inspiration after this, check out my post on quick and easy weeknight dinners!
Mixing the Dry Ingredients and Cutting in the Butter
First thing’s first: whisk your flour, salt, and spices together in a nice big bowl. Now, take that cold butter—remember, cold is key!—and start cutting it in. I usually use one of those pastry blenders, but honestly, using your fingertips works just as well if you move fast so the butter doesn’t get too warm. You are looking for a mixture that resembles coarse crumbs, like little pebbles mixed with sand. This action is what guarantees those beautiful layers in your cheese straws.
Bringing the Cheese Straw Dough Together and Chilling
Next, toss in all that sharp cheddar you grated. Stir until it’s all mixed in nicely. Then, the water part—this is crucial! Add the ice water just a tablespoon at a time. You stop mixing the second the dough starts holding onto itself when you squeeze a bit. It should look shaggy, not smooth. Overmixing this dough is how you lose that beautiful flakiness we love in Homemade Cheese Crackers. Form that shaggy mess into a disk, wrap it tight, and put it in the fridge for at least 30 minutes. Seriously, do not skip the chill time!
Shaping and Baking Your Savory Cheese Straws Recipe
Once chilled, flour your counter lightly. Roll that dough out thin, about 1/8 of an inch thick—thinner means crisper, remember? Then just slice them into strips, maybe half an inch wide and about four or five inches long. Lay them on parchment paper and brush them with that beaten egg wash; this gives them that gorgeous golden hue. Bake at 400°F for about 10 to 14 minutes. Remember to rotate your baking sheets halfway through so every single stick in your Savory Cheese Straws Recipe batch gets perfectly done!
Expert Tips for Achieving the Flakiest Cheese Straws
I want you to have truly phenomenal results with these, not just good results. Achieving that shatteringly crisp texture—the hallmark of the Best Cheese Straw Technique—comes down to a few small details I always adhere to. You might think all cheddar is created equal, but trust me, the flavor and moisture content varies wildly, which impacts our final crispness.
My notes section stresses that pre-shredded cheese is a textural nightmare in this recipe. Those bags have starches or cellulose added to keep them separate in the bag, but that stuff stops them from melting properly and getting fully integrated into the dough. So, if you want the ultimate savory, buttery bite, you have to grate that cheese yourself. It’s worth the few extra minutes, I promise!
If you’re interested in other baking perfection secrets, I dive deep into technique for my flourless chocolate cake, where temperature control is also our best friend.
Cheese Selection and Flavor Boosts for Your Cheese Straws
We specified sharp cheddar because the aging process concentrates that tangy, savory flavor we adore. If you use mild cheddar, the flavor gets a bit lost under the butter and flour. You need that bite!
But you can absolutely play around with flavor additions! To make these your own signature Cheese Straws, try replacing about a quarter cup of that cheddar with grated Parmesan cheese. Parmesan has a wonderful salty punch and really helps keep things dry and flaky. If you want to explore herbs—which totally elevates these from a snack to a sophisticated appetizer—add a teaspoon of dried rosemary or thyme right in with your flour mixture. The little green flecks look so beautiful against the golden baked dough. We’re aiming high flavor, low effort here.
Variations on Classic Cheese Straws
While the sharp cheddar version linked to classic Southern kitchens is my favorite way to serve these, tweaking the recipe is half the fun! I always encourage you to make these cheese straws your own, especially if you are serving them for a specific gathering. You can move these from a simple snack to a more complex flavor profile with minimal extra work.
If you aren’t quite ready for a full makeover, a little secret for making fantastic Spicy Cheese Straws is just bumping up that cayenne pepper. If you used 1/2 teaspoon before, try pushing it to 3/4 teaspoon, or even add a tiny pinch of freshly ground black pepper for a little background heat. It cuts through the richness of the butter beautifully!
We talked about swapping some cheddar for Parmesan, but that’s just the beginning of what you can do with Parmesan Herb Straws. For a totally different vibe, try this mix: use half sharp cheddar and half Gruyère cheese. Gruyère melts like a dream and gives you an incredible nutty flavor that elevates any party spread. Or, lean into the herbs!
- For a Mediterranean twist, swap the cayenne for dried oregano and add a half teaspoon of dried rosemary.
- For a richer, deeper flavor, grate in some smoked Gouda along with your cheddar—wow, that makes for amazing buttery cheese snacks.
These simple ingredient swaps are all about maximizing flavor without adding complex steps to your routine. If you love testing out new flavor combinations, you might also enjoy experimenting with my recipe for caramelized onion pasta!
Serving Suggestions for Your Homemade Cheese Crackers
These cheese straws are so versatile, which is why they’ve earned their spot as a Southern entertaining staple. They are utterly addictive on their own, of course—you might want to make two batches because the first always disappears immediately! But they truly shine when paired with other things, turning a simple platter into a sophisticated spread.
For parties, I love setting up a small bowl of creamy, bright dip next to the platter. A little roasted red pepper dip or even just a good quality whipped cream cheese mixed with chives works wonders for dipping. The warmth of the spice in the straws contrasts beautifully with something cool and creamy. If you are looking for something hearty to serve alongside these savory snacks, I often make my Easy Zuppa Toscana Soup. The crunch of the straws dipped into that rich, slightly spicy soup is pure comfort food heaven.
Because these are essentially savory shortbread, they also work beautifully layered on a cheese board. They stand in perfectly for basic crackers! I saw a fantastic idea recently over on Cut + Cook + Taste where they paired theirs next to some sharp pickles and olives. That salty, briny element alongside the rich, buttery snap of our Homemade Cheese Crackers just sings. Honestly, once you master this recipe, serving appetizers becomes way less stressful and way more delicious!
Storage and Keeping Your Cheese Straws Crispy
These savory snacks are best enjoyed the day they are made, but let’s be realistic—sometimes we need to prep ahead for a party! The absolute key to keeping your cheese straws wonderfully crisp is letting them cool completely on the wire rack. If you try to store them even slightly warm, they will steam in the container and lose that satisfying snap.
Once they are totally room temperature, transfer them to an airtight container. They should hold their crispness just fine for about three days this way. If you happen to make too many, you can freeze them once cooled, but they might need a little reviving afterward. If they soften up a bit, don’t panic! Just pop them on a baking sheet at 350°F for about five minutes until they crisp right back up. It’s amazing how resilient these buttery treats are when made correctly. For other simple, make-ahead sweet treats, you might want to check out my no-bake fudge recipe!
Frequently Asked Questions About Savory Cheese Snacks
We all run into little snags when baking, especially when we’re chasing that perfect texture in something delicate like these cheese straws. I’ve gathered up the most common things people ask me when they’re trying to get the crispiest, most flavorful results possible. If you have any other burning questions after trying this Savory Cheese Straws Recipe, feel free to reach out through my Contact Page!
Can I use pre-shredded cheese in this recipe?
Oh, I wish you could! But honestly, no, I strongly advise against it if you want that shatteringly crisp texture. Pre-shredded cheese has anti-caking agents, usually powdered cellulose, mixed in to keep the shreds from sticking together in the bag. Those little powders stop the cheese from melting down smoothly into the dough and achieving that fully integrated, buttery goodness we want in our Homemade Cheese Crackers. Grate it fresh; your texture will thank you ten times over!
How long can I chill the dough for the best flaky cheese pastry?
The recipe calls for a minimum of 30 minutes of chilling, and that’s usually enough to make wonderfully flaky results. However, if you have the time—and you’re planning ahead—I find that chilling the dough for a full hour, or even letting it rest in the fridge overnight, really takes it up a notch. The longer the fat (the butter) stays super cold before hitting the heat, the better the steam pockets form, giving you that superior flaky cheese pastry.
What is the best way to reheat cheese straws to restore crispness?
If you stored them properly in an airtight container but find they’ve lost a bit of their crunch after a day or two—this happens, especially in humid weather—don’t even think about the microwave! Microwaving brings moisture back in, which is the enemy of crispiness. Instead, spread them out on a clean baking sheet and pop them into a moderate oven, say around 350°F (175°C), for just 4 to 6 minutes. Pull them out right when they start smelling fragrant again, and they’ll be perfectly crunchy, like they just came out of the oven!
Nutritional Estimates for These Appetizers
As we focus here at Pure Plate Path on making nourishing food accessible, I always want you to have a general idea of what you’re enjoying. These cheese straws are certainly a treat, a savory snack designed for celebrations and sharing, so naturally, they have a bit of richness!
Please remember that these numbers are just estimates based on the standard ingredients listed in the recipe and how they divide out across roughly 4 dozen servings. If you use a different cheese brand or add extra spices, results will vary, but this gives you a solid baseline!
Here are the approximate nutritional estimates for a serving size of four straws:
- Serving Size: 4 straws
- Calories: 95
- Fat: 6.5g (with 4.0g saturated fat)
- Carbohydrates: 6.0g
- Protein: 3.5g
- Sugar: 0.2g
- Sodium: 150mg
See? Not bad at all for a truly delicious, homemade appetizer! They are delightfully low in sugar, letting that sharp cheddar flavor really shine through. If you’re looking to balance out your meal after enjoying these delicious starters, make sure to check out my collection of fresh salad recipes for something light and bright.
PrintClassic Crispy Southern Cheddar Cheese Straws

Make shatteringly crispy, savory cheese straws using sharp cheddar. This recipe delivers the buttery texture essential for a perfect party appetizer or game day snack.
- Prep Time: 20 min
- Cook Time: 14 min
- Total Time: 34 min
- Yield: About 4 dozen 1x
- Category: Appetizer
- Method: Baking
- Cuisine: American (Southern)
- Diet: Vegetarian
Ingredients
- 2 cups all-purpose flour
- 1 teaspoon salt
- 1/2 teaspoon cayenne pepper (optional, for spice)
- 1/4 teaspoon paprika
- 1 cup (2 sticks) cold unsalted butter, cut into small pieces
- 1 1/2 cups freshly grated sharp cheddar cheese
- 1/4 cup ice water
- 1 large egg, beaten (for egg wash)
Instructions
- In a large bowl, whisk together the flour, salt, cayenne pepper, and paprika.
- Cut the cold butter into the flour mixture using a pastry blender or your fingers until the mixture resembles coarse crumbs.
- Stir in the freshly grated sharp cheddar cheese until evenly distributed.
- Gradually add the ice water, one tablespoon at a time, mixing until the dough just comes together. Do not overmix.
- Form the dough into a flat disk, wrap it in plastic wrap, and chill in the refrigerator for at least 30 minutes. This step is key for crispiness.
- Preheat your oven to 400 degrees F (200 degrees C). Line two baking sheets with parchment paper.
- On a lightly floured surface, roll the chilled dough out to about 1/8-inch thickness.
- Cut the dough into thin strips, about 1/2-inch wide and 4 to 5 inches long, to form your cheese straws.
- Place the straws on the prepared baking sheets. Brush the tops lightly with the beaten egg wash.
- Bake for 10 to 14 minutes, rotating the sheets halfway through, until the cheese straws are golden brown and crisp.
- Transfer the straws to a wire rack to cool completely. They will crisp up further as they cool.
Notes
- Use freshly grated sharp cheddar cheese; pre-shredded cheese contains additives that prevent optimal crispness.
- For extra flavor, substitute a portion of the cheddar with Parmesan cheese.
- If you want a flakier pastry, chill the dough for an hour instead of 30 minutes.
Nutrition
- Serving Size: 4 straws
- Calories: 95
- Sugar: 0.2
- Sodium: 150
- Fat: 6.5
- Saturated Fat: 4.0
- Unsaturated Fat: 2.5
- Trans Fat: 0.1
- Carbohydrates: 6.0
- Fiber: 0.3
- Protein: 3.5
- Cholesterol: 18