
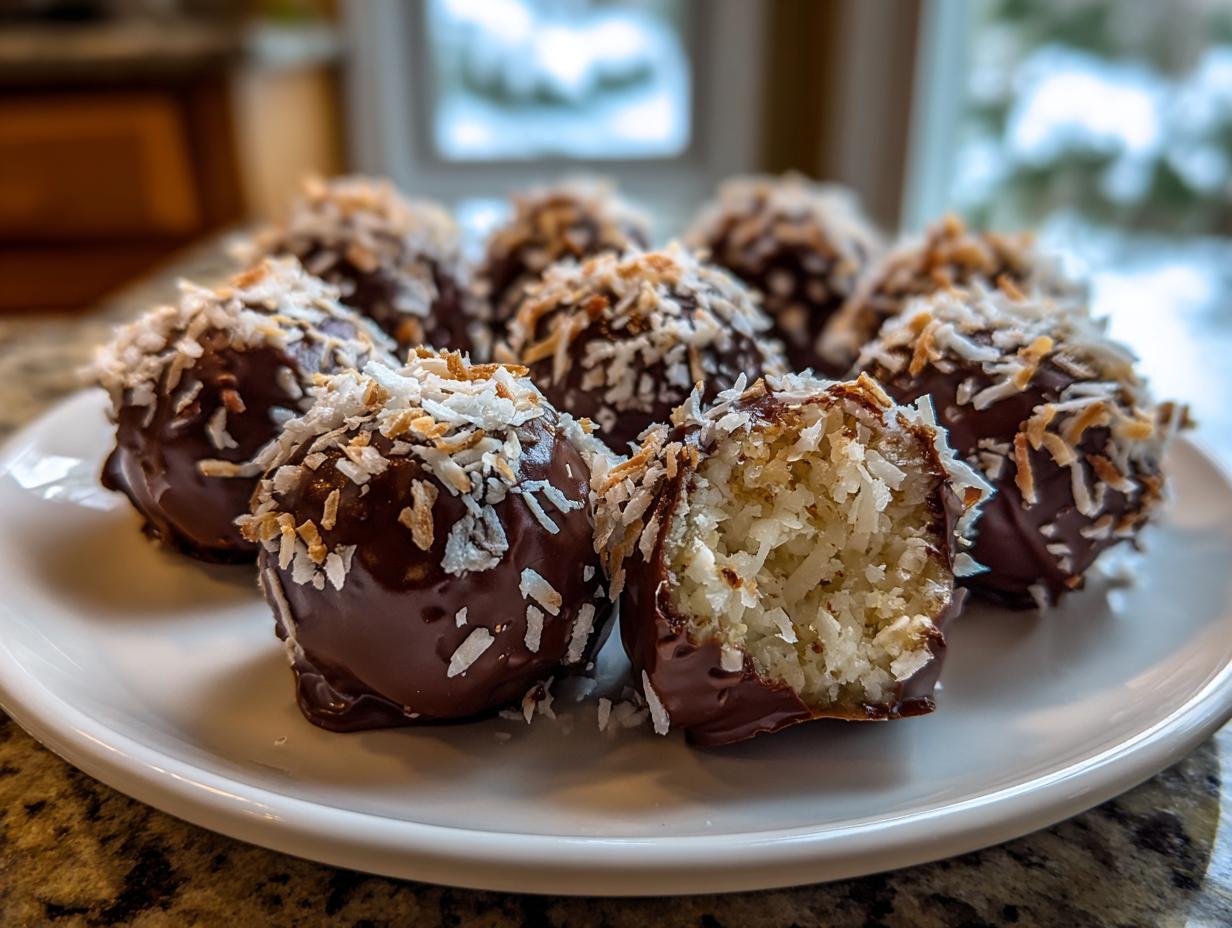
Doesn’t the thought of those classic, perfectly balanced candy bars just transport you back? When life gets hectic—and trust me, I know how those long work weeks at the marketing desk used to drain me—I find such peace in making something pure and delicious from scratch. That’s the whole heart of Pure Plate Path, right? We’re taking back those moments, one simple recipe at a time. If you’ve been craving that perfect blend of chewy coconut, a crunchy almond center, and rich chocolate, you’re in the right place. Forget complicated baking; I’m sharing my absolute easiest, no-bake recipe for authentic almond joy truffles that tastes like the real deal, ready before you know it.
We aren’t using an oven, we aren’t waiting hours for dough to rise; we are just mixing, rolling, and dipping. It’s dessert mindfulness, and it seriously brings the joy back to my kitchen. You can read more about why I started this journey over on my About Page.
- Why You Will Love These Easy No-Bake Almond Joy Truffles
- Gathering Ingredients for Your Almond Joy Truffles
- Step-by-Step Guide to Making Perfect Almond Joy Truffles
- Tips for Success with Homemade Candy Recipes
- Storage and Keeping Your Almond Joy Truffles Fresh
- Serving Suggestions for These Bite Sized Sweets
- Frequently Asked Questions About Almond Joy Truffles
- Approximate Nutritional Information for Almond Joy Truffles
- Share Your Homemade Candy Bar Copycat Recipes
Why You Will Love These Easy No-Bake Almond Joy Truffles
Honestly, why wouldn’t you love these? When I was trying to simplify my life but still needed that little sweet reward, these almond joy truffles became my go-to. They hit every single craving without setting foot near the oven. Trust me on this one, they are a game-changer for quick treats.
- Absolutely No Fuss Baking: This is a true no-bake dessert! If you can mix ingredients in a bowl and melt chocolate, you can make these. Perfect for when you need quick dessert ideas for a sudden gathering.
- Tastes Exactly Like the Candy Bar: We nail that nostalgic flavor profile—that perfect contrast between the sweet, chewy coconut filling and that satisfying crunch of the whole almond inside. It’s the ultimate candy bar copycat recipe.
- Ridiculously Fast Prep Time: You’re looking at maybe 20 minutes of hands-on work before they head into the freezer. That ease is why I often turn to Simple Meal Tips, because even dessert should be manageable!
- Perfect For Gifting: They look impressive once dipped in chocolate, but they’re so simple to produce that you can whip up a big batch to give away during the holidays or just because. Who doesn’t love little bite sized sweets?
- Minimal Ingredients: We use pantry staples! No weird extracts or hard-to-find items here, just simple components for incredibly satisfying coconut chocolate treats.
Gathering Ingredients for Your Almond Joy Truffles
Okay, the best part about these almond joy truffles is that the ingredient list is so short and sweet—it really highlights the beauty of keeping things simple, which is what Pure Plate Path is all about! We aren’t messing around with powdered sugar bases or complicated fudge recipes here. We are going for the authentic candy bar experience using just a handful of things you probably already have.
When selecting your components, quality matters, even in a recipe this quick. Since there are so few players in this game, each one really has to pull its weight. Remember, this recipe is going to yield about 18 beautiful little treats, so it’s perfect for a small batch or doubling up if you’re feeling ambitious!
Essential Components for Authentic Almond Joy Truffles
To build that perfect, familiar flavor, you’ll need the following. Make sure you grab the *unsweetened* shredded coconut; sweetened stuff just changes the balance too much when paired with the maple syrup. And critically, you need those whole almonds because they are the crunchy secret weapon right in the middle that makes this truly a copycat.
Here is exactly what you need to pull together your fudgy coconut balls:
- 2 cups unsweetened shredded coconut
- 1/2 cup almond butter (This is our binder! It makes them creamy, not crumbly.)
- 3 tablespoons maple syrup (I love using maple syrup here; it adds a depth white sugar just can’t touch.)
- 1 cup dark chocolate chips (I prefer dark, but milk works if that’s what you love!)
- 1/2 cup whole almonds (for the center)
Step-by-Step Guide to Making Perfect Almond Joy Truffles
Now for the fun part! This is where those beautiful almond joy truffles truly come together. Since these are no-bake, the process is just about assembly and timing. My main goal here is to make sure your coconut filling is perfectly packed around that almond so nothing shifts when we dip them into the chocolate later. Read through these steps; they follow a very specific order for success! If you love sweet, decadent treats like this, you might also want to check out my recipe for Easy Creamy Maple Fudge.
Creating the Creamy Coconut Center
First things first, we build the inside! Grab a good medium bowl—you want room to mix everything without spilling; trust me, shredded coconut flies everywhere. Combine your shredded coconut, the almond butter, and the maple syrup. Start mixing this by hand or with a strong spoon. It’s going to look dry and crumbly at first, but keep going! You are looking for sticky dough that holds together when you squeeze it between your fingers. If it’s still too loose after a good minute of mixing, add just another tiny splash more of maple syrup, a half teaspoon at a time.
Expert Tip for Texture: Once you press a small bit of the mixture between your palms, it should hold its shape firmly without wanting to crumble out from the sides. If you can roll a small amount into a ball that feels solid, you are ready for the next step!
Chilling and Preparing for the Chocolate Coating
This step is non-negotiable, so don’t try to rush it! Once you’ve formed balls around each whole almond, place them all onto a baking sheet lined with parchment paper. Now, into the freezer they go for a solid 30 minutes. Why freeze them? This is crucial! If the coconut center is soft, the moment it hits the hot melted chocolate, it will start to melt or, worse, your almond might push right out the bottom. Freezing them until they are rock hard ensures they stay perfectly plump and easy to dip.
Achieving a Smooth Chocolate Finish on Your Almond Joy Truffles
While those little guys are chilling, get your chocolate ready. Melt your dark chocolate chips in a microwave-safe bowl. The trick here is doing it in short bursts—30 seconds at a time—stirring well between each burst. If you overheat chocolate, it seizes up and becomes useless, and we absolutely cannot have that on our easy truffle recipes!
Once smooth, here is my little secret for an absolutely gorgeous, shiny coating: stir in just 1 teaspoon of coconut oil. That small amount of extra fat makes the chocolate flow beautifully, giving you that professional look we all want. Carefully take one frozen truffle at a time and drop it into the chocolate. Use a fork or a toothpick to roll it completely over until it’s covered. Lift it out, letting the extra chocolate drip back into the bowl, and then gently set it back onto that parchment-lined sheet. Pop them back in the fridge for just 15 minutes until that chocolate shell sets up nice and firm. So simple, right?
Tips for Success with Homemade Candy Recipes
Even though these are incredibly forgiving no bake desserts, there are just a few little tweaks that take your almond joy truffles from “great” to “oh my goodness, where has this recipe been all my life?” Since we are making a copycat here, those tiny details in the texture and the coating make a huge difference in achieving that candy bar magic. If you’ve got a demanding schedule but still want amazing eats, remember that quick treats like this pair perfectly with my list of simple lunch recipes for keeping things easy all day long.
Ingredient Adjustments and Substitutions
Let’s talk chocolate first. I specified dark chocolate chips because I find the bitterness really cuts through the sweetness of the coconut and maple syrup beautifully. It gives you that classic, dark-chocolate-dipped experience. However, if you are making these for younger folks or just really love the mild taste, go right ahead and swap those in for milk chocolate chips! Just know the final flavor profile will be sweeter overall.
Remember that little dash of coconut oil I mentioned when melting? Seriously, don’t skip that if you can help it. It’s not there for flavor; it’s pure physics! That extra bit of fat thins the chocolate just enough so that when you pull the frozen truffle out, the chocolate flows down smoothly instead of globbing up thickly around the bottom seam. We want that thin, crackly shell, not a heavy chocolate boulder.
Also, think about your almond butter. If yours is really thick and stiff right out of the jar, you might need to add just an extra half teaspoon of maple syrup to get that perfect sticky dough consistency we talked about when forming the coconut center. If the binder isn’t quite right, your fudgy coconut balls might crumble when you try to dip them, and that’s just heartbreaking!
Storage and Keeping Your Almond Joy Truffles Fresh
You’ve done the hard part—you’ve dipped every single one of those gorgeous almond joy truffles! The last thing we want is for all that hard work to go soft or lose that fresh sweetness. Since these are homemade candy recipes relying on fresh ingredients and no baking magic, storage requires keeping them cool.
My absolute rule for keeping these perfect coconut chocolate treats fresh is simple: they must live in the refrigerator. Don’t try leaving them on the counter, even if the chocolate seems really firm at room temperature. The coconut filling will start to soften after just a couple of hours, and you risk having them turn into a sticky mess.
Get yourself a really good, airtight container. You can layer them, but put a small piece of parchment paper between the layers—we don’t want the bottom of one truffle sticking to the top of another after a few days in the cold. Stored properly in the fridge, these quick chocolate truffles will stay fantastic for at least a week, sometimes longer. I always tell people they taste best on days two or three, once the chocolate has fully permeated the coconut center!
When you want to serve them, I highly recommend pulling them out about 15 to 20 minutes before you plan on eating them. Serving them straight from the fridge means the chocolate coating will be rock hard, and you won’t get that perfect little *crack* when you bite in. Letting them warm up just slightly softens that chocolate just enough to match the creamy filling. It truly transforms the experience, making them the perfect end to any meal.
Serving Suggestions for These Bite Sized Sweets
Honestly, once you’ve made these, you’ll find excuses to serve them everywhere! These little gems are so versatile, which is why they fit perfectly into my philosophy of having accessible, joyous food options year-round. If you’re looking for quick dessert ideas that feel special without all the work, look no further than these almond joy truffles.
They shine brightest when they are offered up as part of a simple spread. Think about setting up a small dessert station after dinner. Because they are little, satisfying, and packed with flavor, they don’t feel overwhelming alongside something else. They pair amazingly with coffee after a meal; the bitterness of the coffee really complements that rich, dark chocolate coating we used.
If you’re hosting a party, these party dessert bites are a must-have because they are totally self-contained—no forks needed! I love setting them out on a tiered stand. You can mix them up with some plain chocolate-covered almonds for textural contrast, or even pop some fresh berries nearby—the tartness of a raspberry is fantastic next to the tropical flavor of these bites.
For the holidays, they are absolutely essential. These holiday candy making projects always feel charming, and because they are no-bake, they don’t steal precious oven space when you’re making a big feast. They travel wonderfully too. Just keep them chilled until you arrive, and you’ve brought the most popular treat to the potluck! If you’re feeling ambitious and want to try another stunning, but still simple, dessert, you should check out my Easy Apple Tart Recipe; it’s less messy than a full pie but just as impressive!
We also love these as a little afternoon treat when the energy dips. Having just one or two of these fudgy coconut balls nestled next to a cup of tea can single-handedly turn around a stressful afternoon. They are the definition of a quick snack that feels indulgent.
Frequently Asked Questions About Almond Joy Truffles
When you’re making homemade candy recipes, especially ones that aim to nail that nostalgic flavor, questions always pop up! I get asked the same things repeatedly, so I thought I’d put all the crucial bits of advice right here to make sure your almond joy truffles turn out perfect. Don’t sweat it if this is your first time trying candy bar copycat recipes—we’re walking through every detail together.
Can I make these almond joy truffles without baking?
YES! That’s the beauty of this recipe, and it’s one of the biggest reasons I love them so much. These are truly no bake desserts. There is zero baking involved! You mix the filling, wrap it around the almond, freeze it so it sets up nice and firm, and then you dip it in melted chocolate. It’s quick, easy, and perfect for those days when the oven is just too much effort, or when you need to save space for Christmas cookies!
What is the best chocolate to use for coating?
I really, really push for dark chocolate chips here because I think that slight bitterness balances the sweetness of the coconut and maple syrup perfectly. But the real secret to a professional-looking coating isn’t just the type of chocolate you choose; it’s what you add to it when melting! For that ultra-smooth, quick-setting shell, make sure you stir in about 1 teaspoon of coconut oil once your chips are fully melted. It lowers the viscosity so the coating flows right around the frozen truffle without leaving thick globs, especially around the bottom seam. If you want a sweeter truffle, milk chocolate chips work just fine, but follow that coconut oil rule!
How do I stop the coconut filling from being too crumbly?
This usually comes down to the binder ratio—the almond butter and maple syrup. If your mix looks too dry and won’t hold together when you press it, it’s going to crumble when you try to wrap it around the almond. Don’t reach for more shredded coconut! Instead, add just a splash extra of maple syrup, maybe a half teaspoon at a time, and mix it thoroughly until you feel that stickiness return. Consistency is key for these fudgy coconut balls to hold their shape when chilled. You want it sticky enough to glue itself together, but not so wet that it feels greasy.
If you’re looking for more inspiration for quick, feel-good foods that nourish your body without adding stress, I cover loads of great ideas on my Healthy Desserts and Treats page. Let me know how your first batch of coconut chocolate treats turns out!
Approximate Nutritional Information for Almond Joy Truffles
Okay, now let’s talk numbers for a second. I know when I’m indulging in something like these almond joy truffles, I don’t necessarily want a massive breakdown, but I always feel better knowing the general picture, right? Since these homemade candy recipes use whole ingredients and we aren’t using refined sugars in the filling (we used maple syrup!), they honestly aren’t bad once you look at the individual serving size.
Please, keep in mind these are just estimates! I calculated these rough numbers based on the ingredients I listed, and they are broken down per one single truffle, assuming you get about 18 perfect bites out of the whole batch. This is just for general knowledge, not a strict diet plan! I focus much more on how amazing they taste than counting every tiny gram, which reminds me of my overall philosophy that food should bring joy, not stress!
Here is a quick look at what you can expect in one of these delicious bite sized sweets:
- Serving Size: 1 truffle
- Calories: Approximately 180
- Total Fat: About 12g (A good amount of that is healthy fat from the almond butter!)
- Carbohydrates: Roughly 18g
- Protein: Around 3g
- Sugar: Approximately 15g (This is where the chocolate and maple syrup come in, naturally.)
You can see they fit right in line with a satisfying little treat to satisfy that craving for coconut chocolate treats without feeling overly heavy. Enjoy them knowing you made them yourself with care!
Share Your Homemade Candy Bar Copycat Recipes
And just like that, you’ve navigated the world of homemade candy recipes and created your own perfect batch of almond joy truffles! I truly hope making these simple, no-bake delights brought a little moment of peace and real joy into your kitchen, just like it always does for me. When I look at these little chocolate-covered gems, I don’t just see coconut and almonds; I see an easy win against the rush of the week, something truly special made with my own hands.
Whether you made them for a holiday candy platter, slipped them into a lunchbox as a simple gesture, or just devoured them while standing over the sink (no judgment here!), I desperately want to know how they turned out! Did you stick with the dark chocolate, or did you go for milk chocolate? Did those homemade chocolate coverings set up beautifully?
Please, don’t be a stranger! Drop your thoughts, ratings, and anything you learned while making these candy bar copycat recipes down in the comments below. If you took a picture, I’d be thrilled if you shared it! Tag me or reach out via my Contact Page—seeing your success stories fuels the whole mission here at Pure Plate Path.
If you’re looking for more inspiration on other fantastic treats people have made, you can always check out some other popular recipes out there, like this version I stumbled across while perfecting my own a while back: Almond Joy Truffles. Happy dipping, friends!
PrintEasy No-Bake Almond Joy Truffles

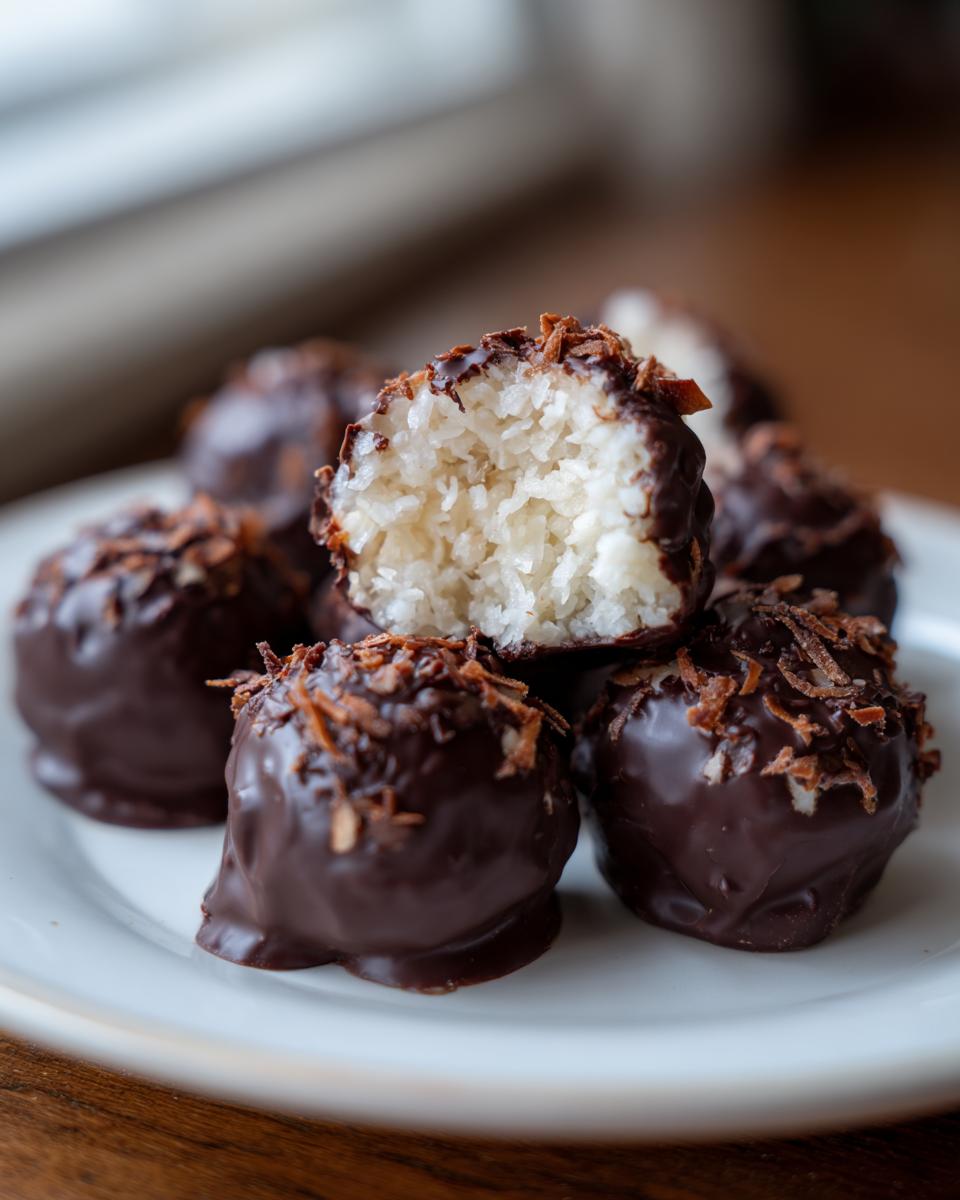
Make homemade truffles that taste just like the classic candy bar using simple ingredients. This no-bake recipe delivers a creamy coconut center, a whole almond, and a rich chocolate coating.
- Prep Time: 20 min
- Cook Time: 5 min
- Total Time: 50 min
- Yield: About 18 truffles 1x
- Category: Dessert
- Method: No Bake
- Cuisine: American
- Diet: Vegetarian
Ingredients
- 2 cups unsweetened shredded coconut
- 1/2 cup almond butter
- 3 tablespoons maple syrup
- 1 cup dark chocolate chips
- 1/2 cup whole almonds (for the center)
Instructions
- Combine the shredded coconut, almond butter, and maple syrup in a medium bowl. Mix until you form a sticky dough.
- Take one whole almond and wrap a small amount of the coconut mixture around it to form a ball shape. Place the formed ball on a parchment-lined baking sheet. Repeat until all the mixture is used.
- Place the baking sheet with the coconut balls into the freezer for 30 minutes to firm up completely.
- Melt the dark chocolate chips in a microwave-safe bowl in 30-second intervals, stirring between each interval until smooth.
- Dip each frozen coconut ball into the melted chocolate, ensuring it is fully coated. You may need to use a fork to roll it around.
- Place the coated truffles back onto the parchment-lined sheet.
- Return the finished truffles to the refrigerator for about 15 minutes, or until the chocolate coating is set.
Notes
- For a smoother coating, add 1 teaspoon of coconut oil to the melted chocolate.
- If you prefer milk chocolate, substitute the dark chocolate chips with milk chocolate chips.
- Store these homemade candy bar copycat recipes in an airtight container in the refrigerator.
Nutrition
- Serving Size: 1 truffle
- Calories: 180
- Sugar: 15
- Sodium: 15
- Fat: 12
- Saturated Fat: 7
- Unsaturated Fat: 5
- Trans Fat: 0
- Carbohydrates: 18
- Fiber: 2
- Protein: 3
- Cholesterol: 0