
When life gets hectic, I always drift back to the foods that feel like a warm hug—and nothing says comforting, sweet escape quite like a truly perfect plate of Thai dessert. Forget complicated steps; I struggled for years trying to balance deadlines and genuinely nourishing food until I committed to bringing simplicity back to my kitchen. That’s why I’m thrilled to share what I think is the ultimate, easy way to make authentic mango sticky rice right at home. We’re skipping the stovetop drama and using the rice cooker, making this tropical favorite totally stress-free for even the busiest schedule. Trust me, this easy recipe is my go-to for reclaiming a little moment of peace!
- Why This Easy Mango Sticky Rice Recipe Works for Busy Cooks
- Ingredients for Authentic Mango Sticky Rice (Khao Niew Mamuang)
- How to Prepare Mango Sticky Rice Using a Rice Cooker
- Tips for Perfect Mango Sticky Rice Every Time
- Serving Suggestions for Your Asian Dessert
- Storage and Reheating for Leftover Mango Sticky Rice
- Frequently Asked Questions About Mango Sticky Rice
- Nutritional Estimates for Mango Sticky Rice
- Share Your Homemade Mango Sticky Rice Success
Why This Easy Mango Sticky Rice Recipe Works for Busy Cooks
I get it—you want that authentic, incredibly creamy Thai dessert recipe experience without spending half the afternoon hovering over a saucepan. That’s where this method shines! We’re aiming for a total time under an hour, which is unbelievable for something this decadent. The focus here is on reliable technique that cuts down on active time while guaranteeing that incredible texture.
- We rely on the rice cooker for hands-off cooking of the rice, which is a lifesaver when you’re trying to get dinner on the table too.
- The steps are broken down simply, which means less confusion and more enjoying the process. If you’re looking for ways to streamline your kitchen routine, check out my tips for quick meal prep!
- The result is the perfect balance of sweet, savory, and tropical flavors that tastes like street food perfection.
Achieving the Perfect Coconut Sticky Rice Texture
The real secret sauce here isn’t the coconut milk—it’s what you do with the rice *before* cooking. You absolutely must soak your glutinous rice. I aim for at least four hours, but overnight is even better. This forces the starch to hydrate fully. When you cook it, use slightly less water than you would for plain white rice; we want it chewy, not soupy! My expert tip? Once it’s cooked, immediately stir in two-thirds of your warm sauce while it’s piping hot. This absorption step is what transforms dry grains into that wonderfully creamy, luscious base.
Ingredients for Authentic Mango Sticky Rice (Khao Niew Mamuang)
When it comes to recreating this classic Asian dessert, sourcing the right components is non-negotiable. I lay everything out before I even start soaking the rice just so I can confirm I have exactly what I need. Don’t try to substitute the glutinous rice; it’s the entire foundation of this treat! For the best texture and flavor, always opt for full-fat coconut milk. If you’re looking for other treats that fit into a healthy lifestyle, pop over to my guide on healthy desserts for some inspiration.
Here’s what you’ll need for four servings:
- 1 cup glutinous rice (sticky rice)
- 2 ripe mangoes (Nam Dok Mai or Honey variety recommended)
- 1 cup coconut milk (full-fat for the best sauce!)
- 3/4 cup sugar
- 1/4 teaspoon salt
- Sesame seeds or toasted mung beans for garnish (optional)
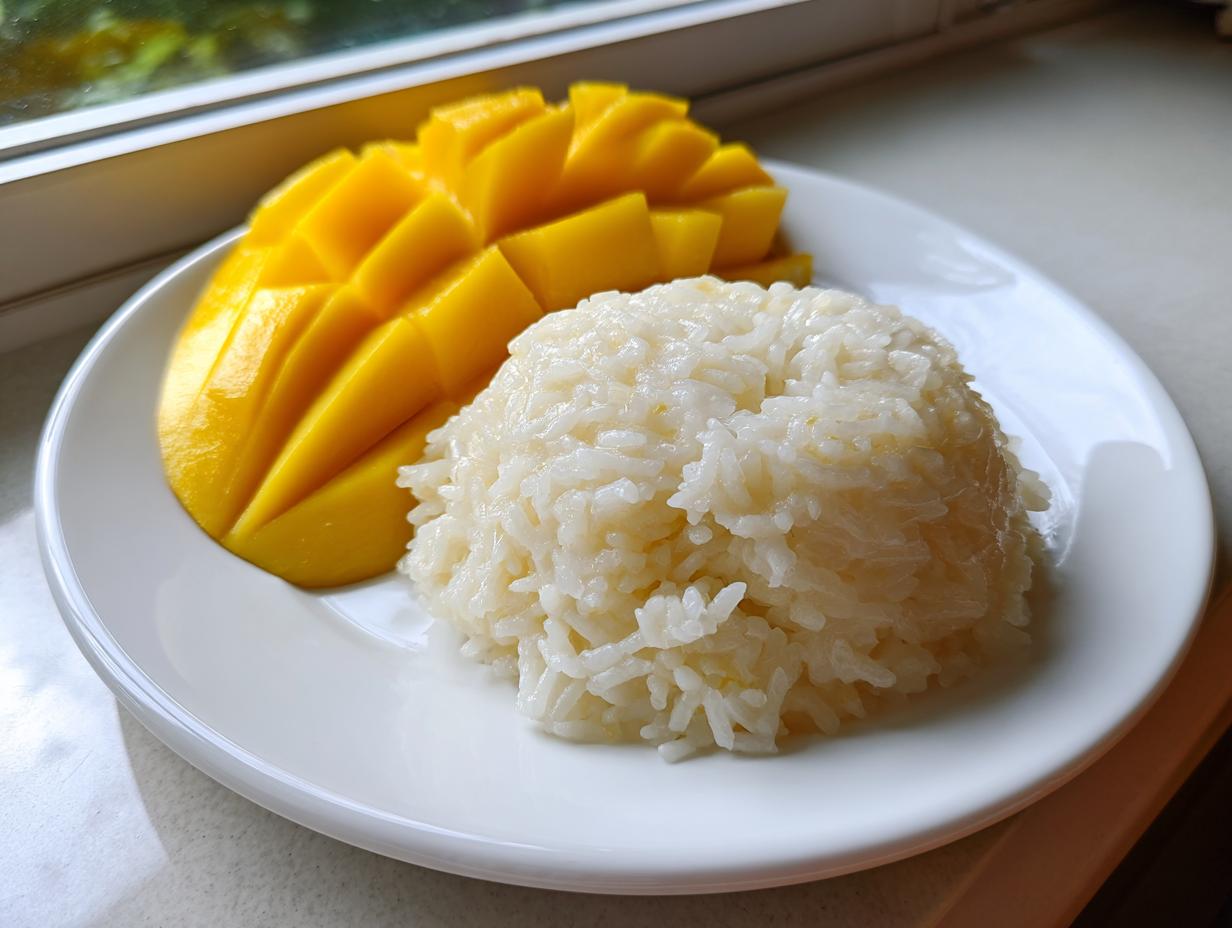
Selecting the Best Mangoes for Your Sweet Rice Dessert
Choosing a mushy, underwhelming mango will completely sabotage your hard work! For the most authentic flavor in your mango sticky rice, you need sweet, slightly tangy mangoes. The gold standard is the Nam Dok Mai variety, but if you can’t find those, the classic Honey mango works perfectly stateside. How do you test them? You gently squeeze them—they should give slightly, like a ripe peach, but never feel squishy or watery. If they smell strongly of perfume from the stem end, that’s usually a great sign they are perfectly ripe and ready to pair with your coconut sticky rice.

How to Prepare Mango Sticky Rice Using a Rice Cooker
Okay, this is where the magic truly happens, and honestly, it’s so simple thanks to the rice cooker! We’re making the world’s easiest rice cooker sticky rice. First thing’s first: make sure those grains have soaked! Once you’ve drained your sticky rice really well, pop it into the rice cooker pot. Use a little less water than you normally would for regular fluffy rice—we want that characteristic chewiness, remember? Hit the button and let the machine do the heavy lifting while we move on to the luscious sauce.
Making the Creamy Coconut Sauce Recipe
For the sauce, grab a small saucepan. We’re talking coconut milk, sugar, and salt. Put it over medium-low heat—and here is the non-negotiable rule Sarah taught me: you do not want this to boil! If it boils, the texture of the coconut milk changes, and it gets a weird film on top. Just stir gently until the sugar and salt completely dissolve into that rich coconut milk. Once it’s smooth, take it right off the heat. That’s it! You’ve made the essential creamy coconut sauce recipe without breaking a sweat.
Combining Rice and Sauce for the Best Mango Sticky Rice
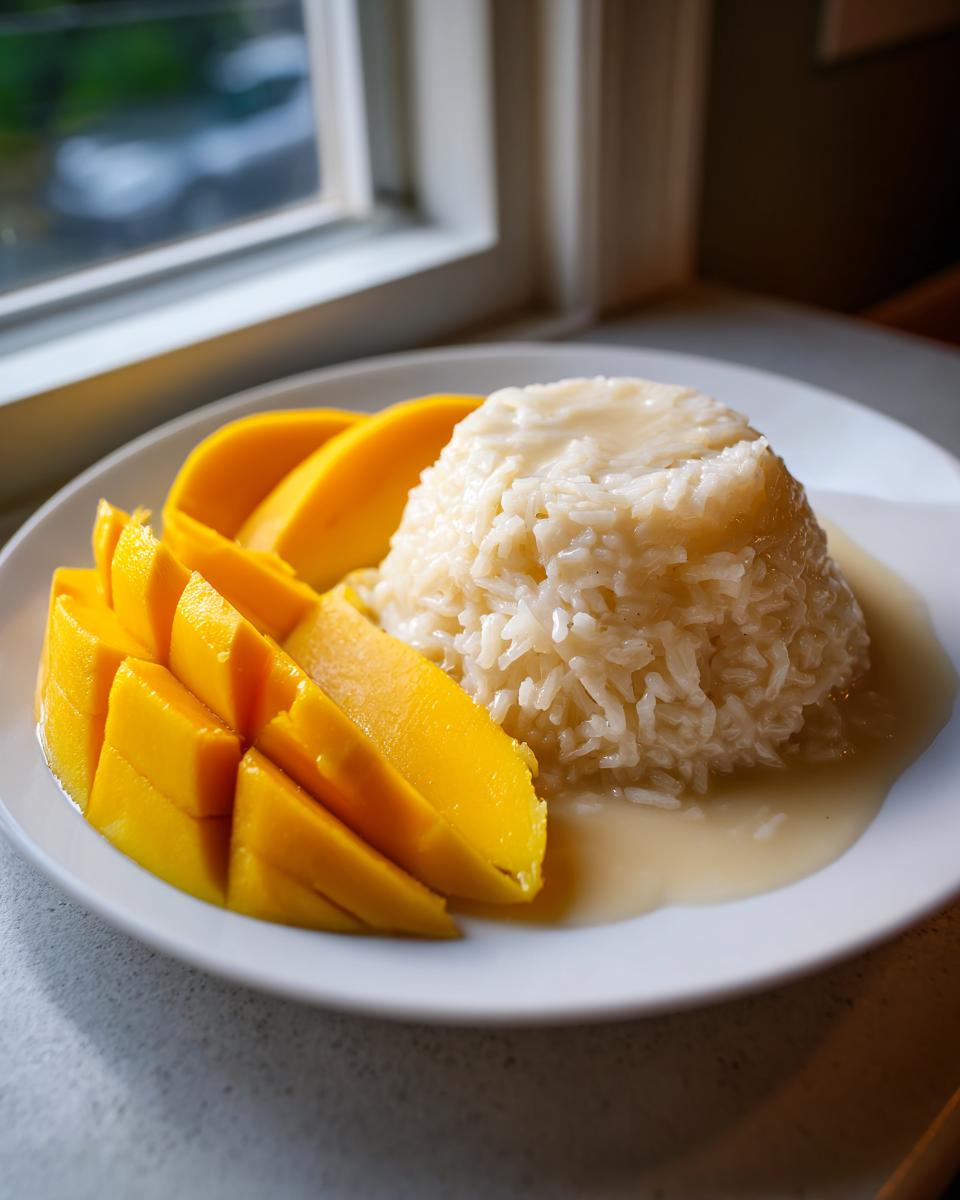
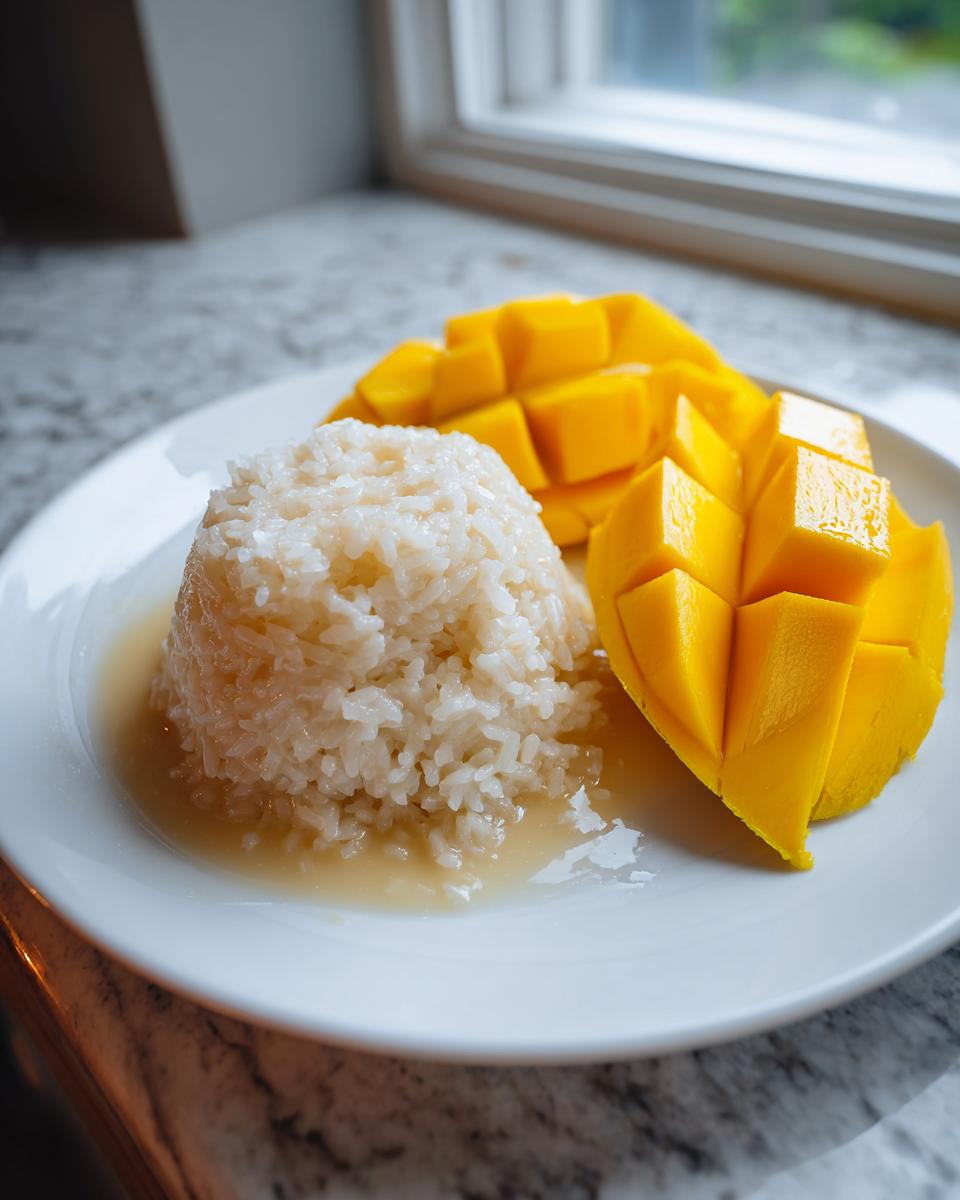
When that rice cooker dings, immediately transfer that hot, tender rice into a big bowl. Take about two-thirds of your warm sauce—yep, use that measuring cup again—and gently fold it into the rice. Don’t beat it up! Fold until it mostly disappears. Then, cover that bowl tightly. You have to let it sit undisturbed for 15 to 20 minutes. I still remember the first time I skipped that resting period! I thought I was rushing things, but the rice was stiff. Waiting is key; it lets the starches truly absorb that sweet liquid, creating that famous, almost custardy texture. Once it’s rested, fluff it gently and you are ready to plate!
Tips for Perfect Mango Sticky Rice Every Time
Even with simple recipes, kitchen intuition plays its part! If you find your sauce is a little too thin after dissolving the sugar—don’t panic. Just let it sit! As it cools down, the full-fat coconut milk will firm up beautifully. If you still need a bit more body, stir in a spoonful of cornstarch slurry right before you pour it over the rice, but honestly, the chilling process usually does the trick for me.
Also, don’t forget that finishing drizzle! I love taking that tiny bit of leftover sauce and making sure there’s a generous pool of it beside the rice when I serve it. It’s that final rich touch that really elevates this Asian dessert. If you’re curious about other creamy treats, I have a fantastic maple fudge recipe that gives you that same satisfying texture!
Making This Vegan Thai Dessert Recipe Work
One of the best parts about this classic Khao Niew Mamuang is how naturally it fits our desire for simple, whole-food eating. Good news: this recipe is completely gluten free and vegan as written! We only use coconut milk, fruit, rice, and sugar, so you don’t have to worry about subbing out dairy or eggs. Just double-check your sugar source, as some brands process refined white sugar with bone char, though most brown sugar is usually fine. For the most part, this beautiful sweet rice dessert is ready to go straight from the recipe to your table, worry-free.
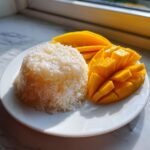
Serving Suggestions for Your Asian Dessert
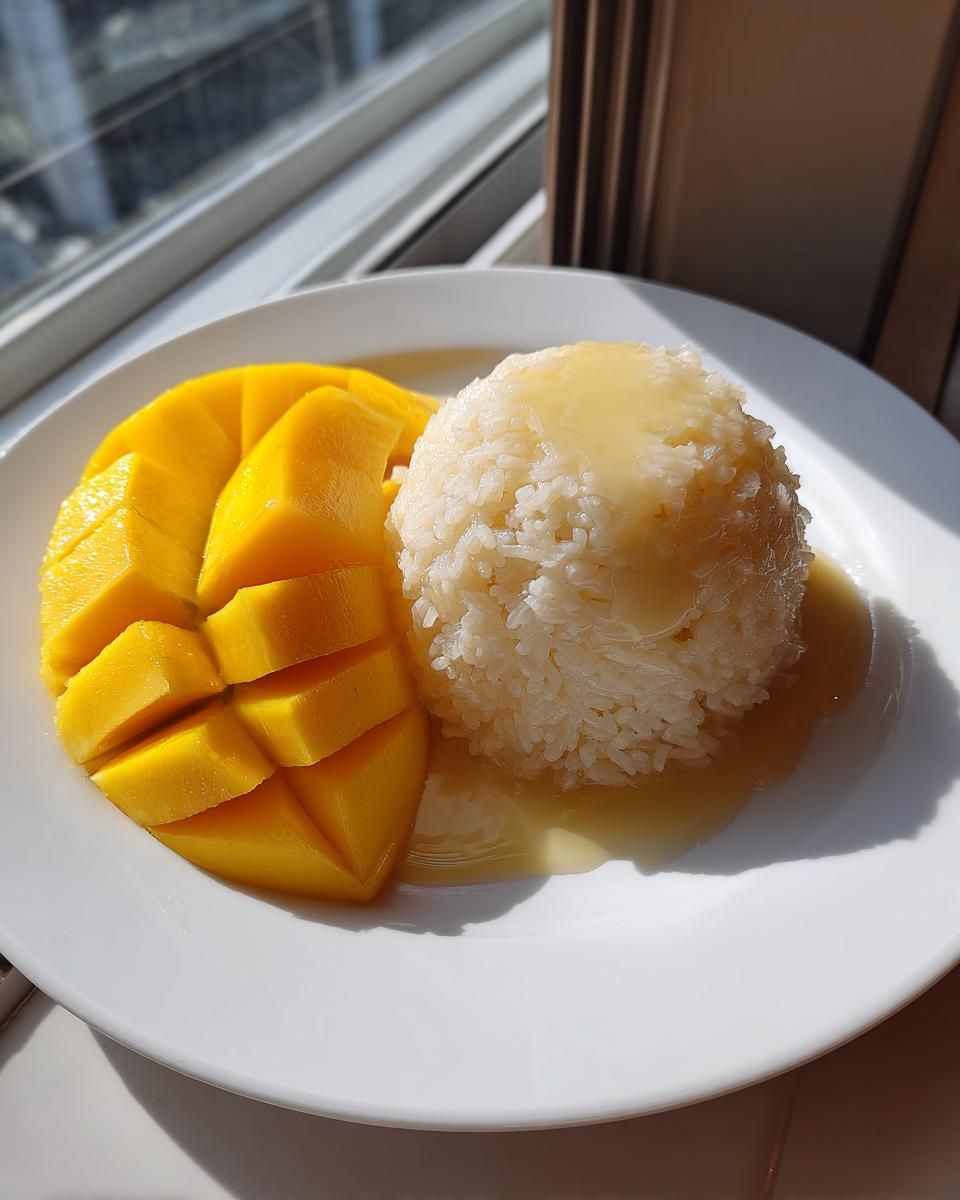
Once you’ve got that gorgeous, creamy rice and perfectly ripe mango sliced, presentation matters! This isn’t about fuss; it’s about making the moment feel special, which aligns perfectly with my philosophy around self-care through food. Think about how a colorful plate instantly makes your meal feel more intentional. I usually plate this on simple white dishes so the vibrant yellow of the mango just pops right off the platter.
The textural contrast is everything here. Right before serving, you absolutely have to garnish!
- Give it a light sprinkling of toasted sesame seeds. The little nutty crunch is phenomenal against the soft rice.
- If you happen to have toasted mung beans, use those instead—they add a unique, slightly savory crunch that really balances the sweetness.
- A final, small drizzle of any extra coconut sauce you reserved is crucial. Make sure the sauce pools right next to the rice so people can mix it in as they eat.
Because this dessert is so rich and satisfying, I find that it needs something light alongside it to cleanse the palate. Skip the heavy after-dinner wine! This pairs beautifully with a light, unsweetened jasmine or green tea. If you’re serving this earlier in the day, it also makes a wonderful, decadent addition to a weekend brunch spread; you can check out some of my favorite brunch ideas if you need other wholesome companions for your table.
Storage and Reheating for Leftover Mango Sticky Rice
This truly is an easy dessert, but you probably won’t have leftovers because it’s so good! If, by some miracle, you do have some of that decadent sweet sticky rice dessert remaining, handling it correctly is important so it doesn’t get hard. Always store the sweet rice and the extra coconut sauce in separate, airtight containers in the fridge. Don’t store the fresh mango with the rice; it gets slimy quickly.
When you’re ready to enjoy it again, the best reheating method is gentle steaming for the rice—just a few minutes until it softens up. If you are in a rush, microwave the rice in short 15-second bursts, stirring between each one, to bring back that moisture. Never reheat the mango; just slice a fresh piece to serve alongside your warmed, creamy rice!
Frequently Asked Questions About Mango Sticky Rice
I always get so many questions after people try this recipe for the first time! It’s a showstopper, which means people want to get every detail just right. This sweet Thai treat can feel intimidating, but I promise, once you know the tricks, it’s just simple cooking. Here are a few things I hear most often when people are trying to master this sweet sticky rice dessert.
Can I use regular white rice instead of glutinous rice?
Oh, no, please don’t! This is the single most important change you can’t make if you want authentic results. Regular long-grain or jasmine rice won’t release the same starches, so it won’t get that signature gummy, almost-like-tapioca texture. You really need glutinous rice, sometimes called sweet rice, for this to work. If you can’t find it locally, you can often find it right alongside other international items in large grocery stores.
What if I don’t have a rice cooker? Can I still make this?
Absolutely, you can! The rice cooker is just my favorite shortcut since it’s completely hands-off. If you don’t have one, you can definitely steam the rice, which is actually the most traditional method. After soaking your rice (don’t skip that!), drain it really well and steam it in a steamer basket lined with cheesecloth or parchment paper over simmering water for about 20 to 25 minutes until it’s soft and tender. Then, you treat it exactly the same way: pour the hot sauce over it immediately and let it soak!
Can I make the coconut sauce ahead of time?
Yes, you absolutely can! And I recommend it, especially if you’re planning to serve this when guests are over. I usually make the full creamy coconut sauce recipe a day ahead, let it cool, and keep it stored in an airtight jar in the fridge. It will thicken up significantly as it cools down. When you’re ready to serve, gently reheat the sauce on the stovetop over low heat, stirring constantly, just until it’s warm and pourable again—never boil it! Keep in mind that the rice needs the sauce warm when you mix them together, so keep the two components separate until it’s plating time.
Is this recipe really gluten free?
Yes, it’s inherently a fantastic option for those avoiding gluten! Since we are working purely with rice, coconut milk, fruit, and sugar, there are no wheat products involved. It truly is a naturally gluten free dessert. Just make sure whatever sugar you use is refined well, though most commonly available cane and brown sugars are safe for a gluten-free diet. Enjoy!
Nutritional Estimates for Mango Sticky Rice
I always try to keep things real here at Pure Plate Path, and that means being honest about what we’re eating, even when it’s a delicious treat like this Thai dessert recipe! Since we are using full-fat coconut milk and a good amount of sugar to make that beautiful, creamy sauce, this isn’t exactly a low-calorie snack. But that’s okay! Knowing what’s in it helps us enjoy it mindfully.
Please remember that these figures are just estimates based on the ingredients listed on the card—the size of your mangoes and the specific brand of coconut milk you choose will definitely change the final numbers. I calculated this based on the recipe yielding four generous servings:
- Calories: Right around 450 per serving. It’s decadent, but worth every bite!
- Total Fat: About 18 grams. That rich, wonderful mouthfeel comes mostly from that full-fat coconut milk, so we embrace it!
- Sugar Content: Expect around 35 grams. This is mostly from the added sugar in the sauce, plus the natural sweetness of the ripe mangoes.
- Carbohydrates: This will be the highest number, about 70 grams, primarily from the starches in the glutinous rice.
It’s fantastic to note that this dessert is naturally free of cholesterol and dairy, making it a wonderful, comforting vegan Thai dessert that just feels good going down. Enjoy your treat!
Share Your Homemade Mango Sticky Rice Success
Well, that’s it! You’ve transformed a few simple ingredients into one of the world’s most beloved sweet treats. I truly hope that making this mango sticky rice felt like a tiny, peaceful vacation right in your own kitchen. That’s the goal here at Pure Plate Path—to replace stress with simple, joyful cooking.
Now, the best part: I want to hear how it turned out for you! Did you find that perfect ripe mango? Did the rice cooker work its magic easily? Please, don’t be shy! Drop your thoughts in the comments below. Knowing which parts you loved or if you had any little tweaks helps me keep making honest, practical recipes for you.
If you snapped a picture of your gorgeous plating or your creamy coconut drizzle, I’d love to see it! While I always encourage you to share your culinary triumphs on social media, you can also send me photos directly through my contact page. Seeing your finished plates is seriously the highlight of my week!
If you tried this out and thought it was the best Thai dessert recipe you’ve ever made, please consider giving it a rating right here on the page. Let others know why they should trust this simple method. And if you’re looking for other incredible ways to utilize tropical flavors, you might want to check out this amazing version I saw recently from Evelyn for more inspiration on mastering Authentic Mango Sticky Rice.
Happy cooking, and enjoy every single creamy, sweet bite!
PrintThe Ultimate Easy & Authentic Thai Mango Sticky Rice (Rice Cooker Friendly)
Make classic Thai Mango Sticky Rice at home using a rice cooker for simple preparation. This recipe features sweet glutinous rice, a creamy coconut sauce, and ripe mangoes for a comforting Asian dessert.
- Prep Time: 20 min
- Cook Time: 30 min
- Total Time: 50 min
- Yield: 4 servings 1x
- Category: Dessert
- Method: Steaming/Rice Cooker
- Cuisine: Thai
- Diet: Vegan
Ingredients
- 1 cup glutinous rice (sticky rice)
- 2 ripe mangoes (Nam Dok Mai or Honey variety recommended)
- 1 cup coconut milk
- 3/4 cup sugar
- 1/4 teaspoon salt
- Sesame seeds or toasted mung beans for garnish (optional)
Instructions
- Rinse the glutinous rice thoroughly until the water runs clear. Soak the rice in water for at least 4 hours, or preferably overnight. Drain the soaked rice well.
- Cook the drained sticky rice in a rice cooker according to the manufacturer’s instructions, using slightly less water than you would for regular rice, or steam it until tender.
- While the rice cooks, prepare the coconut sauce. In a small saucepan, combine the coconut milk, sugar, and salt. Heat over medium-low heat, stirring until the sugar and salt dissolve completely. Do not boil.
- Once the rice is cooked, transfer it to a bowl. Pour about two-thirds of the warm coconut sauce over the hot sticky rice. Stir gently to combine, cover the bowl, and let it sit for 15 to 20 minutes to allow the rice to absorb the liquid and become creamy.
- Slice the ripe mangoes.
- To serve, place a portion of the sweet sticky rice on a plate. Arrange the sliced mango next to the rice. Drizzle the remaining coconut sauce over the rice and mango. Garnish with sesame seeds or toasted mung beans, if using.
Notes
- For a richer sauce, use full-fat coconut milk.
- If you do not have a rice cooker, you can steam the soaked rice for about 20-25 minutes until tender.
- This dessert is naturally gluten free and vegan if you avoid any non-vegan garnishes.
Nutrition
- Serving Size: 1 serving
- Calories: 450
- Sugar: 35g
- Sodium: 150mg
- Fat: 18g
- Saturated Fat: 15g
- Unsaturated Fat: 3g
- Trans Fat: 0g
- Carbohydrates: 70g
- Fiber: 3g
- Protein: 5g
- Cholesterol: 0mg