
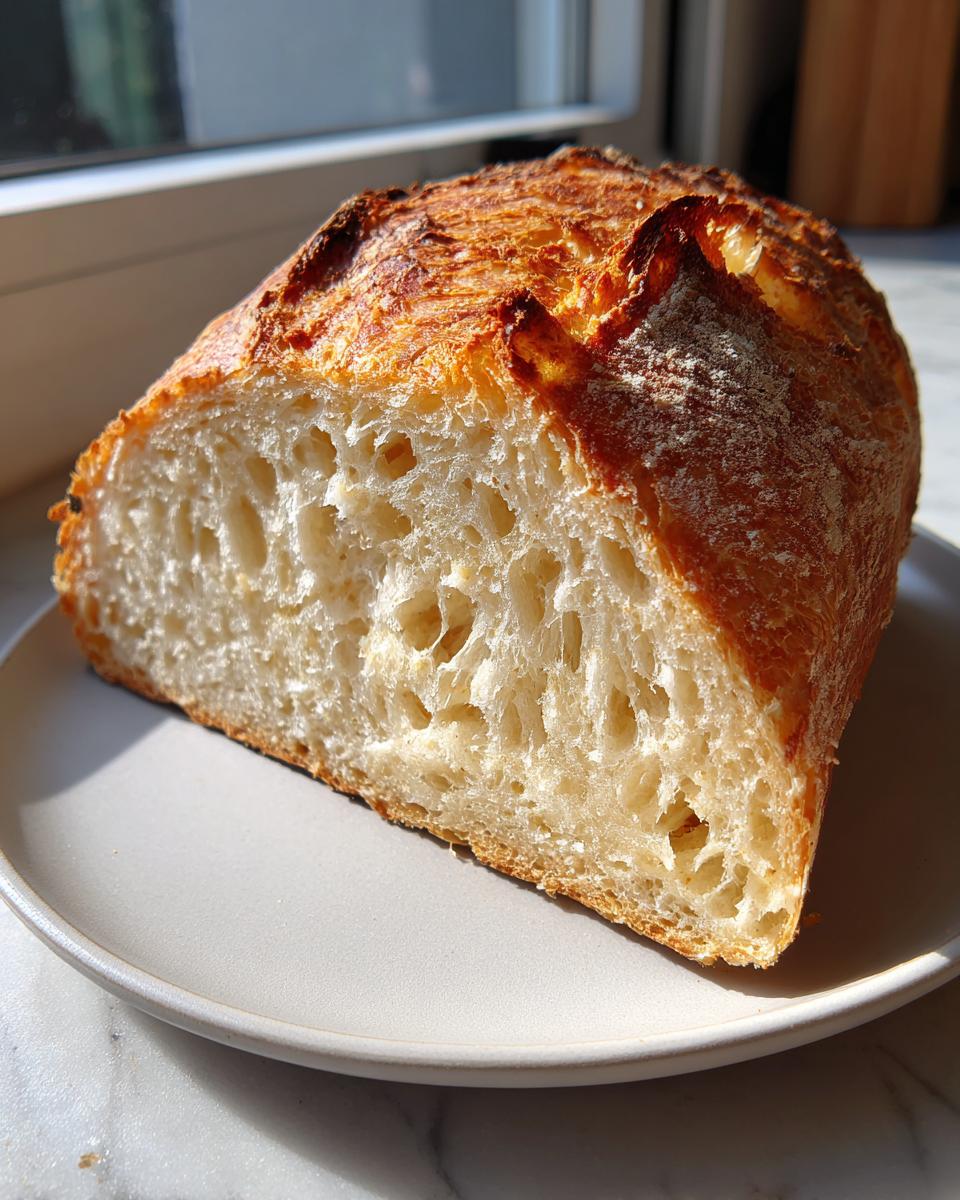
Okay, let’s just be honest for a second. If you’ve ever tried to make sourdough for your kids’ lunchboxes, you know the struggle! That beautiful, rustic artisan sourdough that comes out smelling incredible? It’s fantastic for dipping in soup, but try making a PB&J with it, and you end up with a sandwich that fights back. It’s too holey, too chewy, and honestly, too complicated for a Tuesday morning rush.
But what if I told you that you absolutely *can* have that tangy, gut-friendly goodness of sourdough, but soft? Like, truly soft, with a fine, even crumb perfect for slathering butter or making delicate tea sandwiches? That’s exactly what we cracked here. This recipe for Soft sourdough sandwich bread was born out of necessity when Sarah Miller realized she couldn’t keep relying on store-bought sliced bread while trying to manage a demanding career. We needed real food, but we needed it fast and family-friendly.
This loaf pan version changes everything. It’s surprisingly easy, making it the perfect beginner sourdough recipe that delivers a pillowy result every single time. You get all the benefits of fermentation without the giant caves in the middle of your slices!
If you’re already keeping your starter happy—and if you need a refresher on how to get it bubbling, check out our guide right here: sourdough starter guide from scratch—then you are halfway there. Get ready for the softest loaf you’ll ever pull out of a standard loaf pan!
- Why This Soft Sourdough Sandwich Bread Works for Beginners
- Gathering Ingredients for Your Soft Sourdough Sandwich Bread
- Step-by-Step Guide to Making Easy Sourdough Sandwich Bread
- Tips for Perfecting Your Soft Sourdough Sandwich Bread
- Storage and Reheating Instructions for Soft Sourdough
- Serving Suggestions for Your Honey Sourdough Bread
- Frequently Asked Questions About Soft Sourdough Sandwich Bread
- Estimated Nutritional Snapshot for Soft Sourdough
- Share Your Soft Sourdough Sandwich Bread Creations
Why This Soft Sourdough Sandwich Bread Works for Beginners
I know what you’re thinking: sourdough, soft, beginner—those three words don’t usually go together, right? Most standard sourdough recipes aim for maximum oven spring and an open, chewy crumb. That’s great for crusty bread, but terrible for toast that doesn’t shred apart! This recipe is different because we dialed back a few things to make it an easy sourdough sandwich bread that fits seamlessly into a busy week. This is how we beat the stress of baking and got that perfect texture.
The main reason this loaf is so approachable is that we aren’t aiming for 100% hydration. We keep the water content just right so the dough is easy to handle, even after four stretch and folds. It’s designed so you won’t feel lost during the bulk rise!
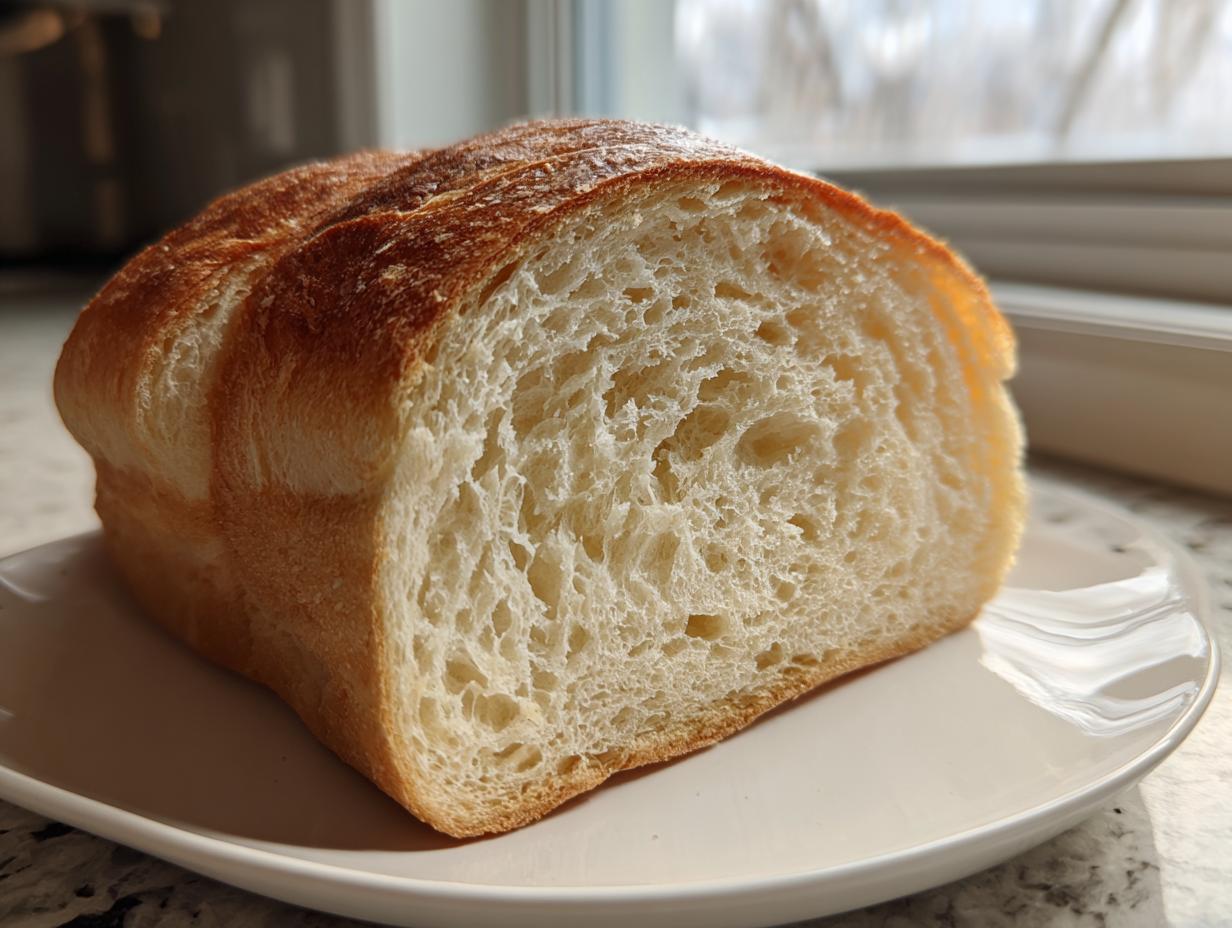
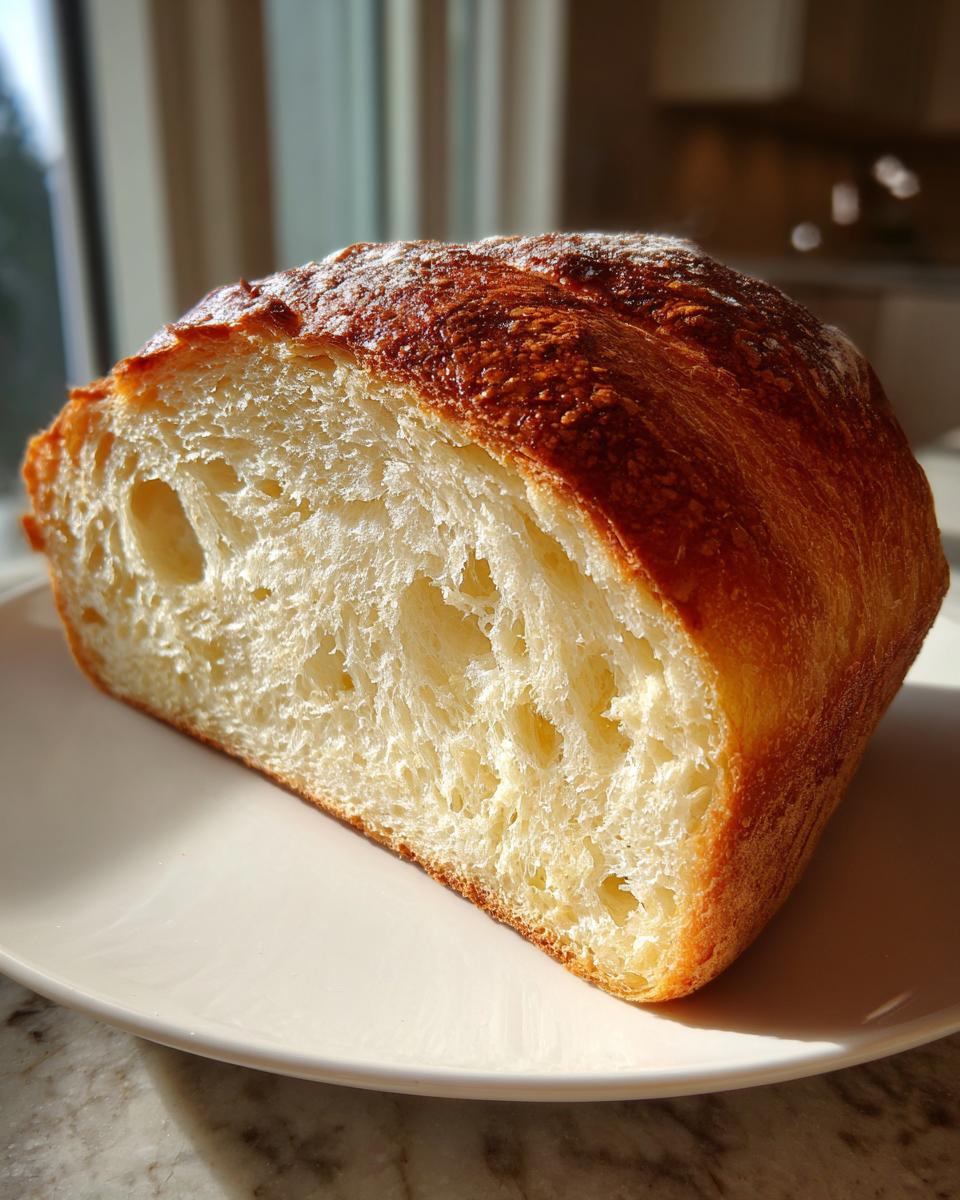
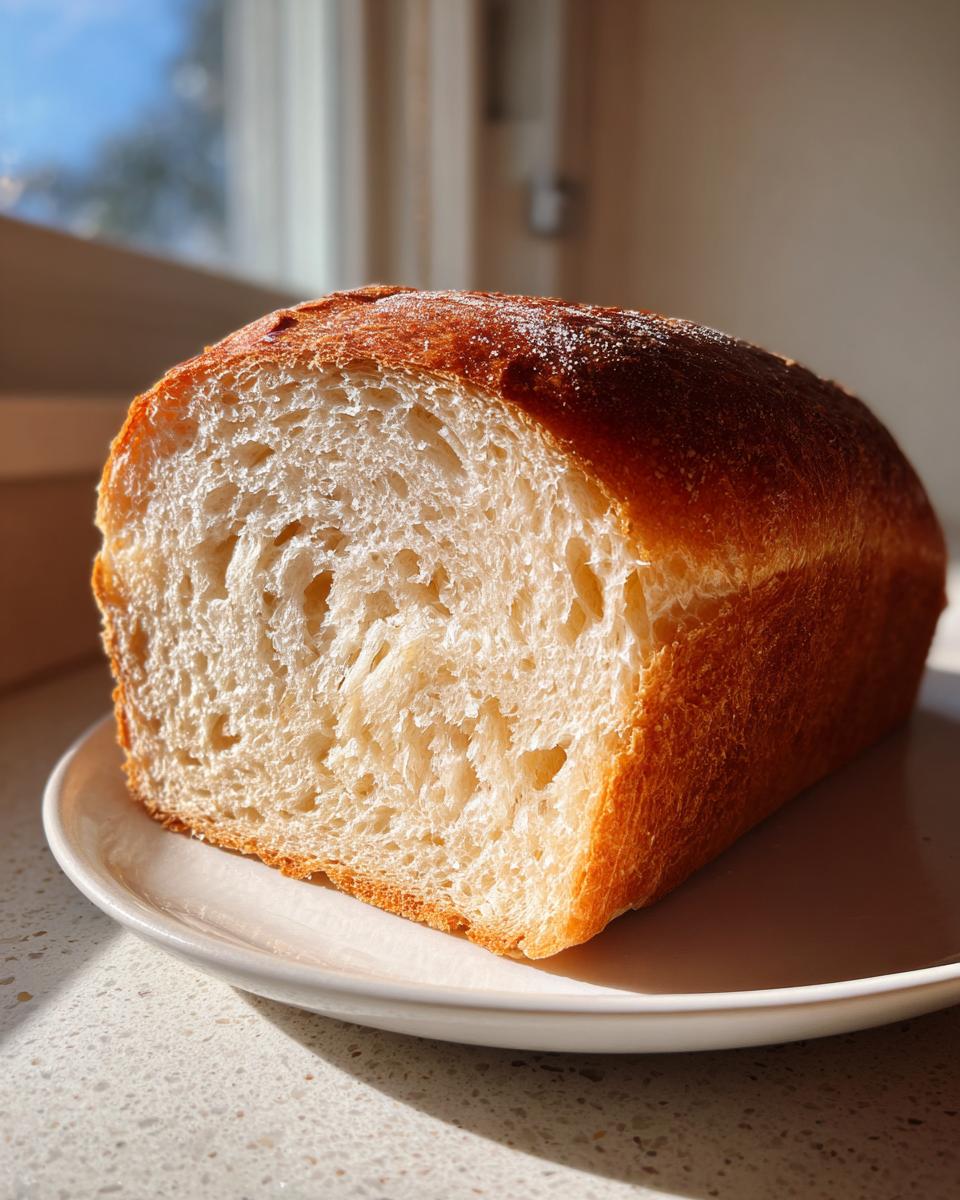
The Secret to a Pillowy Soft Sourdough Crumb
The absolute key to that incredibly smooth, soft sourdough crumb—the kind that feels almost like a brioche bun—is the inclusion of two non-traditional sourdough ingredients: honey and butter. Honey, our natural sweetener, actually keeps the crumb softer by interfering just slightly with the very strong gluten network you usually build. Then we fold in softened butter right before bulk fermentation. That fat coats the flour particles beautifully, resulting in a delicate texture that stays soft for days. Trust me, once you taste this, you won’t go back to your standard rustic loaf for sandwiches!
Gathering Ingredients for Your Soft Sourdough Sandwich Bread
You don’t need a hundred fancy things for this loaf—that’s the beauty of it! But the few things we do need must be right. When you look at the list, you’ll see it’s pretty straightforward, but a couple of those items are non-negotiable if you want that signature tender texture. First off, make sure your sourdough starter is super active. I mean bubbling up big and doubling nicely; this is essential for structure in a softer loaf. Also, we are sticking with proper bread flour here. It gives us the backbone we need to support the honey and butter without collapsing.
Ingredient Specifics and Substitutions
The 30 grams of honey is crucial, not just for that lovely subtle sweetness that makes this a wonderful honey sourdough bread, but because it physically changes how the crumb sets up. If you try to swap it straight for white sugar, you lose that special softness! Also, the butter needs to be truly softened—room temperature, yielding but not greasy. If you swap the bread flour for standard all-purpose flour, you’ll end up with a loaf that’s more delicate and might fall apart easily. We need that strength, so stick with the high-protein flour for the best outcome!
Step-by-Step Guide to Making Easy Sourdough Sandwich Bread
This is where the magic happens, and I promise, it feels less intimidating than actual artisan boules! We’re treating this dough gently because we want that luxurious, soft sourdough crumb, not a crusty, uneven monster. We are making a true sourdough loaf pan bread here, which is much more forgiving for anyone new to sourdough.
Mixing and Autolyse for Soft Sourdough Sandwich Bread
First things first: grab your warm water and drizzle in that 30g of honey. Stir it until it dissolves—you want that sweetness integrated right away. Then, whisk in your active starter until it looks cloudy. Now, dump in all your flour and salt. Mix this by hand until you have absolutely no dry flour spots left. It’s going to look shaggy, almost like wet cement, and that’s perfect! Cover the bowl; we are giving this dough a 30-minute rest period, called the autolyse. This rest lets the flour fully absorb the water before we even start developing the gluten network. Don’t skip it; it’s foundational!
Developing Structure with Folds and Butter Incorporation
After that 30 minutes, it’s time for our stretch and folds—we need four sets, spaced 30 minutes apart. You just grab one side, stretch it up gently, fold it over, rotate the bowl, and repeat until you’ve gone all the way around. You’re building strength softly. After that fourth set of folds, which should be around the 2-hour mark, we introduce the fat. Take your 20g of softened butter and just start folding it in gently. Don’t knead! Just fold until the butter seems totally incorporated. It might feel a little messy for a moment, but keep folding until the dough tightens up again. This is key for that amazing soft texture.
Shaping and Final Proofing in the Loaf Pan
Once the dough has increased by about 50% during bulk fermentation (look for those signs of life!), it’s time to shape. Gently turn the dough out onto a lightly floured counter. We aren’t trying to degas it completely—remember, we want soft, not airy! You want to shape it into a tight log or cylinder, seam-side down. Place that log carefully into your greased 9×5 inch loaf pan. Cover it up again. The final proof needs to look very specific for this recipe: wait until the dough swells about one inch above the rim of the pan. Any higher, and it might collapse when you bake it!
Baking Your Soft Sourdough Loaf Pan Bread
Get your oven screaming hot—we start at 450°F (232°C) with the rack low down. This initial blast gives the loaf a good spring. Bake it for 20 minutes at that high heat. Then, immediately drop the temperature to 375°F (190°C) and bake for another 20 to 25 minutes. Now, for the real test: stick an instant-read thermometer in the center; you want 205°F (96°C). As soon as you pull that glorious sourdough loaf pan bread out, gently brush the top with a tiny bit of melted butter if you want that extra soft crust—that’s an old trick that works wonders! You absolutely must let it cool completely before slicing, or you’ll steam out all that effort.
If you need any inspiration for what to do with that delicious bread besides sandwiches, check out this quick easy 5-minute bread dip recipe while you wait for yours to cool!
Tips for Perfecting Your Soft Sourdough Sandwich Bread
Look, even when I first started trying to get that perfect soft texture, I had loaves that just wouldn’t cooperate! When I was juggling everything, I realized that timing fermentation was where I usually messed up the structure. If it’s too cold in your kitchen, that 50% rise—which is what we need before shaping—can take forever, and you’ll get a dense, gummy loaf instead of a soft pillow.
I learned the hard way that you’ve got to watch the dough, not the clock, when it comes to bulk fermentation. That’s why I always recommend keeping an eye on it in a clear container, so you can actually see the volume increase. Don’t just guess!
Managing Bulk Fermentation for Beginners
If your kitchen is colder than 70°F (21°C), that bulk rise might stretch out to seven or eight hours, which can sometimes weaken the structure we built during the folds. If you see that dough looking sluggish, move it somewhere warmer—mine often goes into the oven with just the light on. It gives just enough ambient heat to keep those wild yeasts happy. Once it hits that 50% increase, it’s ready for shaping, no matter how long it took! You can check out my tips for another moist bake over here if you like moist one bowl banana bread recipe—the same patience applies.
Storage and Reheating Instructions for Soft Sourdough
We worked so hard to get this pillowy texture, so we definitely don’t want it going stale by day two! Since this is a high-utility loaf meant for lunches, keeping it soft is everything. Once it’s completely cooled—and I mean completely, don’t rush this part!—wrap it tightly in plastic wrap or put it in an airtight bread bag. Don’t refrigerate this one; that actually speeds up the staling process for sourdough.
If you find the edges getting a little firm after a couple of days, don’t toss it! Just quickly warm up a slice wrapped in foil for about five minutes in a 350°F oven. It comes right back to life. For more fantastic recipes that fit right into your busy life, take a peek at my soft buttery dinner rolls recipe!
Serving Suggestions for Your Honey Sourdough Bread
This loaf honestly shines when you move beyond the standard lunch meat sandwich. Because of that touch of honey and the ultra-soft crumb, it just begs to be treated a little sweeter in the morning, or even as a simple snack. Think about it: that soft sourdough is incredible when sliced thick and soaked for breakfast. You absolutely have to try it for French toast—it absorbs the custard perfectly without getting soggy in the middle, unlike regular white bread!

I also love toasting a slice just lightly and spreading it with a good quality jam or even some ricotta cheese. It’s a beautiful base for anything, really! If you’re looking for a truly next-level breakfast, hop over and see my recipe for easy French toast recipe simple breakfast; this bread is the perfect candidate for it!
Frequently Asked Questions About Soft Sourdough Sandwich Bread
After baking this loaf dozens of times for my own family’s chaotic schedule, I’ve totally figured out what trips people up. It’s usually timing, or maybe they try to skip a crucial step that I swear by. Don’t worry if your first attempt isn’t magazine-perfect; sourdough is a journey! We just want to get you that soft bread right away without the stress.
Can I skip the butter in this beginner sourdough recipe?
Technically, I suppose you could, but I’m going to strongly advise against it! The butter is absolutely necessary for making this an easy sourdough sandwich bread that stays soft for days. When you fold in that fat right before the bulk rise, it coats the gluten strands and keeps them from linking up too tightly as they ferment. If you skip it, you’re basically pulling a fast one on your own texture, and you’ll end up with a much chewier, standard loaf rather than the soft sourdough sandwich bread we are aiming for. Stick with the butter for that pillowy result!
How can I ensure I get that fine, soft sourdough crumb?
This comes down to a couple of things, but the biggest factor is definitely shaping and proofing! If you over-proof the dough in the pan, the internal structure gets too weak, and those huge air bubbles form—what we call large, uneven holes. We want the opposite for a great sandwich! Make sure you only let it rise about an inch over the pan rim. Also, the shaping step is key: create a nice, tight log so that the dough stays compact and even while baking. This careful handling guarantees that gorgeous, fine crumb.
If you’re looking for something quick to pair with that fantastic bread, you should check out my recipe for easy chicken piccata 30-minute lemon caper sometime this week!
Estimated Nutritional Snapshot for Soft Sourdough
Okay, for those of you who track things—and I totally get it, because knowing what goes into your fuel is important—here is the breakdown for this loaf. Since we added honey and butter, it’s slightly richer than a basic sourdough, but it’s still miles better than anything store-bought. I want to emphasize that these numbers are just an estimate based on the ingredients I use, and your actual values might vary a bit depending on the specific flour or starter you have!
- Serving Size: 1 slice
- Calories: 220
- Sugar: 2g
- Sodium: 300mg
- Fat: 3g (mostly from the butter we folded in!)
- Carbohydrates: 42g
- Protein: 8g
See? Very reasonable for a slice of homemade, naturally leavened bread. It’s hearty enough to keep you going until lunch. Just remember, this is an estimation—it’s real food, not lab food, so don’t sweat the small stuff!
Share Your Soft Sourdough Sandwich Bread Creations
I genuinely hope this loaf brings a little bit of ease and wonderful flavor back to your busy routine. Baking this soft sourdough sandwich bread has made such a difference in our weeknight lunches and weekend brunches, and I really want to know how it turned out for you!
When you pull that golden, soft loaf out of the pan, snap a picture! Tag me on social media so I can see your beautiful bake. It helps other busy home cooks, like you and me, see that achieving a soft sourdough crumb is totally possible, even with a busy schedule. If you loved how simple this beginner sourdough recipe was, please consider leaving a quick rating at the top of the page too; it means the world to me as I try to share these practical wellness paths!
If you’re curious about the philosophy behind why we keep things simple here at Pure Plate Path, you can always peek at our About Page. Happy baking, and enjoy those soft sandwiches!
PrintSoft Sourdough Sandwich Bread for Easy Lunches

Bake a soft sourdough loaf pan bread with a fine, pillowy crumb perfect for daily sandwiches. This beginner sourdough recipe uses honey for natural sweetness.
- Prep Time: 30 min
- Cook Time: 45 min
- Total Time: 5 hours 45 min
- Yield: 1 loaf 1x
- Category: Baking
- Method: Baking
- Cuisine: American
- Diet: Vegetarian
Ingredients
- 100g active sourdough starter (100% hydration)
- 350g warm water
- 500g bread flour
- 10g fine sea salt
- 30g honey
- 20g unsalted butter, softened
Instructions
- Mix the active starter, warm water, and honey in a large bowl until combined.
- Add the bread flour and salt to the wet ingredients. Mix by hand until a shaggy dough forms and no dry flour remains.
- Cover the bowl and let the dough rest for 30 minutes (autolyse).
- Perform four sets of stretch and folds every 30 minutes. After the fourth set, incorporate the softened butter by gently folding it into the dough until it is fully absorbed.
- Place the dough in a lightly oiled bowl, cover, and allow it to bulk ferment at room temperature until it has increased in volume by about 50% (this may take 3-5 hours depending on your kitchen temperature).
- Gently shape the dough into a tight log.
- Place the shaped dough seam-side down into a lightly greased 9×5 inch loaf pan.
- Cover the pan and let the dough proof at room temperature until the dough has risen about 1 inch above the rim of the pan (final proof, about 1-2 hours).
- Preheat your oven to 450°F (232°C) with a rack in the lower third position.
- Bake the bread for 20 minutes at 450°F (232°C). Reduce the oven temperature to 375°F (190°C) and continue baking for another 20-25 minutes, or until the crust is golden brown and the internal temperature reaches 205°F (96°C).
- Remove the bread from the pan immediately and cool completely on a wire rack before slicing.
Notes
- For a softer crust, lightly brush the top of the loaf with melted butter immediately after removing it from the oven.
- Use a high-protein bread flour to achieve the best structure for this soft sourdough crumb.
- If your kitchen is cold, place the dough in a slightly warm spot, like inside an oven with only the light on, to encourage fermentation.
Nutrition
- Serving Size: 1 slice
- Calories: 220
- Sugar: 2
- Sodium: 300
- Fat: 3
- Saturated Fat: 2
- Unsaturated Fat: 1
- Trans Fat: 0
- Carbohydrates: 42
- Fiber: 2
- Protein: 8
- Cholesterol: 5