

Are you tired of that 5 PM panic? You know the one—staring into the fridge convinced that a satisfying weeknight dinner is just outside your reach? I get it! Balancing life and wanting real, flavorful food can feel impossible. That’s why I wanted to share something truly special today: my go-to recipe for Crispy Baked Chicken Chimichangas. When I first started Pure Plate Path, I was struggling to find Tex-Mex favorites that weren’t loaded with fuss. This recipe, born from my own necessity to eat well without spending an hour cooking after work, cuts through the chaos. It proves you can have that satisfying crunch and rich flavor in under 40 minutes. Trust me, these are about to become your favorite!
- Why These Baked Chicken Chimichangas Are Your New Weeknight Mexican Dinner Staple
- Gathering Ingredients for Your Easy Chimichangas Recipe
- Step-by-Step Instructions for Perfect Baked Chimichangas
- Variations: Making Beef Chimichangas or Air Fryer Chimichangas
- Tips for Success with Cheesy Tortilla Wraps
- Serving Suggestions for Your Crispy Chimichangas
- Storage and Reheating Instructions for Leftover Chimichangas
- Frequently Asked Questions About Chimichanga Recipe
- Approximate Nutritional Data for Baked Chicken Chimichangas
- Share Your Homemade Chimichangas Experience
Why These Baked Chicken Chimichangas Are Your New Weeknight Mexican Dinner Staple
Honestly, these Chimichangas are a game-changer for busy evenings. We’re talking about a rich, cheesy, savory Tex-Mex Favorite that lands on your table in about 35 minutes total. Who needs takeout when you can have this? My favorite part is that they genuinely taste like they came from a restaurant, yet they use ingredients you probably already have on hand. If you need quick dinner ideas that your whole family will cheer for, look no further. This is your new go-to Weeknight Mexican Dinner!
Achieving Crispy Chimichangas Without the Oil
If the thought of deep-frying terrifies you (and believe me, cleaning up that grease definitely scares me off!), we’ve got you covered. Baking is the secret weapon here. We’re aiming for those beautifully golden, Crispy Chimichangas, and a quick spray of cooking oil or a light brush of olive oil before baking does all the hard work. You get all the crunchy satisfaction, but you skip the mess and the heavy feeling afterward. It’s the best of both worlds, really!
Gathering Ingredients for Your Easy Chimichangas Recipe
Okay, let’s talk about what you need! I keep the ingredient list super straightforward because we aren’t looking for complicated here; we want Easy Chimichangas ready fast. You’ll need about eight medium flour tortillas—make sure they are fresh, or they will definitely snap when you try to roll them up. The main stars are the filling components, and how you prep them really matters for the texture of these Homemade Chimichangas.
The Best Chimichanga Filling Components
For the actual filling, we are using 2 cups of cooked, shredded chicken—make sure that chicken is ready to go! Then comes the cheese: grab 1 cup of Monterey Jack. I highly recommend shredding it yourself, as the anti-caking agents in pre-shredded stuff can make the filling a little grainy instead of perfectly gooey. Mix that in with about 1/2 cup of your favorite salsa—pick mild or medium, depending on your crew’s spice tolerance. Finally, a couple of seasonings and 1/4 cup of softened cream cheese to make everything bind together beautifully into the Best Chimichanga Filling.
Step-by-Step Instructions for Perfect Baked Chimichangas
This is where the magic happens, and trust me, following these steps ensures you knock these out as the ultimate Quick Dinner Ideas. The best part about this method is how fast the actual assembly goes once the oven is warm. Before you even grab your bowl, make sure you’ve got your oven preheated to 400°F (200°C) and a baking sheet lightly sprayed—we want easy cleanup later!
Preparing the Chicken Chimichangas Filling
Let’s get that filling mixed up! Grab your bowl and toss in the 2 cups of shredded chicken, the cheese, the salsa, and all those wonderful spices—chili powder, cumin, and garlic powder. Now, the cream cheese is key here. It has to be softened because if it’s cold, you’ll end up with little hard clumps in your mixture. Mix everything gently but thoroughly until it’s uniform. You want that creamy, slightly spicy chicken mix ready to go!
Rolling and Sealing Your Homemade Chimichangas
This next part stops everything from falling apart! Tortillas need to be warm—just 15 seconds in the microwave usually does the trick. This makes them super pliable so they don’t crack when you try to roll. Lay the warm tortilla flat, put about a quarter cup of filling near one edge, fold the sides inward over the filling, and then roll it up tightly, just like a burrito. I always use a little toothpick right in the seam to secure it. It feels a bit old-fashioned, but it’s my little hack to guarantee nothing bursts open while these Homemade Chimichangas bake!
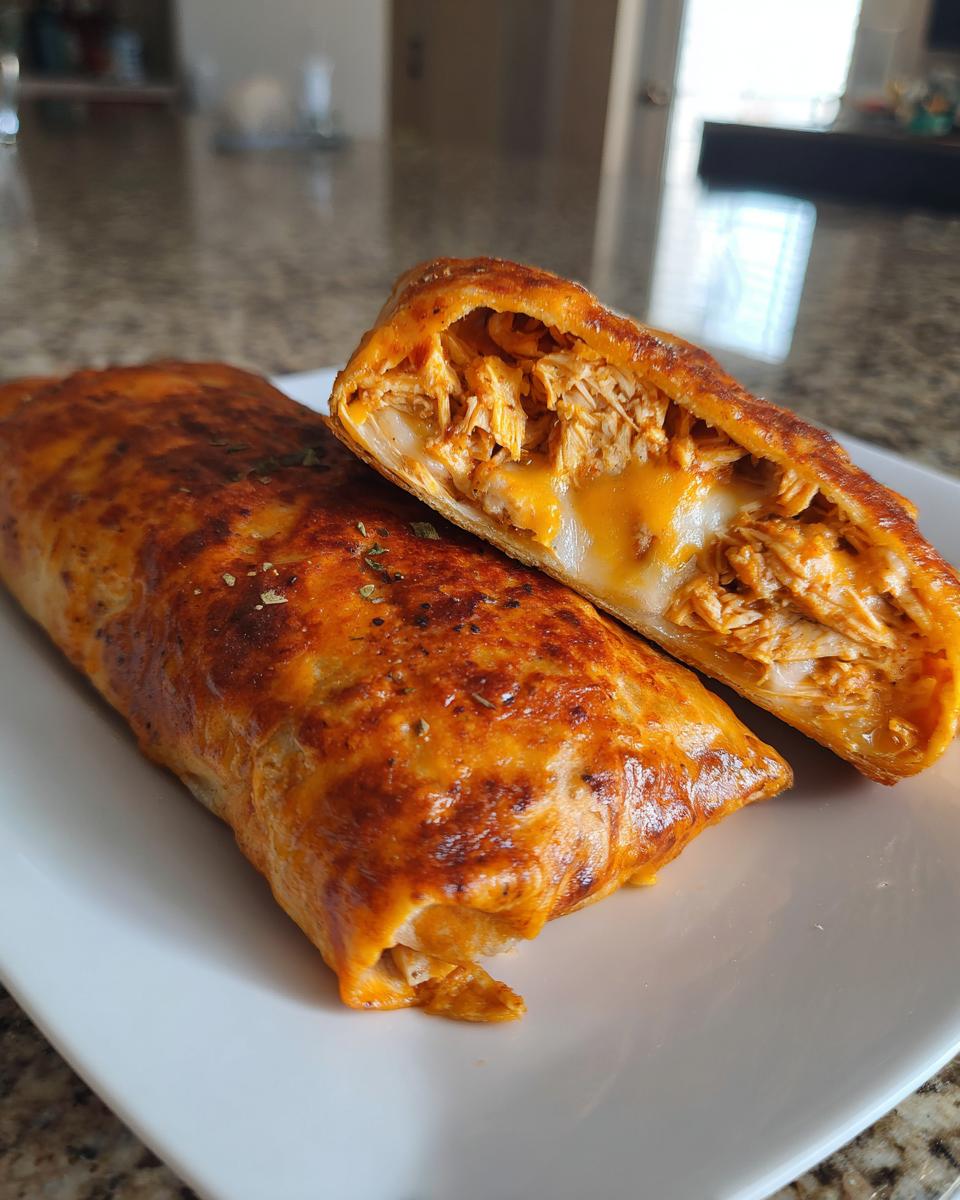
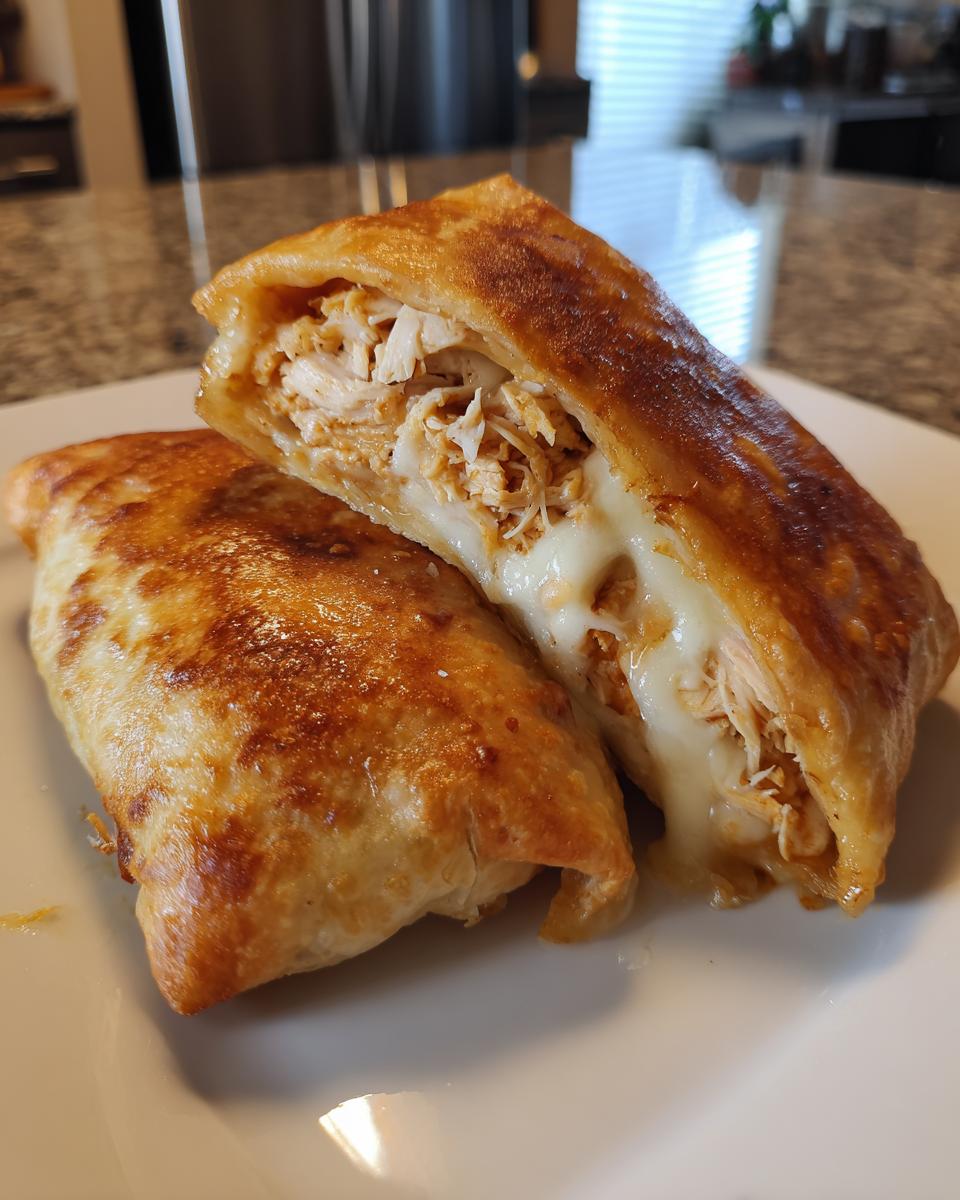
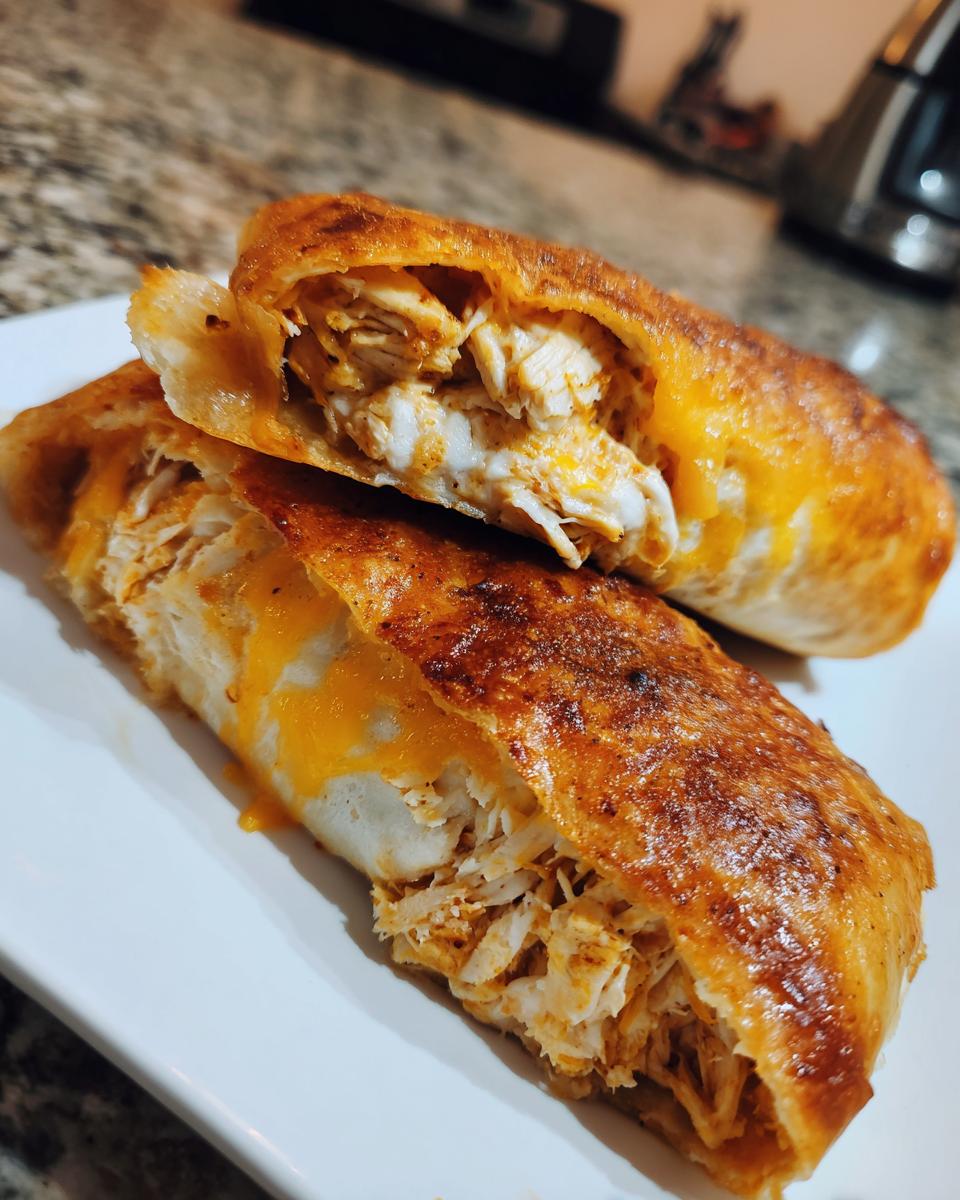
Baking for Golden, Crispy Chimichangas
Load your rolled guys seam-side down onto that sprayed baking sheet. Don’t forget this step: hit the tops lightly again with cooking spray or brush with oil. This is crucial for color and crunch! Pop them into that 400°F oven for 15 to 20 minutes. Set a timer, and when you hit the halfway mark, flip them over. This flips your chance of getting those coveted Crispy Chimichangas! Pull them out, let them cool just a second, and remember to take those little toothpicks out before serving!
Variations: Making Beef Chimichangas or Air Fryer Chimichangas
I love that this recipe for Chicken Chimichangas is so adaptable. Not every night calls for chicken, and sometimes you just need that extra bit of speed. If you are craving that deep ground beef flavor, swapping it out is a breeze! For Beef Chimichangas, just brown about a pound of ground beef with your favorite taco seasoning until it’s cooked through. Drain off any extra grease before mixing it in with the cheese and salsa—it works just as perfectly as the chicken.
And for those days when you need even faster cleanup, we have to talk about the air fryer. Seriously, the air fryer turns these into ultra-crispy snacks in record time. If you’re leaning toward the Air Fryer Chimichangas route, just pop the assembled wraps into the basket. Skip the oven and run them at 375°F (190°C) for about 8 to 10 minutes maximum, flipping them through the middle. You get that incredible crunch with virtually no added oil. It’s amazing for quick meals!
Tips for Success with Cheesy Tortilla Wraps
When you’re building these beautiful Cheesy Tortilla Wraps that turn into Chimichangas, a few tiny details make a huge difference between good and absolutely fantastic. Since we aren’t deep-frying, we need to help that tortilla crisp up just right in the oven. The recipe suggests cooking spray, which works well, but if you want that deeper, richer golden color—the kind that makes your mouth water—try swapping the spray for melted butter brushed on lightly instead. It gives the outside a little extra TLC.
Also, remember what I said about warming those tortillas? That is not optional! Cold flour tortillas are brittle, and no matter how carefully you fold the sides in, they are going to crack when you start rolling. Heating them just until they become soft and stretchy means you can wrap that cheesy filling up tightly without fear of spillage. It’s that prep step that secures your masterpiece before it even sees the oven!
Serving Suggestions for Your Crispy Chimichangas
Okay, your Chimichangas are golden, crispy perfection—what’s next? Presentation is everything, right? You absolutely must have the classic lineup waiting on the side. We’re talking cool dollops of sour cream to cut the spice, a big scoop of fresh guacamole for healthy fat, and a sprinkle of vibrant, chopped cilantro on top for color and freshness. It just brightens everything up!
If you’re serving these as the main event for your Easy Family Dinner, they need a little something extra to feel like a complete meal. Instead of reaching for store-bought stuff, why not whip up a batch of my simple turmeric rice? It’s bright, fluffy, cooks up fast, and pairs beautifully with the savory filling. A side of black beans, maybe seasoned with just a dash of cumin, makes this Tex-Mex favorite feel hearty and ready for anything!
Storage and Reheating Instructions for Leftover Chimichangas
Because these Chimichangas are so good, you might actually have leftovers—although I certainly never manage to! If you do, thankfully they store like a dream. Make sure they are completely cooled before wrapping them tightly. I usually put mine into an airtight container and they stay perfectly fine in the fridge for up to three days. That’s right, easy Tuesday dinner becomes easy Thursday lunch!
Now, the most important part: reheating. If you use the microwave to reheat these, you are going to turn that gorgeous crisp shell into a sad, soft wrapper. Don’t do it! For the best results, throw your leftovers onto a baking sheet and pop them back into a 350°F oven for about 8 to 10 minutes. If you have your air fryer handy, that’s even better—just 4 minutes at 375°F should bring that crunch right back to life. These Easy Chimichangas deserve to be crispy every single time, so skip the microwave!
Frequently Asked Questions About Chimichanga Recipe
It’s totally normal to have questions when you’re making something new, even if it’s designed to be an Easy Chimichangas Recipe! I get asked about substitutions all the time, especially when people are trying to clean out their pantry or skip an extra grocery run. I’ve compiled a few of the common queries I see so we can make sure your Chimichangas turn out perfect for your next Tex Mex Favorite meal.
Can I use pre-cooked beef instead of chicken for these Chimichangas?
Absolutely, yes! That’s one of the great things about this recipe; it’s so flexible for a Quick Dinner. If you prefer a richer flavor, you can easily make Beef Chimichangas instead. Just make sure whatever beef you use is already cooked. If you’re making the filling from scratch and browning raw ground beef—say, a pound or so—you’ll want to drain off every last bit of grease once it’s browned. Then, stir in about two tablespoons of taco seasoning into the meat mixture before you fold it in with the cheese and salsa. It makes for a fantastic, savory filling!
How do I keep my Chimichangas from getting soggy?
This is the biggest fear when you try to transition away from deep frying, but I promise, the baking method minimizes this risk! The key to preventing soggy bottoms on your Crispy Chimichangas is twofold. First, don’t overload them; stick to that quarter cup of filling per tortilla. Too much filling means the tortilla won’t seal well or the moisture has nowhere to go. Second, and this is crucial, you need to serve them immediately after they come out of the oven or air fryer. They are designed to be eaten hot and fresh when the exterior is at its crispiest. If you need to prep ahead, reheat them using that dry heat method (oven or air fryer, never microwave!) right before serving.
Another quick tip that helps if you’re making a chicken-heavy, juicy filling is to add your seasonings directly to the chicken before mixing it with the cheese and salsa. This ensures the spices absorb some moisture rather than the tortilla absorbing all of it!
If you’re curious about other quick, satisfying meals that won’t let you down, check out my ideas for a Chicken Burrito Bowl—it’s another great way to get those Tex-Mex flavors without worrying about a wrapper.
Approximate Nutritional Data for Baked Chicken Chimichangas
I always like to include an idea of what you’re looking at nutritionally, just to keep things honest and transparent, which is super important to me here at Pure Plate Path. Since we’re baking these instead of deep frying, we save on a lot of unnecessary fat, which is a big win for a family meal! The numbers below cover exactly two of these Chicken Chimichangas, before you add any outside toppings or sauces.
Please remember, these values are just estimates based on the ingredients listed in the recipe. If you swap out the Monterey Jack for a sharper cheddar, or if you use a heavier hand with the salsa, things will shift a bit. It’s just a guide so you know what a great, balanced meal you’re putting together!
- Serving Size: 2 chimichangas
- Calories: 450
- Fat: 22g
- Saturated Fat: 10g
- Carbohydrates: 40g
- Protein: 25g
- Sugar: 3g
- Sodium: 650mg
See? That’s pretty good for a satisfying Tex Mex Favorite! Because we are using lean chicken and baking everything, the fat content stays manageable, and you still get that fantastic amount of protein to keep everyone full and energized. Enjoy knowing you’re serving up a delicious, sensible meal!
Share Your Homemade Chimichangas Experience
Well, that’s it! I’ve shared my little secrets for making these Easy Weeknight Chimichangas crispy, cheesy, and absolutely stress-free for a busy night. Now comes the part where I truly love hearing from you all!
The best way for me to know if I’ve hit the mark is seeing your results. Did you try them baked? Did you sneak in some refried beans? Did you manage to get them baked to that perfect golden crisp that we talked about? I genuinely want to know! Please take a moment to leave a star rating for this Chimichanga Recipe right below this section. Those stars help other busy people find these simple, wonderful meals!
And if you made a cool variation—maybe you tried a lean ground beef filling, or perhaps you topped yours with something unexpected—please drop all the details in the comments section. Seriously, don’t be shy! I love reading about how you adapt these foundational recipes to fit your family’s needs. If you have any specific questions about the process or need help troubleshooting, you can always reach out via my contact page, but usually, the community here has amazing tips too. Happy cooking, my friends!
PrintCrispy Baked Chicken Chimichangas for Quick Weeknight Dinners
Make these simple, crispy baked chicken chimichangas. Filled with seasoned chicken and cheese, they are a satisfying Tex-Mex favorite ready fast for your busy weeknights.
- Prep Time: 15 min
- Cook Time: 20 min
- Total Time: 35 min
- Yield: 4 servings 1x
- Category: Dinner
- Method: Baking
- Cuisine: Tex-Mex
- Diet: Vegetarian
Ingredients
- 8 medium flour tortillas
- 2 cups cooked, shredded chicken
- 1 cup shredded Monterey Jack cheese
- 1/2 cup salsa (mild or medium)
- 1/4 cup cream cheese, softened
- 1 teaspoon chili powder
- 1/2 teaspoon cumin
- 1/4 teaspoon garlic powder
- Cooking spray or 2 tablespoons olive oil
- Optional toppings: sour cream, guacamole, fresh cilantro
Instructions
- Preheat your oven to 400°F (200°C). Lightly spray a baking sheet with cooking spray.
- In a medium bowl, combine the shredded chicken, Monterey Jack cheese, salsa, softened cream cheese, chili powder, cumin, and garlic powder. Mix until the filling is evenly combined.
- Warm the tortillas briefly in the microwave (about 15-20 seconds) to make them pliable. This prevents tearing when rolling.
- Place about 1/4 cup of the filling mixture near the edge of one tortilla.
- Fold the sides of the tortilla inward over the filling. Then, tightly roll the tortilla up like a burrito. Secure the seam with a toothpick if necessary.
- Place the rolled chimichanga seam-side down on the prepared baking sheet. Repeat with the remaining tortillas and filling.
- Lightly spray the tops of the chimichangas with cooking spray or brush with olive oil for crisping.
- Bake for 15 to 20 minutes, flipping halfway through, until the tortillas are golden brown and crispy.
- Remove toothpicks before serving. Serve immediately with your choice of sour cream, guacamole, or fresh cilantro.
Notes
- For an air fryer method, cook at 375°F (190°C) for 8 to 10 minutes, flipping halfway, until golden and crispy.
- You can substitute ground beef for chicken. Brown 1 pound of ground beef with taco seasoning before mixing it into the filling.
- If you prefer a deeper flavor, brush the tortillas lightly with melted butter before baking instead of using cooking spray.
Nutrition
- Serving Size: 2 chimichangas
- Calories: 450
- Sugar: 3
- Sodium: 650
- Fat: 22
- Saturated Fat: 10
- Unsaturated Fat: 12
- Trans Fat: 0
- Carbohydrates: 40
- Fiber: 3
- Protein: 25
- Cholesterol: 75