
Listen, I know you’re busy. Life just moves so fast these days, right? Sometimes you need a dessert that looks like you spent hours on it but actually takes about fifteen minutes of active work. That’s where self-care meets dessert, and I’m thrilled to share my secret weapon: the ultimate easy cherry cheesecake trifle. This recipe is pure genius because it requires absolutely no oven time. It’s all about layering creamy, sweet components in individual glasses, which is so much prettier than one big bowl! This simple approach lets you step away from the rush and enjoy a moment of peace, knowing you created something wonderful. You can check out more of our simple ideas over in our healthy desserts collection when you have a second. Trust me, this fast format makes dessert feel special again.
- Why This Is the Best Easy Cherry Cheesecake Trifle Recipe
- Gather Your Ingredients for the Easy Cherry Cheesecake Trifle
- Step-by-Step Guide to Assembling Your Easy Cherry Cheesecake Trifle
- Tips for the Perfect Easy Cherry Cheesecake Trifle
- Ingredient Notes and Substitutions for Your Easy Cherry Trifle Recipe
- Serving Suggestions for Your Quick Cheesecake Dessert
- Storage and Reheating Instructions for the Layered Cherry Dessert Cups
- Frequently Asked Questions About This Easy Cherry Cheesecake Trifle
- Share Your Simple Cherry Cream Cheese Dessert Creations
Why This Is the Best Easy Cherry Cheesecake Trifle Recipe
If you need a dessert that’s stunning but requires zero sweat, this is it. We focus here on simple, rewarding assembly, not complicated baking. This recipe is the definition of a minimal effort cheesecake.
- It whips up in about 15 minutes—seriously!
- No oven required means no stress trying to time the bake.
- It delivers that rich, creamy flavor profile you expect from cheesecake.
- It’s perfect as a quick cheesecake dessert that looks fantastic for guests. You can see how we use similar speed-focused recipes for easy desserts for a crowd too.
Gather Your Ingredients for the Easy Cherry Cheesecake Trifle
Okay, let’s get these simple ingredients ready! Because this is a no-bake dish, the quality and state of your ingredients matter a lot for the final texture. Remember, we’re using convenience products to keep things lightning fast, but make sure your cream cheese is truly softened so it mixes without lumps.
- 1 package (8 ounces) cream cheese, softened
- 1 cup powdered sugar
- 1 teaspoon vanilla extract
- 1 container (8 ounces) frozen whipped topping, thawed (or heavy cream, whipped, if you prefer!)
- 1 package (14.3 ounces) graham cracker crust mix, or about 2 cups graham cracker crumbs
- 1/4 cup melted butter
- 1 can (21 ounces) cherry pie filling (Trust me, this is the secret to speed! You can find tips on how to elevate commercial fillings here.)
That’s honestly the whole list! Minimal shopping, maximum flavor.
Step-by-Step Guide to Assembling Your Easy Cherry Cheesecake Trifle
Now for the fun part—building these beautiful layered cherry dessert cups! The best part about this recipe is that you aren’t baking anything, so you can assemble this entire gorgeous dessert faster than most cakes even finish preheating. Take your time layering, but remember we want to keep that air in the cream cheese mixture for the best texture in this fast cherry parfait. We want the whole process to feel like a treat, not a chore, which is why I love how simple this simple cherry cream cheese dessert comes together.
Preparing the Creamy Cheesecake Layer
First things first: tackle the cheese filling. Beat your softened cream cheese together with the powdered sugar and vanilla extract until it’s perfectly smooth and airy. Next, gently fold in that thawed whipped topping—and I mean gently! You want to keep all that fluffiness, so stop folding the second you see no more white streaks.
Creating the Easy Graham Cracker Dessert Base
Move onto your crumble layer. In a separate bowl, toss those graham cracker crumbs with the melted butter until they are evenly coated, looking like wonderful, sweet, damp sand. If you don’t have graham crackers, crushed vanilla wafers or shortbread cookies work just as well, honestly!
Assembling the Individual Cheesecake Servings
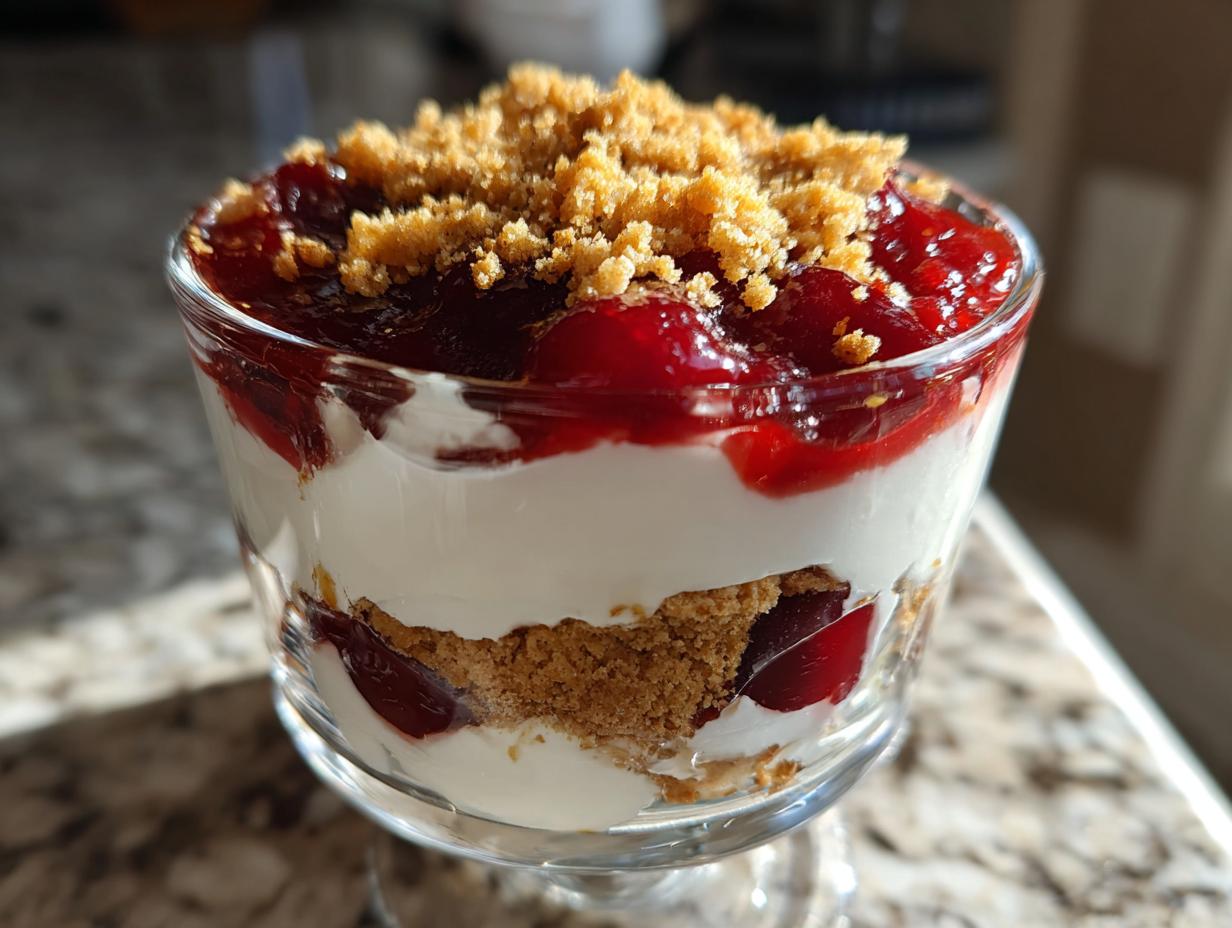
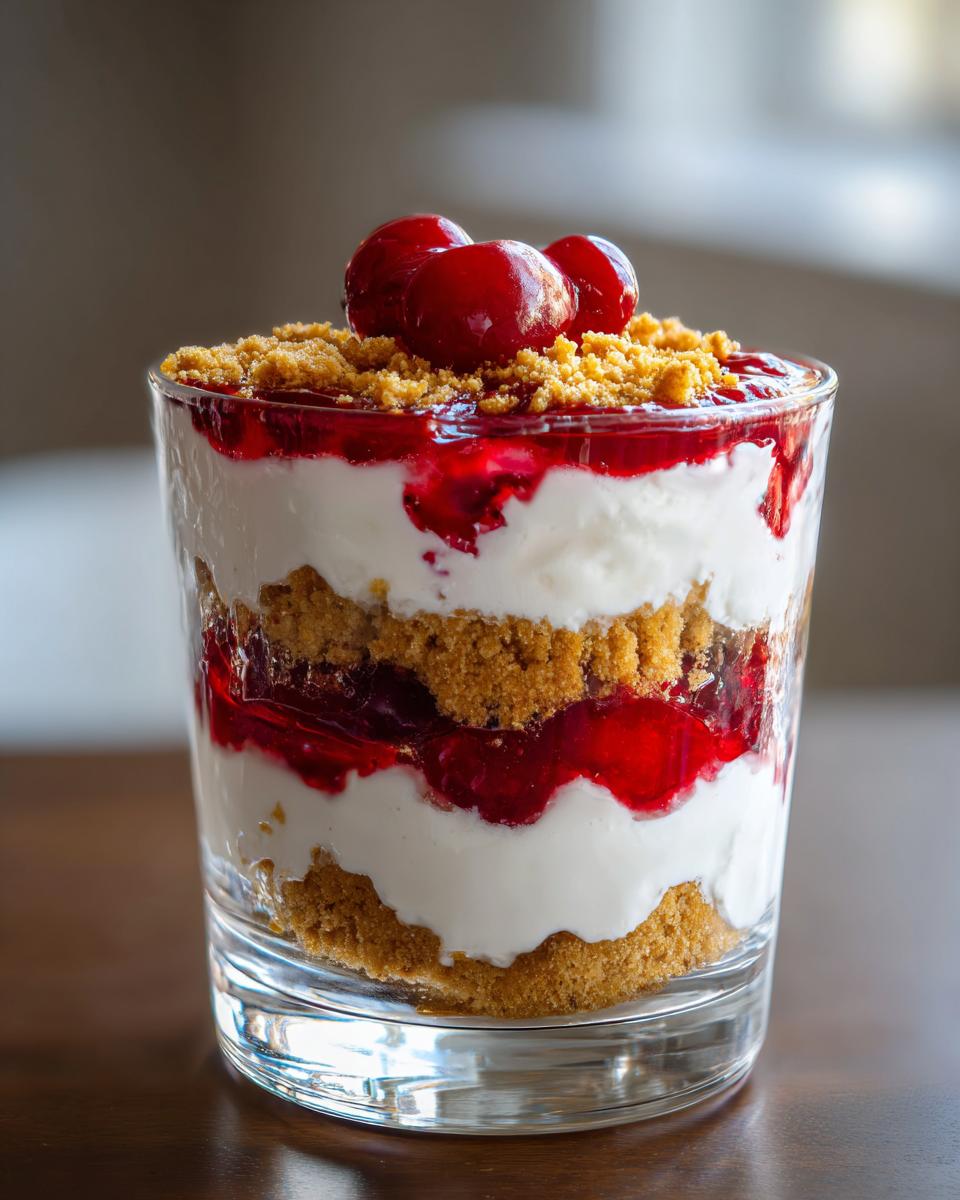
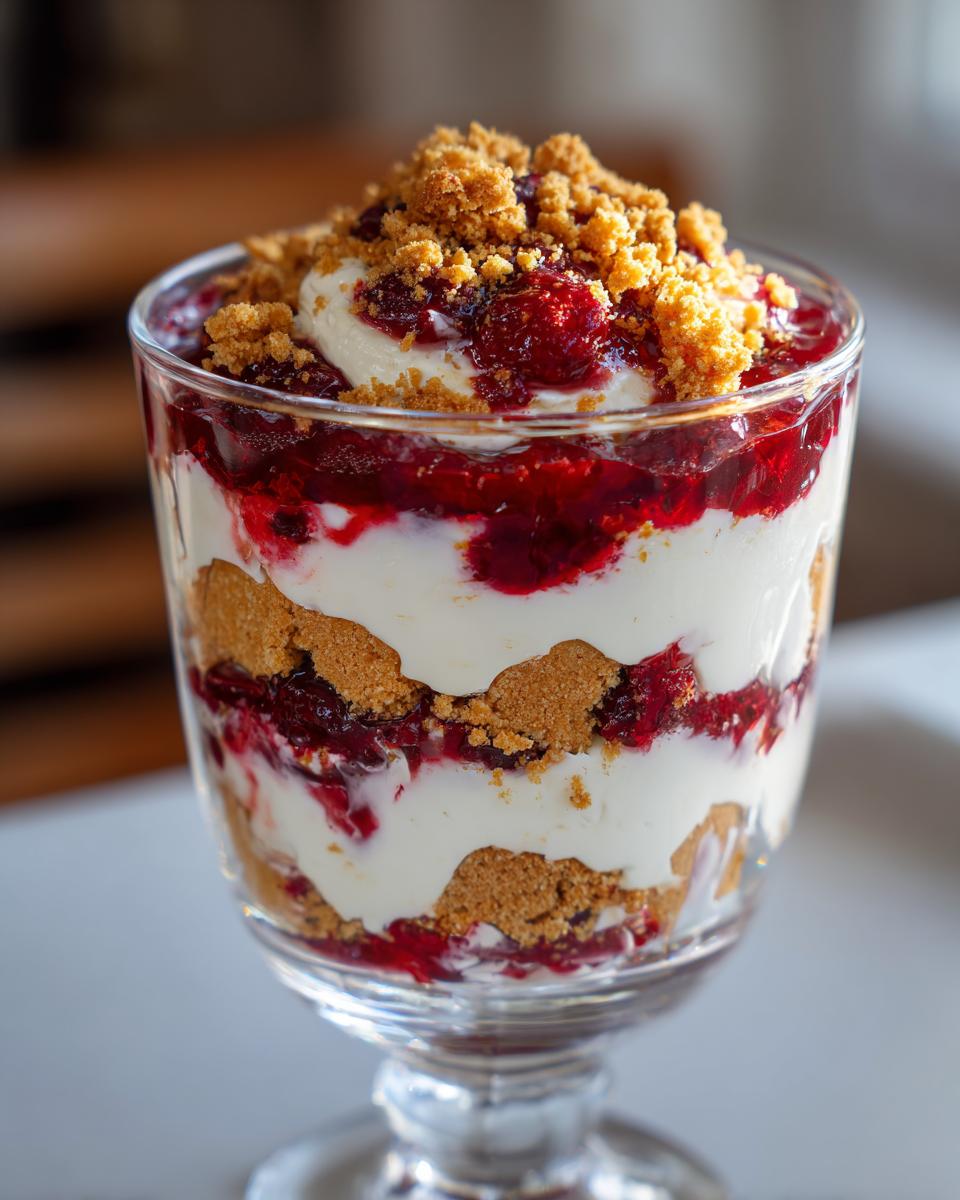
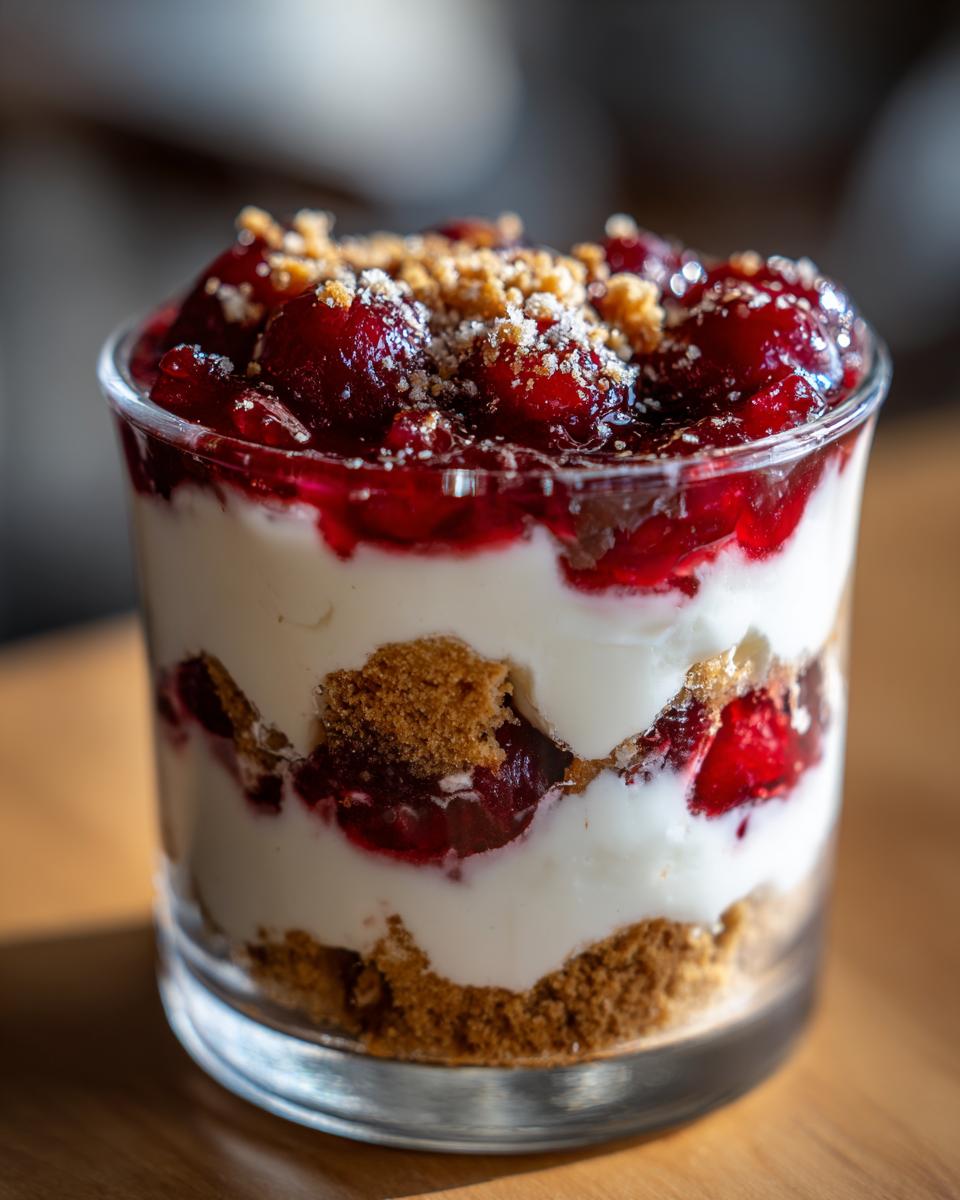
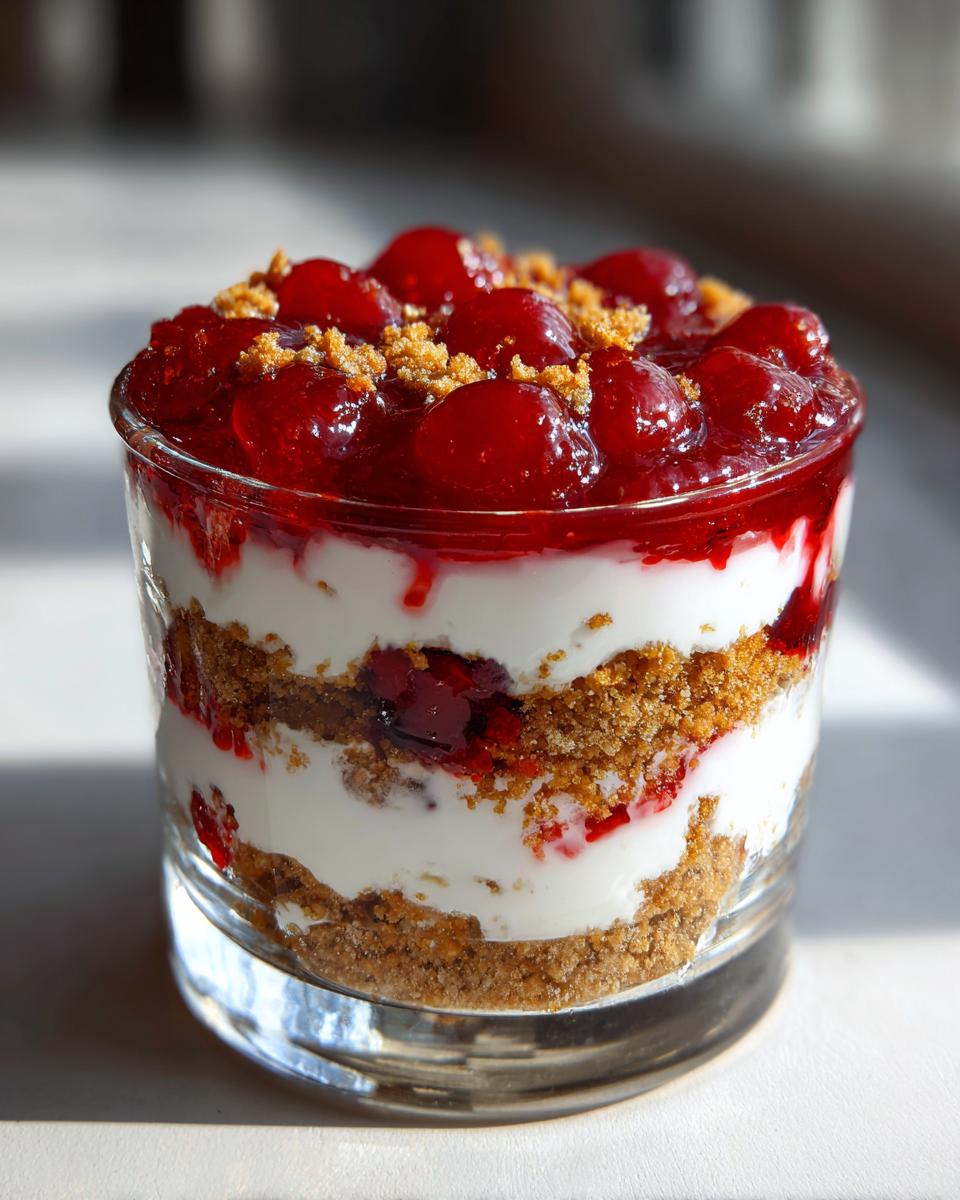
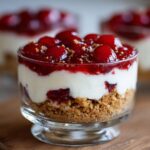
Time to layer! Spoon a small amount of the buttery crumbs into the bottom of each glass. Then alternate with the cheesecake mixture, followed by a spoonful of that bright cherry pie filling. Repeat those layers until your glasses are full. Don’t forget to finish with a final flourish of cherry on top! This method creates those stunning individual cheesecake servings. For the best structure, you absolutely must chill them for at least 30 minutes before anyone dives in.
Tips for the Perfect Easy Cherry Cheesecake Trifle
Since this easy cherry trifle recipe is so simple, the little things we do make a huge difference in making it taste gourmet. My biggest piece of advice? Think ahead! This is the absolute best make ahead cherry dessert you can whip up. Cover those individual cups tightly with plastic wrap and pop them into the fridge for at least an hour, or even overnight. They firm up beautifully, and the flavors actually marry together overnight—it tastes even better the next day! You can find more tips on planning desserts like this here.
Also, resist the urge to stir the cherry filling into the cream cheese layer. Keep them starkly separate during assembly. That clean line between the bright red topping and the pale, fluffy cheesecake layer is what makes this dessert so visually appealing in those individual glasses.
Ingredient Notes and Substitutions for Your Easy Cherry Trifle Recipe
I always get questions about the whipped topping, so let’s clear that up right now! If you don’t like using the frozen tub, you can absolutely whip one cup of heavy cream yourself until stiff peaks form. It adds a gorgeous richness, though the prep time bumps up by about five minutes. For the base of our easy cherry trifle recipe, the graham crackers are standard for that classic cheesecake crumble.
However, if you want a fun switch, crushed vanilla wafers or even store-bought shortbread cookies create an amazing buttery crunch. We talk about using different cookies in trifles over in our post on simple trifles with cookies. Bottom line: use what you have on hand, just make sure it’s fully crumbled and mixed with that melted butter!
Serving Suggestions for Your Quick Cheesecake Dessert
You don’t need to do much work to make this already beautiful! Since we are focusing on a quick cheesecake dessert, let’s keep the garnishes simple but impactful. A tiny sliver of fresh mint placed right on top of that cherry layer adds a beautiful pop of green color against the red and white. Or, if you want to amp up the spice just a touch, dust the very top layer with a tiny bit of ground cinnamon right before serving.
These little extra touches elevate the look dramatically. See more simple ways to finish desserts at this link about quick cheesecake desserts!
Storage and Reheating Instructions for the Layered Cherry Dessert Cups
Since this easy cherry cheesecake trifle has zero baking involved, storage is wonderfully straightforward! You can totally make these ahead of time, which is a lifesaver when you have company coming over. Just make sure you cover those individual layered cherry dessert cups tightly with plastic wrap before popping them into the fridge. They hold up perfectly for up to 24 hours. You’ll never reheat this, though—it is designed to be served cold and firm after a good chill. Find more great advice on how to manage make-ahead desserts in our guide to layered cherry dessert cups.
Frequently Asked Questions About This Easy Cherry Cheesecake Trifle
I know when a dessert sounds this quick, questions always pop up! My goal is always to make this collection accessible, so let’s tackle a few things you might be wondering about this easy graham cracker dessert.
How long absolutely must I chill the trifle cups?
You need that minimum chilling time! While you can eat it right after layering, I strongly recommend chilling them for at least 30 minutes. This allows that cream cheese layer to firm up just enough so your layers don’t get messy when someone tries to dig in. For the best results, use this as a make ahead cherry dessert and chill it for a few hours!
Can I use fresh cherries instead of the canned pie filling?
That’s a fun idea, but it changes the whole ‘easy’ structure, if I’m being honest! If you use fresh cherries, you have to cook them down with sugar and perhaps a thickener to make a sauce, which requires cooking time. For this specific no bake cherry dessert, sticking to the canned filling keeps the prep under 15 minutes, which is the whole point! You can certainly find recipes for homemade cherry sauces on the site too.
Can I make this in one large glass bowl instead of individual cups?
Yes, of course you can! It definitely works beautifully as a traditional trifle in one shallow dish. Just remember that when you do this, you lose some of that gorgeous visual appeal of seeing all the individual layers stacked perfectly. Either way, you’ll have an incredible easy graham cracker dessert!
Is this considered a true ‘no oven dessert with cherries’?
Absolutely! This entire creation is assembled cold. Zero baking, zero melting, zero stress. It is the perfect no bake cherry dessert for those hot summer days when you just can’t bear to turn on the stove or oven!
Share Your Simple Cherry Cream Cheese Dessert Creations
Phew! Now that you’ve mastered this incredibly easy cherry cheesecake trifle, I’d love to hear about it! Did you have fun assembling those layers? Please rate this recipe right below and leave a comment telling me how quickly you got it done. If you snapped a picture of your stunning individual servings, please share it with us over on the contact page—I always cherish seeing your creations!
PrintEasy Cherry Cheesecake Trifle (No Bake)
Prepare this simple, no-bake cherry cheesecake trifle in individual glasses for a quick, satisfying dessert. It uses minimal effort and is ready fast.
- Prep Time: 15 min
- Cook Time: 0 min
- Total Time: 15 min
- Yield: 6 servings 1x
- Category: Dessert
- Method: No Bake
- Cuisine: American
- Diet: Vegetarian
Ingredients
- 1 package (8 ounces) cream cheese, softened
- 1 cup powdered sugar
- 1 teaspoon vanilla extract
- 1 container (8 ounces) frozen whipped topping, thawed (or heavy cream, whipped)
- 1 package (14.3 ounces) graham cracker crust mix, or about 2 cups graham cracker crumbs
- 1/4 cup melted butter
- 1 can (21 ounces) cherry pie filling
Instructions
- In a medium bowl, beat the softened cream cheese, powdered sugar, and vanilla extract until smooth.
- Gently fold in the thawed whipped topping until just combined. This is your cheesecake layer.
- In a separate bowl, mix the graham cracker crumbs and melted butter until the crumbs are evenly moistened.
- Assemble the trifles in individual serving glasses or small bowls. Start with a layer of graham cracker mixture at the bottom of each glass.
- Top the crumbs with a layer of the cheesecake mixture.
- Spoon a layer of the cherry pie filling over the cheesecake layer.
- Repeat the layers: graham crackers, cheesecake mixture, and finish with a dollop of cherry pie filling on top of each trifle.
- Chill the trifles for at least 30 minutes before serving to allow them to set slightly.
Notes
- You can make this dessert ahead of time; cover and refrigerate for up to 24 hours.
- For a different texture, substitute the graham crackers with crushed vanilla wafers or shortbread cookies.
- If you want a richer flavor, use real heavy cream whipped to stiff peaks instead of the frozen topping.
Nutrition
- Serving Size: 1 trifle cup
- Calories: 410
- Sugar: 35
- Sodium: 280
- Fat: 24
- Saturated Fat: 14
- Unsaturated Fat: 10
- Trans Fat: 0
- Carbohydrates: 45
- Fiber: 1
- Protein: 5
- Cholesterol: 55