
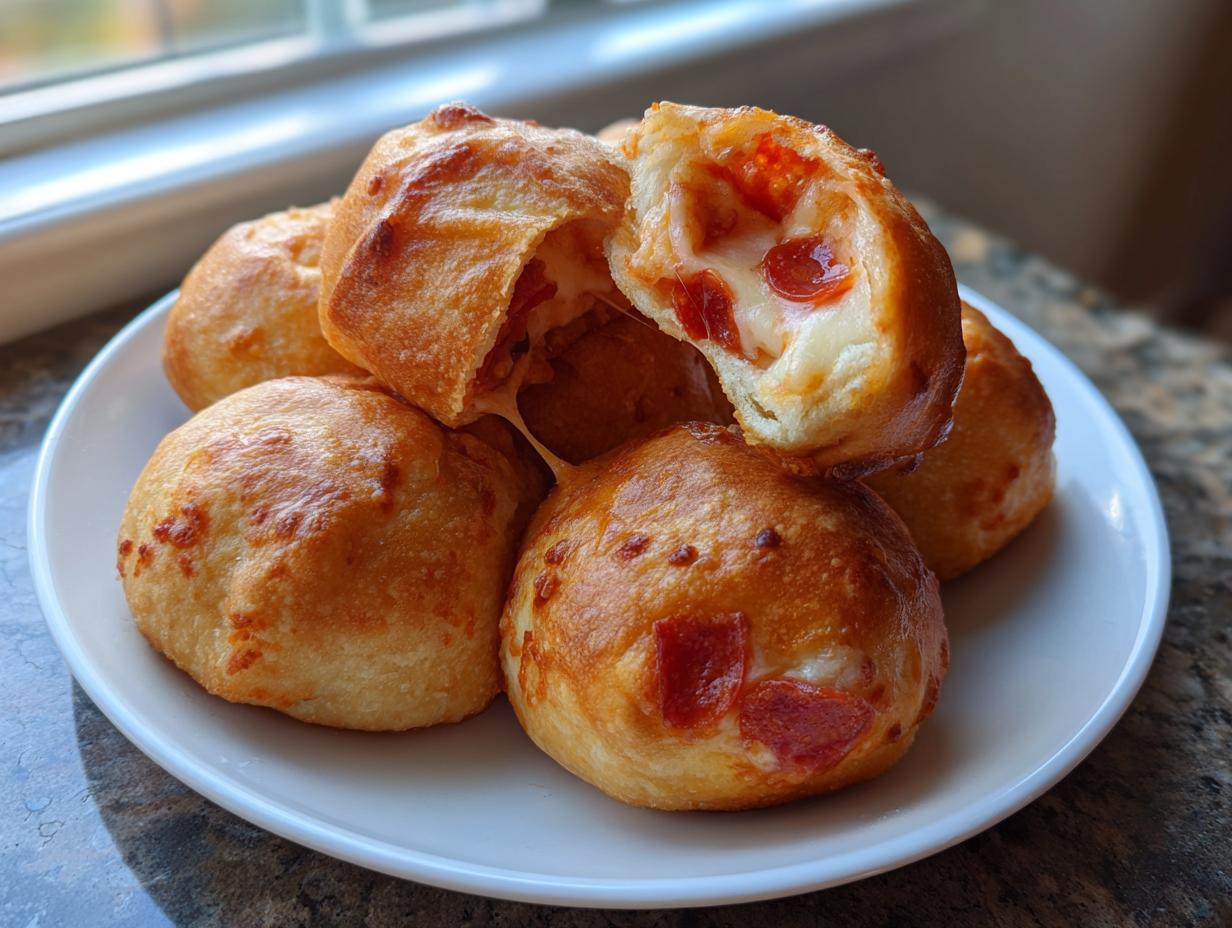
If you’re like me, sometimes you just need that gooey, savory pizza punch, but you absolutely do not have two hours to mess around with yeast and flour. We’ve all been there! That’s why I’m bringing you the easiest solution for those urgent pizza cravings: our Ultimate Easy Biscuit Dough Pizza Bombs. These little treasures are everything you want in satisfying quick, satisfying snacks, but they come together in literally minutes using store-bought dough. Here at Pure Plate Path, Sarah Miller always champions simplicity because we know life is too busy for fussy cooking. These pizza bites nail that perfectly—they’re fast, packed with cheese and pepperoni, and feel like a real treat without any effort. Seriously, you won’t believe how fast these come together.
- Why These Are the Best Easy Pizza Bites Recipe You Will Make
- Gathering Ingredients for Your Homemade Pizza Bites
- Step-by-Step Instructions for Amazing Pizza Bombs Recipe
- Serving Suggestions for Your Cheesy Pizza Poppers
- Storage and Reheating Instructions for Leftover Pizza Bites
- Troubleshooting Common Issues with Pizza Bites
- Frequently Asked Questions About Making Pizza Bites
- Estimated Nutritional Information for Mini Pizza Bites
- Share Your Simple Snack Recipes Success
Why These Are the Best Easy Pizza Bites Recipe You Will Make
When I’m pulling together a last-minute platter or need something for the kids that doesn’t involve ordering delivery, this recipe is my absolute go-to. Forget making dough from scratch; that’s where you lose the precious time! Using refrigerated biscuit dough gives us this wonderfully soft, slightly chewy texture that you just can’t beat for speed. This is why this is top-tier among all quick appetizer recipes. If you love the idea of stuffed pizza treats, you might also want to check out my easy pizza pinwheels recipe!
- They are ready in under 30 minutes total—start to finish!
- They satisfy that deep craving for classic pizza flavor.
- They are phenomenal as kid friendly snacks—no messy slices here!
Honestly, ditching the homemade dough step is my biggest piece of advice here, reflecting Sarah’s philosophy that simple ingredients make the best meals for busy people. Trust me, the texture of these pizza bites stays perfect.
Perfect for Game Day Snacks and Parties
If you’re hosting friends for a game or just need something delicious for a Friday movie night, these are your ticket. They are totally portable finger food ideas and perfectly sized to grab one (or five!) without needing plates. They hit the spot every single time when you’re craving those savory pepperoni pizza snacks. They disappear fast, so make an extra batch, I always do!
Gathering Ingredients for Your Homemade Pizza Bites
Okay, let’s look at what you need to grab for these truly simple homemade pizza bites! Because we’re banking on speed, we’re using some brilliant shortcuts here. Everything you need should be easy to find, and I promise, you only need a handful of things to make these mini pizza bites work their magic.
- One can (16.3 ounces) of that refrigerated biscuit dough—we need exactly 8 biscuits.
- About half a cup of your favorite pizza sauce.
- Mozzarella cheese, shredded, about half a cup.
- Mini pepperoni slices, about a quarter cup—go heavy if you want!
- Melted butter and garlic powder for that amazing glaze on top.
If you want to skip the biscuit dough aisle entirely, don’t sweat it! Check out my thoughts on other great pizza dough alternatives if you’re curious.
Ingredient Notes and Simple Substitutions
These instructions are flexible, which is the best part about Sarah’s philosophy of practical cooking. If you don’t have biscuit dough, the recipe notes mention that you can absolutely use puff pastry squares instead—you’ll get a flakier texture which is also delicious for these appetizers with pizza flavor! Also, feel free to swap out the pepperoni. If you have leftover cooked sausage or some diced bell peppers from dinner, toss those in for a great custom flavor profile. Just don’t overstuff them, or sealing becomes tricky!
Step-by-Step Instructions for Amazing Pizza Bombs Recipe
Alright, let’s get these pizza bombs assembled because the smell that comes out of the oven is worth every second! First things first: make sure your oven is already at 375°F (190°C). We want that heat ready to go! Lightly grease your baking sheet, maybe put down a piece of parchment if you’re worried about sticking—always a good idea for simple snack recipes.
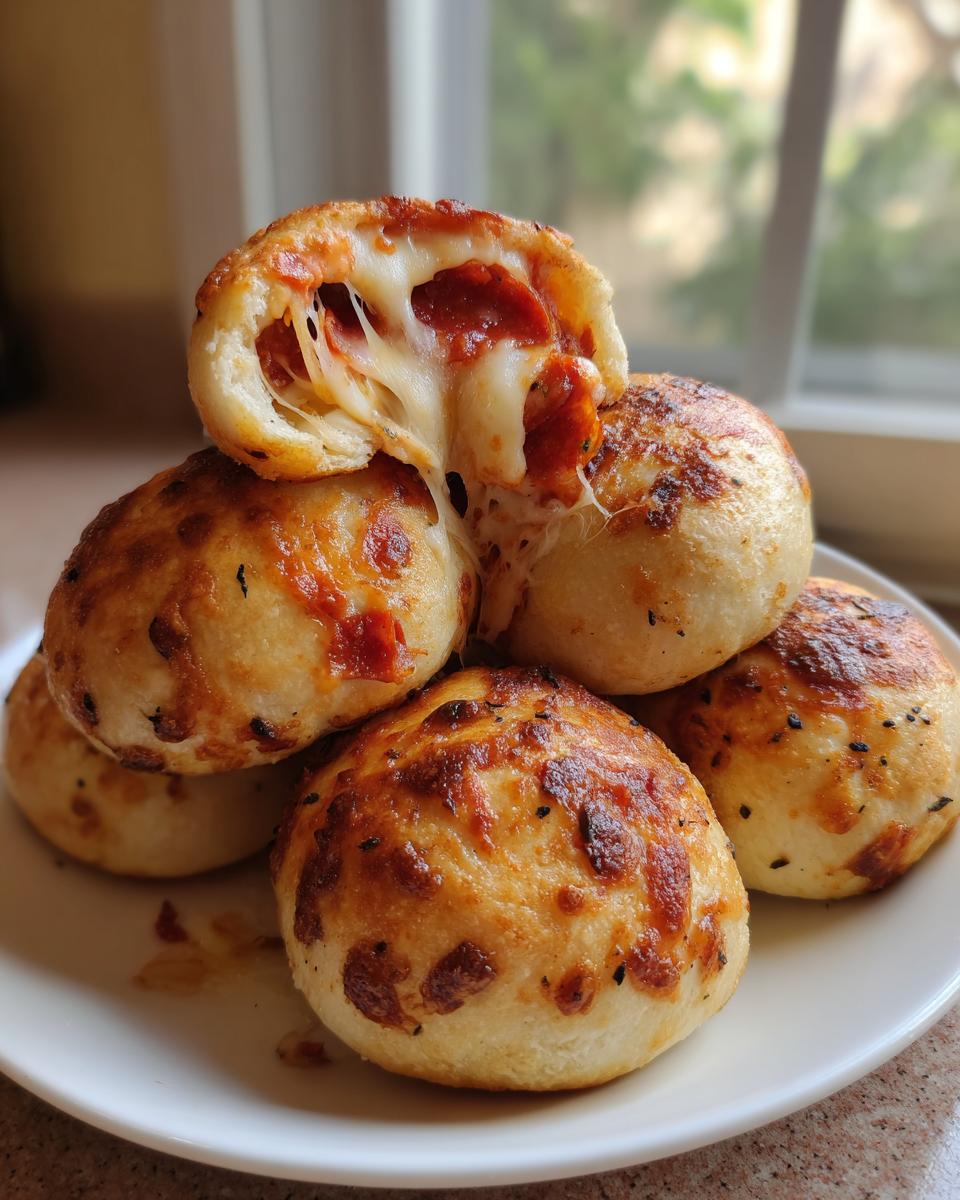
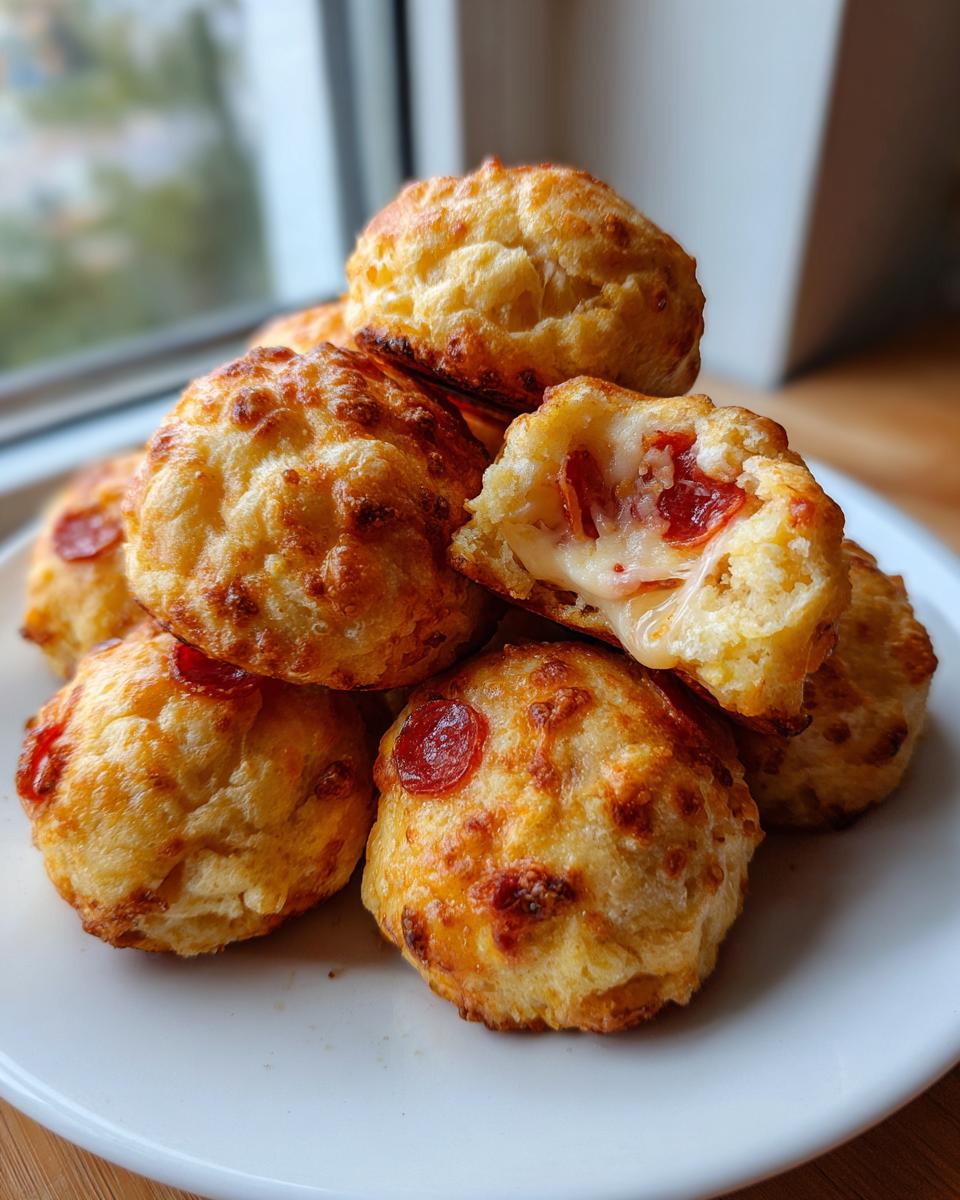
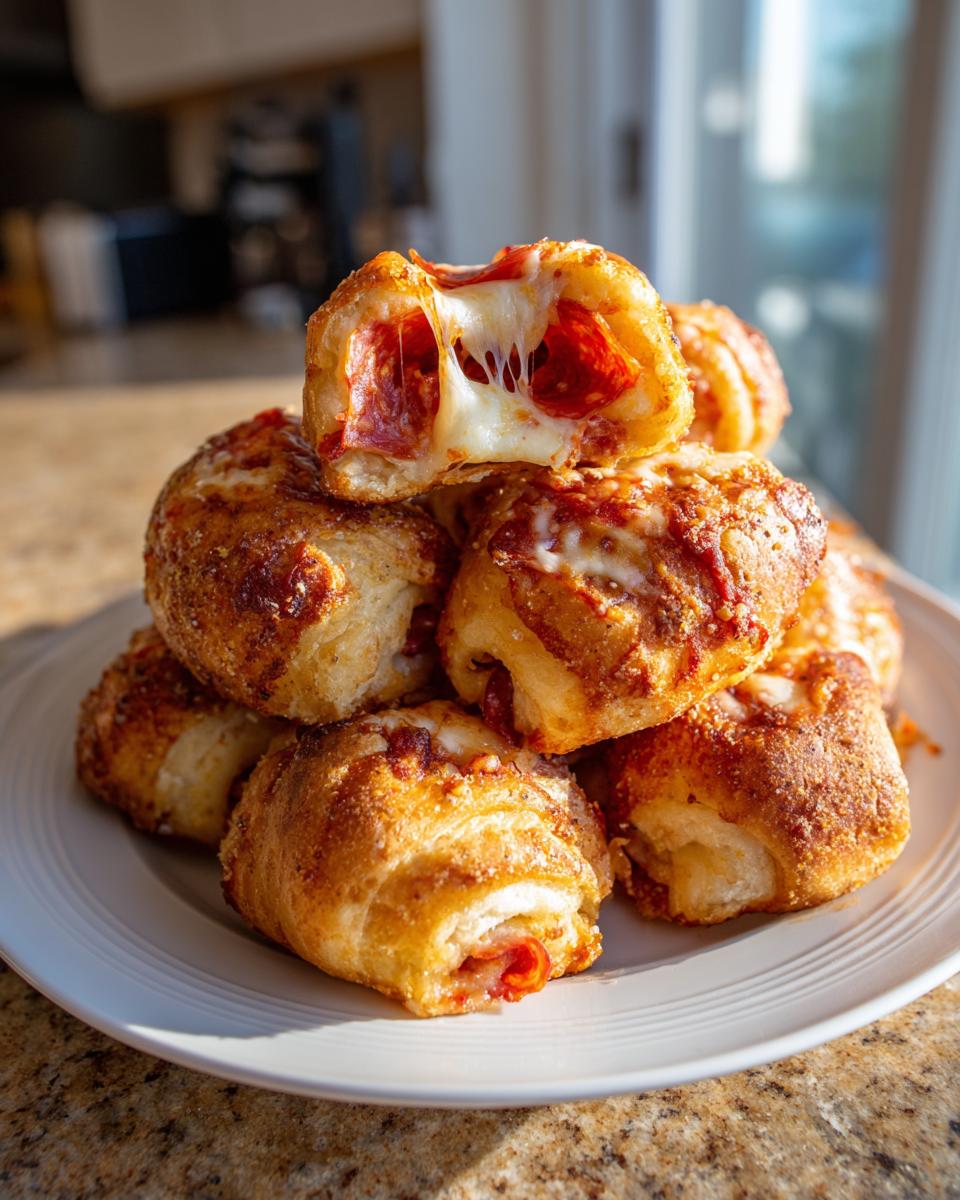
Next, take your 8 biscuits and gently flatten each one. I usually just use my fingers to pat them into a small circle; no need for a whole rolling session. Then comes the filling! Spoon just about a teaspoon of pizza sauce right into the center of the disc. Don’t go crazy, or they won’t seal right. Top that with a little mozzarella and a few mini pepperoni slices. This is where the magic happens—you need to bring those edges up, around the filling, and pinch those seams together firmly. We’re making these bite sized pizza treats portable, so that seal needs to be tight. Place the sealed ball, seam-side down, on your sheet.
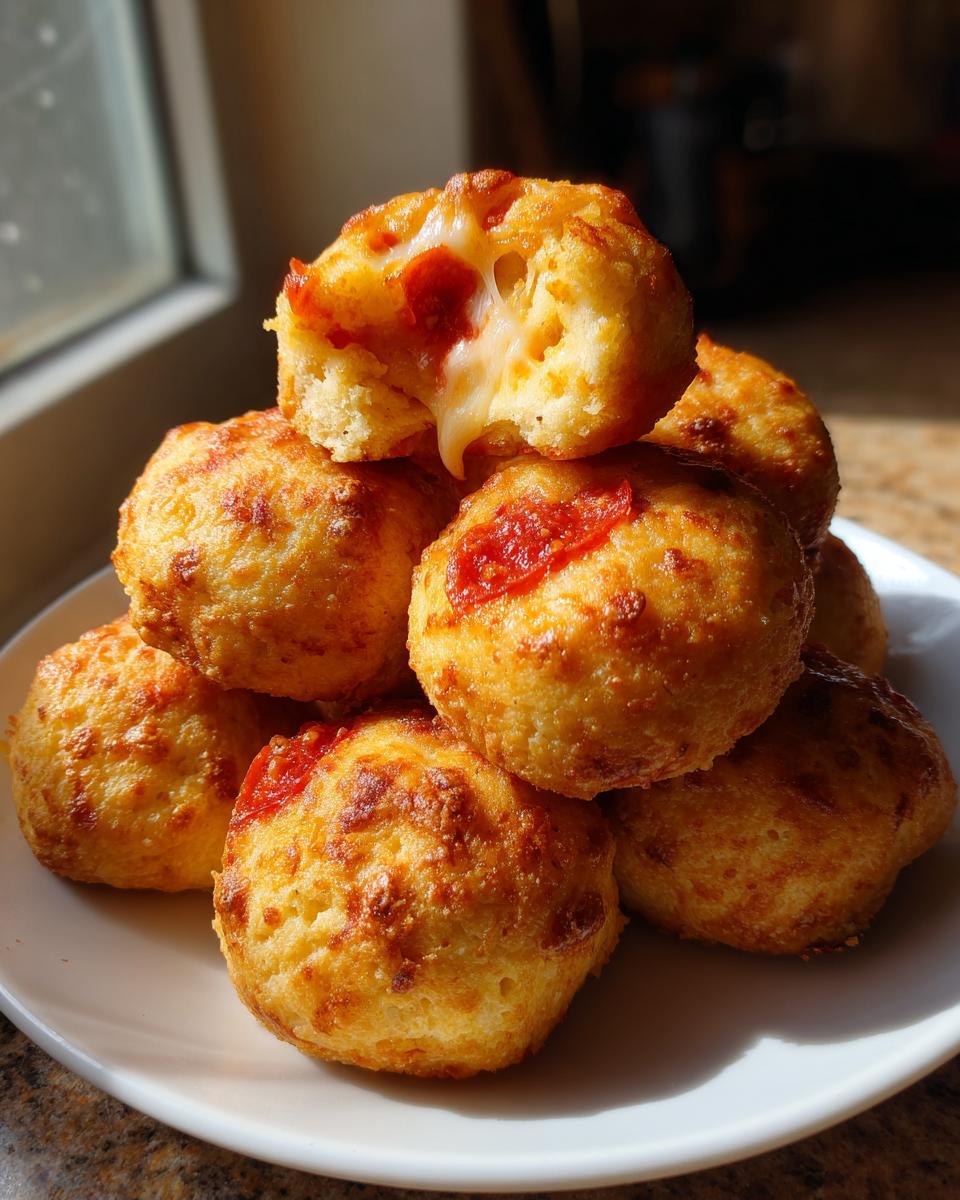
Now for the buttery goodness! In the instructions, I told you to brush them with melted butter mixed with garlic powder *before* baking, which is perfect for flavor infusion. But, if you want an extra crispy, savory top, you can save that garlic butter mixture and brush it on right when they come out of the oven. Bake for about 12 to 15 minutes until they are beautifully golden brown and puffy.
Tips for Perfect Sealing and Golden Tops on Your Pizza Bites
Listen, the number one complaint about homemade pizza bites is that the cheese oozes out everywhere, turning your pan into a cheesy lava field. Don’t let that happen to you! The trick is forming a ball and pinching really hard right at the top seam. If you think you’ve pinched enough, pinch it one more time! You want to create that tight closure.
As for getting that golden top, brushing with the garlic butter before they bake gives you a lovely richness. But if you’re feeling extra indulgent—and let’s be honest, when are we not?—try brushing them with melted *plain* butter right after they come out of the oven. The residual heat melts it perfectly, and you get this incredible, slightly crisp exterior that screams delicious bite sized snacks.
Serving Suggestions for Your Cheesy Pizza Poppers
Don’t just serve up these beautiful cheesy pizza poppers naked! We absolutely need a dipping partner for these wonderful bite sized pizza treats. The instructions mention it, but I have to shout it: a good, warm marinara sauce is the only way to go. It just completes that familiar pizza flavor profile we’re aiming for.
If you are setting these out for your next big get-together, try having a couple of options out for your guests. Besides the classic red sauce, these are surprisingly dreamy dipped into my hot honey ricotta dip for a little sweet heat kick. They are the ultimate game day snacks because they are so easy to manage while everyone is yelling at the TV!
Storage and Reheating Instructions for Leftover Pizza Bites
Okay, I know that when you make these incredibly addictive pizza bites, you usually eat them all immediately. But just in case you manage to have a few leftover—which is a serious parenting win, by the way—you need to know how to store them so they are still great later!
For storage, you simply need an airtight container. Pop any cooled-down leftovers right into a quality container and keep them in the fridge. They usually hold up really well for about three to four days. They stay tasty, but that crispness you got right out of the oven? Well, that fades a little in the fridge, so reheating is key!
Now, I know the microwave is fast, but please, *please* don’t go that route if you can avoid it. Microwaving these mini pizza bites turns the lovely biscuit dough into something squishy and sad. We want that slight chewiness back, right?
The best way to revive them is in the oven. Preheat your oven to about 350°F (175°C). Place the cheesy pizza poppers right on a baking sheet (maybe sprinkle a tiny splash of water near them to introduce a little steam, if you’re feeling fancy!). Let them bake for about 8 to 10 minutes. This warms the cheese all the way through and crisps up that little garlic butter glaze we brushed on top. If you’re already a big fan of optimizing texture, you should check out my thoughts on using the air fryer for things like air fryer chicken tenders—that’s another great tool for reviving crispy snacks!
If you’re really in a huge rush, the toaster oven works fantastic too, just keep a very close eye on them so the toppings don’t burn!
Troubleshooting Common Issues with Pizza Bites
Even with the simplest recipes, things sometimes go a little sideways in the kitchen, right? Don’t worry if your first batch of these pizza bites doesn’t look exactly like the picture. It happens to everybody, even me when I first started relying on store-bought dough for simple snack recipes!
The number one issue I hear about when people make these pizza bombs is leakage. You know, you pull them out and there’s a little cheese trail running across the baking sheet. If this happens, the solution is almost always in how you pinch the dough together. When you bring the edges up around that filling, you really need to press firmly. Don’t just gently press; you need to pinch and twist to create a really tight seal. Think of it like you’re sealing a tiny little purse! If you have a tiny bit of dry dough on your finger, you can actually use that to patch any weak spots before you brush on that garlic butter.
Another common snag is uneven browning. Sometimes the bottoms are pale, or the tops still look a bit doughy even after the timer goes off. This usually comes down to your oven. First, make sure you aren’t crowding the pan! These little guys need space for the heat to circulate, especially if you’re doubling the batch for a big party. Also, check your oven temperature with an external thermometer! Many home ovens run hot or cool, and if your oven is too cool, the dough won’t set up fast enough before the cheese melts out. Aiming for that perfect 375°F (190°C) is crucial for these cheesy pizza poppers to get that golden color.
Finally, if you used puff pastry instead of biscuit dough, you might find they brown *very* quickly. If that’s the case, you may need to drop your oven temperature down by about 25 degrees and keep an eye on them—they cook significantly faster than the biscuit version, so check them around the 10-minute mark!
Frequently Asked Questions About Making Pizza Bites
I get so many questions about tweaking this super simple recipe, and honestly, that’s a compliment! It just proves how much everyone loves these pizza snacks for parties. Here are the top things people ask me when they are ready to whip up a batch of these delicious bite sized snacks.
Can I use homemade pizza dough for these pizza bites?
You absolutely can! While I champion the shortcut dough because it gets you on the table faster (hello, busy life!), if you have a favorite homemade pizza dough recipe, go for it. Just remember, homemade dough might require proofing time or be slightly trickier to seal than the pre-cut biscuits. If you’re looking for other easy dough options, you might enjoy checking out my thoughts on pizza dough alternatives!
What is the best cheese for pizza bites?
For that classic, gooey, pull-apart experience that screams “pizza,” you really can’t beat good old low-moisture shredded mozzarella. It melts beautifully and gives you those glorious cheese stretches. If you want to boost the flavor, try mixing in about a tablespoon of grated Parmesan cheese with your mozzarella. That little shake of Parmesan really bumps up the savory factor for these cheesy pizza poppers.
How long do these pizza bites stay fresh?
If you manage to have any leftovers from your game day snacks batch, they’re generally good in an airtight container in the fridge for about three to four days. But, let’s be honest, they are miles better warm! If you reheat them using the oven method I described earlier, they taste almost as fresh as the first batch. Don’t save them longer than four days, though; texture starts to dip after that.
Can these be made ahead of time?
Yes! This is one of my favorite party finger food ideas because they are make-ahead friendly. You can assemble the entire pizza bomb right up until the stage where you brush them with butter. Place them on your baking sheet, cover tightly with plastic wrap, and keep them in the fridge for up to 24 hours. When you’re ready to bake, pull them out, let them sit on the counter for 20 minutes while the oven preheats, brush with butter, and bake as directed!
Estimated Nutritional Information for Mini Pizza Bites
I always get asked about the specifics, and while I am here to share delicious, simple meals, I do want to be clear that these figures are exactly what they sound like: estimates! Since we are using store-bought dough and varying amounts of cheese and pepperoni topping, the numbers can shift around quite a bit. But for those of you planning meals or watching macros, this provides a great starting point for these wonderful easy pizza bites recipe servings.
This information is calculated based on the exact ingredients listed in this recipe, yielding 8 individual pizza bombs. If you decide to try my swap for puff pastry instead of biscuit dough, you might see some differences! You can always find more tips on balancing flavor and wellness over on my healthy breakfast ideas section, which emphasizes whole foods.
Here is the breakdown for one single serving (one pizza bomb):
- Serving Size: 1 pizza bomb
- Calories: 180
- Fat: 10g total (5g saturated fat)
- Carbohydrates: 16g
- Fiber: 1g
- Protein: 6g
- Sugar: 1g
- Sodium: 450mg (Yes, they are a bit salty, which is expected for a pepperoni snack!)
These numbers confirm what I always say: these mini pizza bites are a fantastic, satisfying snack when you need something fast and flavorful, hitting that perfect savory spot without loading up on excessive sugar!
Share Your Simple Snack Recipes Success
Well, that’s it! You’ve conquered minimal effort and maximum flavor territory. I truly hope you loved making these pizza snacks for parties just as much as I love eating them on the sofa during a big game. Since these simple snack recipes are all about making your life easier, I’d love to hear how they turned out for you!
Did you stick to the classic pepperoni, or did you try adding something fun inside your bite sized pizza treats? Please, hop down into the comments box below and let me know! A simple rating lets me know what recipes are working best for your busy schedule. Did they disappear in under five minutes while watching the kids’ soccer game like mine do? Did they leak cheese everywhere (if so, tell me, and we can fix it next time)?
If you snap a picture of your golden, buttery cheesy pizza poppers—especially if you captured that perfect moment of dipping them into marinara—please tag me on social media! Sharing those wins, no matter how small, is the entire reason Sarah started Pure Plate Path. We’re all navigating this busy life together, and knowing that this recipe made your snack time easier warms my heart more than anything. If you’re already planning your next no fuss appetizer, don’t forget to look at our contact page if you have specific questions or just want to say hello. Happy snacking, everyone!
PrintEasy Biscuit Dough Pizza Bombs

Make these simple, bite-sized pizza bombs using store-bought biscuit dough. They are cheesy, packed with pepperoni, and perfect as a quick appetizer or game day snack.
- Prep Time: 10 min
- Cook Time: 15 min
- Total Time: 25 min
- Yield: 8 servings 1x
- Category: Appetizer
- Method: Baking
- Cuisine: American
- Diet: Vegetarian
Ingredients
- 1 can (16.3 ounces) refrigerated biscuit dough (8 biscuits)
- 1/2 cup pizza sauce
- 1/2 cup shredded mozzarella cheese
- 1/4 cup mini pepperoni slices
- 1 tablespoon melted butter
- 1/2 teaspoon garlic powder
Instructions
- Preheat your oven to 375°F (190°C). Lightly grease a baking sheet or line it with parchment paper.
- Separate the biscuit dough into 8 biscuits. Flatten each biscuit slightly with your hands or a rolling pin until it forms a small circle.
- Place about 1 teaspoon of pizza sauce in the center of each flattened biscuit.
- Top the sauce with a small amount of mozzarella cheese and 3-4 mini pepperoni slices.
- Bring the edges of the biscuit dough up and around the filling, pinching the seams together firmly to seal the filling inside, forming a ball. Place the sealed ball seam-side down on the prepared baking sheet. Repeat for all biscuits.
- In a small bowl, mix the melted butter and garlic powder. Brush this mixture evenly over the tops of the pizza bombs.
- Bake for 12 to 15 minutes, or until the biscuits are golden brown and puffed.
- Remove from the oven and let cool slightly before serving. Serve warm with extra marinara sauce for dipping.
Notes
- For an extra savory flavor, brush the tops with melted garlic butter after baking instead of before.
- You can substitute the biscuit dough with puff pastry squares if you prefer a flakier texture.
- Use your favorite pizza toppings inside, such as cooked sausage or diced bell peppers.
Nutrition
- Serving Size: 1 pizza bomb
- Calories: 180
- Sugar: 1
- Sodium: 450
- Fat: 10
- Saturated Fat: 5
- Unsaturated Fat: 5
- Trans Fat: 0
- Carbohydrates: 16
- Fiber: 1
- Protein: 6
- Cholesterol: 20