
You know that feeling? That deep, undeniable craving for a massive plate of warm, comforting Italian food, complete with crunchy edges and a mountain of melted cheese? Me too! It used to feel like that kind of restaurant-quality weeknight Italian dinner was reserved for special occasions or long weekend projects. But when I started Pure Plate Path, I promised myself I’d find shortcuts to bring that amazing flavor home, fast. This ultimate chicken parmesan recipe is the pure result of that mission. We’re talking ultra-crispy, unbelievably juicy chicken that hits your table in under an hour. Trust me, you deserve this level of dinner perfection tonight.
- Why This is the Best Chicken Parmesan Recipe for Your Weeknight Italian Dinner
- Essential Ingredients for Your Homemade Chicken Parm
- How to Make Chicken Parmesan: Step-by-Step Instructions
- Tips for Success with Your Chicken Parmesan Recipe
- Serving Suggestions for Your Chicken Parmesan Dinner Ideas
- Storage and Reheating Instructions for Leftover Chicken Parmesan
- Frequently Asked Questions About This Chicken Parmesan Recipe
- Nutritional Estimates for This Classic Italian Comfort Food
- Share Your Homemade Chicken Parm Experience
Why This is the Best Chicken Parmesan Recipe for Your Weeknight Italian Dinner
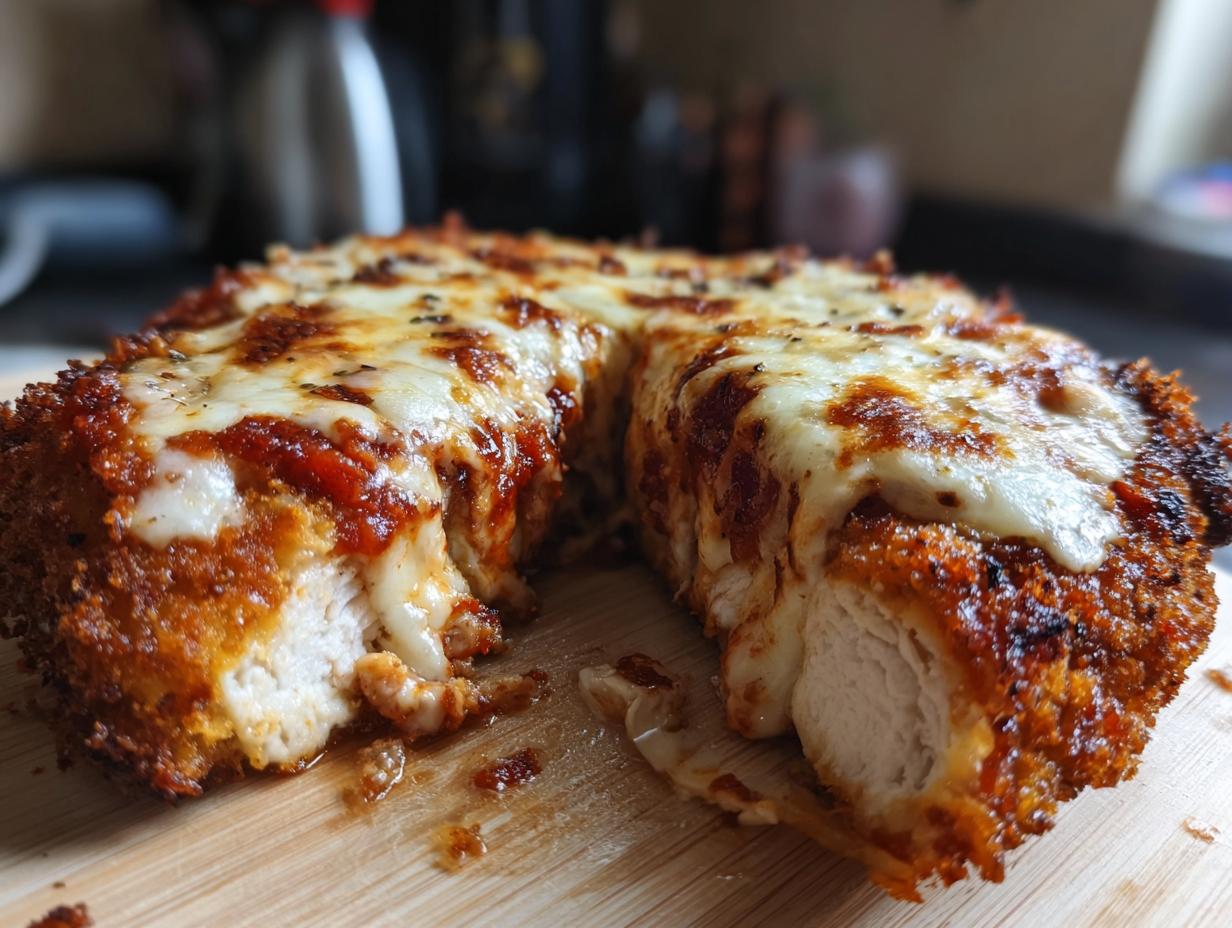
If you’ve ever been disappointed by a soggy homemade chicken cutlet swimming in sauce, I hear you! That’s why this chicken parmesan recipe focuses entirely on texture. We want that glorious, crunchy exterior you get at a top Italian spot, but we need it ready for a Tuesday night!
This is truly turning into the Best Chicken Parmesan because we manage moisture control right from the start. Being able to serve a restaurant-style Weeknight Italian Dinner that everyone loves? That’s the goal here, and we nail it every time.
Achieving the Ultimate Crispy Chicken Parmesan Crust
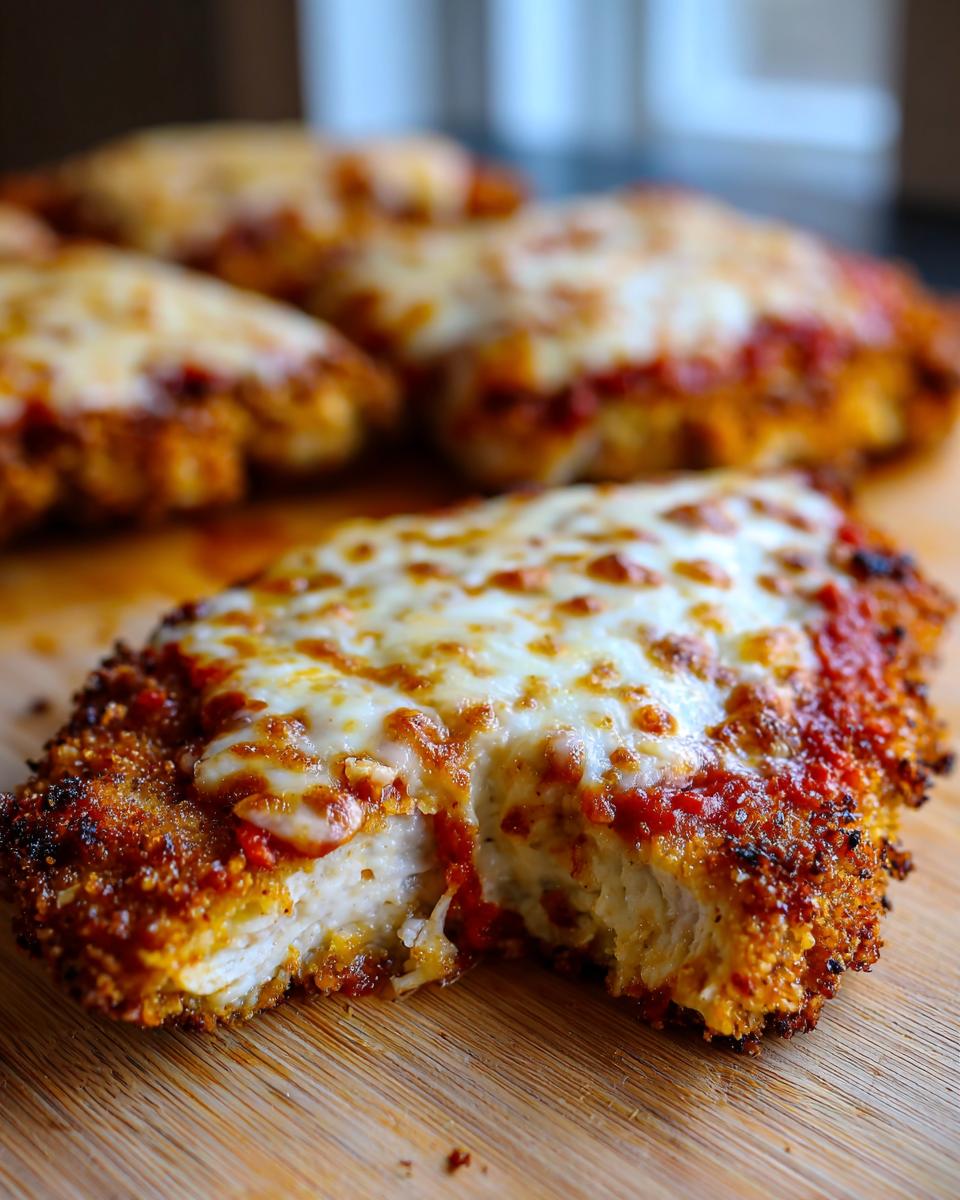
The secret weapon here, really, is Panko breadcrumbs. They are lighter and flakier than regular crumbs—it’s non-negotiable in my book. After you dredge the chicken through the flour and egg, you need to press the Panko onto the cutlet really firmly. I mean really press it in!
This firm press ensures the breading has maximum contact with the pan and locks in that crunch factor. Don’t be gentle here; we want a thick, golden shield protecting that juicy interior.
Essential Ingredients for Your Homemade Chicken Parm
You can’t fake great flavor when it comes to this dish, that’s why stocking the right ingredients matters so much. We’re going for that Restaurant Style Chicken Parm experience right here in our kitchen, and that means quality counts!
First up: ditch the Italian seasoned breadcrumbs! We’re using Panko for that major crunch factor we talked about, mixed with our own Parmesan for flavor. You also absolutely need fresh mozzarella, not the stuff that comes pre-shredded in a bag. That fresh mozzarella melts into those beautiful, creamy pools everyone loves on their Cheesy Chicken Bake.
And please, please, use a good jarred marinara sauce if you’re short on time. We want flavor depth here! Spend your energy elsewhere, but make that sauce count, okay?
How to Make Chicken Parmesan: Step-by-Step Instructions
Alright, let’s get cooking! This is where the magic happens, and it moves pretty fast, so have your dredging stations set up before you even look at the stove. We are aiming for that Crispy Chicken Parmesan finish, and that means working efficiently.
First things first: get your oven preheating to 400°F right away. While that’s warming up, we tackle the chicken. You’ll cook these bad boys on the stovetop until they’re golden, and then a quick jump in the oven melts that cheese perfectly.
Preparing the Cutlets for Juicy Chicken Parmesan
This step is completely vital, don’t skip the mallet work! We have to pound those chicken breasts down evenly to about a half-inch thickness. You can do this between wax paper or saran wrap—I usually use some parchment paper because it just peels away cleaner later. That even thickness is precisely what guarantees you get Juicy Chicken Parmesan because they cook fast all the way through without burning the outside!
Once pounded, coat them meticulously through the flour, egg wash, and our crusted Panko mix. Remember to press hard to make sure every square inch is covered! Then, into that shimmering hot oil they go—just 3 to 4 minutes per side!
Assembling the Cheesy Chicken Bake
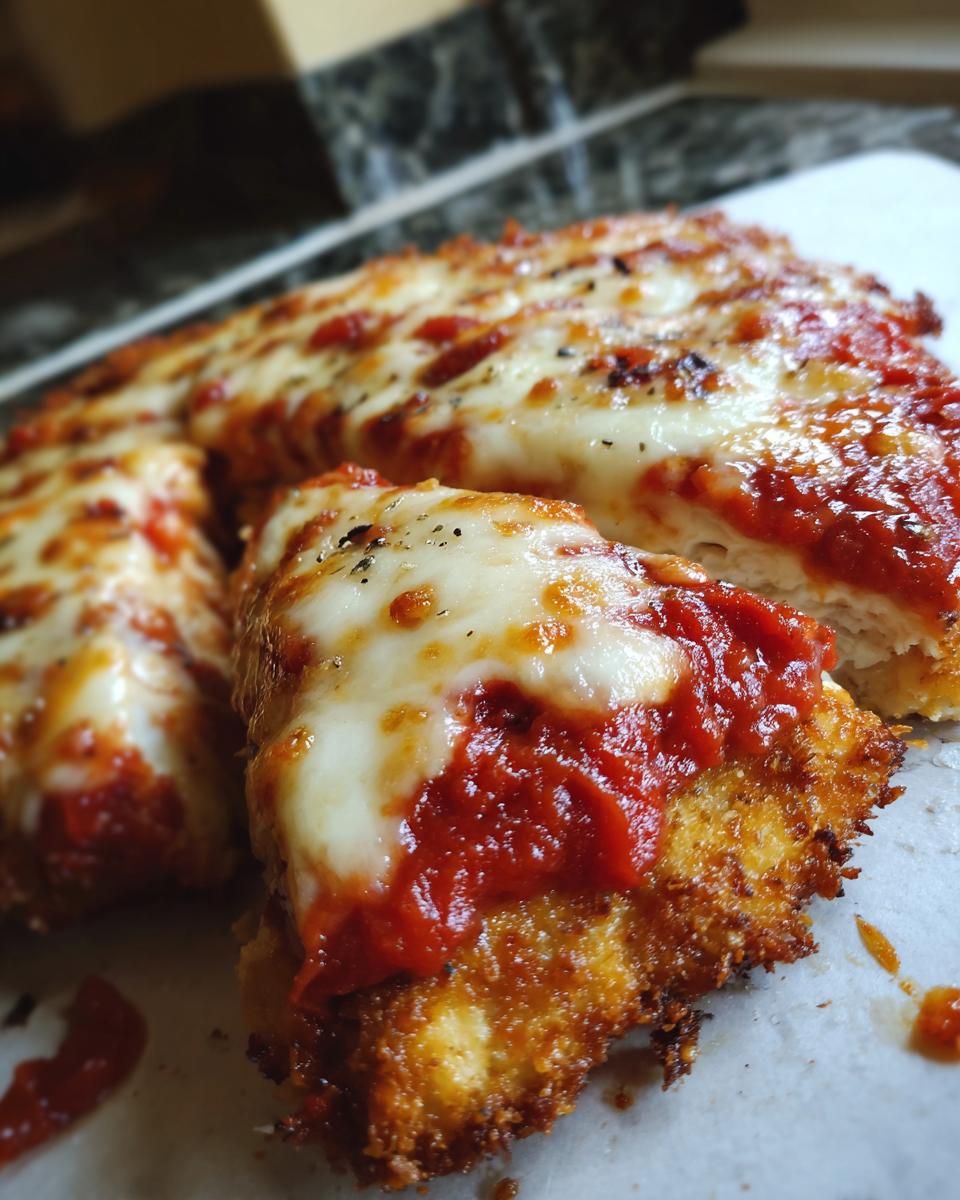
Once your cutlets are beautifully golden and crispy, move them onto a baking sheet lined with parchment paper over a rack—this protects that crucial crisp bottom layer. Now, spread just a tiny smear of your quality marinara on the baking dish bottom first; this keeps the chicken from sticking.
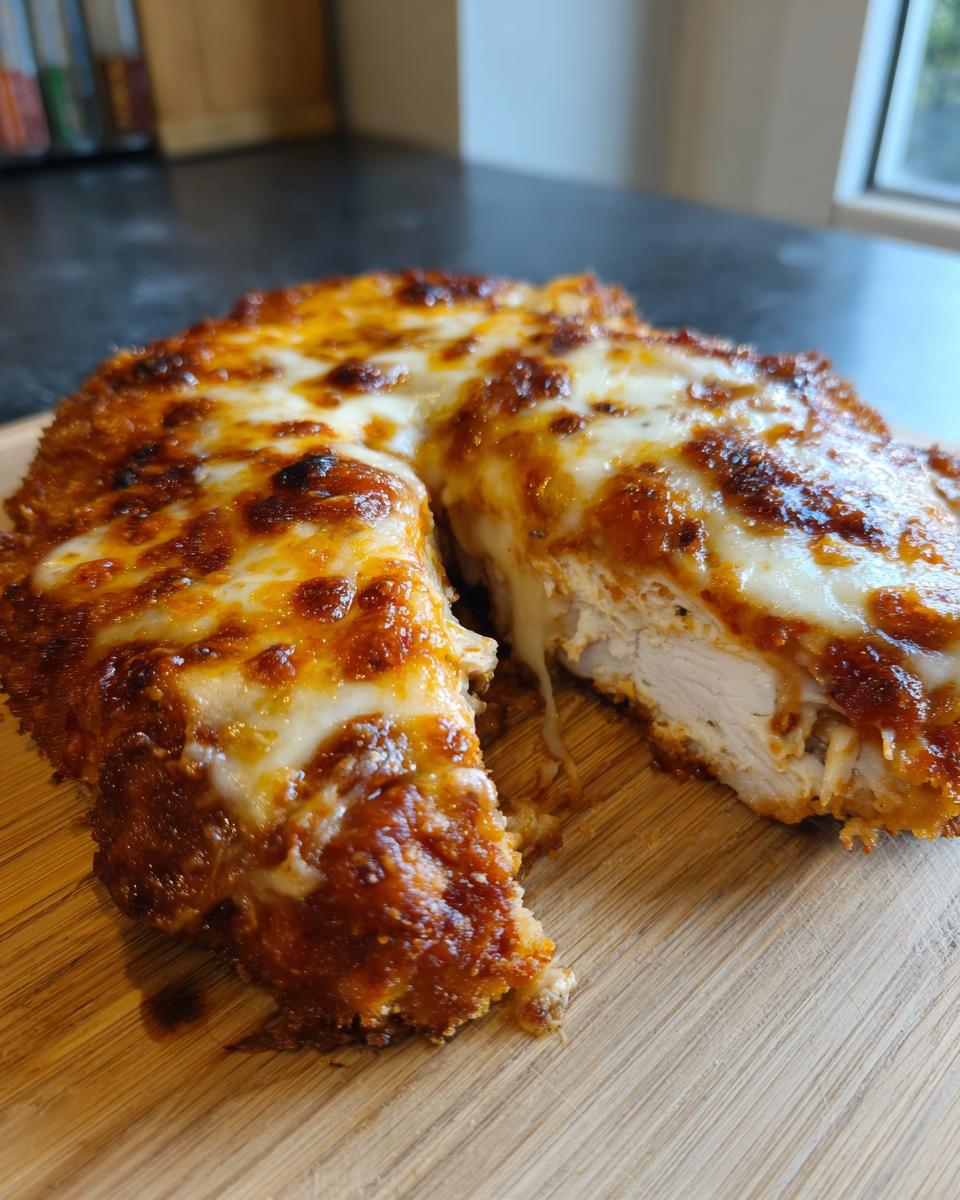
Nestle your crispy chicken in, spoon a little more sauce over the top of each piece, and then pile on the fresh mozzarella and that final sprinkle of Parmesan. It transforms into a serious Cheesy Chicken Bake when it heads into the oven for 10 to 12 minutes. Seriously, if you want that top cheese layer browned perfectly, switch the oven to broil for the last minute, but watch it like a hawk—it goes from golden to charcoal in three seconds flat!
Tips for Success with Your Chicken Parmesan Recipe
Honestly, making this dish perfectly comes down to a few little tricks I learned trying to avoid that dreaded soggy bottom. If you follow the dredging steps, you are 90% of the way there! The key to success is treating that Panko coating like gold—don’t let sauce touch it until it’s had its initial crisping session in the hot oil. That step locks everything in tight.
Also, remember that since the sauce is such a big flavor player in this Classic Italian Comfort Food, using the best quality jarred marinara you can find makes a huge difference. Seriously, taste the sauce before you put it on—if you like it, the final dish will sing!
Making a Baked Chicken Parmesan Recipe Alternative
Now, I know sometimes you want to skip the pan-frying, and that’s totally fine! We can absolutely create a fantastic Baked Chicken Parmesan Recipe Alternative here. If you choose this route, skip the oil entirely at first.
You’ll bread the chicken just like normal, place it on a lightly oiled rack over a baking sheet, and bake it at a higher temp—try 425°F—for about 15 minutes. This gives it time to crisp up without having to soak in hot oil. Once it’s starting to get that golden edge, pull it out, add your sauce and cheese, and pop it back in until that mozzarella is bubbly. It won’t be quite as deep-fried crispy, but it’s amazing and so much lighter!

Serving Suggestions for Your Chicken Parmesan Dinner Ideas
This amazing Chicken Parmesan Dinner Ideas centerpiece is rich, so you need sides that balance it out but still satisfy that comfort food craving. Of course, it sits perfectly atop a steaming bed of spaghetti or linguine—that’s just tradition, right?
But if you’re trying to keep it slightly lighter after all that glorious cheese, I love serving it with something bright. A big helping of Caesar salad works wonders, or try some roasted green beans or maybe even some simple easy roasted honey glazed carrots for a touch of sweetness against the savory sauce. And don’t forget the garlic bread for soaking up every last drop of that extra marinara!
Storage and Reheating Instructions for Leftover Chicken Parmesan
Okay, let’s talk about the *highly unlikely* scenario where you actually have leftovers of this amazing Homemade Chicken Parm. Because this dish has sauce and cheese, you have to be careful how you store it so that beautiful crust doesn’t turn into a sad, saucy sponge.
First, let the chicken cool completely after you take it out of the oven. Trying to put warm food directly into the fridge is never a good plan! Once cool, I suggest separating the components if you can. If you’re storing it over pasta, try to scrape the pasta away from the chicken cutlet itself.
Store the cutlets in an airtight container in the fridge for up to three days. Don’t try to keep it much longer than that—fresh is always best! Now, the crucial part: reheating.
Listen to me: Never, ever put leftover chicken parm in the microwave if you want to taste that crisp texture again! The microwave equals instant sogginess. Your best bet is tossing it in a toaster oven or a regular oven set around 375°F for about 10 minutes.
If you have an air fryer, even better! That’s my top recommendation for bringing back that crunch factor without adding any oil. Just pop the cold cutlet in on a low setting for about 5 to 7 minutes. It warms everything through and refreshes that breading—it’s almost like eating it fresh again!
Frequently Asked Questions About This Chicken Parmesan Recipe
Even the best Chicken Parmesan Recipe can bring up a few questions, especially when you’re trying to nail the texture just right. That’s totally normal when you’re aiming for Restaurant Style Chicken Parm at home!
Here are a few things I get asked all the time about making this dish a guaranteed Quick Chicken Recipe success for your family.
Can I prepare the breading for this Easy Chicken Parmesan ahead of time?
This is a tough one, and honestly, my answer is that I really advise against building the breading ahead of time. For the absolute crunchiest result in this Easy Chicken Parmesan, the breading needs to go onto the chicken right before it hits the hot oil.
If you bread it too early, the moisture from the egg wash starts soaking into the Panko, and you lose that fantastic, crisp texture we worked so hard to achieve. If you absolutely must prep, keep your flour, egg, and crumb mixtures completely separate in the fridge, but don’t combine them until you are five minutes from cooking! Don’t sacrifice that crunch!
What is the best cheese to use for a Restaurant Style Chicken Parm?
I’m adamant about this: use fresh mozzarella, hands down. You know that white, slightly watery ball of cheese? That’s what you want to slice up and lay over the top layer.
When it melts, it creates those wonderful, creamy pockets of cheese that are totally different from the dry, sometimes oily melt you get from pre-shredded blends. And for the accompanying flavor? You absolutely need good, finely grated Parmesan mixed into your coating—that adds the salty, savory punch that makes it taste like a real Classic Italian Comfort Food experience. Those two cheeses working together are the key to the gooey top layer!
Nutritional Estimates for This Classic Italian Comfort Food
Now that we’ve made this amazing Classic Italian Comfort Food, let’s take a quick peek at the numbers. I always tell folks that while this dish is rich and satisfying, it’s surprisingly doable for a weeknight meal! Remember, I am not a nutritionist baking professional, these are just estimates based on the standard ingredient amounts I use for four solid servings.
These figures reflect one cutlet served without extra pasta or heavy sides. If you pile on the spaghetti, naturally, those numbers will bump up a bit, but you get the idea!
- Serving Size: 1 cutlet
- Calories: About 550
- Protein: A whopping 42 grams! That’s great for staying full.
- Total Fat: Around 28g (A good chunk of that is healthy olive oil from the pan-fry).
- Carbohydrates: Roughly 35g (mostly from the breading and sauce).
- Sodium: Sits around 750mg—this is the one to watch, so try using lower-sodium marinara if you can!
See? A huge serving of flavor and protein for just over 500 calories. That’s why I love bringing restaurant classics home; we get to control the quality, the size, and what goes into nourishing our bodies while still enjoying that cheesy goodness!
Share Your Homemade Chicken Parm Experience
Okay, now it’s your turn! I’ve shared all my best secrets for getting that perfectly Crispy Chicken Parmesan crust and keeping the inside wonderfully juicy. But honestly, the best part of having this blog is hearing how these recipes work for you in your busy life.
Did you try the Panko pressing trick? Did your family devour this Easy Chicken Parmesan? Tell me everything! I absolutely love seeing photos of this dish on your tables. Seriously, snap a picture of that glorious melted cheese top layer and share it with me!
Leaving a star rating at the top or dropping a quick comment below about your success—or even if you adjusted something that worked really well for you—helps other home cooks feel confident trying this out. This is how we build our community of people who believe that amazing, Homemade Chicken Parm doesn’t have to take all day. Head over to the contact page if you have any tricky questions, but otherwise, let me know how it went below!
PrintThe Ultimate Crispy Chicken Parmesan Recipe: Restaurant-Quality Dinner Made Easy
You deserve chicken parmesan that is perfectly crispy, juicy, and loaded with melted cheese. This recipe delivers that restaurant-style flavor using a simple dredging method, making it a quick and satisfying weeknight Italian dinner.
- Prep Time: 15 min
- Cook Time: 25 min
- Total Time: 40 min
- Yield: 4 servings 1x
- Category: Dinner
- Method: Pan-Frying and Baking
- Cuisine: Italian-American
- Diet: Meat
Ingredients
- 4 boneless, skinless chicken breasts (about 6 oz each)
- 1 cup all-purpose flour
- 2 large eggs, lightly beaten
- 1 tablespoon water
- 1 1/2 cups Panko breadcrumbs (for maximum crispiness)
- 1/2 cup grated Parmesan cheese (for breading)
- 1 teaspoon garlic powder
- 1/2 teaspoon dried oregano
- 1/2 teaspoon salt
- 1/4 teaspoon black pepper
- 1/4 cup olive oil, for pan-frying
- 2 cups quality marinara sauce
- 8 ounces fresh mozzarella cheese, sliced or shredded
- 1/4 cup grated Parmesan cheese (for topping)
- Fresh basil, chopped, for garnish
Instructions
- Prepare the chicken: Place each chicken breast between two sheets of plastic wrap. Pound them to an even 1/2-inch thickness using a meat mallet. This helps them cook quickly and evenly, keeping them juicy.
- Set up the dredging station: Prepare three shallow dishes. In the first, place the flour. In the second, whisk the eggs and water. In the third, combine the Panko breadcrumbs, 1/2 cup Parmesan cheese, garlic powder, oregano, salt, and pepper.
- Coat the chicken: Dredge each cutlet first in the flour, shaking off excess. Dip into the egg mixture, allowing excess to drip off. Finally, press firmly into the Panko mixture to coat both sides completely. Press the breading on to help it adhere.
- Achieve the crisp crust: Heat the olive oil in a large skillet over medium-high heat. When the oil shimmers, carefully place two cutlets in the pan. Cook for 3 to 4 minutes per side until golden brown and crispy. Do not overcrowd the pan. Remove and place on a wire rack set over a baking sheet. Repeat with remaining chicken.
- Assemble and bake: Preheat your oven to 400°F (200°C). Spread a thin layer of marinara sauce on the bottom of a baking dish. Place the crispy cutlets on top of the sauce. Spoon a little more marinara over each cutlet. Top generously with the sliced mozzarella and the remaining 1/4 cup of Parmesan cheese.
- Bake for 10 to 12 minutes, or until the cheese is melted, bubbly, and lightly golden. For extra browning on the cheese, switch the oven to broil for the last 1-2 minutes, watching closely to prevent burning.
- Rest and serve: Let the chicken rest for 5 minutes before garnishing with fresh basil. Serve immediately over your favorite pasta or with a side salad for a complete family favorite dinner.
Notes
- For the crispiest result, use Panko breadcrumbs instead of standard breadcrumbs.
- If you prefer a baked-only method to skip frying, spray the breaded cutlets lightly with cooking spray and bake at 425°F for 15 minutes before adding sauce and cheese, then continue baking until done.
- Use high-quality marinara sauce; since it is a main flavor component, better sauce makes a better dish.
Nutrition
- Serving Size: 1 cutlet
- Calories: 550
- Sugar: 8
- Sodium: 750
- Fat: 28
- Saturated Fat: 12
- Unsaturated Fat: 16
- Trans Fat: 0.5
- Carbohydrates: 35
- Fiber: 3
- Protein: 42
- Cholesterol: 150