
You know, reclaiming a small piece of simple joy in the kitchen can feel like a huge win when life is moving too fast. And honestly, turning basic pantry staples into something utterly addictive? That’s exactly what happens when you make these homemade candied walnuts. Forget those rock-hard, overly sweet things you tried making years ago. My goal here, as always, is bringing ease back to good food, and I’m sharing the absolute fastest, no-fuss stovetop method to get you truly best crispy candied walnuts. We’ll be done in under 15 minutes, and they are perfect for everything from topping a fresh salad to just sneaking a handful straight from the tray. Trust me, this quick tutorial will change how you look at nuts forever.
- Why Our Stovetop Candied Walnuts Recipe Delivers Crunch
- Gathering Ingredients for Perfect Candied Walnuts
- How to Candy Walnuts on Stovetop: Step-by-Step Instructions
- Tips for Success with Your Simple Sugar Coated Walnuts
- Flavor Variations for Gourmet Candied Walnuts Ideas
- Serving Suggestions: Using Your Candied Walnuts for Salads and More
- Storage and Keeping Your Candied Walnuts Crunchy
- Frequently Asked Questions About Candied Walnuts
- Understanding the Estimated Nutritional Value of Candied Walnuts
Why Our Stovetop Candied Walnuts Recipe Delivers Crunch
I remember the first dozen times I tried making these at home. Disaster! They always ended up sticky, clumpy, or just plain burnt on the bottom. It was frustrating because I wanted that perfect, shatteringly crisp texture that bakery treats have. That’s why I obsessively worked on this stovetop method until I nailed the precise moment the sugar hits the right temperature to ensure you get the best crispy candied walnuts every single time. It’s all about controlling the crystallization right at the end.
This recipe skips the messy egg whites many people use, relying instead on a simple water-sugar ratio that transforms right before your eyes. This control is exactly what guarantees a non-sticky, truly crunchy coating when they cool down.
Quick Candied Walnuts Tutorial: Speed and Simplicity
When I was juggling that marketing job, I needed snacks that took less time than my commute, which is why this has become my go-to. We’re talking five minutes of prep and only about ten minutes of active cooking time total. This is genuinely an easy candied walnuts recipe. You get that gourmet flavor without spending an hour hovering over a hot stove or waiting around for an oven to preheat.
Gathering Ingredients for Perfect Candied Walnuts
Because this is such a quick stovetop method, ingredient quality and accurate measurement really matter. That’s why I love this recipe—it uses ingredients you probably already have just sitting in your pantry! This reinforces just how easy this easy candied walnuts recipe truly is. We rely on basic sugar and water, plus spices, to build our coating. Make sure you grab exactly one cup of walnut halves or pieces. Using the right amount of sugar and water creates that perfect syrup base for our coating.
We are keeping things classic here, using half a teaspoon of ground cinnamon and just a quarter teaspoon of salt. These ratios balance the sweetness perfectly, creating exactly what you want in a good snack.
Ingredient Notes and Substitutions for Homemade Glazed Walnuts
A question I get all the time is about the coating texture. Good news: we are totally making candied walnuts without egg whites! Egg whites can sometimes make the final product a little too brittle, and I much prefer this pure sugar crystal shell. If you want to mix things up and try a different twist on these homemade glazed walnuts, you can swap out that cinnamon. For instance, right at the end when you pull the pan off the heat, stir in half a teaspoon of vanilla extract instead. That gives you a much softer, sweeter flavor profile instead of the warm spice!
How to Candy Walnuts on Stovetop: Step-by-Step Instructions
Alright, let’s get down to the action. This is where the magic happens, and it happens fast! If you’ve ever wondered exactly how to candy walnuts on stovetop using just simple ingredients, pay close attention to the timing here. Grab your medium non-stick skillet—please, non-stick is your best friend for this. We are going to combine half a cup of granulated sugar, a quarter cup of water, your cinnamon, and salt right in that skillet over medium heat.
The very first thing you absolutely must do is stir this mixture constantly until you see every single grain of sugar disappear into the water. It needs to be totally dissolved. Once you see that steam rising and it’s looking glassy, you stop stirring! Seriously, put the spoon down! If you stir once it starts boiling, you risk forcing crystallization too soon, and we want that to happen only when the nuts are added.
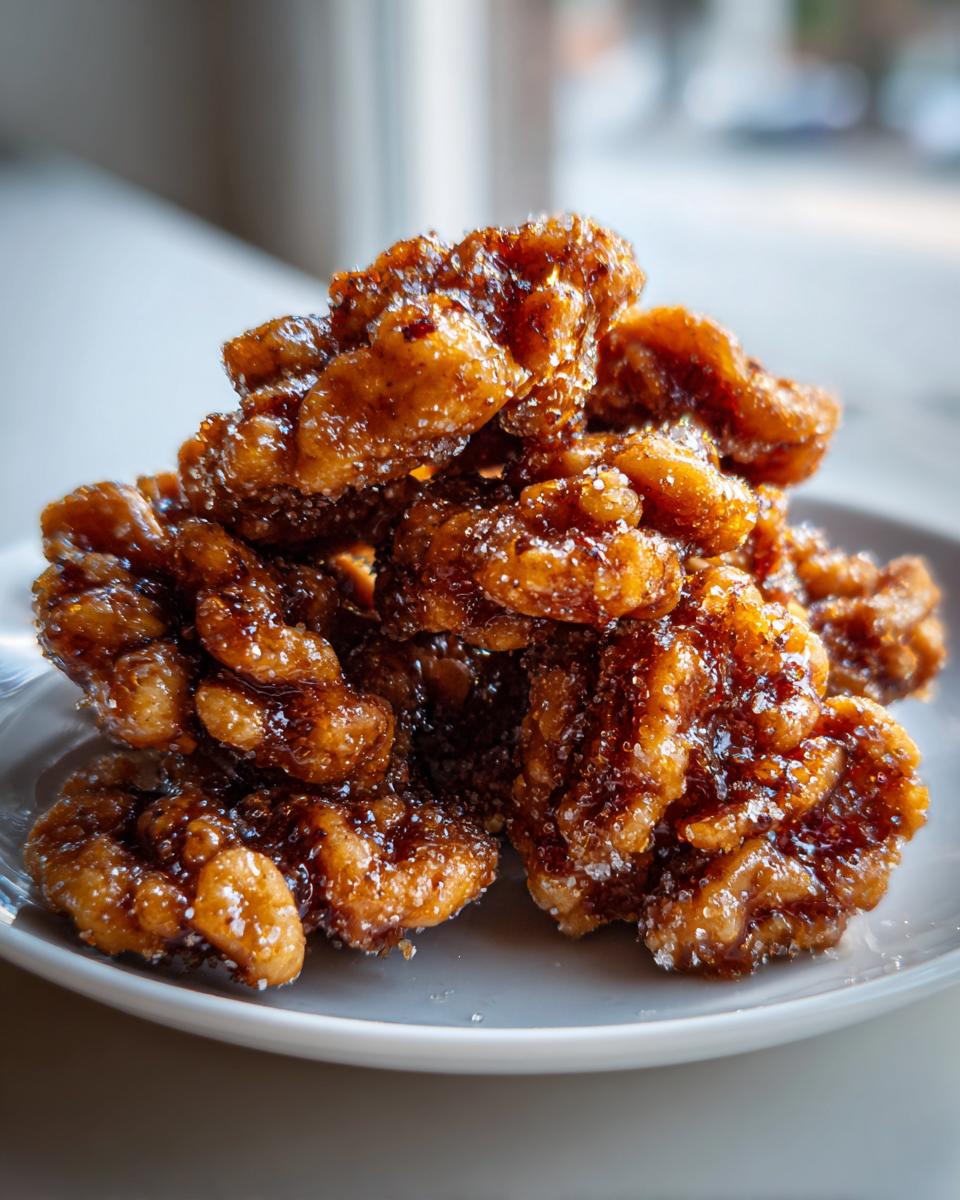
Once you stop stirring, let it boil away for about five to seven minutes. You are waiting for the color to change. It will go from clear to a very pale amber or light caramel color. This is the point of no return, so watch closely so you don’t burn it! If you need a quick break while waiting for the sugar to reach temperature, maybe check out how to make this amazing easy 5-minute bread dip recipe while you wait, but do not walk away from the stove!
Achieving the Crystalized Coating on Your Candied Walnuts
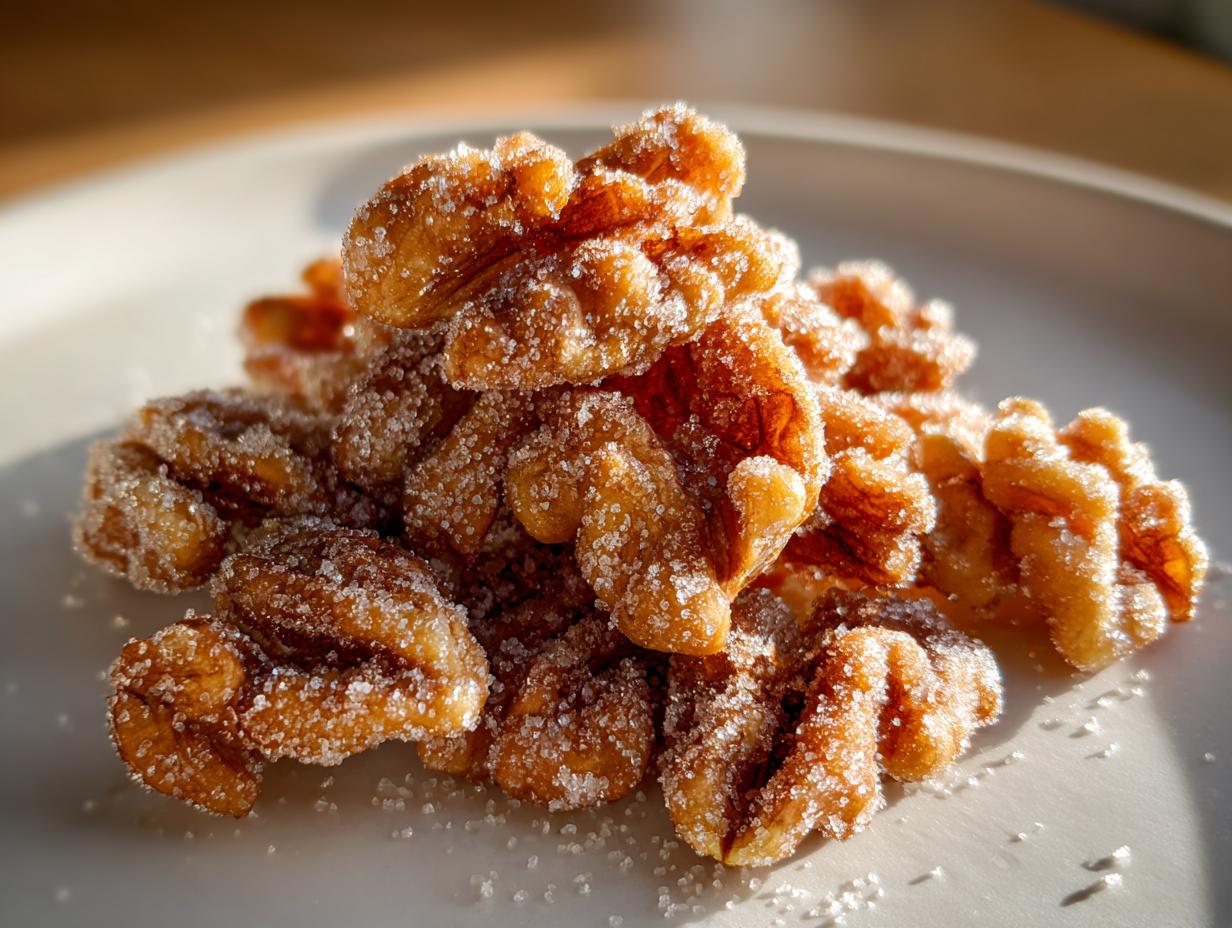
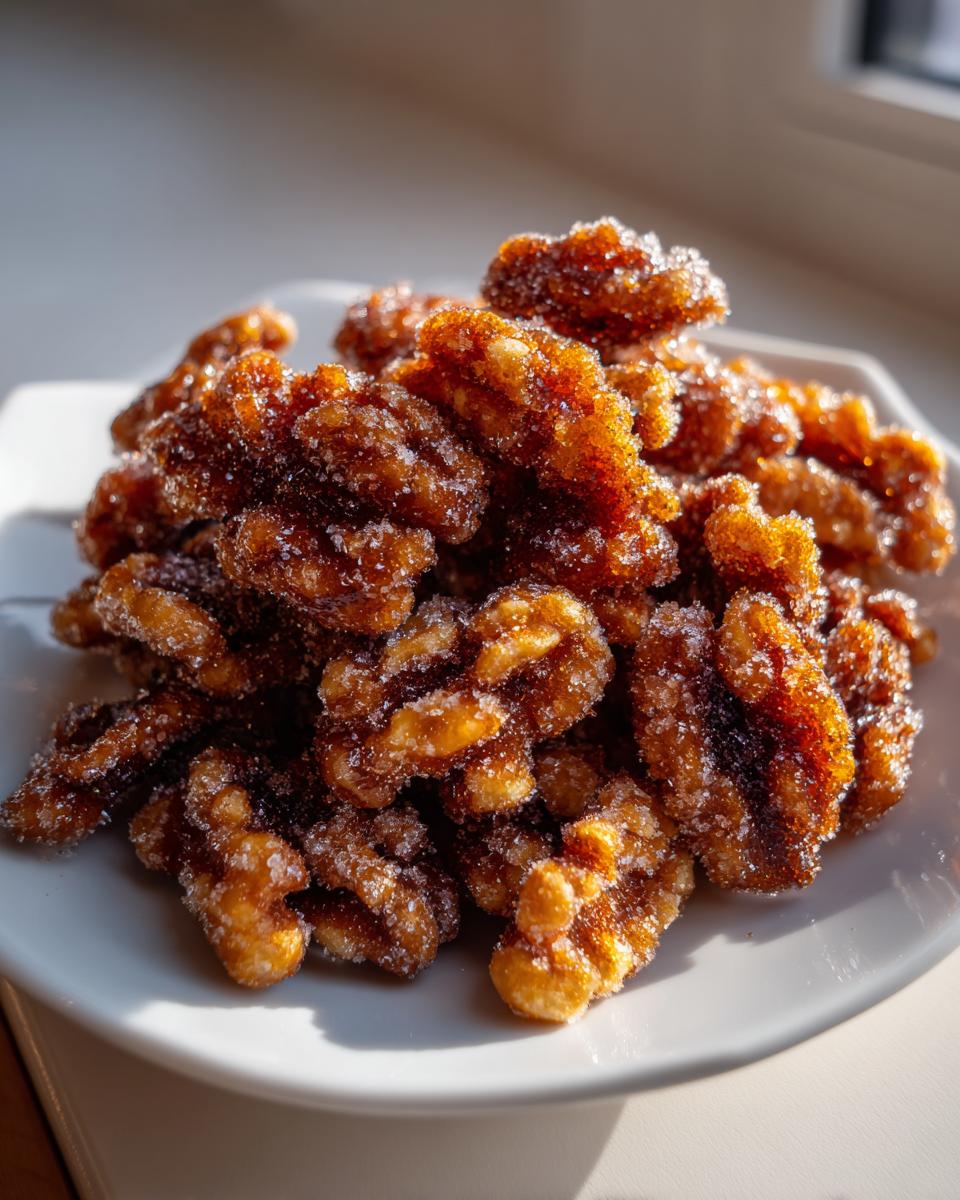
The second that syrup hits that light amber shade, pull the skillet straight off the heat. No hesitation! Now is the time to toss in your one cup of wonderful walnuts. You need to stir absolutely quickly and continuously with a sturdy spatula or wooden spoon. You’ll see the syrup instantly go cloudy and start turning white and granular—that’s the crystallization happening right before your eyes! Keep stirring until every single walnut piece is coated in that gritty, gorgeous sugar mixture. This crucial stirring ensures you get those perfect, crunchy glazed walnuts instructions results.
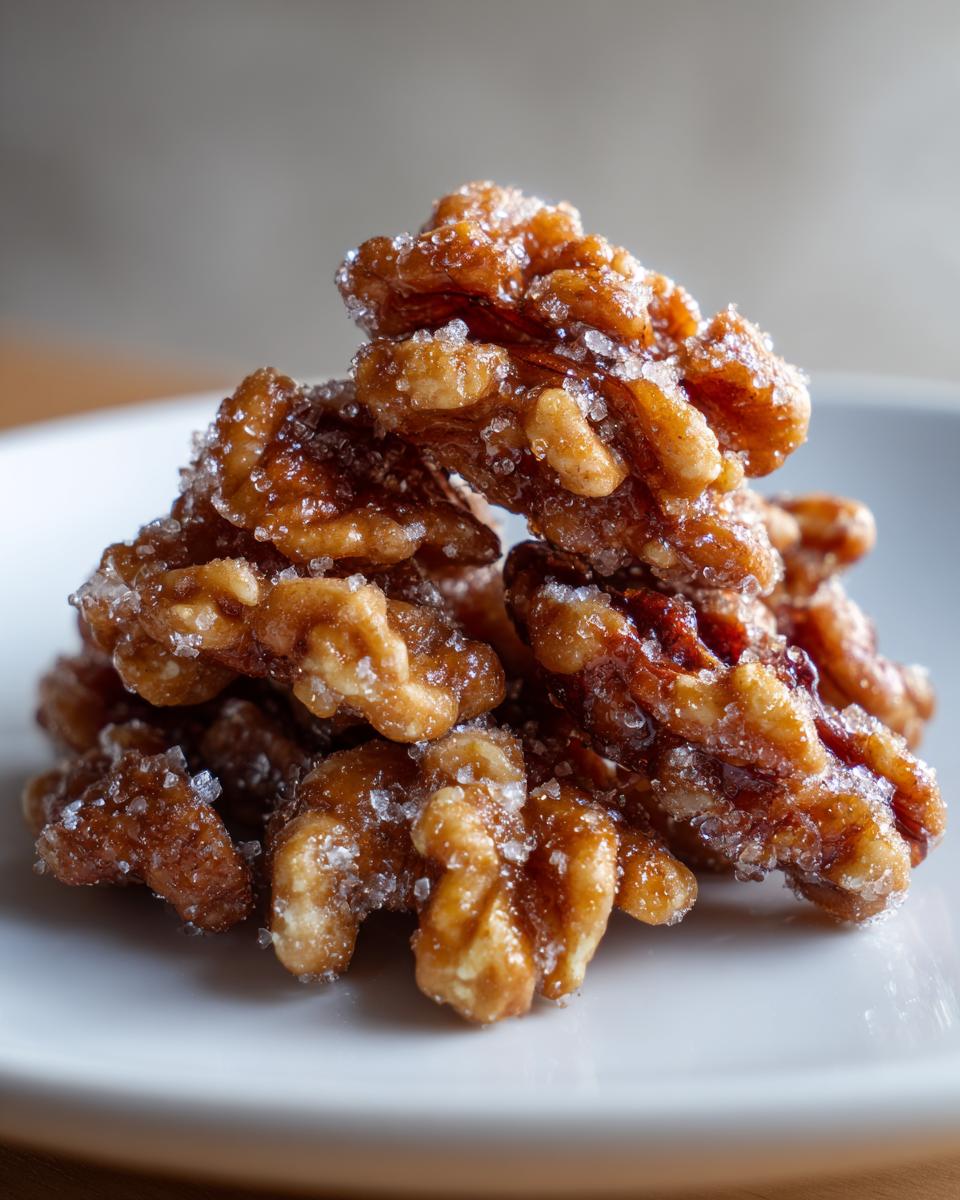
Once they look evenly coated, immediately dump them out onto your parchment-lined baking sheet. Spread them out into a single layer right away! If you wait even thirty seconds, they will start setting together in one giant walnut clump. If they do get stuck, don’t panic; just break them apart gently with your fingers while they’re still warm, which is much easier than trying to smash them later. They need about fifteen minutes to cool completely, hardening into that wonderful, crunchy texture we worked so hard for.
Tips for Success with Your Simple Sugar Coated Walnuts
I’ve already mentioned the speed of this recipe, but to really lock in that crunch for your simple sugar coated walnuts, you have to heed Sarah’s warning about batch size. If you try to double this recipe in the same small skillet we used before, you just won’t get even coverage. The syrup gets too thick too fast, and you’ll end up with some nuts drenched and others barely coated. If you need more than one cup, just run a second full batch right after the first one finishes—it still only takes ten minutes!
Another thing I always do, especially if I’m making these for a quick, sweet snack, is turn it into a sweet and salty walnuts snack. When you dump the coated nuts onto the parchment paper, give them a little sprinkle of flaky sea salt right away. That tiny bit of salt cuts through the sweetness and really makes the flavor pop! If you’re using these in a dessert, maybe save that salt for later. If you want to try something completely different, you can check out this easy lava cake recipe later, but for now, focus on keeping these nuts separate and spread out while they cool completely.
Flavor Variations for Gourmet Candied Walnuts Ideas
While the classic cinnamon sugar gets the job done beautifully, sometimes we need to dress these nuts up a bit, right? Especially around the holidays, I love experimenting with gourmet candied walnuts flavor ideas. If you aren’t feeling that warm spice, remember you can swap the cinnamon for vanilla extract. Add that extract just as you take the pan off the heat—if you add it while it’s boiling, the flavor cooks right out!
For something really special that works beautifully as a snack or on a cheese board, try adding a tiny pinch of cayenne pepper along with the cinnamon. It gives a lovely, subtle heat that pairs wonderfully with the sugar. You can also use different extracts. A hint of almond extract mixed with a splash of orange zest when you pull the pan off the stove creates truly lovely gourmet candied walnuts flavor ideas. If you’re enjoying these flavors, you might also want to try my recipe for soft chewy oatmeal cookie recipe next!
Serving Suggestions: Using Your Candied Walnuts for Salads and More
Now that you have these perfect, crunchy bites, the real fun begins! This is where you integrate simple, quality ingredients into your everyday life, just like we talk about here at Pure Plate Path. The most obvious delicious use is tossing them over a crisp green salad. They add texture and sweetness that makes even a basic bowl of greens feel intentional and special. Think about topping my copycat Olive Garden salad recipe with these!
But don’t stop there! These aren’t just for lettuce. They are amazing sprinkled over Greek yogurt or cottage cheese in the morning, adding a much-needed crunch to breakfast. I also love having a jar ready when I put together a cheese or charcuterie board during gatherings—they pair wonderfully with salty cheeses and dried fruit. Honestly, sometimes I just eat them by the handful straight from the jar. That’s the beauty of something quick and good, isn’t it?
Storage and Keeping Your Candied Walnuts Crunchy
We put all this work into getting that amazing crunch, so we definitely don’t want humidity to ruin them! The most important rule for storing your finished nuts is to make sure they are completely cool before they ever go into a container. If they have even a hint of warmth left, condensation forms, and you end up with sticky nuts later—total bummer.
Once they are stone cold, pop them into a truly airtight container. Glass jars with tight lids work best for me, or a heavy-duty zip-top bag with all the air pushed out. Kept dry on the counter, your candied walnuts should stay perfectly crisp for about two weeks. If your kitchen is really humid, try making smaller batches more often, or you might even consider tossing them into the freezer for longer storage!
Frequently Asked Questions About Candied Walnuts
I always get questions after sharing this stovetop method because folks are usually nervous about working with hot sugar. I totally get it! Here are a few things I hear all the time that might help you feel more confident when making your quick candied walnuts tutorial batch.
Why did my mixture turn sticky instead of crunchy?
This is the number one problem, and I promise it’s usually fixable! Stickiness happens when the sugar syrup hasn’t crystallized properly when it cools down. For these crunchy glazed walnuts instructions, you *must* stir quickly and vigorously the second you pull the pan off the heat and add the walnuts. That rapid agitation forces the sugar to crystallize around the nut instead of just cooling back down into a smooth, sticky syrup. If you wait too long to stir, you’re pretty much doomed to sticky spots!
Can I use maple syrup or honey instead of granulated sugar?
That’s a great thought if you’re looking for flavor variations, but for this specific recipe that calls for achieving a true candy shell, you need granulated white sugar. Maple syrup has too much natural water content, and honey burns way too fast. Sticking to the sugar and water ratio is key for that non-sticky outcome. If you want to try a more complex flavor, check out how this recipe pairs with a hearty easy chickpea soup recipe later!
Can I use pecans or almonds instead?
Absolutely! This is a fantastic, flexible base for any nut you love. If you use pecans or almonds, you want to stick to the same quantity (1 cup), but you might need to adjust the timing slightly because they are different shapes. You’ll still get delicious homemade glazed walnuts, but the cooking time in that sugar might be a minute more or less depending on the nut density.
I want a spice-free version; can I skip the cinnamon?
Of course! If you’re using these for a more savory purpose, or just prefer zero spice, just omit the cinnamon entirely. You’ll be left with a very pure, sweet sugar coating. If you decide to skip the cinnamon in the beginning, you might want to add a tiny splash of vanilla extract right at the very end after you remove the pan from the heat, just to give it a little something extra, turning it into a great sweet and salty walnuts snack!

Understanding the Estimated Nutritional Value of Candied Walnuts
Listen, when we’re talking about simple, delicious treats here at Pure Plate Path, I always want to be completely upfront about what we’re eating. Because this is a simple sugar-coated nut, we definitely see a higher sugar and fat content than if you were just grabbing plain raw walnuts. But honestly, when you make something this good yourself, you know exactly what went into it, which is way better than grabbing a bag from the store!
The figures below are our best estimate based on the small batch size—we only made one cup of these amazing nuts. If you use a little more salt or change the sugar amount for your own perfect batch, these numbers will shift slightly, of course. But this gives you a great general idea of what you’re enjoying when you reach for a handful of these quick candied walnuts.
For context, this estimation is based on a four-serving yield (about 1/4 cup per serving). If you are using these as a sprinkle over a salad, you might only be consuming half of a serving size here, which is good to remember! If you are looking for other treats that still feel wholesome and nourishing, definitely check out my guide on healthy desserts after you finish snacking on these!
- Serving Size: About 1/4 cup
- Calories: 320
- Fat: 22g (with only 2g being saturated)
- Carbohydrates: 30g (25g of that being sugar)
- Protein: 6g
Easy Crispy Candied Walnuts Recipe

Make best crispy candied walnuts on the stovetop using simple sugar coating. This quick tutorial provides crunchy glazed walnuts instructions perfect for salads or snacking.
- Prep Time: 5 min
- Cook Time: 10 min
- Total Time: 15 min
- Yield: 1 cup 1x
- Category: Snack
- Method: Stovetop
- Cuisine: American
- Diet: Vegetarian
Ingredients
- 1 cup walnut halves or pieces
- 1/2 cup granulated sugar
- 1/4 cup water
- 1/2 teaspoon ground cinnamon
- 1/4 teaspoon salt
Instructions
- Combine sugar, water, cinnamon, and salt in a medium non-stick skillet over medium heat. Stir until the sugar dissolves completely.
- Bring the mixture to a boil without stirring once boiling begins. Allow it to cook until the syrup reaches a light amber color, about 5 to 7 minutes. Watch closely to prevent burning.
- Remove the skillet from the heat. Immediately add the walnuts to the syrup. Stir quickly and continuously using a wooden spoon or heat-proof spatula until the syrup crystallizes and coats the nuts evenly.
- Spread the coated walnuts in a single layer onto a baking sheet lined with parchment paper. Separate any clumps immediately while they are still warm.
- Allow the candied walnuts to cool completely, about 15 minutes, until they are hard and crunchy. Store in an airtight container.
Notes
- For a sweet and salty walnuts snack, add a pinch of flaky sea salt when spreading them out to cool.
- If you prefer a different flavor, substitute the cinnamon with 1/2 teaspoon of vanilla extract added just after removing the pan from the heat.
- Do not double the recipe in the same small skillet, as the sugar may not coat evenly. Make two separate batches if you need more.
Nutrition
- Serving Size: 1/4 cup
- Calories: 320
- Sugar: 25
- Sodium: 110
- Fat: 22
- Saturated Fat: 2
- Unsaturated Fat: 20
- Trans Fat: 0
- Carbohydrates: 30
- Fiber: 3
- Protein: 6
- Cholesterol: 0