
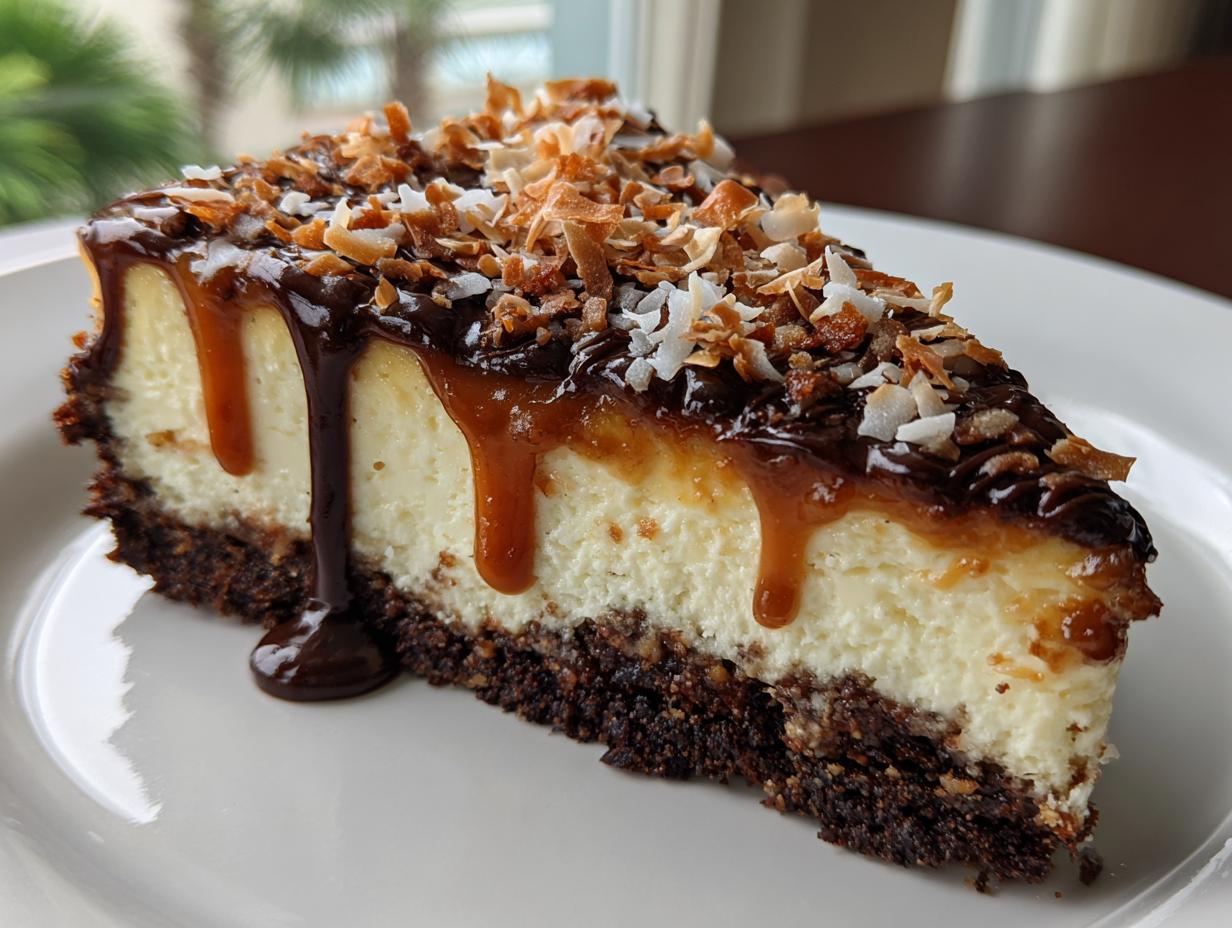
Oh, those cookies! You know the ones—the perfect swirl of caramel, toasted coconut, and chocolate that instantly sends you right back to childhood. Sometimes, you just crave that comforting flavor, but you want it in a format that feels a little more grown-up, a little more celebratory. That’s exactly why I spent a few weekends tinkering with this recipe until I perfected the most gloriously indulgent **samoa cheesecake** you will ever taste. It keeps the beloved flavors but wraps them up in the luxurious, creamy embrace of a classic baked cheesecake. Recreating those familiar treats is where I find so much joy in the kitchen lately, and I hope sharing this journey toward better food inspires you, too!
- Why This Samoa Cheesecake Recipe is a Showstopper
- Gathering Ingredients for Your Caramel Coconut Cheesecake
- Step-by-Step Instructions for the Samoa Cheesecake
- Tips for Success with Your Samoa Cheesecake
- Storing and Serving Your Gourmet Cheesecake Variations
- Frequently Asked Questions About Samoa Dessert Recipe
- Next Steps After Mastering the Samoa Cheesecake
- Next Steps After Mastering the Samoa Cheesecake
Why This Samoa Cheesecake Recipe is a Showstopper
Listen, sometimes you need a dessert that doesn’t just satisfy a craving—it demands attention! This isn’t your average bake; it’s one of those truly decadent cheesecake recipes that stops conversations when you bring it to the table. I designed it to hit all those nostalgic cookie notes.
- The crust has a lovely, slightly salty crunch from those toasted coconut flakes.
- The filling is pure silk—incredibly rich without being heavy, thanks to that water bath technique we use.
- It perfectly balances the sweetness of the caramel drizzle with the slight bitterness of the dark chocolate finish.
If you’re looking to serve one of those showstopping desserts for parties this year, this is the one. It has layers of texture and flavor that just keep giving.
Gathering Ingredients for Your Caramel Coconut Cheesecake
Okay, let’s talk supplies for this masterpiece! Since this **samoa cheesecake** has three very distinct layers—the crunch, the cream, and the gooey topping—we need to organize our shopping list carefully. When you’re baking something this **gourmet cheesecake variation**, precision matters, especially with the cream cheese. Trust me on this one: unless you want lumps, everything for the filling must be at room temperature before you even think about turning the mixer on.
I’ve laid everything out for you below, divided by component. This makes grocery shopping a breeze, and it organizes your prep station nicely before you start that easy homemade caramel sauce recipe!
For the Toasted Coconut Crust Cheesecake Base
This crust isn’t just a base; it’s our first layer of incredible coconut flavor! You need those shortbread crumbs nice and fine, and make sure you don’t skip toasting the coconut—it brings out such a deep, nutty aroma.
- 1 1/2 cups shortbread cookie crumbs
- 1/4 cup toasted shredded coconut
- 6 tablespoons unsalted butter melted
For the Creamy Cheesecake Filling
Remember what I said? Make sure these chill-cold packages of cream cheese have been sitting out for at least an hour. We need them soft enough to blend into absolute perfection.
- 3 (8 ounce) packages cream cheese softened
- 1 1/2 cups granulated sugar
- 1 teaspoon vanilla extract
- 1/4 teaspoon salt
- 4 large eggs (room temp!)
- 1/2 cup sour cream (room temp!)
For the Salted Caramel and Chocolate Topping
Look closely here, because we have two different creams needed for two different finishes! We use the heavy cream for the caramel first, and then a separate, smaller amount for melting the chocolate chips into that gorgeous drizzle. This is how we nail those separate textures for your final creation.
- 1 cup granulated sugar (for caramel)
- 1/2 cup heavy cream warmed (for caramel)
- 1/4 cup unsalted butter cut into pieces (for caramel)
- 1/2 teaspoon vanilla extract (for caramel)
- 1/4 teaspoon sea salt (for caramel)
- 1/2 cup semi-sweet chocolate chips
- 1/4 cup heavy cream (for chocolate)
- 1/2 cup toasted shredded coconut for garnish
Step-by-Step Instructions for the Samoa Cheesecake
Alright, the moment of truth! Following these steps precisely is how you turn a good cheesecake into the **best Samoa dessert recipe** adaptation. We’re moving through the crust, the bake, and then making those amazing toppings. I want this to be foolproof for you, so don’t rush the cooling part—that’s where we build that creamy texture and avoid any annoying cracks!
Preparing the Crust and Water Bath Setup
First things first, get that oven warmed up to 325 degrees F. Since cheesecake loves moisture, we need to protect our pan from the water bath. Take heavy-duty aluminum foil and wrap the outside of your 9-inch springform pan *really* tightly. I usually do three layers just to be safe; you don’t want any water seeping in!
While the oven heats, let’s make that base. Mix your 1 1/2 cups of shortbread crumbs with the 1/4 cup of toasted coconut and the 6 tablespoons of melted butter until it looks like wet sand. Press that firmly into the bottom of your prepared pan. Pop it into the oven for just 10 minutes to set it up. Once it comes out, let it cool off just a bit before pouring in the filling.
Next, before adding the filling, get your roasting pan ready. This roasting pan will hold the water bath, also known as the bain-marie. The water bath is your insurance policy; it surrounds the cheesecake with steam, ensuring it bakes evenly and stays incredibly moist—no sinking centers here!
Creating the Perfect Cheesecake Filling Batter
Take your softened cream cheese—remember, room temperature is key!—and beat it in your large bowl with the sugar, vanilla, and salt until it’s beautiful and smooth. Take your time here; you want zero lumps before we move on.
Now, handle the eggs gently! Add your 4 large eggs in one at a time. I mean it: mix until *just* combined after each egg. If you beat them too much, you introduce too much air, and that air turns into cracks later. Nobody wants a cracked top when you’re aiming for the perfect creamy easy cheesecake!
Finally, fold in the 1/2 cup of sour cream until the batter is completely uniform. Pour this glorious filling right over your slightly cooled crust. Now, place the foil-wrapped springform pan inside that larger roasting pan.
Baking and Cooling the Samoa Cheesecake
Here’s where you need patience! Carefully pour hot water into the roasting pan until it comes about halfway up the sides of the springform pan. Don’t splash any water inside the cheesecake! Slide the whole setup into the 325°F oven. You’re baking for about 60 to 75 minutes. You know it’s done when the edges look set, but the center still has a little wiggle, like firm Jell-O.
This next part is essential for that silky texture: Turn the oven OFF. Crack the oven door open just a smidge—you can wedge a wooden spoon in there. Let the cheesecake slowly cool down inside the oven for a full hour. Removing it too fast causes a temperature shock, which equals cracking!
After that hour, take it out of the water bath, remove the foil, and let it cool on a wire rack until it reaches room temperature. Then, cover it gently and slide it into the fridge. You must chill this beauty for a minimum of 6 hours, but honestly? Overnight is when the real magic happens for this salted caramel dessert inspiration.
Crafting the Homemade Salted Caramel Sauce Recipe
While the cheesecake chills, we make the gooey brown ribbons that define Samoa flavor! In a saucepan over medium heat, melt that 1 cup of sugar all by itself. Don’t stir it at first; just let it melt from the edges inward until it turns a beautiful, deep amber color—think rich molasses. This is tricky, so watch it like a hawk!
Once it’s amber, take the pan OFF the heat—this is critical—and slowly whisk in the 1/2 cup of warmed heavy cream. It’s going to bubble up like a volcano! Keep whisking until it smooths out. Then, while it’s still hot, whisk in the butter pieces, the vanilla, and the sea salt until everything is perfectly incorporated. Let this cool down completely so it thickens up for drizzling.
Assembling and Finishing Your Decadent Cheesecake Recipes
Once your **samoa cheesecake** is nice and firm from the fridge, you can carefully release it from the springform pan. Now for the fun part: dressing it up! Take your cooled salted caramel and drizzle it generously all over the top of that creamy surface. Don’t be shy!
Next, let’s make the chocolate drizzle. Just heat that last 1/4 cup of heavy cream until it’s simmering, pour it over your 1/2 cup of chocolate chips, let it sit for five minutes, and then whisk it into a smooth ganache. Drizzle this chocolate over the caramel layer.
For the final flourish—the signature crunch—take that remaining 1/2 cup of toasted coconut and sprinkle it heavily over the chocolate and caramel. Slice this ultimate dessert bars beauty and prepare for applause!

Tips for Success with Your Samoa Cheesecake
Baking a gorgeous cheesecake, especially one with so many layers of flavor like this **Caramel coconut cheesecake**, always feels like a high-stakes game, but I promise you, it doesn’t have to be stressful. My goal here is to give you the confidence to nail that smooth top every single time. Remember, using simple, quality ingredients and respecting the technique is what separates a good bake from a fantastic one.
Let’s talk about preventing those dreaded cracks first. If you remember one thing from this whole recipe, make it this rule: **ROOM TEMPERATURE INGREDIENTS** for the filling. I mean it! If your cream cheese is even slightly cold, you’ll end up beating it too long trying to smooth it out, and that overmixing introduces the air that causes sinking and cracking later on. Always set out the cream cheese and sour cream several hours ahead of time.
Mastering the Art of Coconut Toasting
Toasting coconut sounds easy, right? But it goes from perfectly golden to totally black in about three seconds, so you have to treat it with respect! I use a dry, heavy-bottomed skillet—no oil needed—over medium-low heat for the best control. Keep stirring the shredded coconut constantly using a spatula. You’re looking for light golden-brown edges and a wonderfully nutty smell. Take it off the heat the second you hit that color because it keeps cooking on the residual heat even after you pull it away.
If you’re using this recipe for your shortbread cookies a 3-ingredient bake bliss, you can toast a large batch and save some for later—it stores beautifully in an airtight container.
Why the Water Bath is Your Best Friend
I know wrapping a springform pan in foil and setting it in a water bath feels fussy, but it is the single most important thing you can do for this **Girl Scout cookie cheesecake**. That steam bath creates a humid environment around the cheesecake so the edges can bake gently at the same rate as the center. This evens out the heat, keeps the filling creamy, and—you guessed it—minimizes cracking.
Don’t skimp on the foil wrapping! If any water seeps into the crust, it will get soggy, and you’ll end up with a gummy base instead of a firm, buttery backdrop for your **rich baked treats**.
Can I Adapt This for a No-Bake Cheesecake?
That’s a fantastic question, especially if you’re aiming for something quick! While I absolutely love the dense, luxurious texture of this baked version, you can definitely adapt it if you prefer a no bake cheesecake with caramel topping. For a no-bake approach, you skip the oven entirely for the filling. You’d need to dissolve your sugar slightly differently, probably by whisking it into the cream cheese and sour cream over *very* low heat just until smooth, never boiling. Then, chill that filling mixture for at least 4 hours before you proceed with the salted caramel and chocolate topping.
Just remember, the texture won’t have that classic baked richness, but you’ll still capture those wonderful Samoa flavors!
Storing and Serving Your Gourmet Cheesecake Variations
So, you’ve made—or you’re about to make—this spectacular **Caramel coconut cheesecake**, and you need to know how to keep it pristine until the party starts! Honestly, if you can resist eating the entire thing straight away, storage is pretty simple. Since this recipe includes those gorgeous fresh dairy components in the filling and the homemade caramel, keeping it cold is key.
Once the cheesecake is fully chilled (that minimum 6-hour chill time is not optional, my friends!), you need to cover it gently. I recommend placing the ring or cover onto the springform pan base *after* you’ve drizzled the caramel and chocolate, or if you remove the ring, use wax paper tented over the top. You want to protect the topping from picking up any fridge smells. It keeps wonderfully in the refrigerator for up to four days.
Serving Suggestions for Maximum Indulgence
When it comes time to serve this **showstopping dessert**, you want to pull it out of the fridge about 20 minutes before slicing. Cheesecake slices best when it’s slightly softened—cutting it ice-cold can cause cracking or uneven slices.
Because this is such a rich treat, I find it pairs perfectly with a hot beverage after dinner. Think about serving a slice alongside a strong cup of coffee or maybe some espresso. If you’re building an indulgent dessert platter ideas for a holiday gathering, this is the star attraction. You could place small squares of it next to something lighter, like fresh berries or maybe some simple shortbread cookies.
I personally love making a full batch of the salted caramel sauce separately because there’s always that one person (usually me!) who wants extra sauce on the side of their slice. Don’t even get me started on how good the leftovers are the next morning with a black coffee!
Frequently Asked Questions About Samoa Dessert Recipe
Whenever I share a favorite recipe like this **samoa cheesecake**, I always get a flood of questions in my inbox, which I absolutely love! It means you’re all excited to try baking it. Here are some of the common things I hear about adapting this **Caramel coconut cheesecake** or how to manage the different textures.
Can I use a different cookie for the crust instead of shortbread?
Yes, you absolutely can! The shortbread base gives you that nice buttery, almost sandy texture reminiscent of the cookie, but if you don’t have them on hand, graham crackers work perfectly well. If you use graham crackers, you might want to add an extra tablespoon of butter since they absorb moisture differently. If you are looking for some inspiration on bases, I have a great guide on easy no-bake Biscoff cheesecake recipe that gives you an idea of how different cookie crumbs behave.
How far ahead of time can I make the salted caramel sauce?
This is the best news for party planners: you can make that **homemade salted caramel sauce recipe** almost entirely in advance! I usually make a big batch and store it in a sealed jar in the fridge about a week before I plan to bake the cheesecake. When you go to use it, the caramel will be quite stiff. Just warm it gently on the stove or in the microwave in 15-second bursts, stirring well between each time, until it’s that perfect drizzly consistency again. It warms up beautifully and keeps that wonderful salty flavor intact.
What if I want to make this a truly chocolate-heavy experience with a swirl?
I love that idea! If you want more chocolate swirl cheesecake ideas running through the filling, take about half a cup of that finished chocolate ganache (before you drizzle it on top) and gently swirl it into the cheesecake batter right before you pour it into the pan. Use a butter knife to make a figure-eight pattern two or three times through the batter. Don’t over-swirl, or you’ll just end up with a uniform brown cake! This way, you get those lovely pockets of chocolate flavor inside.
Is the sour cream absolutely necessary for the filling?
For this specific recipe, I highly recommend keeping the sour cream in. It’s one of those subtle things that really contributes to the **decadent cheesecake recipes** texture. Sour cream adds a lovely tang that cuts through the richness of the cream cheese and sugar, balancing the overall flavor profile so it doesn’t taste too sweet. It also helps keep the filling smooth and tender. If you absolutely must skip it, you could try replacing it with an equal amount of plain Greek yogurt, but the textural results might vary slightly.
Next Steps After Mastering the Samoa Cheesecake
Woohoo! You made it through the whole process, from the toasty crust to that perfect caramel drizzle. Seriously, making one of these **rich baked treats** is such an accomplishment, and I can’t wait to hear how it turned out!
Once you have sliced into this **ultimate dessert bars** creation and shared it with your friends and family, please, please come back and leave me a note below. Did the caramel set just right? Did you add an extra sprinkle of toasted coconut? I want to know all the details!
If you took any gorgeous photos of your finished **samoa cheesecake**, tag me on social media so I can admire your handiwork! And if you have any lingering questions that I didn’t cover here, don’t hesitate to reach out on my contact page. Happy baking, everyone!
PrintDecadent Samoa Cheesecake Recipe
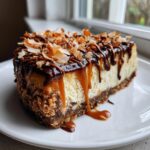
Make this rich, baked cheesecake inspired by Girl Scout Samoa cookies, featuring a toasted coconut crust, creamy filling, and a topping of homemade salted caramel and chocolate drizzle. This is a showstopping dessert for parties.
- Prep Time: 30 min
- Cook Time: 75 min
- Total Time: 120 min
- Yield: 12 servings
- Category: Dessert
- Method: Baking
- Cuisine: American
- Diet: Vegetarian
Ingredients
- For the Crust: 1 1/2 cups shortbread cookie crumbs, 1/4 cup toasted shredded coconut, 6 tablespoons unsalted butter melted
- For the Filling: 3 (8 ounce) packages cream cheese softened, 1 1/2 cups granulated sugar, 1 teaspoon vanilla extract, 1/4 teaspoon salt, 4 large eggs, 1/2 cup sour cream
- For the Topping: 1 cup granulated sugar, 1/2 cup heavy cream warmed, 1/4 cup unsalted butter cut into pieces, 1/2 teaspoon vanilla extract, 1/4 teaspoon sea salt, 1/2 cup semi-sweet chocolate chips, 1/4 cup heavy cream (for chocolate), 1/2 cup toasted shredded coconut for garnish
Instructions
- Preheat your oven to 325 degrees F. Wrap the outside of a 9-inch springform pan tightly with heavy-duty aluminum foil.
- Prepare the crust: Mix cookie crumbs, 1/4 cup toasted coconut, and melted butter until combined. Press the mixture firmly into the bottom of the prepared springform pan. Bake for 10 minutes. Let cool slightly.
- Prepare the filling: Beat the softened cream cheese, sugar, vanilla extract, and salt in a large bowl until smooth. Beat in the eggs one at a time, mixing just until combined after each addition. Mix in the sour cream until the batter is smooth. Do not overmix.
- Pour the filling over the cooled crust. Place the springform pan into a larger roasting pan. Carefully pour hot water into the roasting pan until the water reaches halfway up the sides of the springform pan to create a water bath.
- Bake for 60 to 75 minutes, or until the edges are set but the center still jiggles slightly. Turn off the oven, crack the door open, and let the cheesecake cool in the oven for 1 hour.
- Remove the cheesecake from the water bath and cool completely on a wire rack. Refrigerate for at least 6 hours, or preferably overnight.
- Make the salted caramel: In a medium saucepan over medium heat, melt 1 cup of sugar without stirring until it turns a deep amber color. Remove from heat and carefully whisk in the warmed 1/2 cup heavy cream (it will bubble vigorously). Whisk in the butter, vanilla, and sea salt until smooth. Let cool slightly.
- Make the chocolate drizzle: Place chocolate chips in a small bowl. Heat the remaining 1/4 cup heavy cream until simmering, then pour over the chocolate chips. Let sit for 5 minutes, then whisk until smooth.
- Assemble the cheesecake: Once chilled, remove the cheesecake from the pan. Drizzle generously with the salted caramel sauce. Drizzle with the chocolate sauce. Sprinkle the remaining 1/2 cup toasted coconut over the top. Slice and serve this gourmet cheesecake variation.
Notes
- To prevent cracks, ensure all filling ingredients are at room temperature before mixing. The water bath is essential for even baking and moisture retention.
- Toast coconut in a dry skillet over medium-low heat, stirring constantly until golden brown. Watch closely as it burns quickly.
- If you prefer a no bake cheesecake with caramel topping, chill the filling mixture for 4 hours before topping.
Nutrition
- Serving Size: 1 slice
- Calories: 550
- Sugar: 55
- Sodium: 320
- Fat: 35
- Saturated Fat: 20
- Unsaturated Fat: 15
- Trans Fat: 0
- Carbohydrates: 58
- Fiber: 2
- Protein: 8
- Cholesterol: 150