
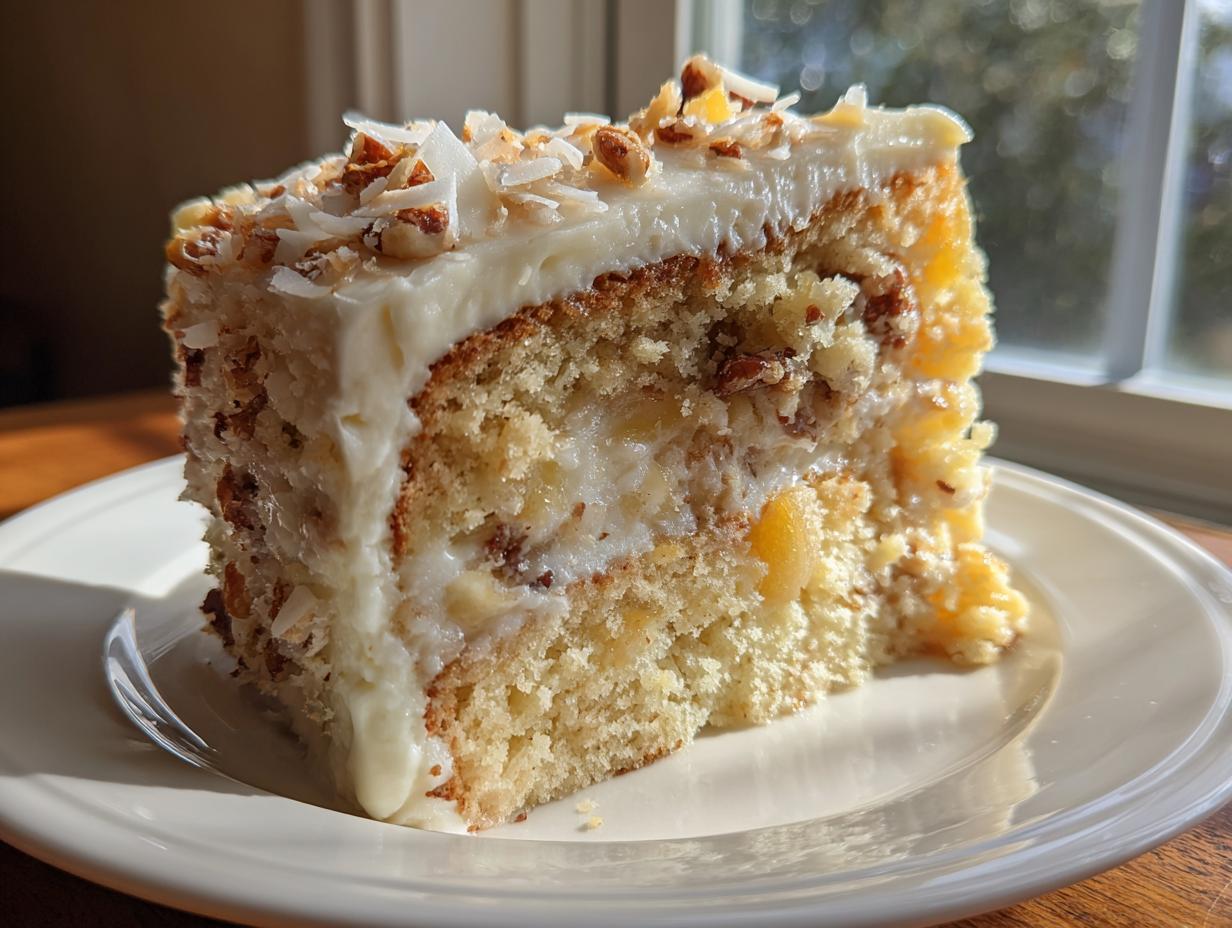
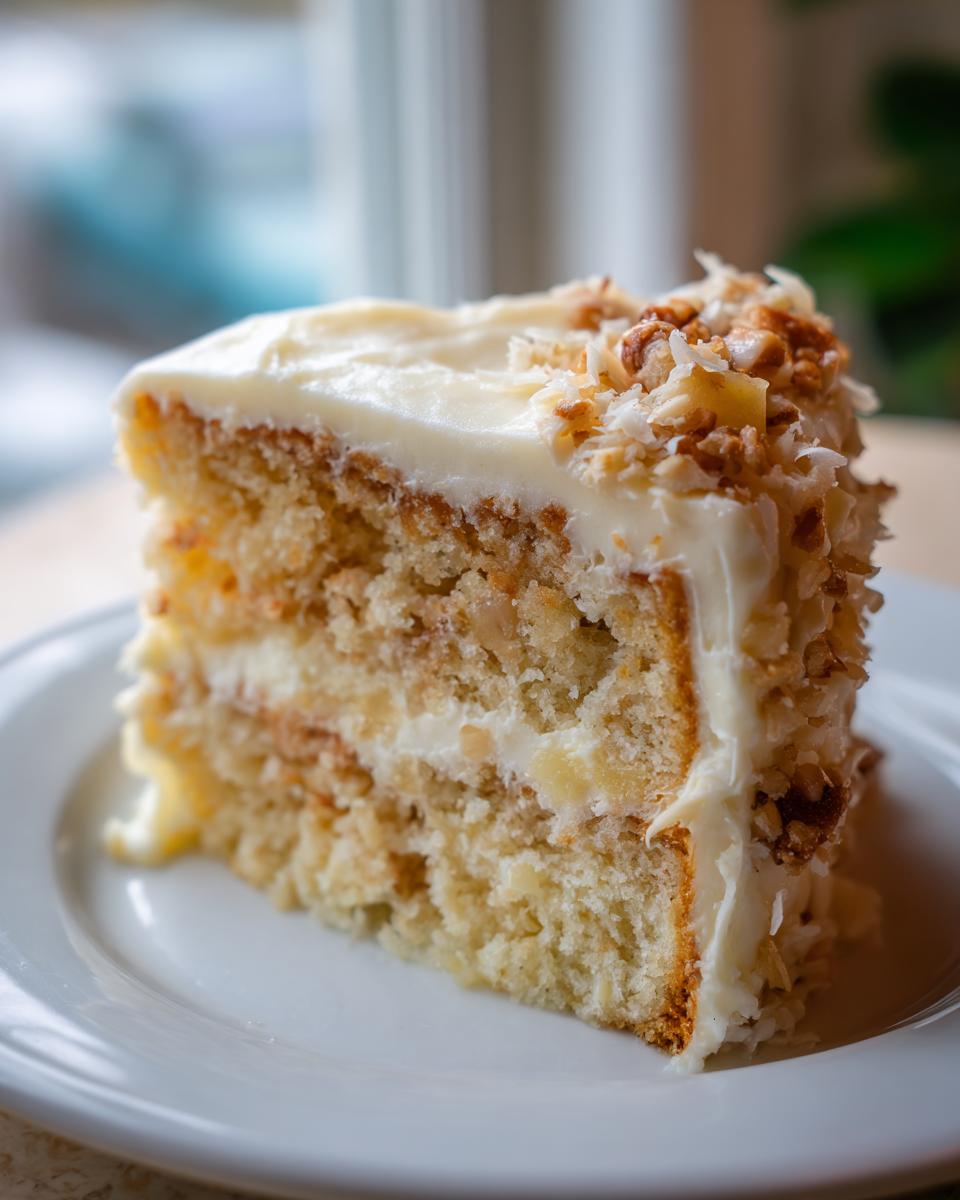
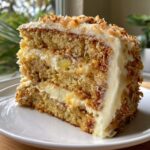
Oh my goodness, are you ready for a slice of paradise? When the sun is shining or you just need a burst of pure joy on your plate, nothing beats a truly tropical dessert. And when it comes to celebrations—especially something as important as a wedding—we need a showstopper that tastes as phenomenal as it looks. That’s why I’m completely obsessed with the authentic Hawaiian Wedding Cake. It’s rich, it’s unbelievably moist, and it’s packed with coconut, pineapple, and those buttery macadamia nuts.
Here at Pure Plate Path, Sarah always says that food should connect us, right? This cake embodies that. It takes those beautiful island flavors and turns them into something welcoming and accessible, even if your life is hectic. Forget those dry, fussy cakes; this one is pure comfort wrapped in sunshine. I promise, just smelling the batter with the vanilla and pineapple is going to transport you straight to the beach! You can read more about Sarah’s philosophy of connecting with food over at our story page.
- Why This Hawaiian Wedding Cake Recipe Stands Out (E-E-A-T)
- Gathering Your Ingredients for the Hawaiian Wedding Cake
- Step-by-Step Instructions: Coconut Pineapple Cake Baking
- Crafting the Classic Hawaiian Cake Frosting (Cream Cheese Icing)
- Assembling Your Perfect Hawaiian Wedding Cake
- Tips for the Best Hawaiian Celebration Cake
- Storage and Serving Suggestions for Your Hawaiian Wedding Cake
- Frequently Asked Questions About Making a Hawaiian Wedding Cake
- Nutritional Estimates for This Tropical Dessert
- Nutritional Estimates for This Tropical Dessert
Why This Hawaiian Wedding Cake Recipe Stands Out (E-E-A-T)
You see tons of Tropical Layer Cake Recipes out there, but this one? This is the one that actually delivers on moisture. We’re talking about a cake that stays tender for days, which is crucial if you’re making it ahead for a big day. Every batch I whip up feels like the Best Hawaiian Celebration Cake because the combination of oil and that undrained pineapple locks in moisture like nothing else. I’ve linked to some of our other lighter dessert ideas, but trust me, this one is worth every delicious crumb.
Sarah absolutely leans into this recipe because it proves that celebratory food doesn’t need to be fussy to taste incredible. It’s perfect for a Luau Party Dessert Recipe or a wedding table because everyone loves these flavors!
Key Tropical Components in This Hawaiian Wedding Cake
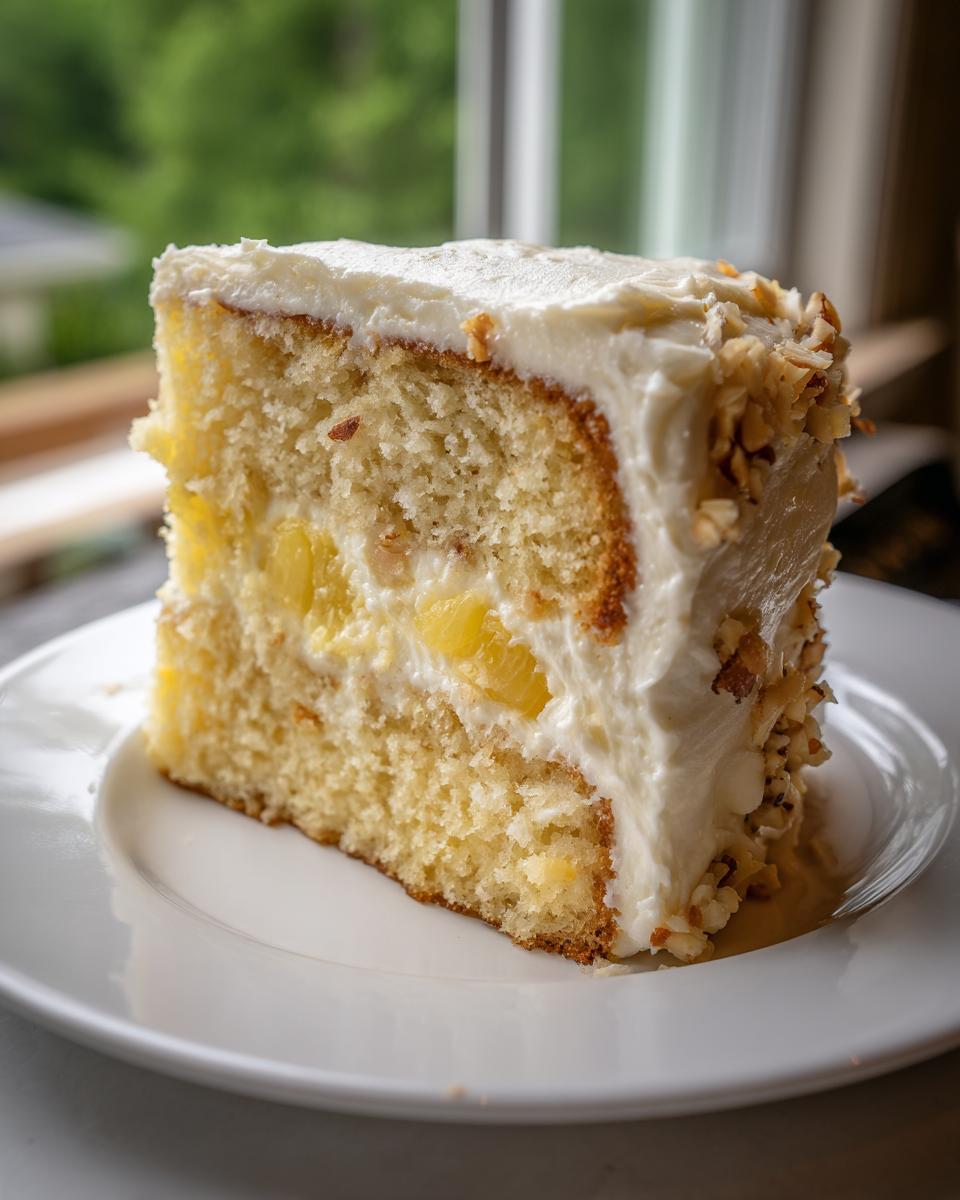
It’s all about the add-ins, honestly. The crushed pineapple is our cheat code for perfect texture—it adds beautiful sweetness and liquid without making the crumb gummy. Then, we have the macadamia nuts. They give you that wonderful, satisfying crunch; they elevate this from a good Coconut Pineapple Cake Baking project into something truly special.
Gathering Your Ingredients for the Hawaiian Wedding Cake
Okay, let’s talk about what you need to pull off this amazing tropical indulgence. Since this is a scratch recipe, prepping your components first makes the whole process fly by, trust me on this one! We need flour, sugar, oil, those four big eggs, vanilla, and buttermilk. The real magic comes from the pineapple, coconut, and those beautiful nuts. Make sure your cream cheese and butter are totally softened for the frosting later—that’s non-negotiable for smooth icing!
Here’s the full list of what you need to hunt down:
- 1 3/4 cups all-purpose flour
- 1 3/4 cups granulated sugar
- 1 teaspoon baking soda
- 1/2 teaspoon salt
- 1 cup vegetable oil
- 4 large eggs
- 1 teaspoon vanilla extract
- 1 (8 ounce) can crushed pineapple, undrained
- 1 cup buttermilk
- 1 cup finely chopped macadamia nuts, toasted
- 1 cup shredded sweetened coconut
- 1/2 cup cream cheese, softened
- 1/2 cup unsalted butter, softened
- 3 cups powdered sugar
- 1 teaspoon almond extract
Ingredient Notes and Preparation Tips
Before you even think about mixing, you *must* toast those macadamia nuts. It wakes up their flavor tenfold! You just spread them on a sheet and pop them into the 350-degree oven for about 8 to 10 minutes. Keep an eye on them because they can burn fast. Also, don’t skip the buttermilk! It reacts with the baking soda to give this Tropical Layer Cake Recipe that slightly finer, tender crumb we aren’t getting from baking powder alone. It sounds fancy, but it just makes the cake beautifully soft.
Step-by-Step Instructions: Coconut Pineapple Cake Baking
Alright, now for the fun part—putting it all together. First things first: Crank that oven up to 350 degrees F (175 degrees C). Don’t forget to properly grease and flour those two 9-inch round cake pans. Seriously, take your time here; we don’t want any sticking emergencies later!
In your biggest bowl, we’re whisking together the dry stuff first—flour, sugar, baking soda, and salt. Once that looks uniform, you’re going to add the oil, the four eggs, and the vanilla right on top. Mix that just until it comes together. You don’t want to overdo it here; we’re trying to keep things light, so treat it gently!
Next, we tackle the wet elements separately. Whisk the buttermilk right into that can of undrained crushed pineapple. Yeah, use the juice! That’s essential moisture! Then, slowly pour that liquid mix into your batter while mixing at a low speed until everything is smooth. This is where the real science happens for a great Homemade Hawaiian Cake from Scratch.
Finally, the payoff! Gently fold in those toasted macadamia nuts and the shredded coconut. I mean really gently, like you’re tucking them into bed. We want to keep all that lovely air we just mixed in! Divide that gorgeous batter between your pans and pop them in the oven. I check out some fantastic baking tips you might find useful over at this resource while you’re waiting!
Baking Times and Cooling for Your Homemade Hawaiian Cake from Scratch
These cakes typically need about 30 to 35 minutes in that 350-degree oven. You’ll know they’re done when a wooden pick slipped into the center slides out clean—or maybe just has a few moist crumbs clinging to it, but definitely no wet batter. Don’t rush the cooling! Let them chill out in the pans for a good 10 minutes. Then, turn them out onto a wire rack to cool completely. If you try to frost them warm, that beautiful frosting melts right into a tropical puddle, and nobody wants that!
Crafting the Classic Hawaiian Cake Frosting (Cream Cheese Icing)
Now that our layers are cool—and I mean *completely* cool, or you’ll regret it!—it’s time for the crown jewel: the frosting. Look, a tropical cake deserves something tangy and rich, so we are absolutely sticking with a Cream Cheese Frosting for Tropical Cake. It’s my secret weapon for making any of my cakes feel fancy enough for a proper celebration.
You’ll start by getting your cream cheese and unsalted butter perfectly softened. I usually leave mine out for a good hour before starting. Beat them together in your mixer until they’re light and fluffy—no lumps allowed! Then, we start adding the powdered sugar slowly, cup by cup, so it doesn’t explode out of the bowl! I’ve got a whole tutorial on getting fluffy frosting texture over here if you want to check out my buttercream techniques, mostly because technique matters for spreading.
Once the sugar is incorporated, drop in that almond extract. That little hint of almond with the coconut and pineapple is just *chef’s kiss* perfection! If the frosting seems a little too stiff for easy spreading, don’t panic. Just whisk in a tablespoon of milk at a time until it’s smooth, creamy, and perfectly spreadable. That’s how we ensure a beautiful finish for your Hawaiian Wedding Cake.
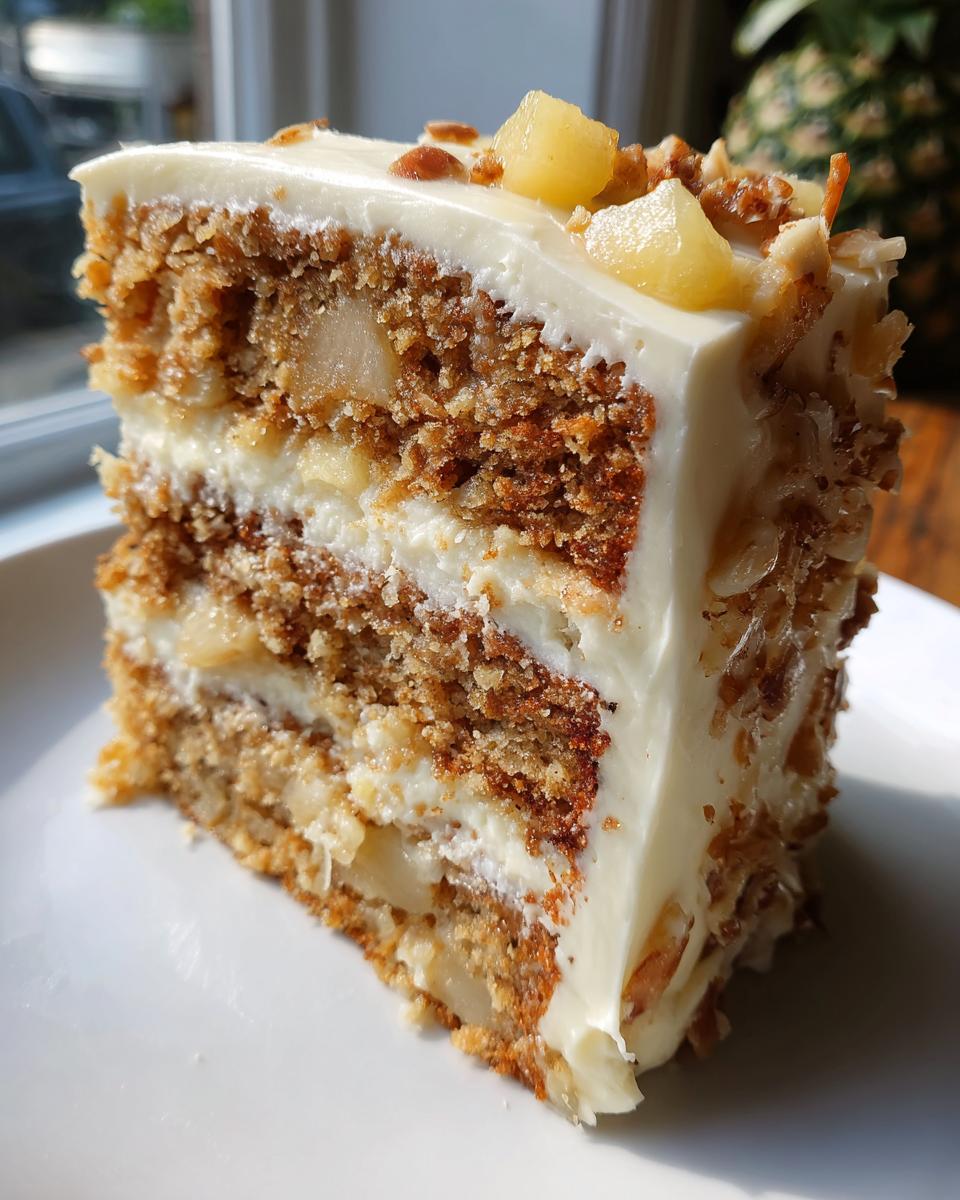
Assembling Your Perfect Hawaiian Wedding Cake
This is the moment we’ve all been waiting for! Your Hawaiian Wedding Cake layers are cooled, and your frosting is perfectly creamy. Don’t get nervous; we’re taking this slow, step-by-step, because presentation matters, especially for a centerpiece like this!
If you want that super professional look that’s often seen on a Wedding Dessert Table Inspiration board, I highly recommend a quick crumb coat. It’s just a thin layer of frosting across the whole cake—top and sides. Brush off any loose crumbs, apply that thin layer, and then pop the whole thing in the fridge for about 20 minutes. This seals everything in, so your final layer of frosting looks flawless! Trust me, this small step is the difference between a good cake and a showstopper.
Once that crumb coat is set, it’s time for the grand finale. Scoop a generous amount of your Classic Hawaiian Cake Frosting onto the center of your bottom layer. Spread it evenly almost to the edge. Then, carefully top it with your second layer. Make sure it sits level! If one side is dipping, just use a little extra frosting underneath to prop it up—no one will ever know.
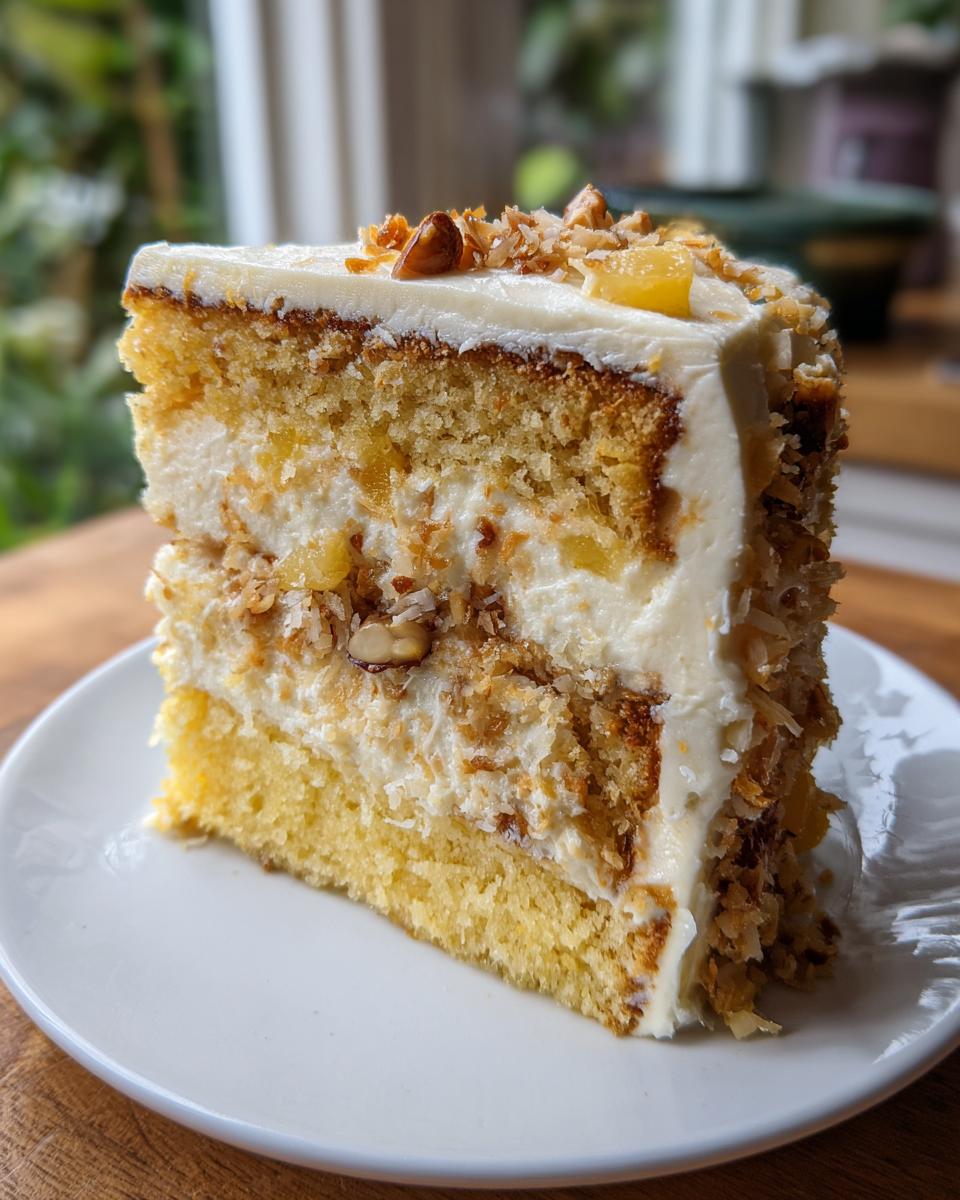
Finish by covering the top and sides with your remaining frosting. I usually use an offset spatula to create soft swirls on top for a rustic, homemade look, or you can use a bench scraper to get perfectly smooth sides. Since this is a Moist Pineapple Coconut Cake, it holds up really well to decoration. A few toasted coconut flakes or a sprinkle of those lovely macadamia nuts around the base makes it look absolutely finished and ready for your celebration!
Tips for the Best Hawaiian Celebration Cake
Listen, making a cake this moist and packed with fruit means we need to be a little smart about handling it, especially if it’s destined for a big event where it might sit out for a bit. For the absolute Best Hawaiian Celebration Cake, ingredient temperature is huge. Make sure those eggs and buttermilk are truly at room temperature before you mix them in—it helps them blend smoothly into that oil-based batter without separating. Serious home cooks know this first rule!
When it comes to presentation for your Wedding Dessert Table Inspiration, don’t overwork the very top layer of frosting. Since this whole cake is so soft, a light touch goes a long way. I love creating simple, gentle peaks with my spatula rather than trying to get mirror-smooth sides; it fits the relaxed island vibe so much better!
If you’re prepping this ahead, keep it chilled once it’s frosted because of that glorious cream cheese frosting, but remember to pull it out about an hour before serving. You want the cake to lose that fridge chill so the tropical flavors really sing through. If you need other practical tips for feeding a crowd, I sometimes look for inspiration over on this fun recipe page—sometimes the logistics of party food are the same, no matter the dish!
Storage and Serving Suggestions for Your Hawaiian Wedding Cake
So you’ve made the most gorgeous Hawaiian Wedding Cake, and now you need to keep it perfect until it’s time to eat! Since we used that luscious cream cheese frosting, we absolutely have to store this beauty in the refrigerator. Don’t just toss it in there uncovered, though—the cake will suck up any funny smells from your fridge! Cover it loosely with plastic wrap, making sure the wrap doesn’t touch the frosting. If you have a cake carrier, even better!
If you’re making this for a large event or as part of your Aloha Themed Party Food setup, it’s actually fantastic when made a day ahead. The flavors meld overnight, especially after that overnight chill in the fridge.
But here’s the important part for serving: You cannot serve this straight from the fridge! Cream cheese frosting gets too firm and the cake layers will taste dense and cold. You need to pull your Tropical Layer Cake Recipe masterpiece out onto the counter about one to two hours before you plan to slice it. This allows the butter in the frosting to soften up beautifully and lets the coconut and pineapple notes in the cake really shine through.
When you’re ready to serve, this cake pairs perfectly with a strong cup of coffee—the bitterness cuts through the sweetness wonderfully. Or, leaning into that island theme, serve thin slices alongside fresh mango, sliced pineapple, or a light passion fruit mousse. It’s already packed with flavor, so you don’t need much else, but a little extra tropical fruit never hurt anybody!
Frequently Asked Questions About Making a Hawaiian Wedding Cake
I know when you’re making something special like the Hawaiian Wedding Cake, you have a million little questions buzzing around. Don’t worry, that’s why I’m here! We want this to be stress-free, whether you’re using this recipe for a big party or just craving a taste of the tropics on a Tuesday. Sarah always says that practical knowledge is what builds confidence in the kitchen, so let’s tackle the common hurdles right now.
Can I use fresh pineapple in this Moist Pineapple Coconut Cake?
This is a great question, and the answer is yes, you totally can! However, fresh pineapple has more water content than canned, and we really rely on the consistency of the crushed, canned pineapple (undrained!) for the cake structure. If you use fresh pineapple, you’ll need to chop it fine and probably let it drain in a sieve for an hour or two first. You might even need to cut back on the buttermilk slightly—just watch the batter thickness—otherwise, you risk having a very dense cake. Stick with canned for the surest results!
What if I don’t have buttermilk for this Tropical Layer Cake Recipe?
Oh, the buttermilk dilemma! It happens! The acidity is important because it tenderizes the crumb and reacts with the baking soda, so we don’t want to skip that boost. The easiest fix for this Homemade Hawaiian Cake from Scratch is making your own substitute. Take one cup of regular milk—whole milk is best—and stir in one full tablespoon of white vinegar or lemon juice. Let that mixture sit on the counter for about 5 or 10 minutes until it looks slightly curdled. That’s your buttermilk replacer, ready to go! Fantastic trick, right?
Can I substitute the macadamia nuts in this Moist Pineapple Coconut Cake?
If you can’t find macadamia nuts—or if they are just way too pricey for your budget—you can definitely swap them out, but you’ll lose a little bit of that signature creamy melt-in-your-mouth texture. Walnuts are a fine backup; they bring a bit more earthiness. Pecans work beautifully too, especially if you toast them! Just remember that the macadamia nut provides a unique balance to the sweet coconut, so maybe add an extra teaspoon of coconut if you pivot to a different nut.
What is the best way to transport this Luau Party Dessert Recipe?
Transporting a tall, layered cake requires a strategy, especially one as rich as this one! First, you absolutely must chill the fully frosted cake for at least an hour before moving it. This firms up the Cream Cheese Frosting for Tropical Cake so it won’t slide around. Place the cake on a sturdy cake board, and then put the entire board inside a box that gives you several inches of clearance on all sides. That way, if the car brakes suddenly, the box absorbs the shock, not your beautiful layers! Drive slowly, like you’re carrying precious cargo—because you are!
Can this Hawaiian Wedding Cake recipe be made into cupcakes?
Yes, it absolutely can! This makes a phenomenal Luau Party Dessert Recipe in miniature form. You’ll get far more than 12 servings, probably closer to 24 standard cupcakes. The baking time will drop significantly, so start checking them around 18 to 20 minutes. They bake very quickly because the pan size is smaller. Filling the liners about two-thirds full is the standard rule—don’t overfill, or you’ll have little cake hats spilling over the tops!
If you have any more questions about technique or need a quick chat about your baking adventure, don’t hesitate to reach out to us through the contact page!
Nutritional Estimates for This Tropical Dessert
I always like to give a general idea of what’s in the slice, though remember, this is just an estimate, especially since the exact size of your slices for your Best Hawaiian Celebration Cake will vary wildly! Since this recipe uses oil and plenty of sugar to achieve that luxurious texture, it’s definitely an indulgence, but one totally worth having for a special occasion.
- Serving Size: 1 slice
- Calories: 450
- Sugar: 55g
- Sodium: 250mg
- Fat: 22g
- Saturated Fat: 8g
- Unsaturated Fat: 14g
- Trans Fat: 0g
- Carbohydrates: 60g
- Fiber: 2g
- Protein: 5g
- Cholesterol: 75mg
These numbers reflect a standard serving size based on yielding 12 slices exactly as instructed in the recipe. Enjoy every bite!
PrintAuthentic Hawaiian Wedding Cake with Pineapple and Macadamia Nuts
Make a moist, tropical layer cake perfect for celebrations. This recipe features crushed pineapple, toasted macadamia nuts, and a rich cream cheese frosting.
- Prep Time: 25 min
- Cook Time: 35 min
- Total Time: 60 min
- Yield: 12 servings 1x
- Category: Dessert
- Method: Baking
- Cuisine: American/Hawaiian
- Diet: Vegetarian
Ingredients
- 1 3/4 cups all-purpose flour
- 1 3/4 cups granulated sugar
- 1 teaspoon baking soda
- 1/2 teaspoon salt
- 1 cup vegetable oil
- 4 large eggs
- 1 teaspoon vanilla extract
- 1 (8 ounce) can crushed pineapple, undrained
- 1 cup buttermilk
- 1 cup finely chopped macadamia nuts, toasted
- 1 cup shredded sweetened coconut
- 1/2 cup cream cheese, softened
- 1/2 cup unsalted butter, softened
- 3 cups powdered sugar
- 1 teaspoon almond extract
Instructions
- Preheat your oven to 350 degrees F (175 degrees C). Grease and flour two 9-inch round cake pans.
- In a large bowl, whisk together the flour, sugar, baking soda, and salt.
- Add the vegetable oil, eggs, and vanilla extract to the dry ingredients. Mix until just combined.
- In a separate bowl, mix the crushed pineapple (with its juice) and buttermilk. Slowly add this wet mixture to the batter, mixing until smooth.
- Fold in the toasted macadamia nuts and shredded coconut gently.
- Divide the batter evenly between the prepared cake pans.
- Bake for 30 to 35 minutes, or until a wooden pick inserted into the center comes out clean. Let the cakes cool in the pans for 10 minutes before inverting them onto a wire rack to cool completely.
- Prepare the frosting: Beat the softened cream cheese and butter together until smooth. Gradually add the powdered sugar, mixing until creamy. Stir in the almond extract. Add a tablespoon of milk if the frosting is too stiff.
- Once the cakes are completely cool, frost the layers and the top and sides of the cake.
Notes
- To toast macadamia nuts, spread them on a baking sheet and bake at 350 degrees F for 8 to 10 minutes, watching closely to prevent burning.
- For an extra tropical flavor, add 1/2 teaspoon of coconut extract to the cake batter.
- This cake is best served slightly chilled or at room temperature.
Nutrition
- Serving Size: 1 slice
- Calories: 450
- Sugar: 55g
- Sodium: 250mg
- Fat: 22g
- Saturated Fat: 8g
- Unsaturated Fat: 14g
- Trans Fat: 0g
- Carbohydrates: 60g
- Fiber: 2g
- Protein: 5g
- Cholesterol: 75mg