

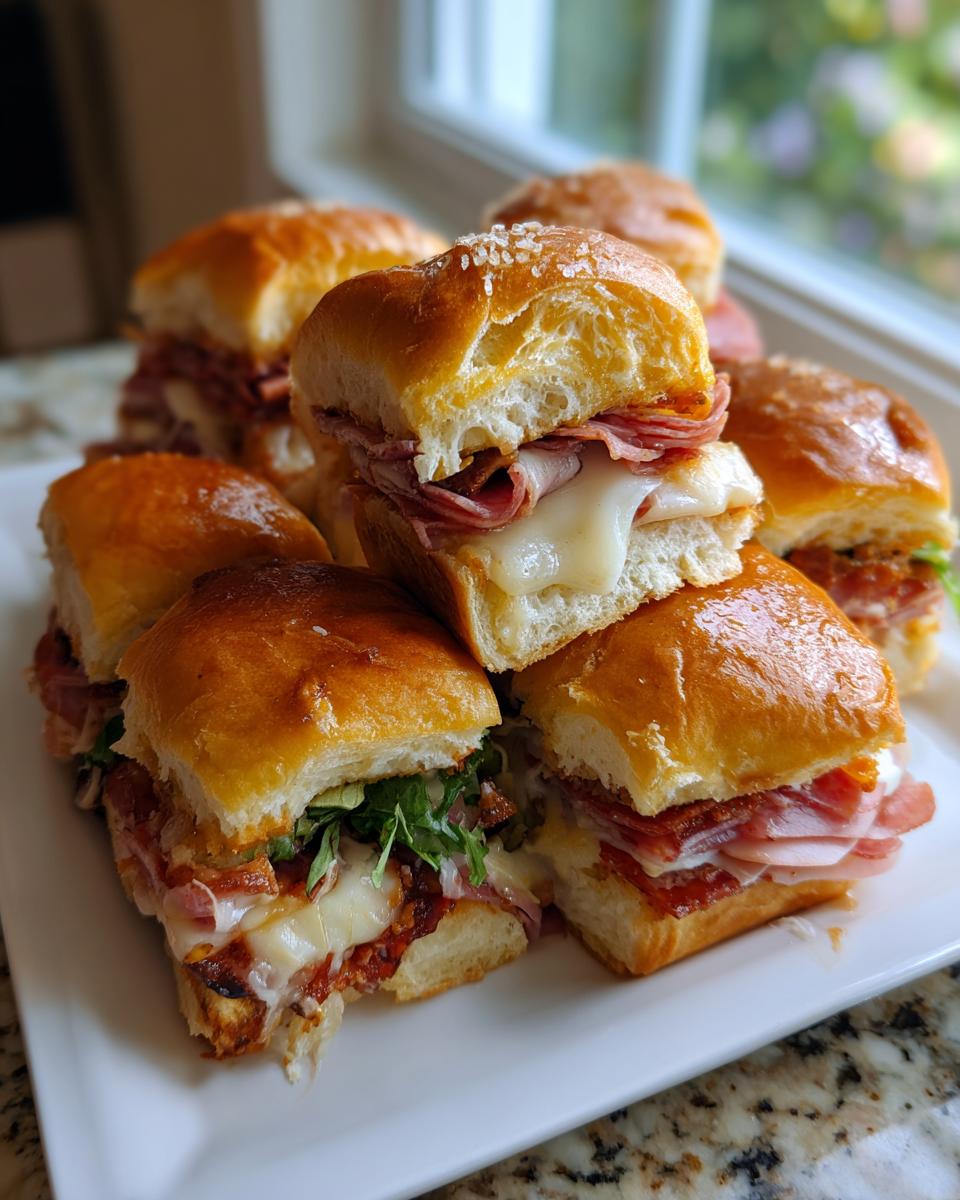
When game day rolls around, or you have a spontaneous crowd showing up, you need food that travels well, tastes incredible, and doesn’t require you to hover over the stove all afternoon. That’s where these ultimate baked Italian grinder sliders come into play! Seriously, these little bites take all the bold, zesty flavors of a massive Italian sub—the meats, the sharp cheese, the tang—and shrink them down into one perfect, pull-apart sandwich. It’s all about making incredible food accessible, which is exactly what Sarah Miller set out to do when building the Pure Plate Path philosophy. These sliders deliver huge flavor with minimum fuss, I promise you!
- Why You Need These Flavor-Packed Grinder Sliders
- Gathering Ingredients for Your Grinder Sliders
- Step-by-Step Instructions for Perfect Grinder Sliders
- Tips for Making the Best Grinder Sliders
- Variations for Your Grinder Sliders
- Storage and Reheating Instructions for Grinder Sliders
- Serving Suggestions for Party Sliders Recipe
- Frequently Asked Questions About Grinder Sliders
- Nutritional Estimate for These Savory Baked Rolls
- Share Your Experience Making These Crowd Pleaser Sliders
- Nutritional Estimate for These Savory Baked Rolls
- Share Your Experience Making These Crowd Pleaser Sliders
Why You Need These Flavor-Packed Grinder Sliders
I’m telling you, if you are looking for the absolute easiest way to impress people without stressing out, this recipe is your golden ticket. Forget those fussy appetizers that require fancy toothpicks! These Crowd Pleaser Sliders are designed for maximum flavor impact with minimal effort on your part.
- Total Crowd Appeal: Seriously, nobody leaves a party without grabbing at least three of these. They disappear faster than you can mix the butter glaze!
- Game Day Sandwiches Ready: They bake up perfectly contained in a single sheet, making them perfect for setting out on a buffet or carrying over to a friend’s house. No messy plates needed.
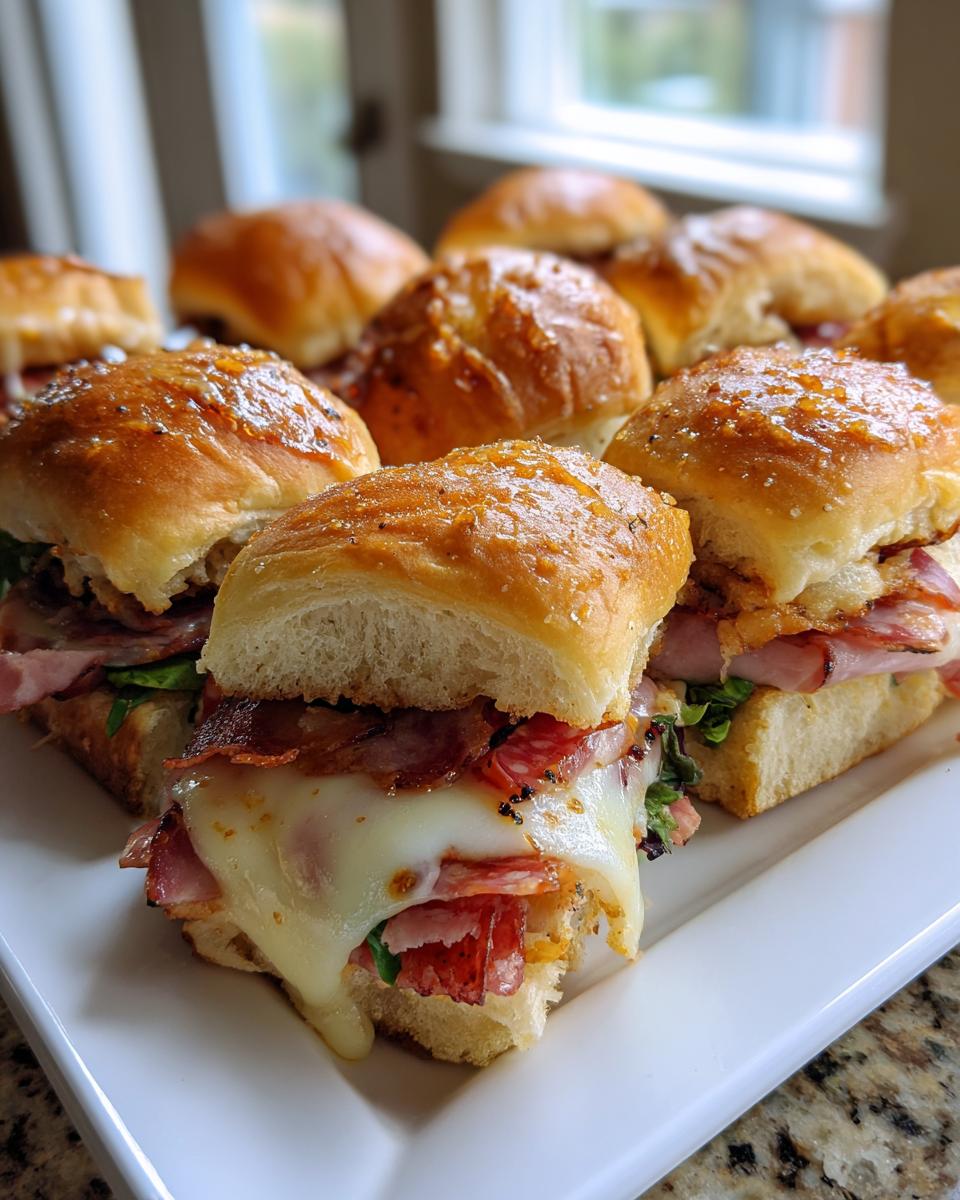
- Flavor Bomb Alert: We’re talking about that tangy Italian dressing mixed right into the crisp lettuce, hot melted provolone, and savory deli meats. It’s the whole grinder experience in one hot bite.
- Quick Prep Time: You’re looking at maybe 20 minutes of assembly before they hit the oven. That leaves you plenty of time to relax before the guests arrive!
Gathering Ingredients for Your Grinder Sliders
Okay, listen up! For these amazing grinder sliders to come together perfectly, we need to be super organized. Since we are making a dressing, a salad topping, and the baked meat layer separately, I’ve broken down the list into three parts. This helps make sure nothing gets forgotten in the heat of assembly. Trust me, prepping the dressing first makes the salad toss way easier!
For the Grinder Salad Dressing Base
- 1/4 cup mayonnaise
- 1 tablespoon red wine vinegar
- 1 tablespoon olive oil
- 1 tablespoon pepperoncini juice (Don’t skip this—it’s got that signature tang!)
- 2 teaspoons Italian seasoning
- 1/2 teaspoon salt
- 1/4 teaspoon black pepper
For the Grinder Salad Topping
This is the crunchy part that makes these more than just a hot ham and cheese slider. Keep these veggies nice and cold until you toss them with the dressing.
- 1/2 cup shredded iceberg lettuce (Iceberg gives the best snap!)
- 1/4 cup thinly sliced red onion
- 1/3 cup sliced pepperoncini peppers
For the Slider Assembly and Garlic Butter Glaze
This section covers the bread, the meats, the cheese, and that glorious, fragrant topping we brush on before baking the grinder sliders.
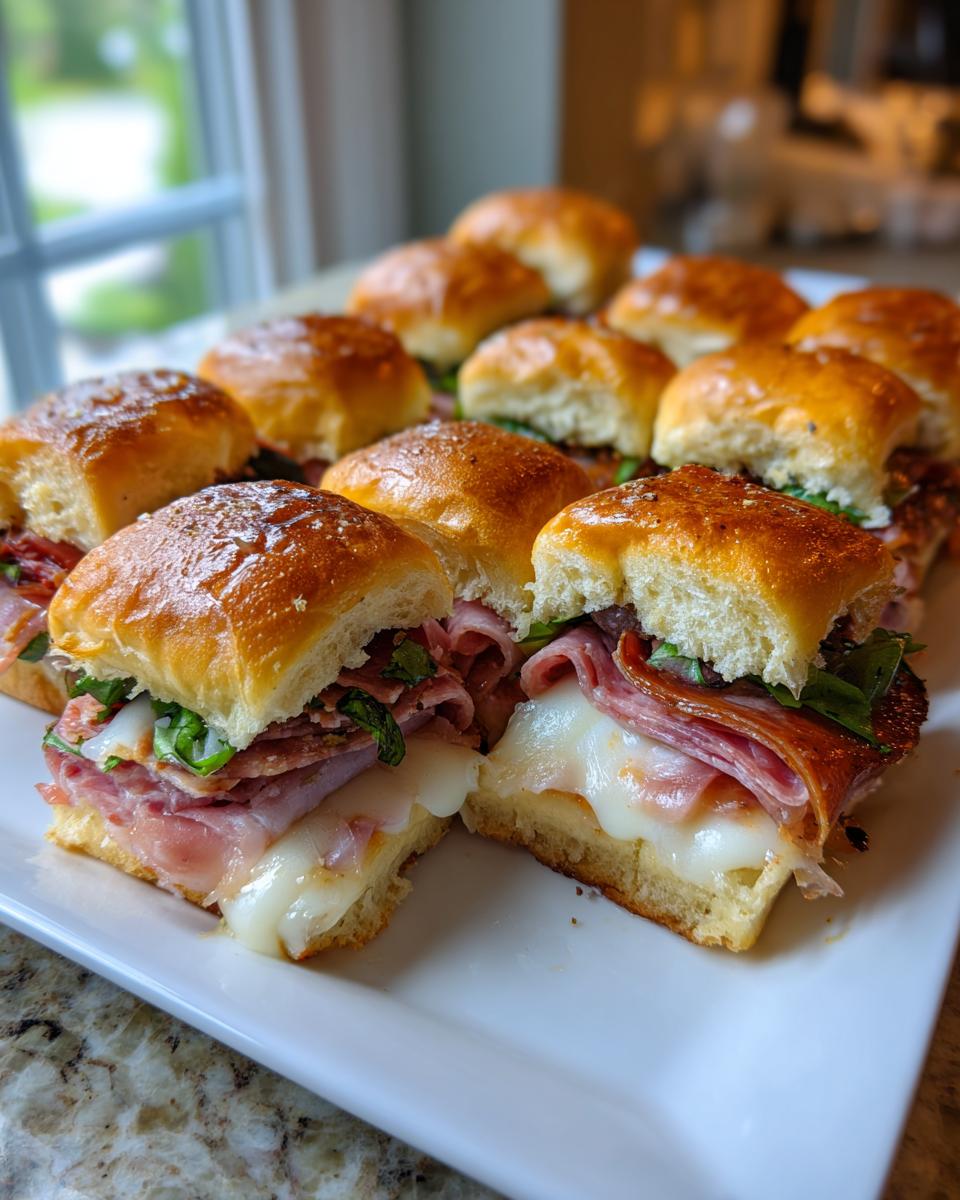
- 1 (12 count) package Hawaiian sweet rolls (The sweetness balances the salty meats so perfectly.)
- 12 slices ham
- 12 slices salami
- 12 slices pepperoni
- 12-14 slices provolone cheese (Use good quality provolone; it melts the best!)
- 2 1/2 tablespoons unsalted butter, melted
- 2 cloves garlic, minced
- 1 teaspoon Italian seasoning (For the glaze)
Step-by-Step Instructions for Perfect Grinder Sliders
Alright, this is where the magic happens! Since we need that zesty salad mixture to chill and meld its flavors—and we definitely don’t want it to wilt while the cheese melts—we do the salad first. Then we bake, and only then do we combine everything. It sounds like a lot of steps, but I promise, it moves fast once you get going. You’ll be so proud of these Pull Apart Sliders!
Preparing the Grinder Salad Mixture
First things first, let’s tackle that fresh topping. Grab a small bowl and whisk together all the dressing ingredients: the mayo, red wine vinegar, olive oil, that special pepperoncini juice, Italian seasoning, salt, and pepper. Make sure that’s smooth! Then, find a medium bowl for your veggies. Dump in the shredded lettuce, onion, and peppers. Pour that dressing over the veggies and toss everything super gently until it’s all coated. Pop this bowl into the fridge to hang out while we focus on the hot part.
Assembling and Baking the Cheesy Meat Sliders
Grab your 9×13 dish and give it just a little spritz of cooking spray—we don’t want anything sticking to your beautiful rolls! Next, take your Hawaiian rolls and carefully slice the entire thing horizontally, keeping the top and bottom connected like one big sandwich slab. Lay the bottom half into your dish. Now, layer it up: ham, then salami, then pepperoni, and cover it all with that provolone cheese. Get the top layer back on. For the garlic butter glaze, melt your butter and stir in the minced garlic and the extra teaspoon of Italian seasoning. Brush that glorious mixture right over the top buns!
Cover the dish tightly with foil and pop it into your 350-degree oven for 15 minutes. This steams it just enough to heat everything through. Then, take the foil off and bake for another 5 to 7 minutes until the cheese is totally gooey and you see a little bit of golden brown on top. Don’t walk away here; you don’t want these Baked Deli Sliders to get too hard!
Finishing and Serving Your Grinder Sliders
This is the secret step that keeps the lettuce crunchy! Carefully lift the top half of the rolls off the baked meat and cheese layer. Spoon that cool, tangy grinder salad mixture evenly over the hot cheese. Seriously, mound it on there! Place the top rolls back on. Now, grab a sharp knife and slice them right along the perforations into individual servings. Serve these amazing grinder sliders immediately while they are hot and the cheese is stretching.
Tips for Making the Best Grinder Sliders
We’ve made the main assembly, but just like any great recipe, a few insider tricks can take these grinder sliders from delicious to absolutely legendary. Getting those contrasting textures right—hot melty cheese against a cold, crisp salad—that’s the goal! My philosophy here is always about maximizing real flavor sources, and for these Italian-inspired bites, that starts with the ingredients themselves.
Ingredient Quality for Authentic Grinder Sliders
You know how I feel about cutting corners on flavor, right? Since the deli meats are the star here, don’t grab the cheapest stuff under the counter. For truly authentic results, try to stick to good quality ham, salami, and pepperoni. If you can find a place that slices them fresh that day? Even better. The salt and spice levels really shine through when they’re fresh.
And the cheese! Provolone is non-negotiable for that classic taste. It melts beautifully and has a little bite to it. If you use pre-sliced bulk cheese, make sure it’s a good brand. I always aim for thin slices so they sit nicely over every single meat layer. Think about layering them slightly overlapping so you don’t end up with one big cheesy patch and one bare bread patch—we want even distribution!
Keeping the Grinder Salad Crisp
This is the absolute make-or-break moment for these grinder sliders. Remember how we made a creamy slaw and set it aside? You absolutely, positively must resist the urge to put that salad mixture on the sandwiches *before* you bake them. I know that messy instinct hits when you see those hot rolls, but if you bake the lettuce and onions, they’ll wilt down into steamed mush, and you lose that fantastic texture!
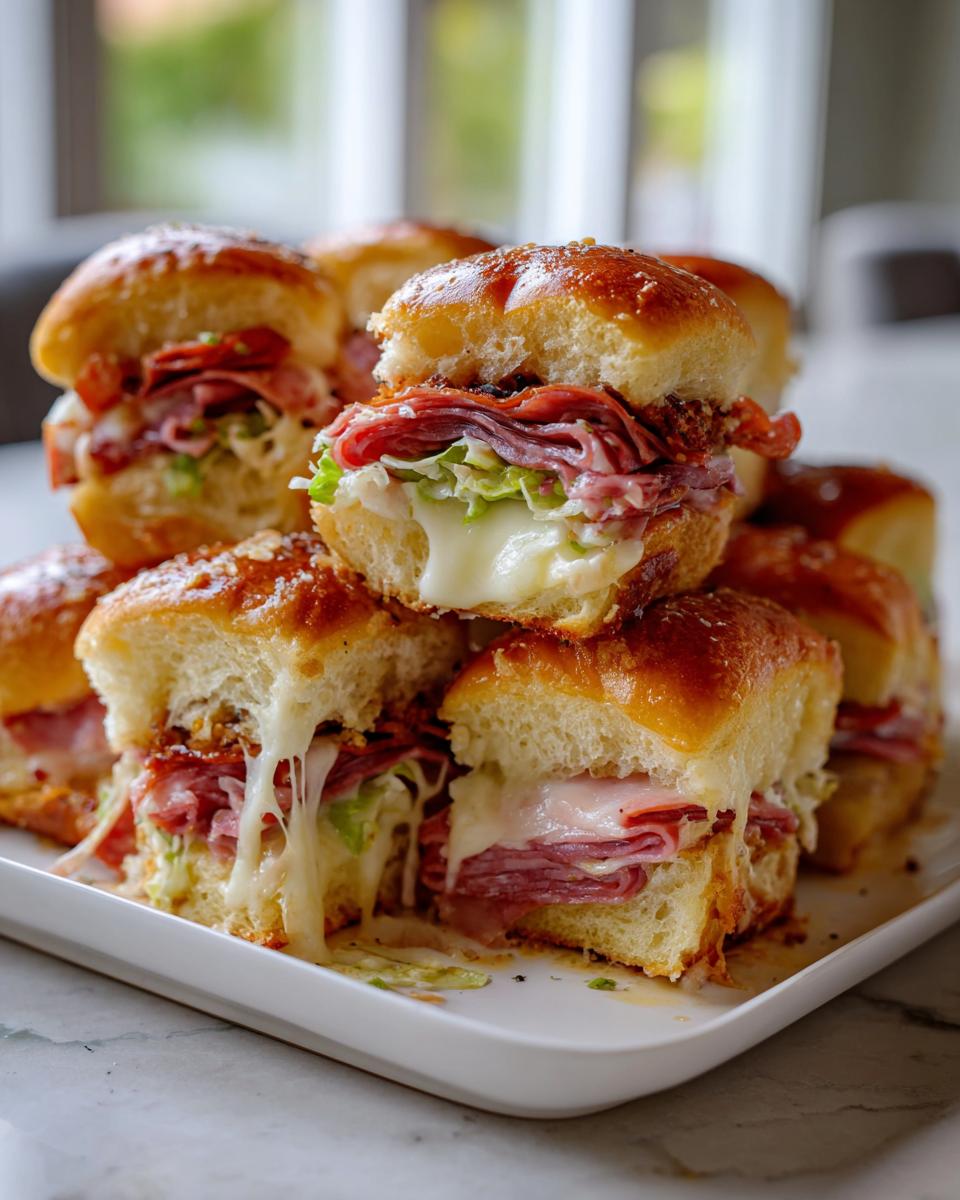
The cold, tangy salad is the refreshing counterpoint to the hot, salty meat. Always assemble the meat and cheese, bake it until it’s piping hot and golden, let it cool for just two minutes so it doesn’t completely steam the toppings, then lift that top bun and spoon the crisp salad mixture on right before you slice and serve. It’s that contrast that makes these Savory Baked Rolls so addictive!
Variations for Your Grinder Sliders
While I think my original recipe for these grinder sliders is pretty much perfect for capturing that classic Italian deli flavor, I totally get that everyone likes to tweak things! Food is meant to be played with, right? It’s all about making the recipe fit *your* needs, whether you need more spice or just want to use up what’s in the fridge. These tiny sandwiches are surprisingly versatile!
When we talk about customizing these, the easiest place to start is swapping out what’s between the bread. If you want to lean into different Deli Meat Sliders profiles, you have so many options available.
- Go Spicy: If you are a heat-seeker like my husband, swap out some of the mild salami for spicy capicola or even some thinly sliced, seeded jalapeños mixed right into the meat layer before baking. Just be careful how much you pile in!
- Turkey and Roast Beef Twist: Sometimes I find myself with extra roast beef. Try swapping the ham layer for good quality thinly sliced roast beef. It gives the sandwich a deeper, richer flavor profile that is unexpected but wonderful with provolone.
- Adding Freshness After Baking: Remember, we keep the salad cold for crunch, but you can certainly add other fresh components right after you spoon on the salad mixture. Think a few paper-thin slices of ripe tomato or some finely chopped mild banana peppers mixed right in with the lettuce.
- Cheese Swap Test: Provolone is traditional, but Mozzarella melts beautifully if you want something milder. If you’re feeling bold, try alternating Provolone with a little bit of sharp Swiss for a funky contrast.
If you love that tangy dressing element, I highly encourage you to check out my recipe for Panzanella Salad sometime. That same acidic brightness is what we are aiming for in that grinder topping!
Storage and Reheating Instructions for Grinder Sliders
Now, dealing with leftovers from a big batch of grinder sliders is important, because nobody likes a soggy sandwich the next day! The secret here lies in separating the components, which is why we made that salad mixture separately in the first place. If you have any leftovers, you need to treat the hot part differently than the cold part.
For the baked meat and cheese half—the bottom layer you pulled out of the oven—that stores beautifully. Just wrap those baked rolls tightly in a piece of foil or put them in an airtight container. They’ll keep fine in the fridge for about three days. When you want to have one later, I highly recommend reheating the meat/cheese base *by itself*. Pop it back into a 350-degree oven, maybe covered in foil again for five minutes, just until the cheese is soft again.
The grinder salad mixture? That is a completely different story. Because it has that mayonnaise-based dressing and crisp lettuce, it really doesn’t want to hang out in the fridge for more than a day. If you have leftover salad, you are better off wrapping the vegetables loosely and keeping them separate. Then, when you reheat your warm meat base, you refresh the salad with a tiny splash of extra red wine vinegar if it looks a little sad, and spoon it on just before eating.
Seriously, trying to store the whole assembled slider usually results in a sad, damp Hawaiian roll. We want these spectacular grinder sliders to be warm and gooey on the bottom and crisp on top, so always finish the assembly right before you take that first fantastic bite!
Serving Suggestions for Party Sliders Recipe
These Party Sliders Recipe items are amazing on their own, aren’t they? But when you’re putting together a full spread for game day or a casual get-together, you need a few things on the side to round out the whole feast. Since these sliders are rich, savory, and packed with Italian goodness, we want sides that either offer a cool, fresh relief or are hearty enough to stand up to a buttery roll.
You don’t want anything too fussy here, because the point of these Appetizer Sandwiches is ease! Keep it simple, keep it delicious, and keep it in rotation so people can graze all afternoon.
- Crispy Counterpoint: You absolutely need something fried or baked until it’s super crunchy to contrast the soft bread. Forget soggy chips; I always make a big batch of my Crispy Baked Potato Wedges. A little salt and a dash of paprika does the trick, and they bake right alongside what else you might have going on in the oven.
- A Cool Veggie Side: Even though we put a little salad mixture on top of the sliders, you need something bigger and colder to help cut through all that cheese and meat goodness. A classic side salad or even some fresh crudités always work wonders.
- Tangy Dipping Sauce: While I typically don’t dip these cheesy meat sliders, having a dipping option is perfect for those who want extra zing. My Easy Creamy Garlic Aioli Recipe is amazing here, especially if you stir in a big squeeze of extra lemon juice to keep it bright against the rich meats.
- Simple Sweetness: Sometimes a little sweet side balances out the saltiness. Think about bringing in a fruit platter or maybe some simple coleslaw that focuses more on the apple cider vinegar tang than heavy mayo.
When you lay these out, make sure you leave some space! These little Italian deli sliders look so inviting when they are lined up next to a basket of chips or some crunchy veggie sticks. The presentation matters for a great party spread!
Frequently Asked Questions About Grinder Sliders
I know when you see a recipe that screams ‘party food’ you start thinking about all the ways you might need to tweak it for your crowd. Don’t worry, I’ve got the answers for the most common questions I get about these amazing grinder sliders. You’ll find that they are surprisingly flexible, though a few core components really make them shine!
Can I substitute the Hawaiian Rolls in these Grinder Sliders?
That’s a great question! The sweetness of the Hawaiian rolls is really what balances out all the salty, savory deli meats and the vinegar in the dressing—it’s a specific flavor pairing that I absolutely love. If you can’t find them, or maybe you prefer something less sweet, you can totally use plain, soft slider buns. Just make sure they are the kind that are stuck together in the package so you can slice them horizontally easily!
You won’t get that signature Hawaiian roll sweetness, so you might feel like you need a tiny bit more sweetness in your grinder salad dressing later, or perhaps use a less tangy vinegar. But honestly, using standard Party Sliders Recipe buns works just fine for the structure when you’re in a pinch. Just be sure to brush them well with that garlic butter!
What makes these ‘Grinder’ Sliders different from a standard Italian Sub Slider?
This is the detail that elevates this recipe from just another cheesy ham and cheese slider to something truly special. The difference maker, the thing that makes it a true ‘grinder’ version, isn’t the meat or the cheese; it’s that chopped salad mixture we make! A traditional Italian grinder (or sub!) isn’t just meat and cheese; it’s loaded with shredded lettuce, onion, pepperoncini, and usually tossed in an oil-and-vinegar dressing.
In a standard hot party slider, people often just pour the Italian dressing over the top of the melted cheese and bake it all together. But here, we keep the meat and cheese hot, and then we spoon that cold, crisp, tangy salad mixture on *after* baking. That contrast between the hot, melty provolone and the cool, crunchy, acidic salad topping is what gives you that authentic flavor explosion. It’s the secret sauce!
If you want to explore more amazing ways to turn everyday meals into stunning food for a crowd, check out some of my ideas for quick batch cooking!
Nutritional Estimate for These Savory Baked Rolls
I always like to give folks a ballpark idea of what they are digging into when they make my recipes. Remember, since we are using a variety of deli meats and different brands of cheese, this is just an estimate, not a strict guarantee! But for one of these glorious Savory Baked Rolls, here’s what you can generally expect:
- Serving Size: 1 slider
- Calories: 350
- Fat: 18g
- Saturated Fat: 7g
- Carbohydrates: 28g
- Protein: 18g
- Sodium: 850mg (Yes, it’s high because of the deli meats, so keep that in mind!)
These are definitely indulgent, crowd-pleasing bites, not a calorie-counting snack, but goodness gracious, they are worth every single bite!
Share Your Experience Making These Crowd Pleaser Sliders
I seriously can’t wait to hear how your crew liked these Crowd Pleaser Sliders! Did the sweetness of the rolls pair perfectly with your favorite meats? Did you get rave reviews on game day?
Don’t be shy! Drop a rating down below, or tell me in the comments what twists you tried on the grinder salad mixture. I love seeing how you bring these recipes into your own kitchens. If you snap a picture, tag me—I’ll feature my favorites! If you need more easy party inspiration, feel free to browse or reach out on my contact page!
PrintUltimate Baked Italian Grinder Sliders for a Crowd

Make these easy, flavor-packed Italian Grinder Sliders using Hawaiian rolls. They feature layers of deli meat, melted provolone cheese, and a savory butter glaze, making them the perfect crowd-pleaser for game days or parties.
- Prep Time: 20 min
- Cook Time: 22 min
- Total Time: 42 min
- Yield: 12 servings 1x
- Category: Lunch
- Method: Baking
- Cuisine: American
- Diet: Vegetarian
Ingredients
- 1 (12 count) package Hawaiian sweet rolls
- 12 slices ham
- 12 slices salami
- 12 slices pepperoni
- 12–14 slices provolone cheese
- 1/4 cup mayonnaise
- 1 tablespoon red wine vinegar
- 1 tablespoon olive oil
- 1 tablespoon pepperoncini juice
- 2 teaspoons Italian seasoning
- 1/2 teaspoon salt
- 1/4 teaspoon black pepper
- 1/2 cup shredded iceberg lettuce
- 1/4 cup thinly sliced red onion
- 1/3 cup sliced pepperoncini peppers
- 2 1/2 tablespoons unsalted butter, melted
- 2 cloves garlic, minced
- 1 teaspoon Italian seasoning (for glaze)
Instructions
- Preheat your oven to 350 degrees Fahrenheit. Lightly grease a 9×13 inch baking dish.
- In a small bowl, combine the mayonnaise, red wine vinegar, olive oil, pepperoncini juice, 2 teaspoons of Italian seasoning, salt, and pepper. Mix well to create the dressing base.
- In a separate medium bowl, combine the shredded lettuce, sliced red onion, and sliced pepperoncini peppers. Pour the dressing base over the vegetables and toss gently until everything is coated. Set this grinder salad mixture aside.
- Slice the entire package of Hawaiian rolls horizontally, keeping the rolls connected. Place the bottom half of the rolls in the prepared baking dish.
- Layer the ingredients over the bottom rolls: place the ham slices evenly, followed by the salami, pepperoni, and then the provolone cheese slices.
- Place the top half of the rolls over the cheese layer.
- In a small bowl, melt the butter. Stir in the minced garlic and 1 teaspoon of Italian seasoning. Brush this garlic butter mixture evenly over the top of the slider buns.
- Cover the baking dish tightly with aluminum foil. Bake for 15 minutes.
- Remove the foil and bake for another 5 to 7 minutes, or until the cheese is fully melted and the tops are lightly golden brown.
- Carefully remove the sliders from the oven. Lift the top layer of rolls and spoon the prepared grinder salad mixture evenly over the melted cheese layer. Replace the top rolls.
- Slice the sliders into individual portions. Serve immediately while warm.
Notes
- For extra flavor, you can add a layer of thinly sliced deli turkey along with the ham, salami, and pepperoni.
- If you prefer a spicier kick, substitute banana peppers with thinly sliced jalapeños in the salad mixture.
- These sliders are best served warm right after baking and topping with the salad mixture.
Nutrition
- Serving Size: 1 slider
- Calories: 350
- Sugar: 8
- Sodium: 850
- Fat: 18
- Saturated Fat: 7
- Unsaturated Fat: 11
- Trans Fat: 0.5
- Carbohydrates: 28
- Fiber: 1
- Protein: 18
- Cholesterol: 35