
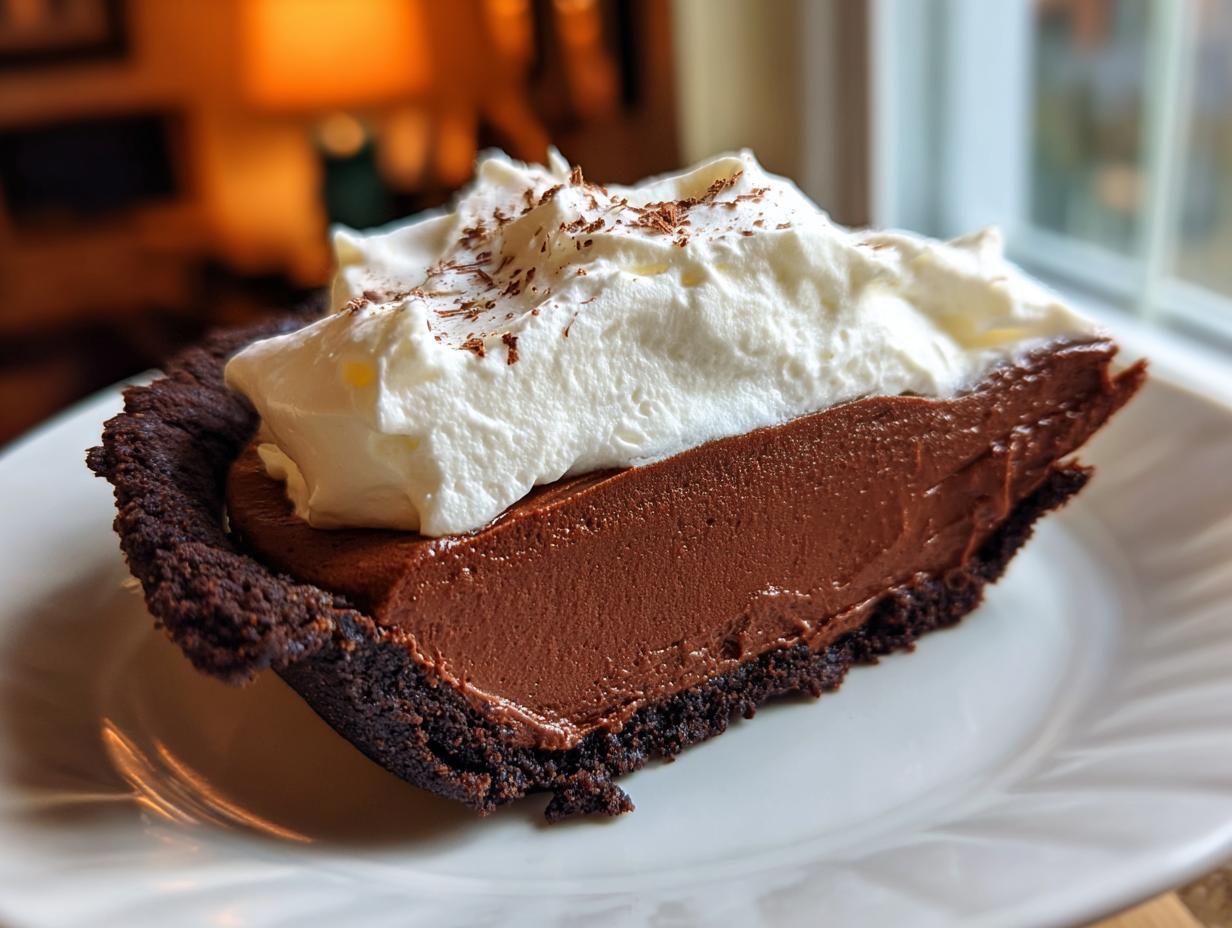
Oh, when I get a craving for something truly decadent, only deep, velvety chocolate will do. You know those desserts that feel so professionally luxurious you think, “I could never make that at home?” Well, I’m here to tell you that this French Silk Pie recipe is here to prove everyone wrong! This is the ultimate, foolproof version that gives you that bakery-level silkiness without all the worry. Back when I was first trying to balance that chaotic marketing job with eating well, I needed desserts that felt like a treat but didn’t demand all day. This Rich and Creamy Pie fit the bill perfectly—it’s pure comfort in a crust. If you love making your own chocolate toppings, check out my recipe for Chocolate Sauce Better Than Store-Bought! I promise, once you taste this melt-in-your-mouth filling, you’ll never look anywhere else.
- Why This is the Best French Silk Pie Recipe You Will Make
- Ingredients for Your Rich and Creamy French Silk Pie
- How to Make the Ultimate French Silk Pie
- Foolproof Silk Pie Recipe: Addressing Raw Egg Concerns
- Tips for the Perfect French Silk Pie
- Make-Ahead and Storage for Your French Silk Pie
- Serving Suggestions for This Chocolate Lovers Dessert
- Frequently Asked Questions About French Silk Pie
- Nutritional Estimates for This French Silk Pie
- Nutritional Estimates for This French Silk Pie
Why This is the Best French Silk Pie Recipe You Will Make
Why run out to the diner when you can create pure bliss right here? This truly is the Best French Silk Pie Recipe because it hits every marker. You get that deep, intense chocolate flavor you dream about, but the texture is the real star.
- It achieves that impossibly light, Velvety Chocolate Mousse Pie consistency every single time.
- We use a method that delivers deep, rich chocolate without any metallic aftertaste.
- It’s foolproof! I’ve adjusted the process so you don’t have to stress about uncooked eggs.
If you love rich chocolate, you need to try my Cheesecake Cookies next!
Achieving Silky Smooth Chocolate Filling Texture
It all comes down to two simple things: using really good melted chocolate, and folding those stiff egg whites in *gently*. You have to treat those air bubbles like gold; they are what make the filling so unbelievably smooth and airy, not dense like a fudge brownie.
Ingredients for Your Rich and Creamy French Silk Pie
Pulling this decadent pie together is surprisingly easy because we rely on pantry staples! When you shop, please, please, make sure you grab the best quality semi-sweet chocolate chips you can find. It makes such a difference for the overall depth of the french silk pie flavor. You’ll need butter, sugar, vanilla, salt, eggs (separated!), heavy cream, and powdered sugar for the topping.
If you like a little tang alongside the chocolate, you might want to check out my recipe for Easy Homemade Caramel Sauce to drizzle on top later—but wait until you see the main ingredients first!
Crust Choices for Your French Silk Pie with Oreo Crust
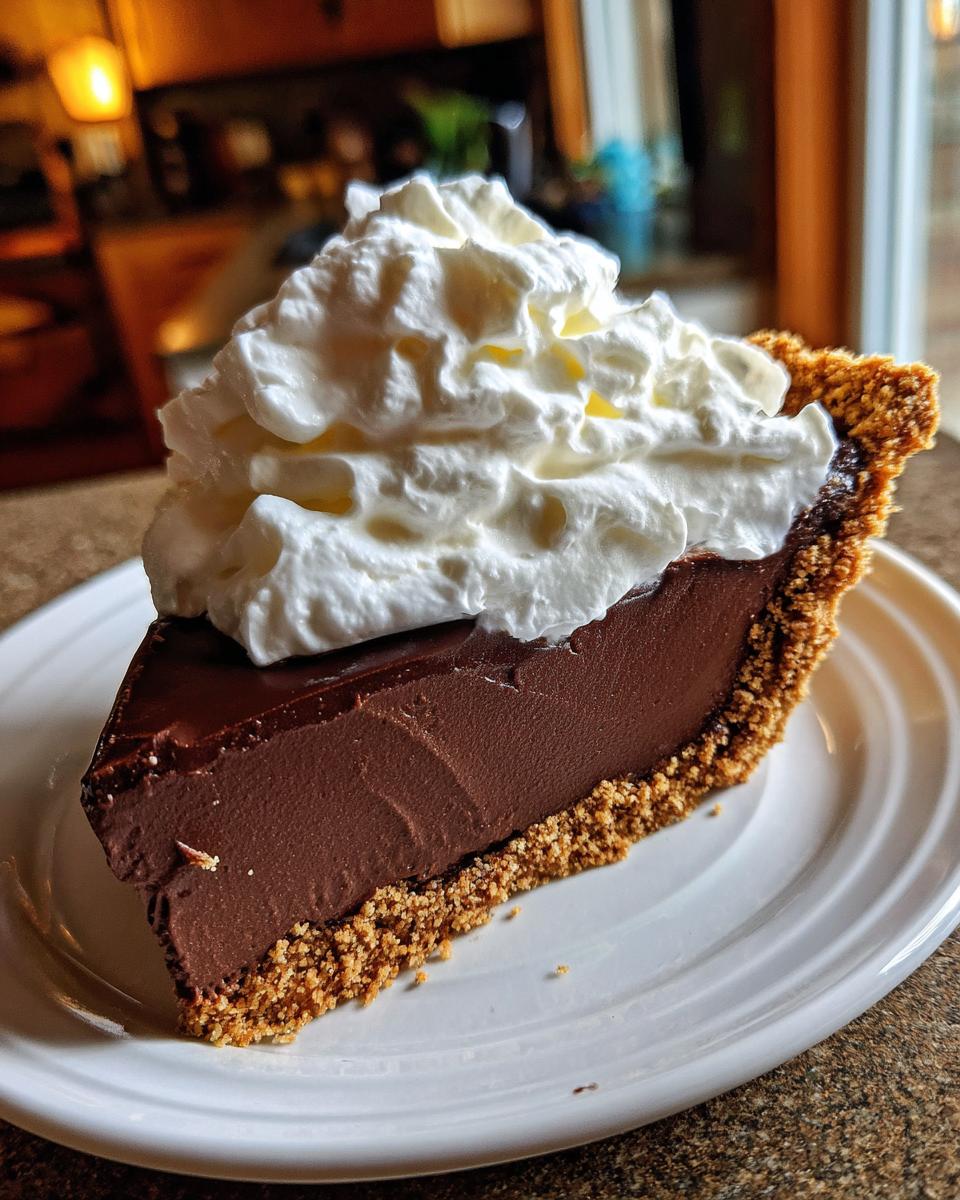
This recipe is flexible on the base, which is great! You can use a 9-inch pre-baked traditional pie crust if you want that flaky texture. But honestly? For sheer indulgence, I always lean toward the French Silk Pie with Oreo Crust profile. If you make this choice, just press the crumbs firmly into the plate and pop it in the fridge to chill while you tackle the filling. It sets up beautifully in the cold!
How to Make the Ultimate French Silk Pie
Okay, getting this Decadent Chocolate Pie made is all about technique, especially once the chocolate is ready. Don’t rush the processes! You always want your crust completely cool before you even think about putting filling in it. I usually start my crust chilling while I melt the chocolate for the base mixture.
- First things first: make sure that 9-inch pie crust is ready—baked and totally cooled down, or your Oreo crust is firmly pressed and chilled.
- Now, we start with the base. Beat that softened butter until it’s light and creamy. Then, gradually add the sugar until the mixture looks pale and fluffy, like a nice cloud.
- Beat in your melted (and slightly cooled!) chocolate chips. Don’t skip cooling them a touch; we don’t want to scramble anything!
- Once that’s smooth, add the egg yolks one at a time, mixing well after each one goes in. Finish this part with your vanilla and salt.
- While that’s happening, whip your egg whites in a separate, clean bowl until they hold stiff peaks. These are your magic air pockets!
- Here’s my big tip for that signature silkiness: Fold those stiff egg whites into the heavy chocolate base. Do it in three careful additions. Seriously, treat those whites gently—cut down the middle and scoop up from the bottom. If you mix hard, you lose all that gorgeous air!
- Pour your lightened, amazing filling into that chilled crust.

- Cover it loosely with plastic wrap, making sure the wrap doesn’t touch the surface, and move it to the fridge. This needs a minimum of 4 hours to set up completely, but honestly, overnight is even better.
- When it’s time to serve, whip up your heavy cream with powdered sugar until you get soft peaks.
- Spread that cloud of whipped cream over the set pie and top it with chocolate shavings!
Creating the Silky Smooth Chocolate Filling
The secret sauce here is the creaming step (Step 2). If you don’t get that butter and sugar light and fluffy first, the whole texture suffers. Then, remember what I said about folding those egg whites (Step 6)? That gentle incorporation is what keeps your french silk pie filling from turning into heavy pudding. We are aiming for fluffy, airy, and rich!
Chilling and Topping Your Creamy French Silk Dessert
Don’t be tempted to cut into the pie before the chilling time is up! Seriously, that 4-hour minimum chill time in Step 7 is non-negotiable if you want a sliceable, beautiful Creamy French Silk Dessert. Once it’s solid, whip up your topping (Step 9) right before you serve it. Whipped cream always looks best when it’s freshly piped or spread, and this topping is super quick to make, especially if you check out my guide on Easy Chocolate Frosting Recipe for inspiration!
Foolproof Silk Pie Recipe: Addressing Raw Egg Concerns
I know, I know. The raw egg thing in traditional Silk Pie recipes gives people the absolute creeps! Trust me, I totally get why you might search for a French Silk Pie without eggs. But if you want that truly authentic, melt-in-your-mouth texture, you usually need them. That’s why this recipe includes my favorite workaround to turn this into a truly Foolproof Silk Pie Recipe.
The trick is gentle cooking! Instead of just mixing the raw yolks and whites straight into the chocolate, you’re going to use a double boiler—a heatproof bowl set over simmering water, making sure the water doesn’t touch the bottom of the bowl.
You gently whisk your separated eggs over that steam until they hit 160°F. Heat kills any worry germs! Once they’re warm and slightly thickened, you can proceed with folding them into the chocolate base. It makes the filling just as airy and silky, but gives you total peace of mind. It’s how I ensure every slice is safe for everyone. If you need an accompaniment for this dessert, you might enjoy my Easy Creamy Dill Dip—wait, just kidding! Stick to coffee with this chocolate beauty!
Tips for the Perfect French Silk Pie
Even though this Classic Chocolate Pie recipe is pretty straightforward, a few little tricks can take it from great to absolutely legendary. Trust me, I learned these the hard way through trial and error—mostly error when I was rushing! These small adjustments guarantee that perfect, decadent experience every time you bake.
Here are my non-negotiables for that melt-in-your-mouth magic:
- Butter Temperature is Everything: When you start creaming that butter (Step 2), it can’t be straight from the fridge, but it *absolutely* cannot be oily or melted! It needs to be genuinely softened—leave it out for a good hour. If the butter is too warm, it won’t hold the air when you beat in the sugar, and your filling will be too heavy.
- Use High-Quality Chocolate: Since the filling is so simple, the flavor of the chocolate really shines through. Skip the budget chips and use good quality semi-sweet chocolate chips or even chopped high-quality baking chocolate. You want deep cocoa notes, not just sweetness.
- Keep the Whipped Cream Cold: Your heavy whipping cream needs to be ice cold, and the bowl you beat it in should be chilled too—throw it in the freezer for 10 minutes before whipping! This keeps the fat structures tight, which helps prevent weeping (that sad watery layer that sometimes appears on top of the pie).
- Don’t Undermix the Yolks: When you beat in those egg yolks (Step 4), make sure you take the time to incorporate them fully into the butter-sugar mixture before moving to the chocolate. Everything needs to emulsify properly to build up the base structure for the french silk pie filling.
If you’re looking for other impressive holiday mains, stop by my recipe for the Easy Herb Crusted Rib Roast Recipe!
Make-Ahead and Storage for Your French Silk Pie
This is fantastic news for anyone hosting a gathering: this french silk pie is the ultimate Easy Make Ahead Dessert! Since it needs that lengthy chill time anyway—remember, at least 4 hours, but overnight is heaven—you can totally make it the day before your party. When storing, cover the pie loosely with foil or plastic wrap, but make sure the wrap isn’t touching that beautiful mound of whipped cream on top, or it will get smashed!
It stays perfect in the fridge for about 3 to 4 days. Honestly, it’s always gone way before that, though! If you are prepping sides, you can definitely get this chocolate beauty done early. Check out my Easy Black Bean Soup Recipe for a great pairing.
Serving Suggestions for This Chocolate Lovers Dessert
Whew! After all that richness, you might think you need a palate cleanser, but darling, this is a Chocolate Lovers Dessert—it calls for an encore! Because the french silk pie filling is so incredibly decadent, I like to balance the plate with something light on the side. You really don’t want to overpower that delicate, silky chocolate mousse flavor, right?
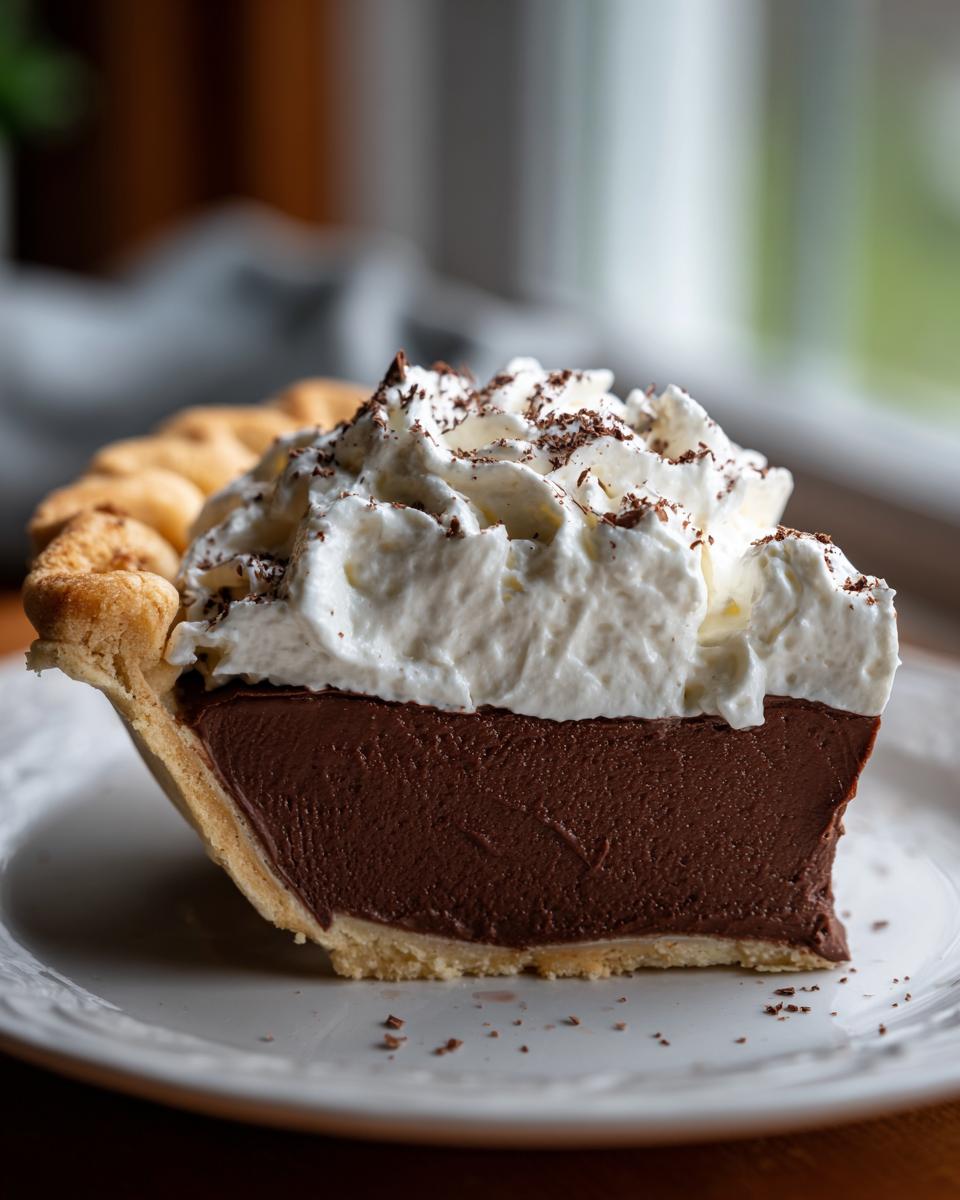
When I serve this, I usually make sure I have a fresh pot of strong coffee brewing nearby. The bitterness of the coffee cuts through the richness so perfectly. Don’t be shy with the garnish either; a light dusting of high-quality unsweetened cocoa powder right before serving always looks so professional, or you can use those chocolate shavings we talked about.
For something on the plate, think fruit! A few fresh, tart raspberries or some finely sliced mandarin oranges offer a fantastic tang that complements the dark chocolate beautifully. If you just can’t resist more chocolate, though, I sometimes serve a *tiny* drizzle of my homemade caramel sauce over the whipped cream layer, but sparingly! If you want another chocolate, no-bake showstopper, you absolutely must try my Easy Dirt Cake Recipe!
Frequently Asked Questions About French Silk Pie
I know when you’re making something this luxurious, you’re going to have questions! I’ve gathered the ones I hear most often about crafting the perfect french silk pie. Don’t let anything hold you back from this incredible chocolate experience!
What is the texture of a true French Silk Pie supposed to be like?
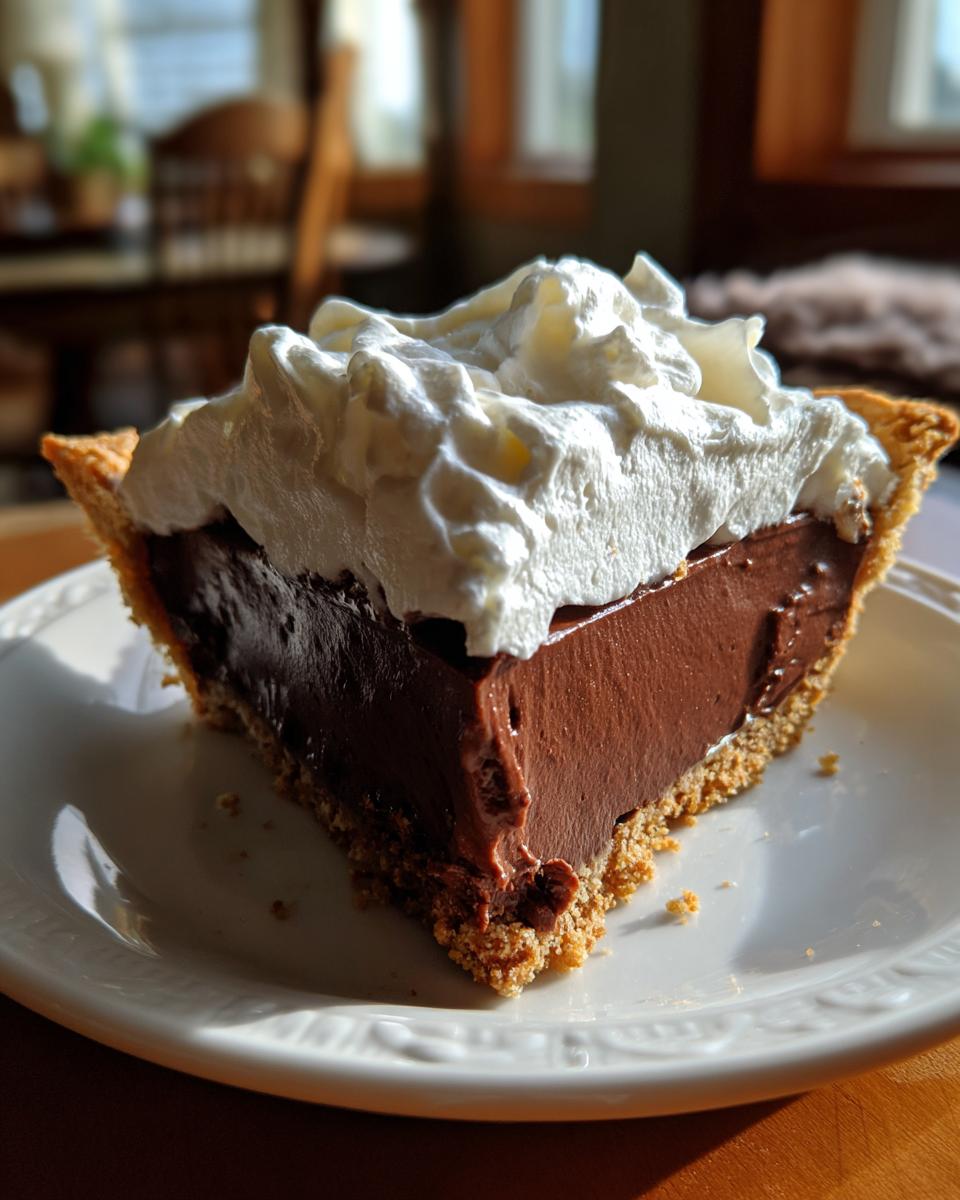
Oh, that texture is everything! It’s supposed to be unbelievably light, airy, and smooth—truly like silk, or a very rich, dense chocolate mousse. It shouldn’t be heavy or grainy like fudge. That velvet feel comes directly from whipping air into those egg whites and gently folding them into the chocolate base. If yours set up too firm, you likely overmixed those whipped whites, so remember to be gentle!
Can I use a graham cracker crust instead of an Oreo or flaky crust?
Absolutely, you can! While I’m partial to the deep chocolate crunch of the Oreo crust for that beautiful contrast in my creamy french silk dessert, a graham cracker crust works wonderfully. It gives you a slightly lighter, buttery base. Just make sure whatever crust you choose is fully pre-baked and completely cooled before you add the filling. A warm crust melts the filling instantly, and we absolutely do not want that!
Can I freeze this pie?
This is a great question, especially if you’re looking for an Easy Make Ahead Dessert! The answer is: usually, no, especially once the whipped cream topping is on. The high fat and air content of the filling and topping don’t freeze perfectly; they tend to weep or separate when thawed. The best way to handle this is to make the pie, chill it until it’s totally set (at least 4 hours), and then cover it and keep it in the fridge for up to 4 days. That’s my sweet spot for keeping that rich and creamy pie texture!
Can I make a No Bake French Silk Pie version?
Yes, you totally can lean into a No Bake French Silk Pie! Since the filling relies mostly on chilling to set up (not actual baking after it’s in the crust), if you use a pre-made, pre-baked crust (like a graham cracker or ready-made pastry shell), the whole thing becomes no-bake. You just need to ensure you follow that minimum 4-hour chill time so the filling is firm enough to slice beautifully. It’s so simple, you won’t believe it!
What kind of chocolate works best for this classic chocolate pie?
For the deepest, most satisfying Classic Chocolate Pie flavor, I highly recommend using good quality semi-sweet chocolate chips or baking bars. If you want a richer, almost bittersweet filling—perfect for cutting the sweetness—you can use 60% cacao baking chocolate instead of just semi-sweet chips. Whatever you use, make sure it’s good quality because the chocolate flavor stands front and center in this recipe!
Can I make a No Bake French Silk Pie version?
Yes, you totally can lean into a No Bake French Silk Pie! Since the filling relies mostly on chilling to set up (not actual baking after it’s in the crust), if you use a pre-made, pre-baked crust (like a graham cracker or ready-made pastry shell), the whole thing becomes no-bake. You just need to ensure you follow that minimum 4-hour chill time so the filling is firm enough to slice beautifully. It’s so simple, you won’t believe it!
Nutritional Estimates for This French Silk Pie
Just as promised, here are the estimated nutrition facts for one slice of this incredible french silk pie. Remember, since we are using real butter and rich chocolate, this is definitely a treat, not an everyday snack! These figures are based on using the recipe as written, split into 8 generous servings.
- Serving Size: 1 slice
- Calories: 450
- Fat: 30g
- Saturated Fat: 18g
- Carbohydrates: 40g
- Sugar: 35g
- Protein: 6g
- Cholesterol: 120mg
We aim for transparency here at Pure Plate Path—this is what wellness looks like when it’s truly comforting! For lighter recipes you can rely on daily, pop over and check out my Pecan Pie Muffins Recipe if you’re looking for a baked good that’s a bit easier on the indulgence scale!
PrintThe Ultimate French Silk Pie Recipe: Rich, Velvety Chocolate Dessert

Make this decadent French Silk Pie with a rich, silky-smooth chocolate filling and a buttery crust. This recipe delivers the comforting, melt-in-your-mouth texture you crave, perfect for any special occasion.
- Prep Time: 30 min
- Cook Time: 10 min
- Total Time: 4 hours 40 min
- Yield: 8 servings 1x
- Category: Dessert
- Method: No-Bake Filling/Chilling
- Cuisine: American
- Diet: Vegetarian
Ingredients
- 1 (9-inch) pre-baked pie crust (or Oreo cookie crust)
- 1 cup unsalted butter, softened
- 1 1/2 cups granulated sugar
- 1 cup semi-sweet chocolate chips, melted and cooled slightly
- 4 large eggs, separated (yolks and whites)
- 1 teaspoon vanilla extract
- 1/4 teaspoon salt
- 1 cup heavy whipping cream
- 2 tablespoons powdered sugar (for topping)
- Chocolate shavings, for garnish
Instructions
- Prepare your 9-inch pie crust. If using a traditional crust, bake it according to package directions and let it cool completely. If using an Oreo crust, press the crumbs into the pie plate and chill while preparing the filling.
- In a large bowl, beat the softened butter with an electric mixer until creamy. Gradually beat in the granulated sugar until the mixture is light and fluffy.
- Beat in the melted and cooled chocolate chips until fully combined.
- Beat in the four egg yolks, one at a time, mixing well after each addition. Stir in the vanilla extract.
- In a separate clean, dry bowl, beat the four egg whites with the salt until stiff peaks form.
- Gently fold the stiff egg whites into the chocolate mixture in three additions. Fold carefully to keep the mixture light and airy, creating the signature silky texture.
- Pour the chocolate filling into the cooled pie crust. Cover the pie loosely with plastic wrap, avoiding contact with the filling surface.
- Chill the pie in the refrigerator for at least 4 hours, or until the filling is completely set.
- Before serving, whip the heavy cream with the powdered sugar until soft peaks form. Spread or pipe the whipped cream over the chilled pie.
- Garnish the top with chocolate shavings. Slice and serve immediately.
Notes
- For a foolproof method that addresses raw egg concerns, gently cook the egg yolks and whites over a double boiler until they reach 160°F (71°C) before incorporating them into the chocolate mixture.
- If you prefer a different base, substitute the traditional crust with a homemade graham cracker crust or a simple Oreo cookie crust.
- Make this dessert ahead of time; it tastes best when fully chilled for at least 6 hours.
Nutrition
- Serving Size: 1 slice
- Calories: 450
- Sugar: 35g
- Sodium: 150mg
- Fat: 30g
- Saturated Fat: 18g
- Unsaturated Fat: 12g
- Trans Fat: 0.5g
- Carbohydrates: 40g
- Fiber: 3g
- Protein: 6g
- Cholesterol: 120mg