
Sometimes, you just need that deep, comforting sweetness that feels completely indulgent, but honestly, who has time to wait for an oven to even preheat? I totally get it. Life throws enough curveballs without us adding complicated dessert steps to the mix! That’s why I’m sharing my absolute go-to for effortless decadence: the ultra-creamy, no-bake biscoff cheesecake. When I was juggling that crazy marketing job and trying to bring wholesome food back into my life, these simple, soulful desserts became my lifeline. This one? It’s magic. It delivers that rich, spiced flavor and luxurious texture everyone craves, all without any baking fuss whatsoever. Trust me, this is the ultimate treat for a busy weeknight or an impromptu gathering!
- Why This No-Bake Biscoff Cheesecake is Your New Favorite Simple Cheesecake Recipes
- Gathering Ingredients for Your Biscoff Cheesecake Recipe
- Step-by-Step Instructions for Easy Biscoff Cheesecake
- Tips for Success Making Your Ultimate Biscoff Dessert
- Making Variations on the Biscoff Cheesecake
- Serving Suggestions for Your Decadent Cheesecake
- Storage and Reheating Instructions for Leftover Biscoff Cheesecake
- Frequently Asked Questions About This Biscoff Cheesecake Recipe
- Share Your Simple Cheesecake Recipes Experience
Why This No-Bake Biscoff Cheesecake is Your New Favorite Simple Cheesecake Recipes
Look, I want you to eat well, but I also want you to *relax*. This particular biscoff cheesecake recipe is the bridge between those two worlds. It’s pure comfort food without the commitment of precise oven temperatures. We rely on quality ingredients and proper chilling to do all the heavy lifting here.
- It’s ridiculously easy—seriously, you just mix and chill.
- It uses the rich, spiced flavor profile everyone is obsessed with right now.
- It tastes like you spent all day on it, even though you didn’t!
If you’re looking for amazing cheesecake cookies or bars, this one will always be first in my rotation for quick indulgence.
Zero Oven Time: The Ultimate No Bake Dessert
This is what you lean on when the last thing you want to do is turn on the stove. Because this is strictly a no bake dessert, we skip the water baths and the cracking worries. That’s the beauty of it! This recipe fits perfectly into a hectic schedule—you can make it start-to-finish in under 30 minutes, which is incredible considering the payoff.
Incredibly Creamy Cheesecake Texture
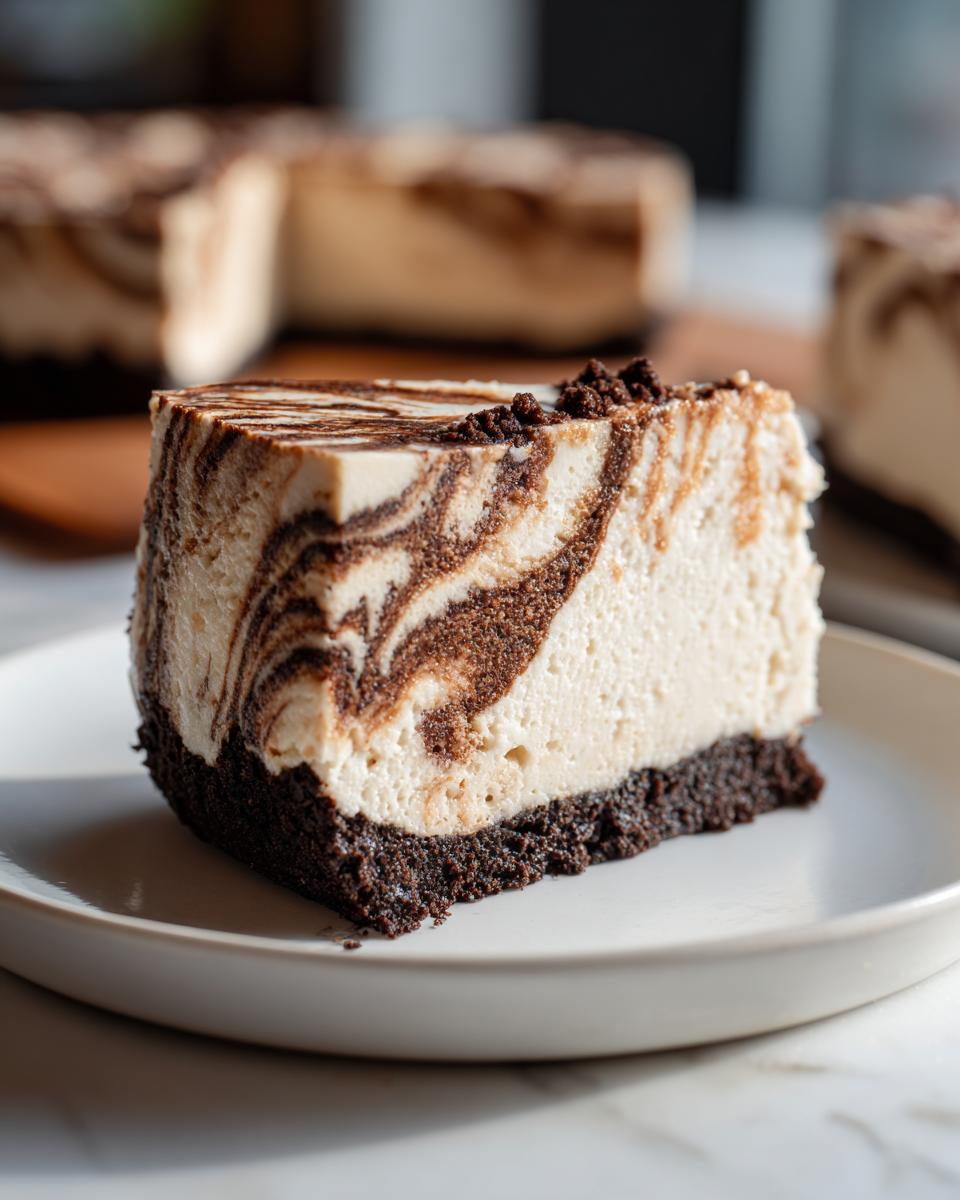
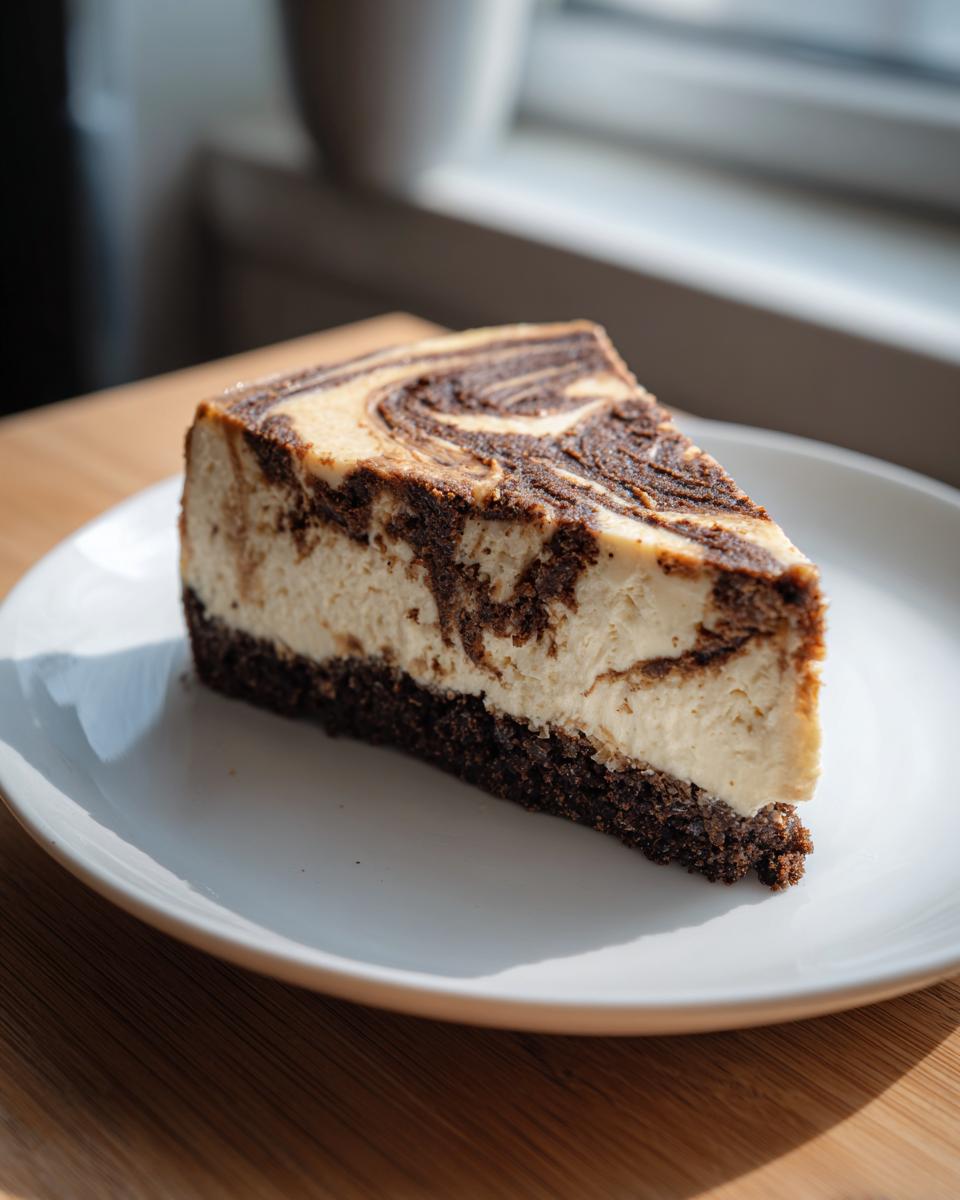
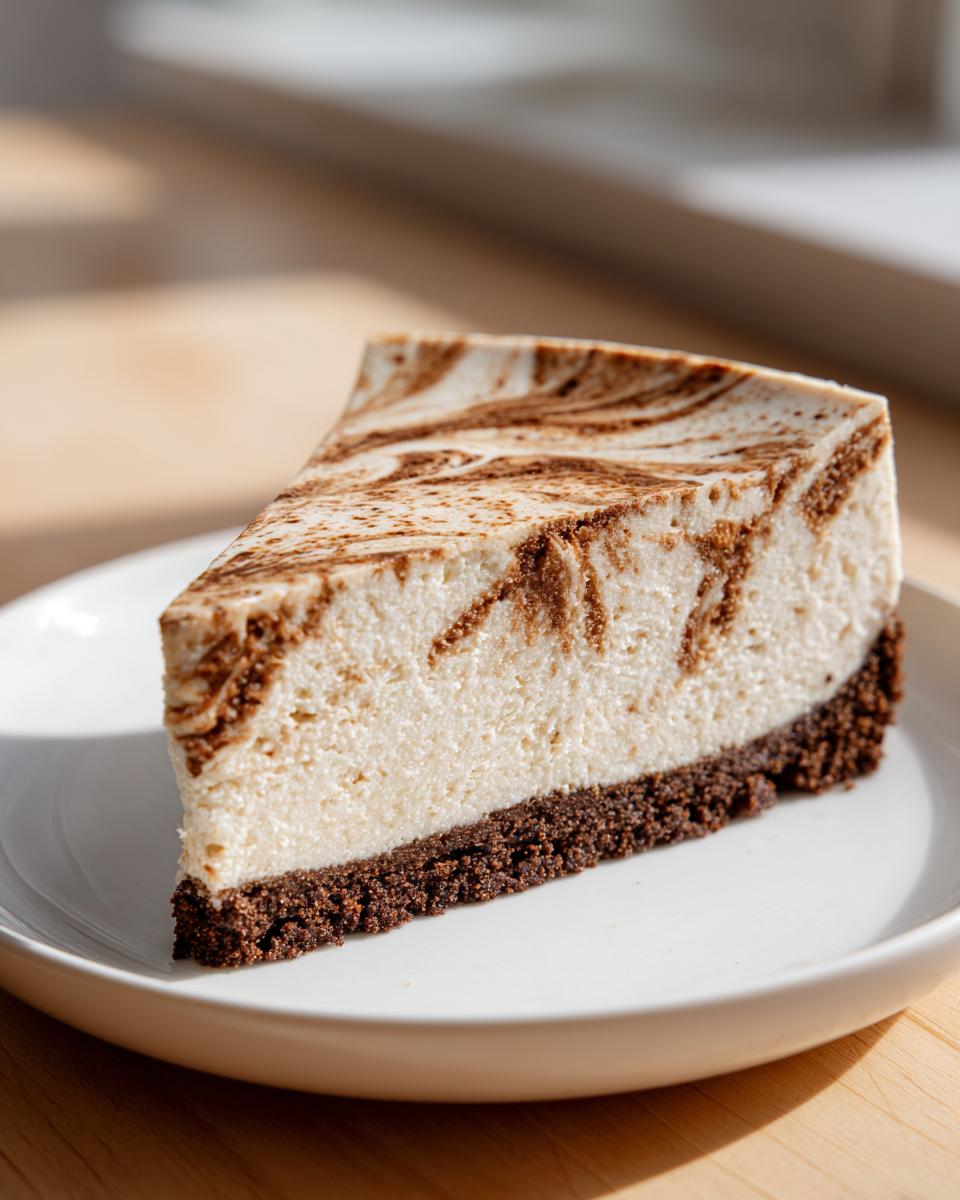
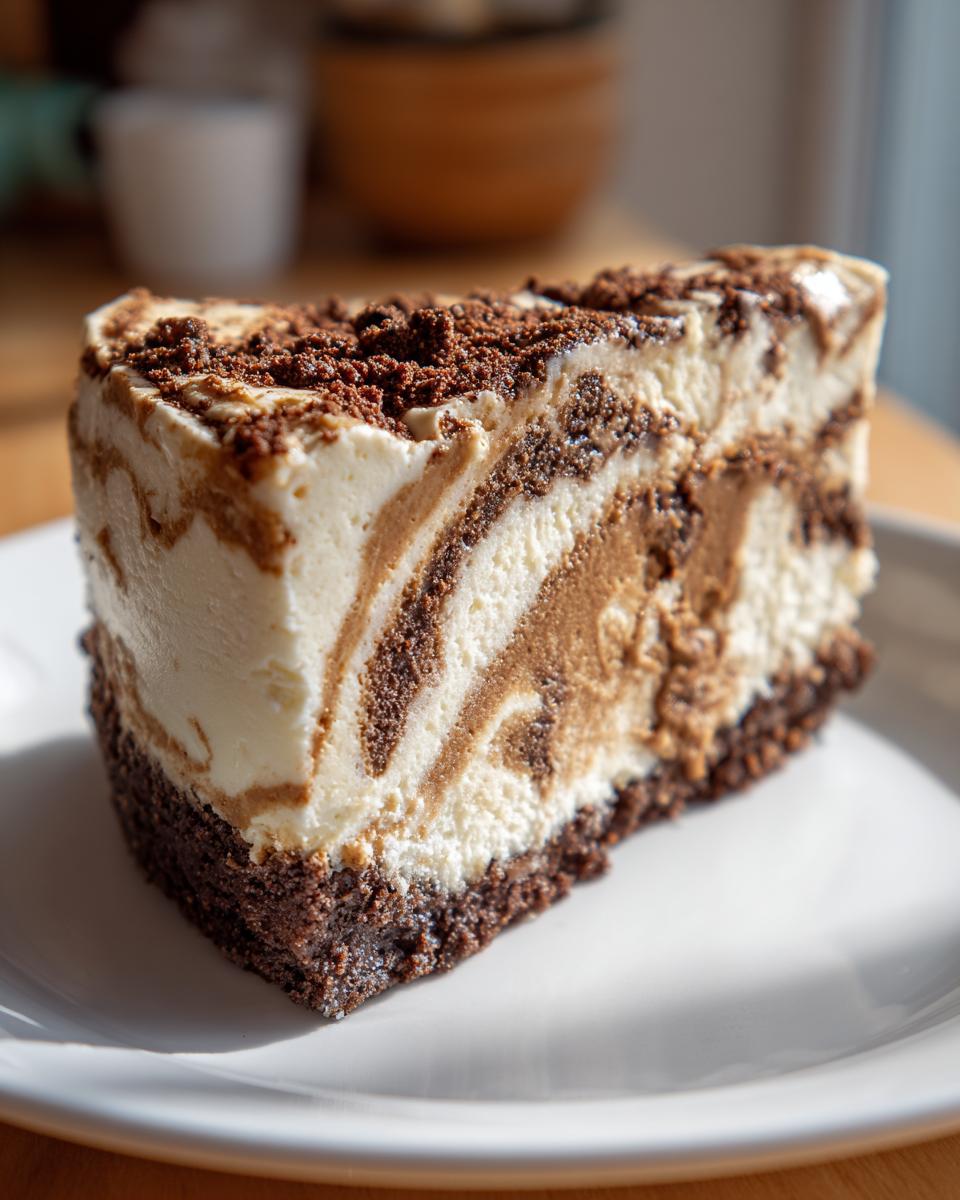
Don’t let the “no-bake” fool you! This isn’t some airy, gelatinous blob; it is dense, rich, and genuinely luxurious. We use a good amount of cream cheese and whipped heavy cream to create what I call ‘cloud-like structure.’ The final result is a truly creamy cheesecake that sets up beautifully firm in the fridge.
Gathering Ingredients for Your Biscoff Cheesecake Recipe
Okay, let’s talk about what you need to make this amazing Biscoff Cheesecake happen. Since this is a no-bake recipe, the quality of what goes in really matters because there’s no baking magic to hide anything. Everything is listed right here, but please, please make sure your cream cheese is fully softened—that’s non-negotiable for that dreamy, smooth filling we are aiming for!
For the Biscoff Cookie Crust
This is the crunchy foundation that smells like a dream coming true.
- 1 1/2 cups Biscoff cookie crumbs (you’ll need about 25 cookies, crushed up fine!)
- 6 tablespoons unsalted butter, melted
For the Creamy Cookie Butter Cheesecake Filling
This is where all the creamy goodness lives. Remember to have your heavy whipping cream straight out of the fridge!
- 16 ounces cream cheese, softened! (I mean it, softened!)
- 1 cup powdered sugar
- 1 teaspoon vanilla extract
- 1 cup heavy whipping cream, cold
- 1 cup Biscoff cookie butter (spreadable), divided
For the Decadent Biscoff Cheesecake Topping
This is the grand finale—the part that makes people gasp when you bring it out.
- The remaining half cup of Biscoff cookie butter (we warm this up later for drizzling)
- Optional: Extra crushed Biscoff cookies for sprinkling on top
Step-by-Step Instructions for Easy Biscoff Cheesecake
Now for the fun part! This is where we turn a pile of amazing ingredients into that stunning Biscoff Cheesecake you’ve been dreaming about. Since we aren’t fighting the oven today, our goal is smooth mixing and perfect chilling. You’ll want to move quickly but handle the mixture gently, especially when adding that whipped cream. It’s a straightforward process, but paying attention to the timing is key!
Creating the Biscoff Cookie Crust Base
First things first, we build our crunchy foundation. Just grab those Biscoff crumbs and pour them into a bowl with your melted butter. Stir it up until it looks like wet sand—that’s the perfect consistency. Next, press that mixture firmly into the bottom of your 9-inch springform pan. Push it down really well; you want a crust that holds together! Once it’s nice and compact, shove the whole pan into the freezer. It needs a quick freeze while you whip up the filling, which is usually about 15 minutes.
Mixing the Smooth Cookie Butter Cheesecake Filling
Time for that famous creamy texture! Grab your mixer and beat that softened cream cheese until it is utterly lump-free. You cannot skip that first step, or your filling will be bumpy, and nobody wants a bumpy cheesecake! Once it’s silky smooth, add your powdered sugar and vanilla and just mix until they disappear. Now, in a separate bowl, whip your heavy cream until you get stiff peaks—you know, when you lift the whisk and the little pointy bits stand up straight? Gently fold that gorgeous whipped cream into the cheese mixture. For the swirls, take half a cup of your Biscoff spread and warm it up just a tiny bit so it pours nicely. Then, gently fold that warmed spread into the filling. Don’t overmix this part! You want beautiful ribbons of cookie butter running through, not a totally uniform tan color. If you want to learn more about making simple sauces for desserts, check out my guide on easy pear butter; the technique for gentle folding is the same!
Chilling and Finishing Your Biscoff Cheesecake
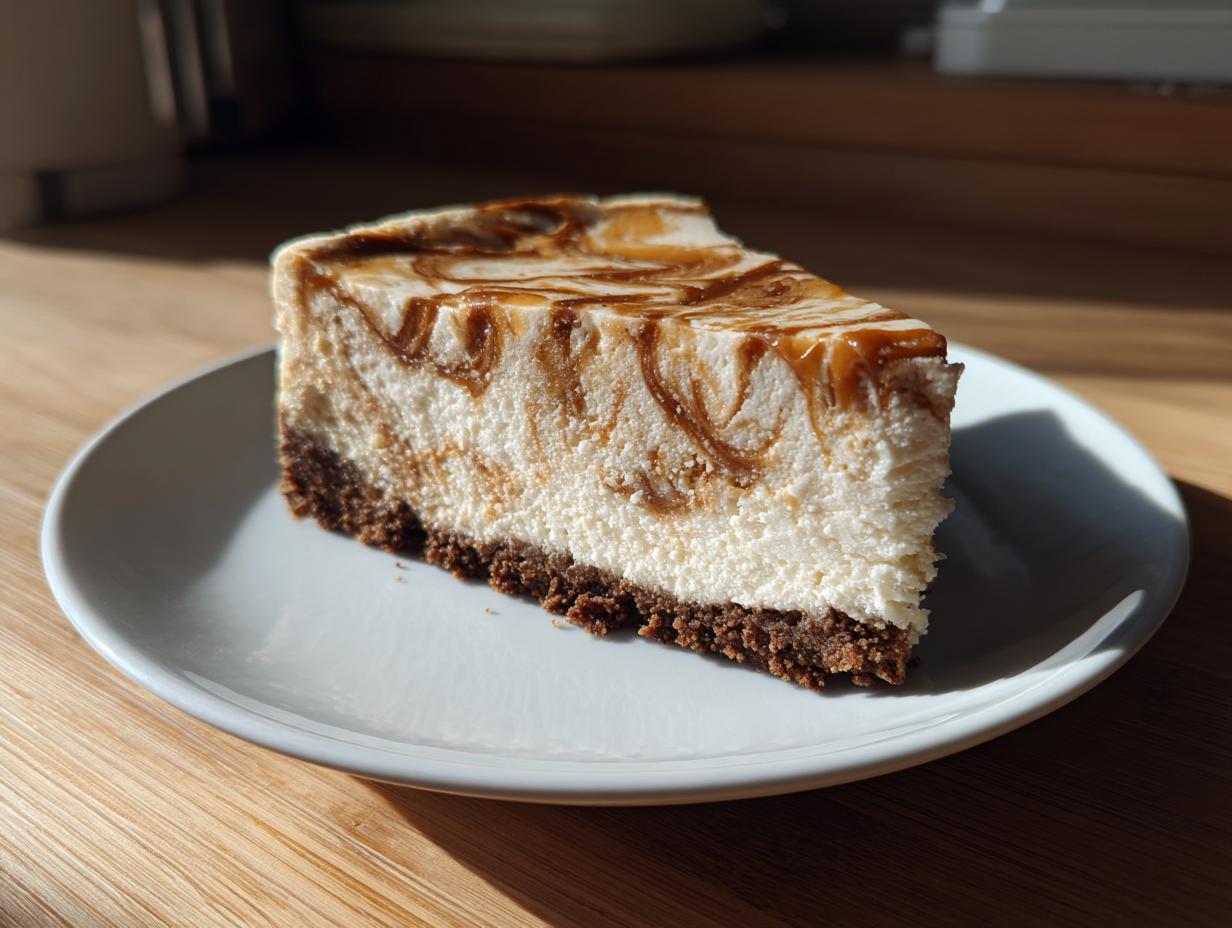
Carefully pour that lovely filling right over your chilled crust and smooth the top with an offset spatula. Now comes the hardest part: waiting! Cover it loosely with plastic wrap, and you must let it chill in the refrigerator for a minimum of 6 hours. Seriously, overnight is best if you can swing it; that’s how the structure really sets up perfectly for cutting. Right before you serve it, take that last half cup of cookie butter and warm it up *just* enough so it drizzles easily off a spoon. Drizzle it all over the top, and sprinkle on extra crushed cookies if you’re feeling extra. Pop the sides off your springform pan and get ready for the compliments!
Tips for Success Making Your Ultimate Biscoff Dessert
Making a spectacular biscoff cheesecake isn’t hard, but since we aren’t baking it, we have to be smart about temperature and timing! Getting that ultra-creamy texture we talked about comes down to those little details I learned the hard way so you don’t have to suffer through a lumpy filling. Think of these as my little secrets for making sure your dessert is perfect every time, whether you’re serving it for a holiday or just because you deserve it.
Achieving Perfect Creaminess: Ingredient Temperature
This is my number one non-negotiable rule for any Cookie Butter Cheesecake: your cream cheese absolutely *must* be at room temperature. I mean, leave it out for at least two hours! Cold cream cheese fights the mixer, and no matter how hard you beat it, you end up with those little white lumps that ruin the silky experience we want. Room temperature cheese blends into liquid silk with the sugar and then you can incorporate everything else perfectly.
The Importance of Chilling Time for This Biscoff Cheesecake
I know, waiting is the worst, especially when something smells this good! But you have to let this No Bake Biscoff Cheesecake firm up properly. If you rush it and only chill for two or three hours, it’ll turn into soup when you cut into it. I always preach letting it chill overnight, honestly. That extra time in the fridge lets the fats solidify and the whole thing gets that perfect dense, yet melt-in-your-mouth structure. If you need a good sauce to pour over your slice, I have a great recipe for chocolate sauce that’s better than store-bought, too!
Making Variations on the Biscoff Cheesecake
Even though this recipe is pretty much perfect as is—because, hello, it’s Biscoff cheesecake!—I love giving you ways to shake things up. Sometimes you want a little extra something for a party, or maybe you just don’t have enough cookie butter left for the full swirl. Don’t panic! We can still customize this treat easily. Think of this as your blueprint for endless Biscoff Dessert Ideas.
Adding a Salted Caramel Swirl to Your Biscoff Cheesecake
If you want to get really fancy, try adding a drizzle of good quality salted caramel sauce right when you swirl the cookie butter in. Just warm 1/4 cup of salted caramel along with that first half-cup of Biscoff spread. Swirl them both gently together into the filling. The salty-sweet combo against the spiced cookie is just divine! It elevates the whole thing.
Making Individual No Oven Desserts
Need something fast, or maybe you’re making dessert for people who only want a small portion? Use a standard muffin tin and line it with cupcake liners! You press the crust into the bottom of the liner, pour in the mix, and let them chill. You get adorable individual portions of No Bake Biscoff Cheesecake that set up in about half the time. It’s so smart, and they look really cute on a tiered platter. If you like easy bar recipes, you should check out my secrets for easy cherry pie bars too!
Serving Suggestions for Your Decadent Cheesecake
Once this showstopping biscoff cheesecake is chilled and ready to go, thinking about what to serve it with just takes it to the next level. Since the cookie butter is so rich and deeply spiced—that caramelized flavor is intense!—I always like to pair it with something bright to cut through that richness. A quick side of fresh raspberries or tart green apple slices works wonders. If you are hosting a big event, serving it alongside a light, peppery salad, like the one I use in my spinach and pear salad recipe, acts as a perfect palate cleanser between rich and fresh bites.
Storage and Reheating Instructions for Leftover Biscoff Cheesecake
The great news about this No Bake Biscoff Cheesecake is that it actually tastes even better the next day! Because it’s loaded with dairy and that delicious cookie butter, though, we need to be smart about storage. Always make sure you cover it really well, maybe with plastic wrap pressed right onto the surface, or pop it into a good airtight container. This keeps it smelling fresh and stops it from absorbing any weird fridge odors.
Since this is a chilled dessert and not baked, you never need to worry about reheating it at all. Just keep it chilled! If you manage to save some, it should stay wonderfully fresh in the refrigerator for about four to five days. Enjoy that second slice!
Frequently Asked Questions About This Biscoff Cheesecake Recipe
I know when you find a showstopper like this Biscoff Cheesecake, you end up with a million questions. It’s totally normal! We want our desserts to be perfect, especially when they involve so much delicious cookie butter. Here are some of the things people ask me most often about making this recipe work for them. And hey, if you are looking for other fantastic, easy make-ahead treats, you absolutely need to check out my guide to easy no-bake peanut butter bars!
Can I use a different cookie for the Biscoff Cookie Crust?
Oh, you *can*, but I honestly wouldn’t recommend it if you want that signature spicy-caramel flavor! The whole point of this Biscoff Cookie Crust is that rich Biscoff flavor. If you have to substitute, graham crackers are the closest texture-wise, but they will taste much blander. If you use something like vanilla wafers, the texture will be slightly different too—a bit denser, I find. Stick to the original if you can; it’s worth hunting down those cookies!
How long does the No Bake Biscoff Cheesecake last in the fridge?
Since this is a proper No Bake Dessert and relies on heavy cream and cream cheese, we need to keep it cold! Stored properly in an airtight container or tightly wrapped, this Cookie Butter Cheesecake stays fantastic for about 4 to 5 days. Don’t leave it sitting out on the counter waiting to be served for more than an hour or so, okay? Keep it nice and chilly to maintain that perfect structure.
What if I want a firmer ‘Cookie Butter Cheesecake’ filling?
The beauty of *my* recipe is how unbelievably velvety and smooth it is, so I engineered it to be creamy, not super firm! If you absolutely prefer a sturdier slice—maybe you want to cut it into perfect squares for a crowded party buffet—you can stabilize the mixture. You could dissolve about one teaspoon of unflavored gelatin according to the package directions and gently fold that into the cream cheese mixture right before folding in the whipped cream. It keeps it ultra-creamy but gives it a little extra insurance against heat!
Share Your Simple Cheesecake Recipes Experience
Now that you know all my little secrets for making this ultra-creamy, no-bake Biscoff Cheesecake, I seriously want to hear about it! There’s nothing that makes me happier than knowing someone else successfully whipped up a decadent dessert without stressing over an oven. Did you manage to get those perfect Biscoff swirls? Did everyone devour it before you could save a slice?
Please take a moment to leave a star rating right here on the recipe card. That feedback helps other busy folks like us know this is truly one of the best Simple Cheesecake Recipes out there. And if you took a picture—and of course, you did!—tag me on social media! I love seeing this dessert make its way into your homes. If you have any tricky questions or suggestions you want to bounce off me, you can always reach out via my contact page. Happy baking (or, well, *no-baking*)!
PrintUltra-Creamy No-Bake Biscoff Cheesecake
You can make this ultra-creamy, decadent dessert without turning on your oven. This easy Biscoff Cheesecake features a buttery cookie crust and a rich, smooth filling made with cookie butter, making it a perfect, simple indulgence.
- Prep Time: 20 min
- Cook Time: 0 min
- Total Time: 6 hr 20 min
- Yield: 10 servings 1x
- Category: Dessert
- Method: No-Bake
- Cuisine: American
- Diet: Vegetarian
Ingredients
- 1 1/2 cups Biscoff cookie crumbs (about 25 cookies)
- 6 tablespoons unsalted butter, melted
- 16 ounces cream cheese, softened
- 1 cup powdered sugar
- 1 teaspoon vanilla extract
- 1 cup heavy whipping cream, cold
- 1 cup Biscoff cookie butter (spreadable), divided
- Optional: Extra crushed Biscoff cookies for topping
Instructions
- Prepare the crust: Combine the Biscoff cookie crumbs and melted butter in a bowl. Press the mixture firmly into the bottom of a 9-inch springform pan. Place the crust in the freezer while you prepare the filling.
- Make the filling: In a large bowl, beat the softened cream cheese with an electric mixer until smooth. Add the powdered sugar and vanilla extract, mixing until just combined.
- In a separate bowl, whip the cold heavy whipping cream until stiff peaks form. Gently fold the whipped cream into the cream cheese mixture until no streaks remain.
- Warm 1/2 cup of the Biscoff cookie butter slightly so it is easily pourable. Gently fold the warmed Biscoff spread into the cream cheese mixture until swirled, but do not overmix; you want visible ribbons of cookie butter.
- Pour the cheesecake filling over the chilled crust and smooth the top with a spatula.
- Chill the cheesecake: Cover the pan loosely with plastic wrap and refrigerate for at least 6 hours, or preferably overnight, until the cheesecake is firm.
- Prepare the topping: Before serving, gently warm the remaining 1/2 cup of Biscoff cookie butter until it is runny. Drizzle the melted cookie butter over the top of the chilled cheesecake. Sprinkle with extra crushed Biscoff cookies if desired.
- Release the springform sides and slice to serve your easy Biscoff Cheesecake.
Notes
- For the best texture, allow the cheesecake to chill for a full 8 hours or overnight.
- If you do not have a springform pan, you can line a regular 9-inch pie dish with parchment paper for easy removal.
- Use room temperature cream cheese to prevent lumps in your filling.
Nutrition
- Serving Size: 1 slice
- Calories: 450
- Sugar: 35g
- Sodium: 280mg
- Fat: 32g
- Saturated Fat: 19g
- Unsaturated Fat: 13g
- Trans Fat: 0.5g
- Carbohydrates: 38g
- Fiber: 1g
- Protein: 5g
- Cholesterol: 95mg