
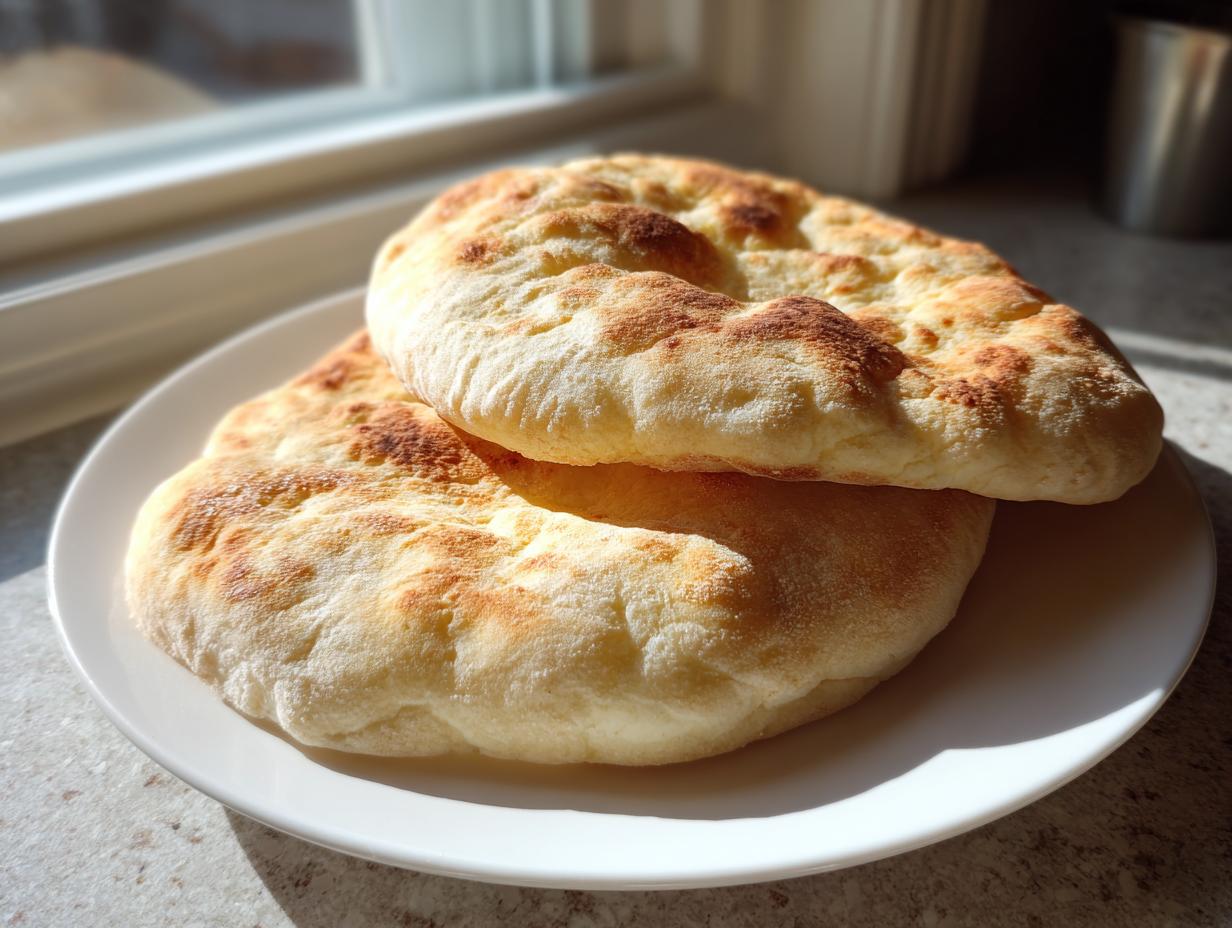
If you’re tired of buying those sad, flat, crusty rounds from the grocery store that refuse to puff, let me tell you a secret: making incredible, fluffy homemade pita bread is actually so simple! I remember relying on those packages when life got hectic, but frankly, missing that warm, airy pocket is heartbreaking. That’s why I wanted to share the absolute no-fail way I make my simple bread baking recipe for pita bread. Using just the stovetop, we create Mediterranean bread that balloons right up. For me, reclaiming this simple, satisfying staple was a huge step in my journey back to nourishing meals, and I know this recipe will bring that joy to your table too.
- Why This Homemade Pita Bread Recipe is Your New Favorite
- Simple Ingredients for Perfect Pita Bread
- How to Make Pita Bread: Step-by-Step Stovetop Pita Bread
- Tips for Success with Your Fluffy Bread Recipe
- Variations: Making Greek Pita Recipe and Vegan Pita Bread
- Serving Suggestions for Warm Pita Bread
- Storage and Reheating Instructions for Homemade Flatbread
- Frequently Asked Questions About Pita Bread
- Sharing Your Ultimate Pita Bread Experience
Why This Homemade Pita Bread Recipe is Your New Favorite
When I first started tinkering with this, I just wanted something soft—you know, the kind of pita bread that doesn’t crack the second you try to fold it. Look, these homemade pitas are soft, they’re fluffy, and they require ingredients you likely already have. You will never go back to the store-bought stuff, trust me on this one!
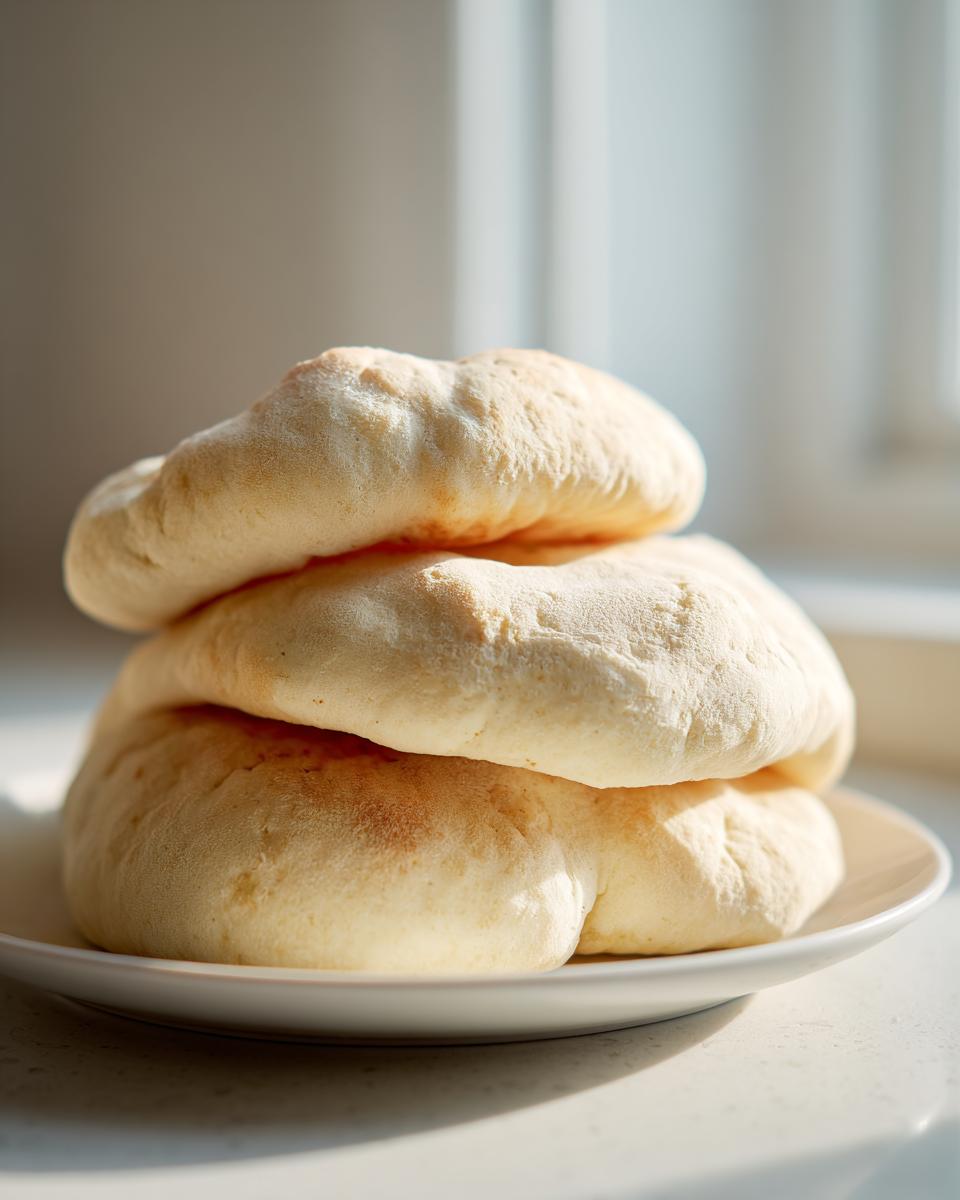
- They genuinely puff up beautifully every single time.
- It’s super fast—we’re talking fresh bread in less than an hour and a half.
- It’s sturdy enough for dipping but tender enough for a great gyro wrap.
Achieve the Ultimate Pita Pocket
The true magic relies on high heat. You must use a very hot, dry skillet. That intense, immediate blast of heat on the dough creates steam inside, and that steam is what forces that beautiful, majestic pocket to balloon open. It’s science, folks, but it feels like pure sorcery!
Quick Yeast Bread Ready in Under 90 Minutes
Because this is a quick yeast bread recipe, we aren’t doing a long, overnight fermentation. We let the dough rise once for about an hour, and then we are rolling and cooking! It’s genuinely one of the fastest ways to get truly satisfying, warm bread on your table for a weeknight meal.
Simple Ingredients for Perfect Pita Bread
Honestly, seeing how few things go into this dough is part of what makes me love it so much. You don’t need fancy equipment or ten different specialty flours. We are relying on simplicity here! For the softest texture, you’ll want 3 cups of all-purpose flour, 1 cup of warm water—and I mean perfectly warm, around 105 to 115°F—2 1/2 teaspoons of active dry yeast, a teaspoon of sugar, a teaspoon of salt, and just one tablespoon of olive oil. If you want that extra-fluffy Greek pita recipe vibe, I always throw in 2 tablespoons of Greek yogurt too!
Ingredient Notes and Substitutions
That little teaspoon of sugar might seem strange in savory bread, but it’s vital! It wakes up the yeast and gives it just the right food source to get a good, strong rise. And about that optional yogurt? It doesn’t drastically change the flavor, but it adds a richness and slightly tangy mouthfeel that pushes this closer to that amazing, tender Mediterranean bread texture. It really helps keep the pita soft long after it cools.
How to Make Pita Bread: Step-by-Step Stovetop Pita Bread
Okay, this is where the real fun begins! We are taking these simple ingredients and turning them into gorgeous, warm, puffy pita bread. Don’t be intimidated, though; this process is actually so straightforward, especially since we are skipping the oven and going right to the skillet. I find stovetop cooking gives you way more control over that initial puff we are chasing.
Activating Yeast and First Rise
First, always prove your yeast works! Mix the yeast, sugar, and warm water together. If you don’t see foam in about 5 to 10 minutes, you need fresh yeast, so don’t skip this check! Once it’s bubbly, we mix in the dry stuff, the oil, and the yogurt (if you’re using it). After kneading until it’s smooth—and you really need to knead for about 5 to 7 minutes to develop that gluten structure—pop it into an oiled bowl and cover it. Let that dough rest in a warm spot for a full hour until it doubles. Don’t rush this part; the rise is key to soft bread!
Rolling Technique for the Best Pita Pocket Bread
Once risen, punch that air out gently, then divide it into 8 equal pieces. Now, this next step is vital for getting that beautiful pita pocket bread: roll each little ball into a flat circle, roughly 6 to 7 inches wide, and not much thicker than 1/8 of an inch. See how thin that is? After rolling, cover them all up again and let them rest for 10 minutes. This rest is what stops the dough from fighting you when you try to roll it out; it relaxes the gluten so it stretches instead of snapping back.
The Hot Skillet Method for Perfect Puffing
This is the climax! Preheat your heaviest skillet—cast iron is the champion here—over medium-high heat. Remember, dry pan! No oil here. Lay one rolled pita onto that screaming hot metal. It should start bubbling almost instantly. After just a minute or two, flip it. If you see it start to swell, congratulations! If it’s just sitting there looking stubborn, take a spatula and gently press down on the top surface right in the middle. That gentle nudge forces the steam inside to burst open the pocket. As soon as it puffs, whip it out and wrap it immediately in a towel so it stays soft while you cook the rest. It’s amazing how quickly you can make a batch using this easy bread recipes method.
Tips for Success with Your Fluffy Bread Recipe
Getting that perfect lift and staying power in this fluffy bread recipe truly comes down to two things: temperature and handling. If you nail these small details, you’ll have no issues making fantastic pita bread every time. Getting the dough handled correctly during the rest periods means it won’t snap back on you when rolling, which is so frustrating!
First, let’s talk water temperature for activating the yeast. If it’s too hot, you kill the yeast dead, and you end up with a flat pancake. Too cold, and it just sleeps! Stick to that 105–115°F range. Second, that skillet must be blazing hot before the dough hits it. If you put the dough on tepid metal, the outside cooks before the steam has a chance to form inside, and, well, no pocket for you. Trust me, I’ve learned this the hard way!

Once they are done cooking, don’t let the pitas just sit out on a plate uncovered. They go stiff almost instantly. I have a whole stack of clean dish towels dedicated just to wrapping these right off the heat. They steam each other gently under the fabric, which locks in all that lovely softness. For more tips on getting great texture, check out my little secrets behind making a great soft white bread loaf!
Variations: Making Greek Pita Recipe and Vegan Pita Bread
One of the things I love most about this ultimate pita bread recipe is how adaptable it is without changing the core technique. You asked about making it a true Greek pita recipe, and I’m happy to report that it’s totally achievable! If you added that optional Greek yogurt back in Step 2—which I highly recommend—you’ve already got the start of that wonderful, slightly thicker, authentically soft texture that defines Greek flatbreads.
Now, for my friends avoiding dairy or looking for a simple, wholesome option: this base recipe is naturally vegan pita bread! As long as you stick to the olive oil and skip the yogurt, you are good to go. It performs exactly the same way on the hot skillet, puffing up those pockets just as reliably. It’s so satisfying knowing I can make this versatile bread for everyone.
If you want to see how I use that yogurt in a main dish, check out my recipe for Greek yogurt chicken salad—it’s perfect stuffed into these warm pitas! If you’re curious about other authentic Mediterranean bread styles, I saw a great resource over at Mia Kouppa detailing some traditional approaches to baking as well. Check that out if you want to dive deeper into the regional styles!
Serving Suggestions for Warm Pita Bread
Okay, you’ve got a stack of these incredible, warm homemade pita bread rounds steaming under the towel—now what? Seriously, don’t just stand there smelling them! The absolute best way to enjoy them is straight out of the skillet, piping hot. These are obviously the classic vehicle for your favorite pita bread for gyros or souvlaki; they just hold up so much better than those flimsy store-bought versions.
But don’t feel limited to wraps! Because they are so soft and perfect for scooping, they are phenomenal bread for dipping. My go-to pairing right now, especially when I have company, is pairing them with my creamy caramelized onion dip recipe. Just tear off a chunk and scoop! They’re also excellent sliced in half, lightly toasted until crisp, and used as chips for your favorite bean dip.
Storage and Reheating Instructions for Homemade Flatbread
These babies are truly best eaten right away, I won’t lie! As soon as they come off that hot pan, you need to wrap them tightly in a clean kitchen towel. That trapped steam is what keeps your fresh homemade flatbread soft and pliable for hours. If they cool down uncovered, they get stiff fast.
If you have leftovers (which is rare in my house!), store them in a zip-top bag at room temperature for about two days. To bring them back to life, just sprinkle them with a few drops of water and microwave them for about 15 seconds, or better yet, warm them directly on a dry skillet for 30 seconds per side until they are soft again.
Frequently Asked Questions About Pita Bread
Why won’t my pita bread puff up?
Oh, this is the number one frustrating moment! Usually, it boils down to two things, and you’ll see them mentioned throughout this recipe. First, your pan wasn’t hot enough. You want that skillet screaming hot before the dough hits it. Second, you might have rolled the dough too thick. If it’s much thicker than 1/8 of an inch, the steam can’t force its way through the layers fast enough to create that perfect pocket. Give that gently pressing technique with the spatula a try too—that often does the trick!
Can I use this recipe for Greek Pita Bread?
Absolutely! The dough itself is already so close to a classic Greek pita recipe. The little secret I shared is adding 2 tablespoons of Greek yogurt to the dough mixture. That small addition gives the final product a slightly richer density and a softer chew that I associate with authentic Greek flatbread. So yes, just toss in that yogurt and you’re set!
How long does homemade pita bread stay soft?
Honestly, they are at their absolute peak within the first hour or two when they are still warm and wrapped together. After that, they’ll start to firm up. If stored properly in a sealed bag at room temperature, they’ll stay wonderfully soft for a full day, maybe even two. That instant wrap in a clean towel right off the heat is non-negotiable if you want them soft the next day. If you are looking for some ideas on what to do with leftover pitas the next morning, check out my ideas for simple healthy homemade bread accompaniments!
Sharing Your Ultimate Pita Bread Experience
Now that you know the secrets that transform simple flour and water into airy, perfect pita bread, I genuinely want to know how it turned out for you! Did you get that magnificent puff? Are you stuffing them with grilled chicken or using them to scoop up a ton of hummus? Don’t be shy!
Leaving a quick rating and sharing your experience in the comments below helps me so much. It lets me know I’m sharing recipes that fit into your busy life, just like this one fits into mine as I run Pure Plate Path. I love reading your variations and tips! When you share your results, it builds this amazing community of home cooks who want real food without the fuss. If you’re curious about my own journey back to simple, nourishing meals, you can read a little more about why I started this path right here.
Happy baking, and enjoy those warm, pillowy pockets!
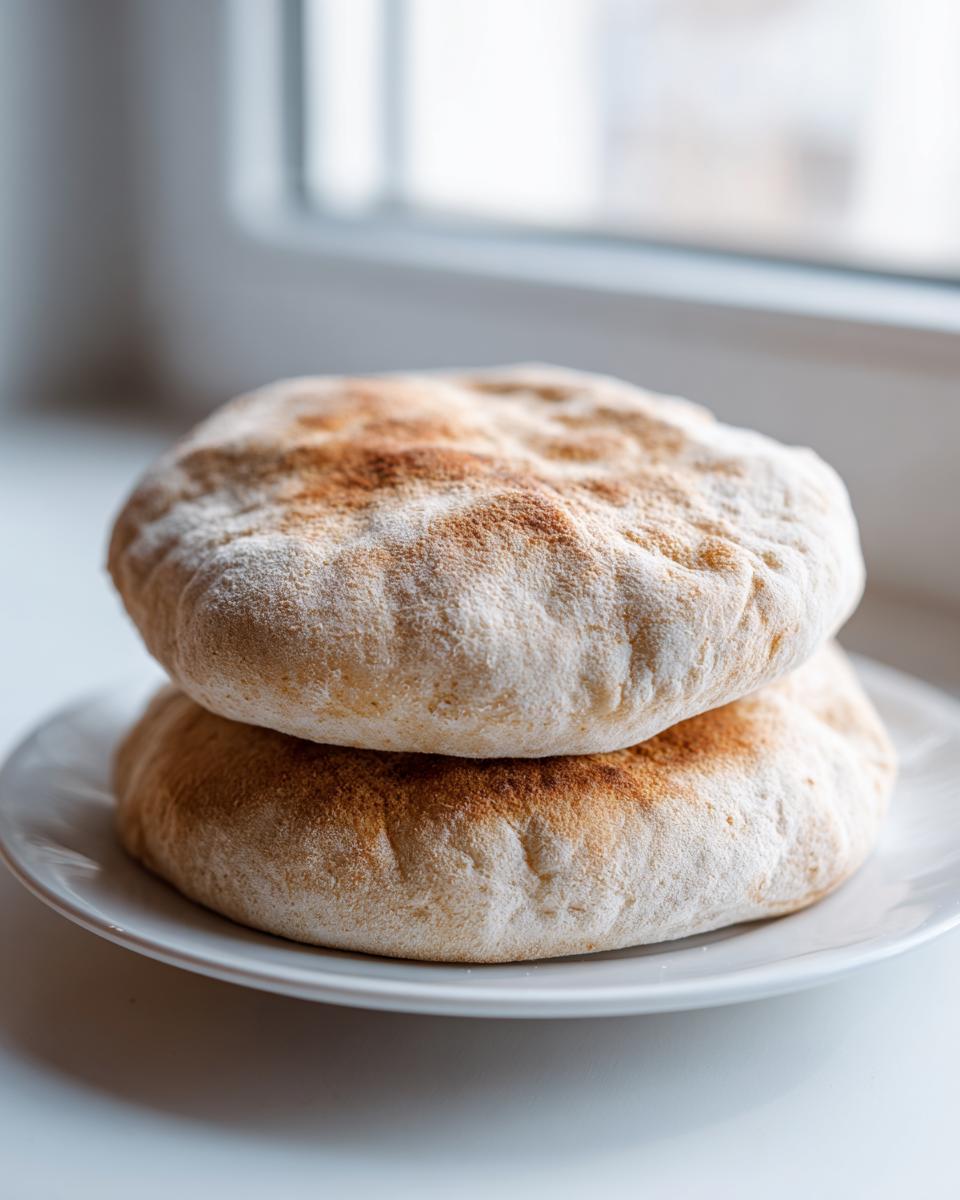
PrintSoft and Fluffy Homemade Pita Bread with Perfect Pockets
Learn the straightforward method for making incredibly soft, fluffy homemade pita bread that forms perfect pockets every time. This easy recipe uses simple ingredients and is ideal for stuffing, dipping, or making wraps for quick weeknight dinners.
- Prep Time: 20 min
- Cook Time: 15 min
- Total Time: 95 min
- Yield: 8 servings 1x
- Category: Bread
- Method: Stovetop Cooking
- Cuisine: Mediterranean
- Diet: Vegan
Ingredients
- 3 cups all-purpose flour
- 1 cup warm water (about 105-115°F)
- 2 1/2 teaspoons active dry yeast
- 1 teaspoon sugar
- 1 teaspoon salt
- 1 tablespoon olive oil
- Optional: 2 tablespoons Greek yogurt for extra softness
Instructions
- Combine the warm water, sugar, and yeast in a small bowl. Let this mixture stand for 5 to 10 minutes until it becomes foamy. This shows the yeast is active.
- In a large mixing bowl, combine the flour and salt. Add the yeast mixture, olive oil, and Greek yogurt (if using). Mix the ingredients until a shaggy dough forms.
- Turn the dough out onto a lightly floured surface. Knead the dough for 5 to 7 minutes until it becomes smooth and elastic.
- Place the dough in a lightly oiled bowl, turning it once to coat. Cover the bowl with plastic wrap or a clean towel. Let the dough rise in a warm place for 1 hour, or until it has doubled in size.
- Gently punch down the risen dough. Divide the dough into 8 equal pieces. Roll each piece into a smooth ball.
- Cover the dough balls and let them rest for 10 minutes. This relaxes the gluten, making rolling easier.
- Preheat a heavy-bottomed skillet or cast-iron pan over medium-high heat. Do not add oil to the pan.
- Working with one ball at a time, roll it out into a circle about 6 to 7 inches in diameter and about 1/8 inch thick.
- Place one rolled round onto the hot, dry skillet. Cook for 1 to 2 minutes until bubbles appear on the surface.
- Flip the pita bread. Cook the second side for 1 to 2 minutes. The bread should puff up completely, forming a pocket. If it does not puff immediately, gently press down on the top surface with a spatula to encourage puffing.
- Remove the puffed pita bread from the pan and immediately wrap it in a clean kitchen towel to keep it soft while you cook the remaining rounds.
- Serve the warm pita bread immediately with your favorite fillings or dips.
Notes
- For the best pocket formation, ensure your skillet is very hot before placing the dough inside.
- If you prefer a Greek pita recipe, adding the optional Greek yogurt helps achieve a slightly denser, softer texture common in Greek flatbread.
- These homemade pita bread rounds are perfect for gyros or serving alongside hummus for dipping.
Nutrition
- Serving Size: 1 pita
- Calories: 180
- Sugar: 1
- Sodium: 250
- Fat: 2
- Saturated Fat: 0.3
- Unsaturated Fat: 1.7
- Trans Fat: 0
- Carbohydrates: 35
- Fiber: 2
- Protein: 6
- Cholesterol: 0