
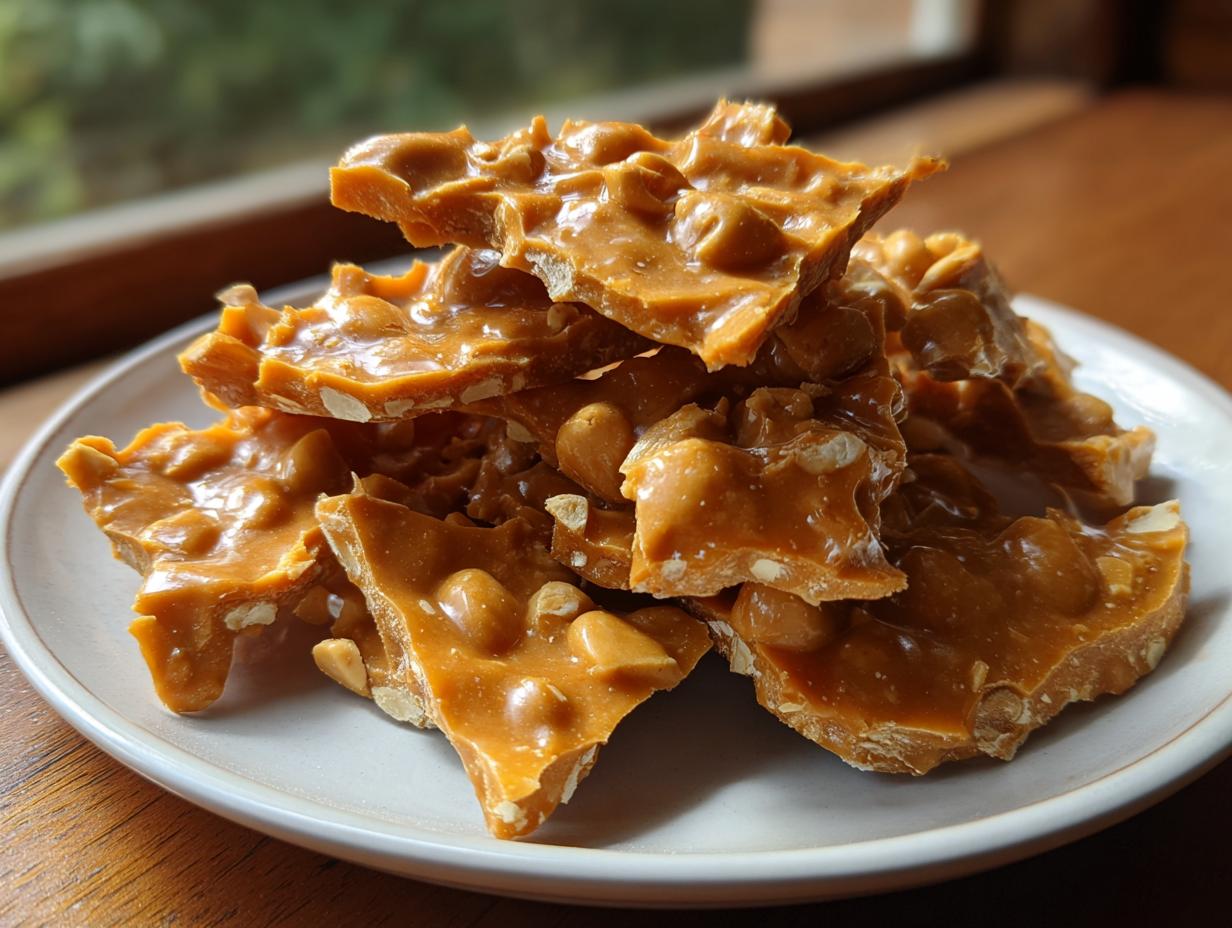
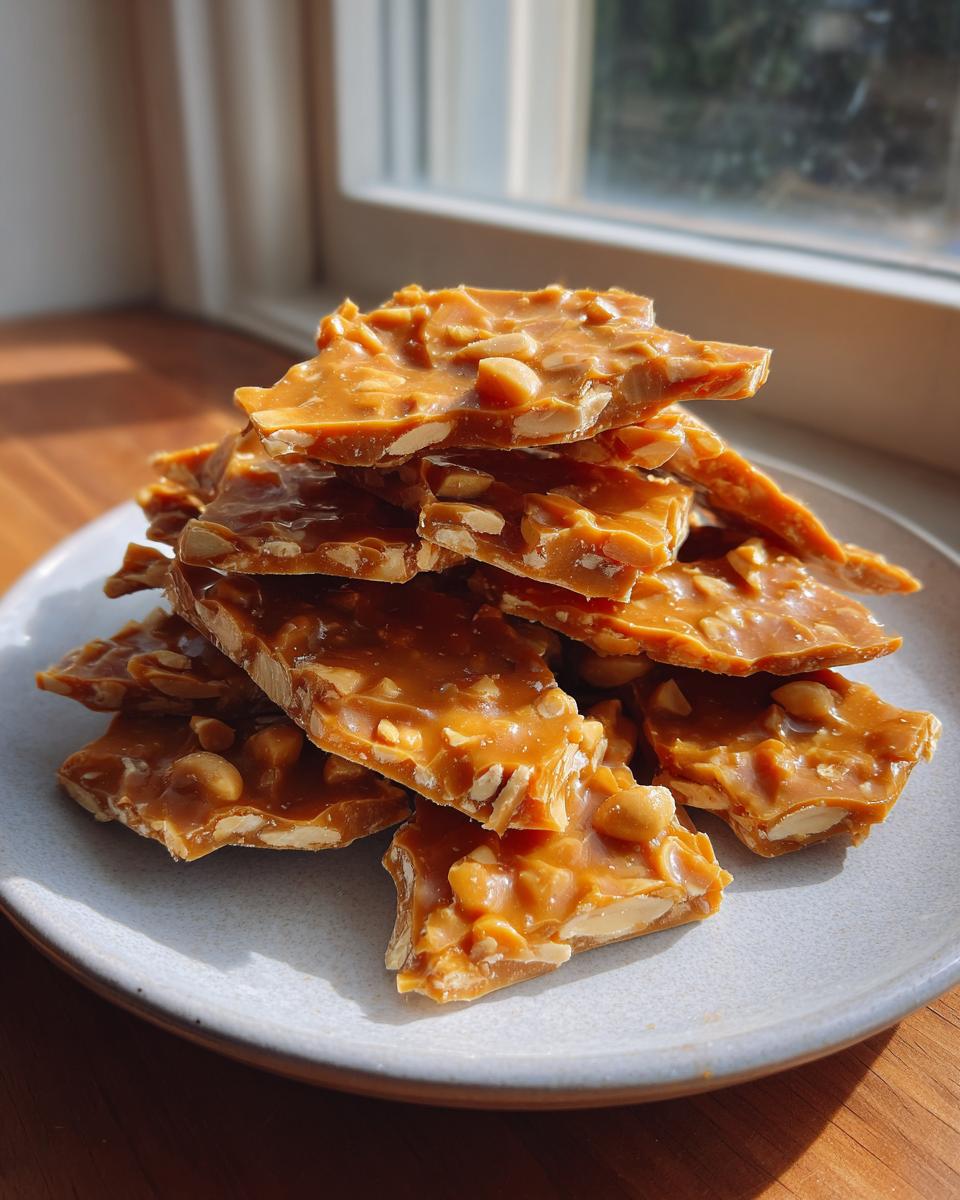
There is something so deeply nostalgic about the sound of peanut brittle cracking—that pure, sharp snap that tells you it’s exactly right. When I first tried making this candy, I ended up with a sticky mess more than once. Trust me, if you’ve ever battled brittle that refused to break, you know the frustration! That’s why I developed this peanut brittle recipe to be foolproof. It focuses on simple steps and reliable heat control so you get that glorious, glassy crunch every single time. We aren’t complicating things here; we’re just using time-tested methods to reclaim a classic treat, which is exactly what we do here at Pure Plate Path, even when baking challenging homemade candy.
- Why This Crunchy Peanut Brittle Recipe Delivers the Perfect Snap
- Gathering Ingredients for Your Homemade Peanut Brittle Recipe
- Essential Equipment for Making Crunchy Peanut Brittle
- Step-by-Step Instructions for the Best Peanut Brittle Instructions
- Tips for Success Making Old Fashioned Candy
- Storing Your Homemade Holiday Gifts Peanut Brittle
- Frequently Asked Questions About This Peanut Brittle Recipe
- Serving Suggestions for Your Sweet and Salty Snack
- Sharing Your Perfect Peanut Brittle Recipe Experience
Why This Crunchy Peanut Brittle Recipe Delivers the Perfect Snap
We’re going straight to the science here because that sadness when brittle is chewy? I won’t let that happen to you! To make this peanut brittle recipe perform like it should, we have two unbreakable rules designed to guarantee crunch. If you nail these two steps, you’re golden. It’s all about precise temperature and that one key aerating ingredient.
- It’s structurally sound, not just sweet.
- It focuses on achieving that beautiful, shatterable texture.
The Magic of the Hard Crack Stage Candy
This is non-negotiable, friends. For that glass-like crispness, you absolutely have to hit 300 degrees Fahrenheit. That specific temperature signals that the sugar syrup has cooked down enough that it will solidify completely once cooled. If you pull it early, even by five degrees? You get chewiness. Your candy thermometer isn’t just a suggestion; it’s your map to the required Hard Crack Stage Candy success. Watch it like a hawk!
The Role of Baking Soda in Your Classic Brittle Recipe
The baking soda seems simple, but it does the heavy lifting toward that signature crunch. When that hot syrup hits the soda, it reacts immediately, creating tons of tiny bubbles. These bubbles create air pockets throughout the candy, which is what makes the final product light and brittle, rather than dense like toffee. It takes your Classic Brittle Recipe from good to unforgettable.
Gathering Ingredients for Your Homemade Peanut Brittle Recipe
Okay, let’s get our simple components ready for this absolutely classic peanut brittle recipe. Remember, we believe in quality over complication here. You only need a few things, which is why this old-fashioned candy is so accessible! Get your ingredients measured out before you even think about turning on the stove, because once that candy starts cooking, things move fast.
Ingredient Notes and Substitutions for Peanut Brittle
Here are the few crucial notes I have about what goes into the pot:
- We want 2 cups of peanuts, and please use the roasted kind! They have a better flavor base than raw ones.
- When choosing your sweetener base, stick with light corn syrup. I find dark corn syrup can muddy the final color a bit too much for this particular look.
- Always use unsalted butter. Since we are adding salt later via balance, controlling that richness upfront is important for a perfect from scratch confection. Seriously, don’t worry about sourcing hard-to-find items; we keep it simple! If you need a great fudge recipe for your holiday platter, check out my guide on easy no-bake buckeye fudge while you’re gathering supplies.
Essential Equipment for Making Crunchy Peanut Brittle
Making candy, especially brittle, requires the right tools so you aren’t scrambling when the syrup is at its peak temperature. This isn’t the time to wing it; having these items ready makes this feel like an easy brittle recipe rather than a stressful science experiment. If you’re new to this, investing in the right gear really pays off!
Here is what you absolutely must have on hand before you start combining the sugar and water:
- A Heavy-Bottomed Saucepan: You need one that’s large enough to hold everything, but more importantly, it needs to have thick sides. This prevents scorching! Thin pans create hot spots, and nobody wants blackened sugar.
- A Reliable Candy Thermometer: I cannot stress this enough for candy making for beginners. You need to measure accurately to 300°F. Clip this right onto the side of your pot so the tip is submerged in the syrup but not touching the bottom.
- A Large Baking Sheet: This needs to be ready to go *before* you light the stove. I prefer using a silicone baking mat because it guarantees easy release and cleanup. If you don’t have a mat, a generously greased sheet works, but the mat is just stress-free insurance.
- Sturdy Spatula: You’ll need something heat-safe for those quick final stirs once the butter goes in.
Grab everything, wipe down your counter where the brittle will spread, and let’s get ready for the heat!
Step-by-Step Instructions for the Best Peanut Brittle Instructions
Now for the main event—the actual cooking! This is where timing and focus matter most for your peanut brittle recipe. Don’t panic; just remember our mantra: precision leads to that perfect, loud crunch. You’ll be relying completely on that thermometer during this phase. Once you master these steps once, you’ll see how this from scratch confection is totally achievable!
Reaching the Soft-Ball Stage (250°F)
First, combine the sugar, corn syrup, and water in that heavy pot you got out. Set your heat to medium. Stirring gently while heating is key right now—we just need to make sure every single grain of sugar melts completely into the liquid. As soon as it hits a full boil, STOP STIRRING. Seriously, put the spoon down! Swirl the pan gently if you see steam building unevenly, but stirring now promotes crystallization, and a crystallized brittle is the enemy of the snap! Just watch that thermometer climb until it hits 250°F.
Achieving the Hard Crack Stage (300°F) for Perfect Snap
Once we hit 250°F, the magic really starts. If you are keeping your roasted peanuts nearby, toss them in now. You must stir constantly from this point forward so nothing scorches on the bottom of that heavy pan. Your goal is 300°F. As the temperature rises past 280°F, the syrup will transform quickly from clear yellow to a deep, beautiful amber—like liquid gold. Watch closely so you don’t burn it! Reaching this specific Hard Crack Stage Candy is what separates the beautiful brittle from the sticky disappointment.
The Rapid Reaction: Adding Butter, Vanilla, and Soda
The instant the thermometer hits 300°F, pull that pan OFF the heat source! Safety first—this mixture is screaming hot. Now, work fast: drop in your butter and vanilla. Then, dump in the baking soda. It will erupt! The mixture will bubble up aggressively, foaming right over the edges of the pan—it’s supposed to do that. As soon as it’s incorporated (maybe five seconds of stirring), immediately—and I mean *immediately*—pour the whole foamy mess onto your prepared sheet. Do not touch it, do not spread it. Let the baking soda do its job and spread the candy naturally. If you want another great recipe that solidifies quickly, check out my guide for cookie icing that hardens fast. When it’s poured, you can also reference some great tips from others making classic peanut brittle!
Tips for Success Making Old Fashioned Candy
Look, even when you follow the temperature guides perfectly, sometimes this Old Fashioned Candy recipe fights back! I remember the first time I tried making a large batch for a holiday market. I used a pan that wasn’t quite heavy enough on the bottom, and even though I was watching the thermometer like a hawk, the edges burned horribly around 290°F. Yuck! I learned then that the pan truly matters, just as much as the heat setting.
Here are a few practical things I’ve picked up over the years that can save you from that sticky situation or scorched flavor:
- Humidity Check: If it’s raining or super humid outside, the sugar absorbs that moisture floating in the air, and it can prevent your brittle from fully setting up properly. If it’s a swampy day where you live, maybe save the brittle for a drier afternoon—it’s the only ingredient you can’t control once you start boiling!
- The Cool Down Zone: Don’t let the brittle sit in the hot pan for more than thirty seconds after pouring. Sugar continues to cook slightly if it stays in the hot metal. Get it onto that cool sheet so the chemical reaction stops immediately when it hits 300°F.
- Don’t Tempt Fate: Resist the urge to scrape the very last sticky bits from the bottom of the pan! Those scraped bits are usually scorched material, and tossing them into your perfect batch will only ruin the clean flavor we worked so hard to achieve.
If you want something amazing to pair with your perfect brittle, try making a comforting warm drink from my recipe for easy rich homemade hot cocoa mix! I totally got the idea for tackling tough candy like this after trying a few other holiday recipes. If you want more inspiration on foolproof treats, check out this great recipe from my friends over at little cooks reading books.
Storing Your Homemade Holiday Gifts Peanut Brittle
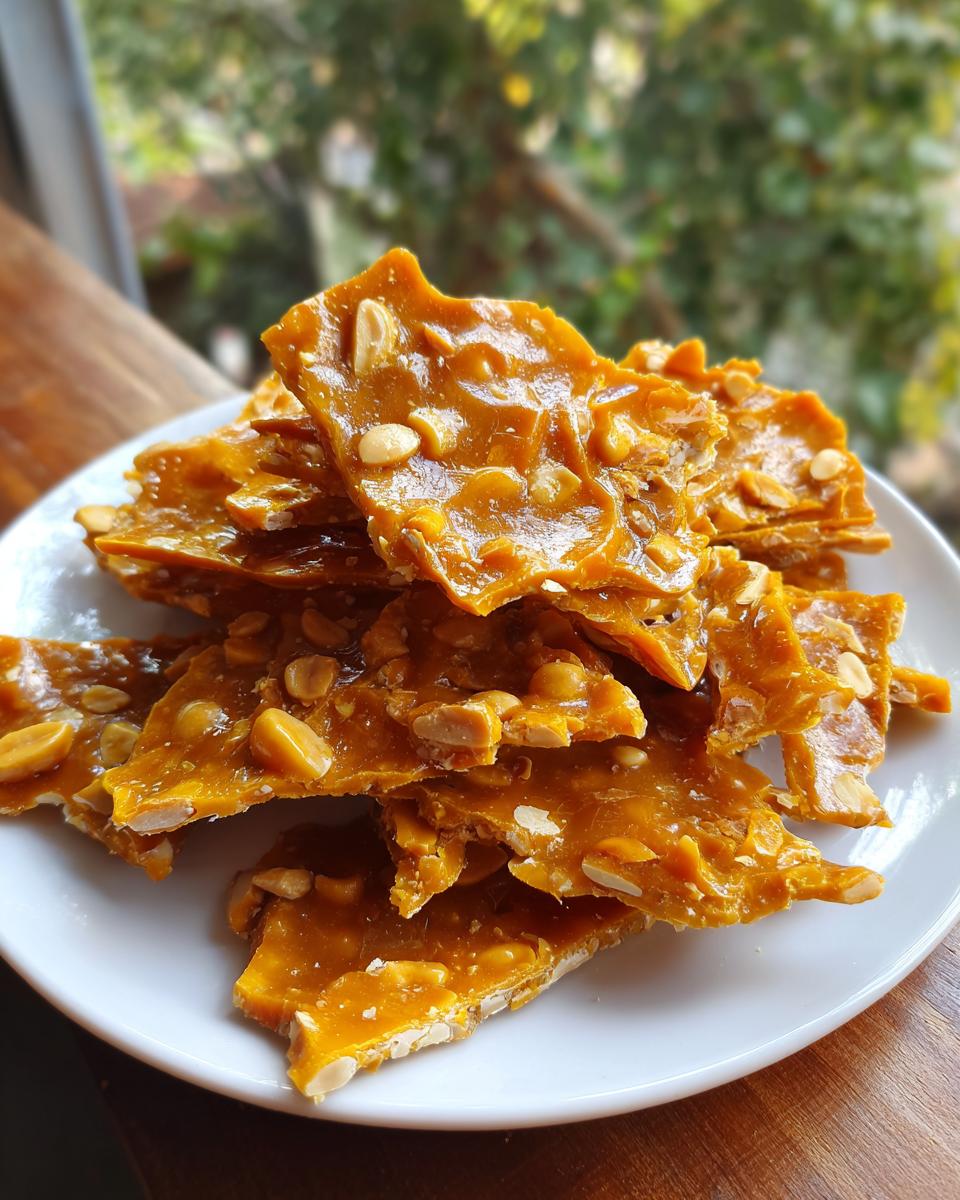
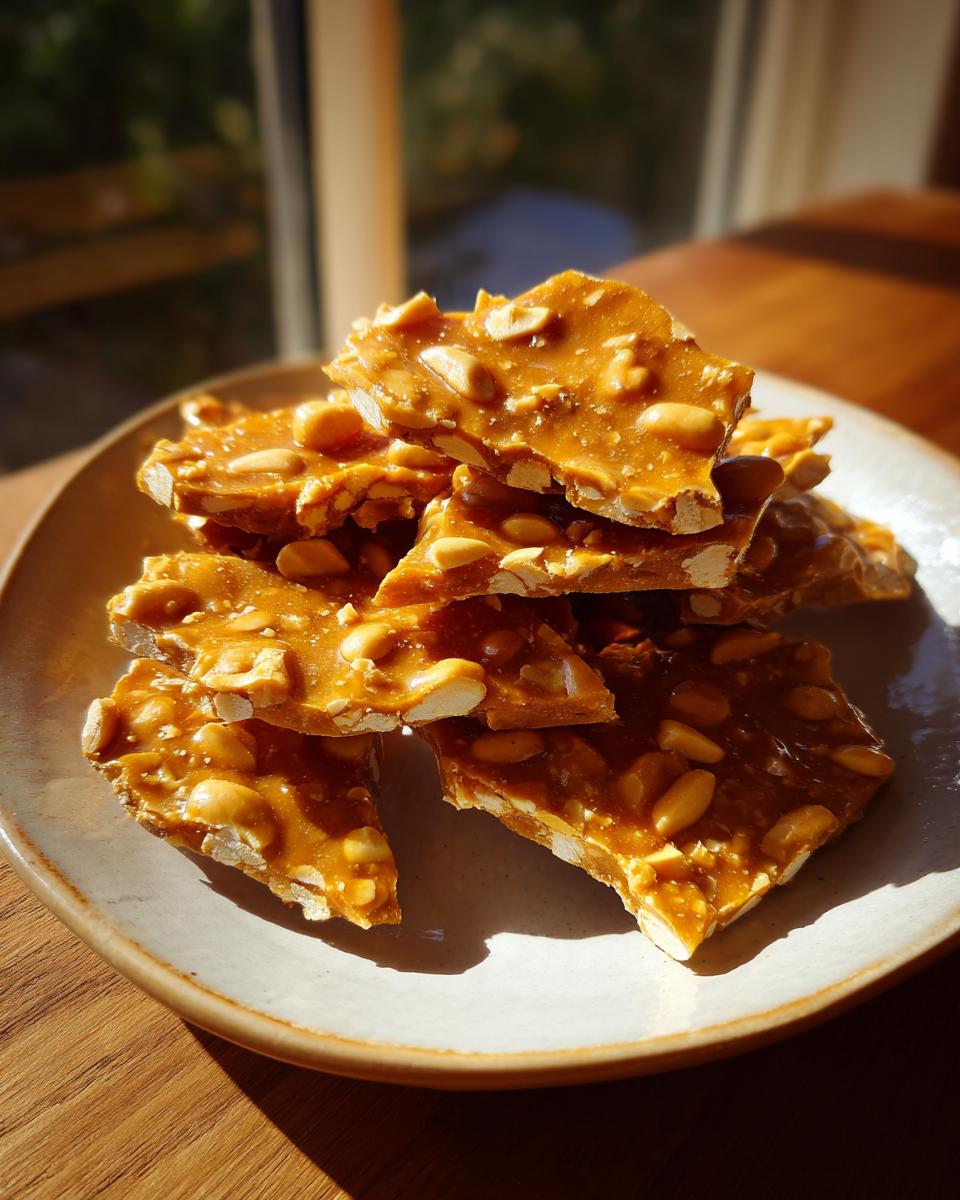
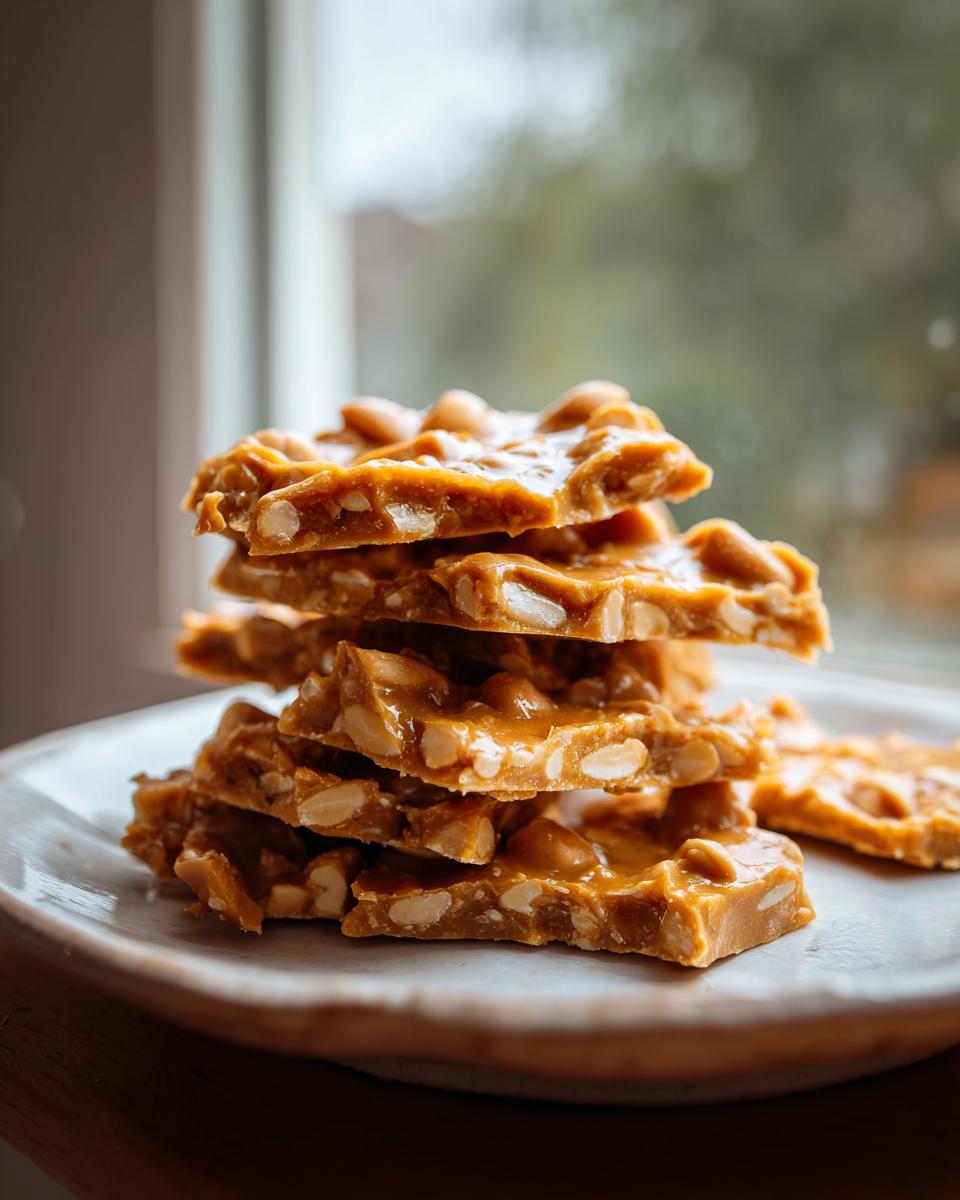
You’ve done it! You hit the 300°F mark, you managed the baking soda foam without burning yourself, and now you have this glorious, snappy candy. Wow! But the job isn’t over until it’s stored right, especially if you plan on using this perfect peanut brittle recipe as part of your Homemade Holiday Gifts selection. The biggest enemy of brittle is humidity. If moisture gets to those beautiful air pockets we created, that snap instantly turns into a sad, chewy stickiness. Don’t let all that hard work go to waste!
My number one rule for storage is finding the driest, darkest spot in your pantry. You need a seal that locks out air completely. I always use heavy-duty zip-top bags that I squeeze every bit of air out of, or better yet, quality glass jars with tight-sealing lids. If I’m packaging it up for gifting, I always use pretty cellophane bags tied tightly with ribbon, but I make sure they are sealed inside a larger, secondary airtight container for transport or storage before the big day.
Keeping Brittle Crisp in Humid Climates
If you live where I used to live—near the coast—humidity is a real bully. For extra insurance, after the brittle is completely cool and broken into pieces, I sometimes add a commercial desiccant packet, the little silica ones you find in vitamin bottles (make sure they are food-safe!). You can toss one right into your airtight storage jar.
If you’re looking for another foolproof treat to stack up next to your brittle this holiday season, you absolutely must try my recipe for easy creamy maple fudge. Fudge keeps incredibly well, and the maple and peanut flavors complement each other so nicely!
Shelf Life of Homemade Brittle
When stored correctly in an airtight container, this peanut brittle recipe stays perfectly crunchy for a good two to three weeks. Honestly, ours never lasts that long! If you notice it feeling slightly softer after a week or two, there’s a little trick Sarah uses: briefly warming the pieces in a 250°F oven for just five minutes can sometimes dry the surface moisture out again and bring back some snap. Just let them cool completely before you eat or repackage them, okay?
Frequently Asked Questions About This Peanut Brittle Recipe
I know candy making can feel intimidating when you start out—it certainly was for me! But honestly, once you understand the temperature rules, it’s just stirring ingredients. Here are some common questions I get asked about making this Old Fashioned Candy so you can feel totally confident tackling your next batch.
Can I make this Easy Brittle Recipe without a Candy Thermometer?
Okay, honestly? I strongly advise against it if you want that crisp, guaranteed snap. This isn’t like baking cookies where being a couple of degrees off is fine. For candy making for beginners, the thermometer is your safety net against sticky failure. If you find yourself in a true emergency with no thermometer, you can try the “cold water test.” Drop a tiny bit of the syrup into a bowl of ice water. If it forms threads that are soft but not immediately pliable, you might be close to soft-ball stage. If it forms a hard, brittle thread that shatters when you try to bend it, you might have hit the hard crack stage. But please, don’t bet your entire batch on it! It’s so much better to use the tool.
Why is my peanut brittle sticky instead of crunchy?
Ugh, the sticky pitfall! If your brittle is chewy or sticky when it cools, there are usually two culprits, and they both relate back to moisture. Number one: you didn’t get the syrup hot enough. You absolutely must reach that 300°F mark for the Hard Crack Stage Candy. If you stop at 290°F, it will never fully set hard. Number two: humidity. If it’s raining out, the sugar actively pulls that moisture right out of the air, which softens the candy structure tremendously. If you suspect humidity, store any leftovers right away in the driest spot you can find.
What is the best type of peanut for this Sweet and Salty Snack?
When making this Sweet and Salty Snack, the flavor of the peanuts really shines through, so choose wisely! I call for roasted, unsalted peanuts in the ingredients list. Roasting them beforehand brings out their natural oils and deepens that nutty flavor profile, which tastes amazing against the caramelized sugar. If you only have raw peanuts on hand, that’s okay—just toss them into your saucepan right after the sugar dissolves and let them toast gently for about five minutes before you start watching the temperature climb. That little bit of extra heat makes a huge difference!
If you are looking for another simple item to build out that holiday spread, may I suggest my easy apple crumble recipe? It’s so simple and comforting!
Serving Suggestions for Your Sweet and Salty Snack
You’ve wrestled the sugar to the perfect temperature, you’ve got that beautiful, shatter-ready sheet of brittle, and now you’re wondering how best to enjoy this wonderful Sweet and Salty Snack. The beauty of brittle is that it stands up perfectly on its own, but it also plays so nicely with other flavors and textures. Since this candy is so intensely sweet and rich, I find that pairing it with something warm or slightly tart really cleanses the palate between bites.
When I make a batch, I almost always have a big mug of something hot nearby. It just feels right when you’re breaking off those crunchy shards. It’s the perfect companion for a chilly evening!
Pairing Brittle with Warm Beverages
You simply cannot go wrong pairing this candy with a warm beverage. The contrast between the cold, crisp texture of the brittle and the warmth of the drink is just divine. If you need a rich base for that pairing, my recipe for the best thick and creamy hot chocolate recipe is perfect. That thick, velvety chocolate is amazing when you dip a piece of brittle into it just before eating.
It also goes surprisingly well with a strong cup of black coffee if you need that sugar rush boost in the afternoon! Sometimes, a simple cup of tea lets the nutty flavor of the brittle be the true star of the show.
Easy Dessert Incorporations
If you manage to have any left after gifting and snacking, try crumbling it up! This turns your hard-earned brittle into an incredible topping. I chop it coarsely—you want some good, chunky bits—and sprinkle it over things that need that extra texture.
- Ice Cream Topper: Over vanilla bean ice cream? Heavenly.
- Yogurt Boost: Mix a little powdered or crumbled brittle into plain Greek yogurt for breakfast—it’s a delicious way to start the day feeling indulgent!
- Garnish for Simple Cakes: Use it to top a plain pound cake or even a simple chocolate pudding dessert. It adds that homemade, rustic look that everyone loves.
Honestly, the possibilities for this salty-sweet treat are endless, but I always recommend checking out this awesome resource on easy crunchy peanut brittle if you’re looking for even more ways to enjoy it!
Sharing Your Perfect Peanut Brittle Recipe Experience
Now that you’ve successfully navigated the tricky waters of candy making, I really want to hear all about it! This is where we connect, and honestly, seeing your success stories is the best part of running this site. Did you get that loud, satisfying crack on the first try? I hope so!
Please, don’t just walk away and eat your beautiful candy silently! Take a picture of those gorgeous, golden shards and tag me, or better yet, drop a comment right here below telling me how it went. I love knowing that a once-intimidating recipe like this peanut brittle recipe is ending up on family candy trays across the country.
And for those of you who tackled this for the season of giving—did you make beautiful homemade holiday gifts? Tell me what kinds of packaging you used! Did you have to fight off hungry family members eager to sample it before gifting time?
If you found this recipe invaluable and it gave you the confidence to try more complex stovetop treats, I’d be so grateful if you could rate the recipe at the top of the page. Your feedback helps other busy home cooks find reliable, honest guidance here at Pure Plate Path. For more on my philosophy and why I share these simple, rewarding techniques, feel free to read a bit more about me over on the About page!
PrintThe Ultimate Crunchy Homemade Peanut Brittle Recipe (Old-Fashioned & Foolproof Snap Guarantee)

Make classic homemade peanut brittle that achieves a perfect, glass-like snap every time. This old-fashioned candy recipe uses simple ingredients and precise temperature control to guarantee a crunchy result, ideal for holiday candy or gifting.
- Prep Time: 10 min
- Cook Time: 25 min
- Total Time: 55 min
- Yield: About 1 pound 1x
- Category: Dessert
- Method: Stovetop Candy Making
- Cuisine: American
- Diet: Vegetarian
Ingredients
- 2 cups granulated sugar
- 1 cup light corn syrup
- 1 cup water
- 2 cups roasted, unsalted peanuts
- 2 tablespoons unsalted butter
- 1 tablespoon baking soda
- 1 teaspoon vanilla extract
Instructions
- Prepare a baking sheet by lightly greasing it or lining it with a silicone mat. Set aside.
- Combine the sugar, corn syrup, and water in a heavy-bottomed saucepan over medium heat. Stir until the sugar dissolves.
- Insert a candy thermometer into the mixture without touching the bottom of the pan.
- Cook the mixture, stirring occasionally, until it reaches 250 degrees Fahrenheit (soft-ball stage). Do not stir once boiling begins, only swirl the pan gently if necessary.
- Add the roasted peanuts to the syrup. Continue to cook, stirring constantly now to prevent scorching, until the mixture reaches 300 degrees Fahrenheit (hard-crack stage). This step requires attention to detail for the perfect snap.
- Immediately remove the pan from the heat. Quickly stir in the butter, vanilla extract, and then the baking soda. The mixture will foam up rapidly.
- Pour the foaming mixture onto the prepared baking sheet. Do not spread or touch the candy; let it flow naturally into a thin layer.
- Let the brittle cool completely at room temperature, about 30 to 45 minutes, until hard.
- Once fully cooled and hard, break the brittle into irregular pieces. Store in an airtight container.
Notes
- Use roasted peanuts for the best flavor in this classic brittle recipe.
- Hitting the 300°F hard-crack stage is crucial for brittle that snaps instead of sticking to your teeth.
- Work quickly after adding the baking soda, as this ingredient creates the necessary air pockets for a light, crunchy texture.
- This candy is excellent for homemade holiday gifts.
Nutrition
- Serving Size: 1 ounce
- Calories: 180
- Sugar: 18g
- Sodium: 35mg
- Fat: 10g
- Saturated Fat: 2g
- Unsaturated Fat: 8g
- Trans Fat: 0g
- Carbohydrates: 22g
- Fiber: 1g
- Protein: 4g
- Cholesterol: 5mg