
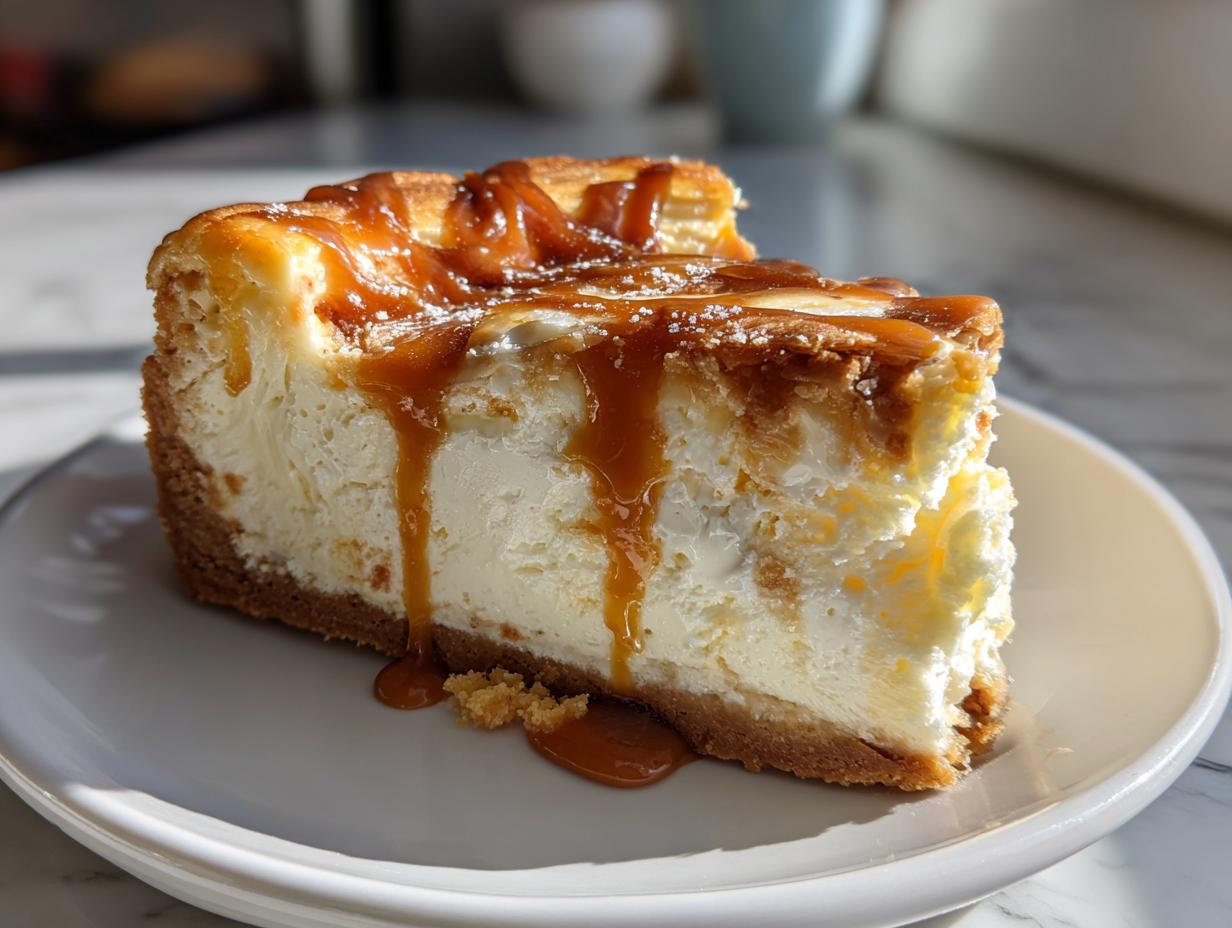
When you crave something truly decadent—a dessert that screams ‘special occasion’ but doesn’t require you to stay up baking until midnight—you absolutely need this recipe. We’re diving into the ultimate indulgence today: the Decadent yet Easy Baked Salted Caramel Cheesecake with a show-stopping Biscoff Crust. As Sarah Miller always emphasizes here at Pure Plate Path, even our richest desserts have to fit into a busy life, and this beauty proves you can have complex flavor without impossible complication.
This cheesecake embodies that sweet spot where simple preparation meets luxurious reward. We use a trusty water bath technique that guarantees that unbelievably creamy texture we all dream of, and trust me, that homemade caramel drizzle is non-negotiable! It’s truly the best baked cheesecake you can make at home with surprisingly little fuss. If you’ve been looking for your signature holiday bake or just need a show-stopper, you’ve found it. You might also want to check out our Pecan Pie Cheesecake if you’re looking for more layered fall flavors!
- Why You Will Make This Salted Caramel Cheesecake Again and Again
- Gathering Ingredients for Your Salted Caramel Cheesecake
- Step-by-Step Guide to the Ultimate Salted Caramel Cheesecake
- Expert Tips for a Perfect Baked Salted Caramel Cheesecake
- Transforming Your Salted Caramel Cheesecake with Variations
- Serving Suggestions for This Decadent Dessert
- Storage and Reheating Instructions for Your Salted Caramel Cheesecake
- Frequently Asked Questions About Making Salted Caramel Cheesecake
- Nutritional Estimates for This Sweet and Salty Treat
Why You Will Make This Salted Caramel Cheesecake Again and Again
I know, I know, baking a cheesecake sounds intimidating! But this recipe is worth every second because it hits all the right notes. This isn’t just another dessert; it’s truly satisfying.
- It achieves that unbelievably creamy cheesecake texture thanks to the water bath method.
- The Biscoff crust recipe adds warm, spicy depth that store-bought crusts just can’t touch.
- It’s the perfect sweet and salty treat—that caramel cut with sea salt is heavenly!
- Even though it’s baked, the process is straightforward, making it an easy homemade cheesecake to manage.
Gathering Ingredients for Your Salted Caramel Cheesecake
Okay, for a truly decadent dessert, we need the right stuff, but don’t let this list scare you! It looks long, but everything plays a vital role in making this the ultimate cheesecake experience. Remember what I always say: for the smoothest result, make sure your cream cheese and eggs are fully at room temperature—that’s half the battle won right there for any creamy cheesecake recipes!
We’ll break this down into three sections so you can shop smart. You’ll need enough caramel for both inside the filling *and* drizzled on top, so make sure you have enough made or bought!
Here is what you need to pull together this masterpiece:
- For the Biscoff Crust: 1 1/2 cups Biscoff cookie crumbs (that’s about 25 of those lovely spiced cookies!), 1/4 cup granulated sugar, and 6 tablespoons unsalted butter, melted.
- For the Filling: You need three (8 ounce) packages of full-fat cream cheese, and please make sure it’s the full-fat kind for that rich texture! Also, 1 1/2 cups granulated sugar, 1/4 cup all-purpose flour, 1 teaspoon vanilla extract, 1/2 teaspoon salt, 1/4 cup heavy cream, and 3 large eggs. Oh, and don’t forget 1/2 cup of your homemade salted caramel sauce to swirl right into this layer.
- For the Topping: We need the rest of that glorious sauce—about 1 cup of homemade salted caramel sauce saved just for drizzling over the top when it’s all chilled and ready.
Once you have all this organized, you’ll realize how easy it is to pull together such an impressive dish. If you’re looking for other tasty sauces—though none are as perfect as this caramel—you might want to check out my guide on making an easy creamy garlic sauce!
Step-by-Step Guide to the Ultimate Salted Caramel Cheesecake
Alright, time to roll up those sleeves! Making this cheesecake is more about gentle assembly than hard work, I promise. We want that super creamy cheesecake recipe texture, and that starts with respecting the batter. Preheating the oven to 325°F (160°C) is step one, but immediately wrap that 9-inch springform pan—sides and bottom—in heavy-duty aluminum foil. We’re preparing for a spa day for the cake, also known as a water bath, which keeps things humid and prevents those dreaded cracks.
Creating the Biscoff Crust Base
First things first: mix up those Biscoff crumbs with the sugar and the melted butter until it looks like wet sand. Pat that mixture firmly into the bottom of your foil-wrapped pan. Don’t be shy here; press it down tight! Once it’s packed down, pop it into the oven for just 10 minutes. This pre-bake step is vital for the best baked cheesecake because it keeps the crust crisp and stops it from getting soggy later on. Let it cool down just a touch while you make the filling.
Mixing the Smooth Cheesecake Filling
Here’s where patience really pays off. Grab your bowl and beat that softened cream cheese until it’s truly smooth—we want no lumps left! Now, slowly beat in your sugar and that tiny bit of flour. Remember the golden rule? Don’t overmix! Add the vanilla and salt, then the heavy cream. Finally, add the eggs, my friends, one at a time, mixing only until *just* combined after each addition. If you beat in air, the cake will puff up too much and crack later. Keep that mixer slow!
After half the batter goes over the crust, drizzle half a cup of your homemade salted caramel sauce over it. Then, gently pour the rest of the batter on top. This layering is what makes it a true smooth dessert experience!
Baking Your Salted Caramel Cheesecake with a Water Bath
Now for the magic trick: the water bath! Set your cheesecake pan inside a larger roasting pan. Carefully pour HOT water into the roasting pan until it comes halfway up the sides of the cheesecake pan. This gentle, steamy heat is the secret to an even bake. Bake this beauty for 60 to 75 minutes. You’re looking for the edges to be set, but the center should still have a noticeable jiggle, like firm Jell-O.
When time’s up, turn the oven OFF. Prop the door open a tiny bit and just let the cheesecake hang out in that warm environment for a full hour. This slow descent in temperature is what helps avoid that awful top crack. After that hour, pull it out of the water bath, let it finish cooling on a rack, and then it’s minimum six hours chilling time. I think you can find some quick easy weeknight dinners recipes for the next few nights while this chills!

Expert Tips for a Perfect Baked Salted Caramel Cheesecake
If you want this salted caramel cheesecake to truly live up to its decadent name, you need to respect the chilling time. Honestly, waiting at least six hours—or better yet, overnight—is crucial for getting that intensely smooth texture that defines the best baked cheesecake. Don’t try to rush it; that creamy texture needs time to firm up against the caramel.
To avoid cracks, that slow cooling in the oven is my non-negotiable step. If you skip the water bath, you *must* do the hour-long cool-down inside the turned-off oven with the door held slightly open. Another trick for those super rich creamy desserts? Always use room-temperature ingredients. Seriously, grab your cream cheese and eggs out early! This helps them blend without needing aggressive mixing, keeping bubbles out and silkiness in.
And for the ultimate flavor pop that makes this a great sweet and salty treat, make sure your homemade caramel has good quality sea salt in it. That sharp contrast against the sweet filling is what makes this recipe unforgettable. If you need a great savory dish to balance out all this sweetness, you have to try my easy eggs benedict recipe!
Transforming Your Salted Caramel Cheesecake with Variations
Now that you’ve mastered the core recipe for the ultimate salted caramel cheesecake, let’s talk about shaking things up! Just because this version is baked doesn’t mean we can’t play with textures, which is what those folks looking for no bake cheesecake variations really crave. If Biscoff isn’t your jam one week, don’t stress! You can easily swap it out for graham cracker crumbs or even crushed Oreos for a chocolate swirl.
Inside that creamy layer, you can mix in other tasty things too. I adore folding in some chopped dark chocolate chips right before I pour the batter in. It just adds another layer of richness! If you want something different entirely, you could try swapping out half the caramel swirl inside the filling for a rich fudge sauce. For more fun ways to use decadent ingredients, check out these sweet potato brownies! It’s all about making the recipe your own.
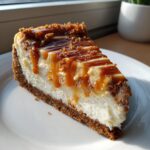
Serving Suggestions for This Decadent Dessert
This salted caramel cheesecake just screams centerpiece status! When it comes time to serve this spectacular dish, keep the sides simple to let the caramel shine. It pairs unbelievably well with a piping hot cup of coffee—the bitterness really helps cut through that sweet richness.
If you want a fresh element, skip heavy sauces and top individual slices with a few fresh raspberries or thin orange segments. That little burst of acid lifts the flavor beautifully, making it perfect for any special occasion cakes table. Don’t forget to check out my recipe for easy roasted honey glazed carrots if you need a great savory dish to balance out all the dessert!
Storage and Reheating Instructions for Your Salted Caramel Cheesecake
Okay, we’ve done the hard part, and now you have this magnificent, creamy creation sitting in your kitchen. We do *not* want to let that effort go to waste! Cheesecake is one of those desserts that actually tastes better the next day, so patience is your friend here.
First things first: Serving. Resist the urge to cut into it immediately after it cools! This recipe demands a long, cold nap. You absolutely must refrigerate your salted caramel cheesecake for a minimum of 6 hours, but truthfully, overnight is when the magic happens. This chilling time allows the filling to fully solidify so you get those clean slices, which is necessary for the presentation, especially with that luscious caramel drizzle on top.
When it comes to leftovers, just cover the whole thing tightly with plastic wrap, making sure the wrap doesn’t touch the surface of the caramel drizzle if you can help it. It keeps beautifully in the fridge for about 4 to 5 days. You might notice the Biscoff crust gets a little softer as it sits, but the flavor only deepens!
Now, about reheating? Look, this is cheesecake. We enjoy it cold, straight from the fridge! Attempting to reheat a slice will definitely turn your lovely firm texture into a sad, melted puddle, and the caramel won’t fare well either. So, the best serving plan is chilling it well, slicing it cold, and leaving any leftovers right where they belong—in the cold!
Frequently Asked Questions About Making Salted Caramel Cheesecake
I get so many messages asking about tweaks and making things easier, which I totally get! You want that show-stopper dessert without the stress. Here are the top things folks ask me when they’re ready to bake this beauty.
Can I turn this into a no-bake salted caramel cheesecake?
That’s a great idea if you’re short on time, but this specific recipe is designed around baking to get that sturdy, rich creamy dessert texture. Baking the eggs helps set the structure firmly around the caramel swirl. If you truly want a no bake cheesecake variation, you’d need to swap out the eggs and flour in the filling completely and use stabilizers like gelatin or whipped topping. For this version, though, stick to the low-and-slow bake—it leads to the smoothest dessert experience!
Is making the homemade caramel drizzle topping complicated?
Honestly, making the caramel drizzle topping is easier than you think, and it makes such a difference! The key is to cook your sugar until it’s a deep amber color *off the heat* before adding in your butter and cream. Make sure you use sea salt or kosher salt! If you want to see the exact measurements I use for a thick sauce that drizzles perfectly, check out my general guide on making that easy homemade cheesecake which details the sauce separately!
How long does this salted caramel cheesecake last in the fridge?
Because this is a baked cheesecake made with full-fat cream cheese, it hangs out wonderfully! Once it’s completely chilled (remember, overnight is best!), it keeps well, covered tightly, in the refrigerator for about 4 to 5 days. It’s one of those truly fantastic fall baking recipes that’s perfect to make ahead for a holiday dinner!
Nutritional Estimates for This Sweet and Salty Treat
Okay, let’s talk fuel, because while this salted caramel cheesecake is pure indulgence, knowing what’s ticking over in that slice is always helpful. I want to be super upfront here: these numbers are just estimates based on standard ingredient brands and measurements for one average slice of this heavy, decadent dessert. Since we are using full-fat cream cheese and rich homemade caramel, it’s certainly not a light snack, but wow, is it worth the indulgence for a special occasion cakes moment!
When you are enjoying this stunning, rich creamy dessert, this is roughly what you can expect per serving:
- Calories: About 550 (Yep, it’s rich!)
- Fat: Roughly 35g (Hello, butter and cream cheese!)
- Carbohydrates: Around 55g
- Sugar: Approximately 45g (That caramel really adds up!)
- Sodium: About 350mg (That’s the “salted” part calling in!)
- Protein: Around 8g
If you are looking for ways to balance out your meals after enjoying a slice of this sweet perfection, hop over and check out my best tips for preparing healthy desserts that keep the joy without sacrificing the flavor! Enjoy knowing exactly what you are eating—and know that every single calorie is packed with Biscoff and caramel goodness!
PrintDecadent Baked Salted Caramel Cheesecake with Biscoff Crust
Make this rich, creamy baked salted caramel cheesecake featuring an easy Biscoff cookie crust and topped with homemade salted caramel drizzle. This recipe balances sweet and salty flavors for a perfect special occasion dessert.
- Prep Time: 25 min
- Cook Time: 75 min
- Total Time: 100 min
- Yield: 12 servings 1x
- Category: Dessert
- Method: Baking
- Cuisine: American
- Diet: Vegetarian
Ingredients
- 1 1/2 cups Biscoff cookie crumbs (about 25 cookies)
- 1/4 cup granulated sugar
- 6 tablespoons unsalted butter, melted
- 3 (8 ounce) packages full-fat cream cheese, softened
- 1 1/2 cups granulated sugar
- 1/4 cup all-purpose flour
- 1 teaspoon vanilla extract
- 1/2 teaspoon salt
- 1/4 cup heavy cream
- 3 large eggs
- 1/2 cup homemade salted caramel sauce (for filling)
- 1 cup homemade salted caramel sauce (for topping)
Instructions
- Preheat your oven to 325°F (160°C). Wrap the outside of a 9-inch springform pan tightly in heavy-duty aluminum foil.
- Prepare the crust: Mix the Biscoff crumbs, 1/4 cup sugar, and melted butter until combined. Press the mixture firmly into the bottom of the prepared springform pan. Bake for 10 minutes. Let cool slightly.
- Prepare the filling: In a large bowl, beat the softened cream cheese with an electric mixer until smooth. Gradually beat in 1 1/2 cups sugar and the flour until just combined.
- Mix in the vanilla extract, salt, heavy cream, and eggs one at a time, mixing only until each egg is incorporated. Do not overmix.
- Pour half of the cheesecake batter over the cooled crust. Drizzle 1/2 cup of the homemade salted caramel sauce over the batter. Pour the remaining batter on top.
- Place the springform pan inside a larger roasting pan. Carefully pour hot water into the roasting pan until it reaches halfway up the sides of the springform pan, creating a water bath.
- Bake for 60 to 75 minutes, or until the edges are set but the center still has a slight jiggle.
- Turn off the oven, crack the door open slightly, and let the cheesecake cool inside the oven for 1 hour. This prevents cracking.
- Remove the cheesecake from the water bath and let it cool completely on a wire rack.
- Once cool, cover and refrigerate for at least 6 hours, or preferably overnight.
- Before serving, remove the sides of the springform pan. Drizzle the remaining 1 cup of homemade salted caramel sauce over the top.
Notes
- For the smoothest texture, bring your cream cheese and eggs to room temperature before starting.
- If you do not want to use a water bath, bake the cheesecake at 325°F (160°C) for 50-60 minutes and cool slowly in the turned-off oven with the door ajar.
- Use high-quality sea salt in your caramel for the best sweet and salty contrast.
Nutrition
- Serving Size: 1 slice
- Calories: 550
- Sugar: 45g
- Sodium: 350mg
- Fat: 35g
- Saturated Fat: 20g
- Unsaturated Fat: 10g
- Trans Fat: 0.5g
- Carbohydrates: 55g
- Fiber: 1g
- Protein: 8g
- Cholesterol: 120mg