

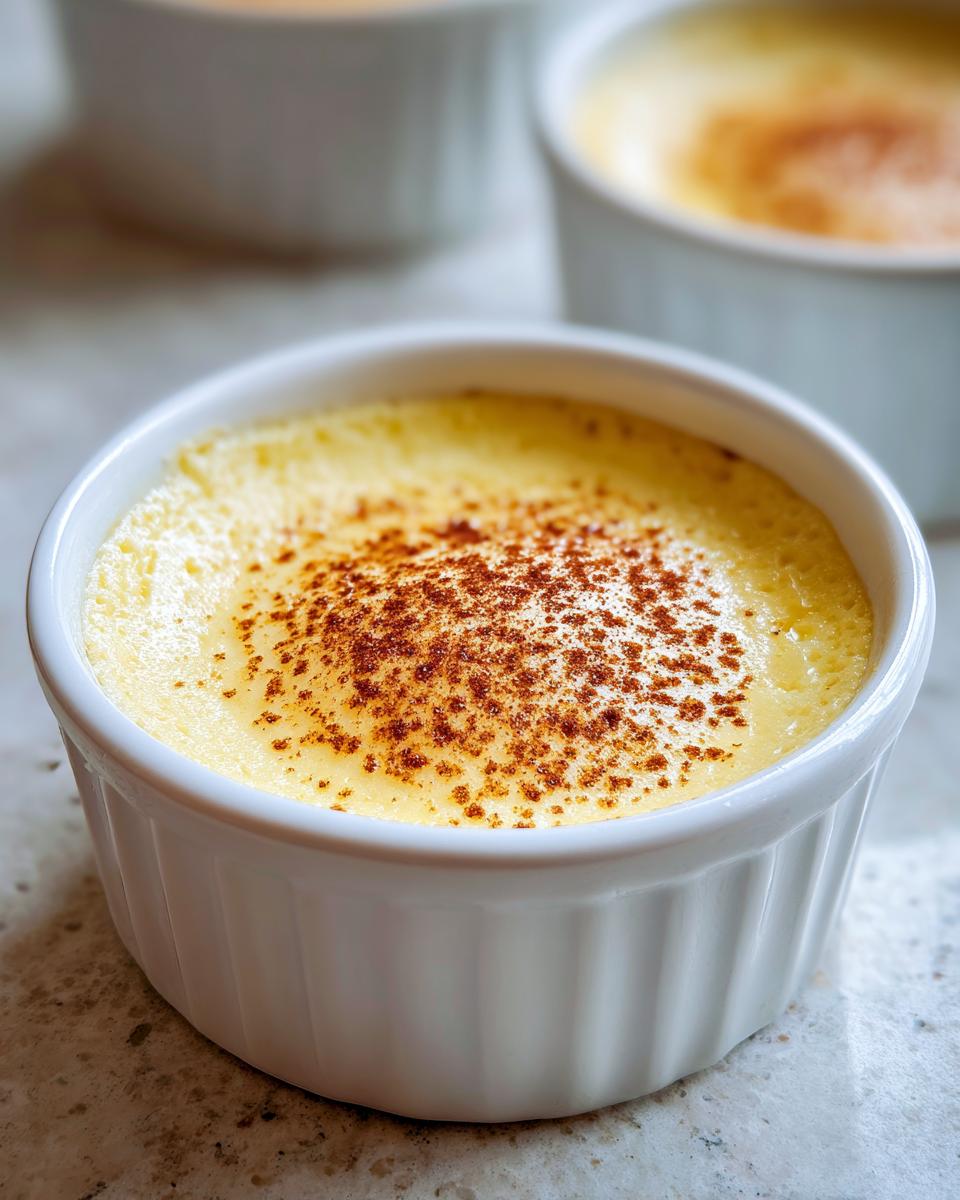
Oh, doesn’t anything just scream pure comfort like a dessert made from scratch? When life gets hectic—and trust me, I know all about that stress from my marketing days—I always turn back to the simplest things. Making something truly delicious by hand feels like hitting the pause button on the chaos. That’s why I’m so excited to share my absolute go-to recipe today: the best **vanilla custard cups** you will ever eat.
Forget those rubbery, strange things you get from a box! Our goal here, using these time-tested, straightforward techniques, is achieving that incredibly smooth, sink-your-spoon-in, melt-on-your-tongue texture. This isn’t complicated baking; this is just pure, simple pleasure that connects us back to real food.
- Why This Homemade Vanilla Custard Recipe Works for You
- Gathering Ingredients for Perfect Vanilla Custard Cups
- Essential Equipment for Baking Custard in Ramekins
- Step-by-Step Instructions for Creamy Vanilla Custard Cups
- Make Ahead Dessert Cups: Timing Your Vanilla Custard Cups
- Variations on Classic French Vanilla Custard
- Storage and Reheating Instructions for Your Vanilla Custard Cups
- Frequently Asked Questions About Vanilla Custard Cups
- Nutritional Estimates for This Creamy Baked Dessert
- Make Ahead Dessert Cups: Timing Your Vanilla Custard Cups
- Variations on Classic French Vanilla Custard
- Storage and Reheating Instructions for Your Vanilla Custard Cups
- Frequently Asked Questions About Vanilla Custard Cups
- Nutritional Estimates for This Creamy Baked Dessert
Why This Homemade Vanilla Custard Recipe Works for You
I know you’re busy, just like I was when I started Pure Plate Path. You need recipes that deliver on their promise without demanding hours in the kitchen. This **homemade vanilla custard recipe** is designed for real life. It’s elegant enough for company but simple enough for a Tuesday night treat. You get maximum flavor with minimal fuss, which is exactly what we strive for here.
- Creamy Texture Guaranteed: We nail the water bath technique every time, meaning you get that luxurious, smooth finish without any curdling.
- Perfect Portion Control: Using individual custard cups is fantastic! These are wonderful dessert recipes for portion control when you want just a little something sweet.
- Simple Ingredients: You probably have everything you need right now. No fancy stabilizers or weird additives—just pure, comforting flavor.
Gathering Ingredients for Perfect Vanilla Custard Cups
Getting the right ingredients is half the battle for achieving that truly superior, creamy baked dessert texture. We need simplicity, but we can’t skimp on quality where it matters most. For this recipe, we’re relying on the richness of whole milk—don’t even think about swapping it for skim if you want that signature silkiness! We need those fat molecules working hard.
You’ll need exactly 2 cups of whole milk, gently warmed, and your sweetness comes primarily from 1/2 cup of good old granulated sugar. The flavor hero here is 1 teaspoon of pure vanilla extract, not that imitation stuff. That high-quality extract really lets the egg flavor shine through beautifully. We anchor it all down with 3 large eggs and just a tiny pinch of salt. And, of course, the final touch before baking: that optional sprinkle of freshly grated nutmeg on top!
Ingredient Notes and Substitutions for Your Vanilla Custard Cups
When it comes to that creamy mouthfeel, whole milk is non-negotiable for these baked custard cups. Low-fat milk just doesn’t carry the richness needed to keep the final product from tasting thin. If you absolutely must use an alternative, half-and-half might work in a pinch, but promise me you’ll try whole milk first!
If you’re out of vanilla, you can try 1/4 teaspoon of almond extract with 1/4 teaspoon of vanilla, or maybe even a tiny drop of bourbon if you’re making these for the grown-ups. But honestly? The pure vanilla extract is what makes this a classic. These precise measurements ensure we get the right balance for firm but delicate individual dessert cups every single time.
Essential Equipment for Baking Custard in Ramekins
For these simple homemade vanilla custard cups, you don’t need an entire toolkit, but a few specific items are must-haves. First, you need your individual baking vessels—we’re talking about four to six 6-ounce ramekins to hold these beauties. They become your perfect single-serving dessert cups.
The most important piece of gear here is a deep baking dish, often called a roasting pan. This is essential because we absolutely must use a water bath when making these **baked custard in ramekins**. The water bath provides gentle, indirect heat, which is the secret handshake for getting that smooth, creamy baked dessert texture we are aiming for. Don’t skip the heavy-duty pan!

Step-by-Step Instructions for Creamy Vanilla Custard Cups
Alright, this is where the magic happens, but listen closely—we have to respect the eggs! Follow these steps exactly, and you’ll have those gorgeous, silky **vanilla custard cups** ready for the oven. First thing’s first: get your oven humming at 325°F (160°C). While that warms up, you need to boil a kettle of water for our water bath later, so get that going now.
Next, we warm the milk. Pour your 2 cups of whole milk into a saucepan and heat it gently until those tiny little bubbles just start kissing the edges. Don’t let it get rolling; take it right off the heat. In another bowl, you’re whisking together your eggs, sugar, vanilla, and salt until everything looks combined and just a little bit frothy. Now, pay attention, this next part is everything!
We have to temper the eggs gently; if we dump hot milk straight onto them, we’ll end up with sweet scrambled eggs, and nobody wants that! Take about a cup of that warm milk and pour it *slowly* into your egg mixture while you whisk constantly, like you’re mixing something delicate. Once that’s incorporated, pour that whole tempered mixture back into the saucepan with the rest of the warm milk. Whisk gently to combine everything again.
To ensure these are the smoothest **creamy baked dessert** you’ve ever had, we’re going to strain the mixture right into a big measuring cup. This catches any little bits of cooked egg or thick chalazae that would otherwise ruin your beautiful texture. Then, set up your water bath! Place your ramekins inside your deep baking dish, pour the strained custard into the cups, and then carefully pour that boiling water into the baking dish until it comes about halfway up the sides of your ramekins. It’s kind of like putting the custards in a tiny hot tub, which ensures they bake evenly. Pop them in for about 35 to 45 minutes. You’ll know they’re done when the edges look set, but the center still has a little wobble when you nudge the pan. If you’re interested in a similar gentle-baking technique for other things, check out my guide on how to bake sweet potatoes perfectly.
Achieving Perfect Smooth Custard Texture Tips
I cannot stress this enough: straining is your non-negotiable step for a perfect texture. It’s the secret weapon for achieving those **Perfect smooth custard texture tips**. If you see any little bits floating on top after straining, that’s okay! What you want to avoid is over-whisking your eggs initially. Too much air whipped in at the start means those air bubbles make it into the oven, and poof—you get a foamy top instead of a sleek surface. We are aiming for a **Simple creamy dessert recipe**, so we mix until combined, not until pale and fluffy!
Make Ahead Dessert Cups: Timing Your Vanilla Custard Cups
One of the best things about making these **vanilla custard cups** is that they are champions of advance preparation! You absolutely must chill them for a long time—a minimum of four hours, but honestly, overnight is where they hit their peak structure. This chilling time lets the sugars settle and the proteins firm up completely. If you’re hosting, making these the day before means your final dessert prep for the night is done!
When it’s time to serve those **Individual dessert cups**, gently pull them out of the fridge. A sprinkle of that fresh nutmeg right before serving really wakes up the vanilla. If you’re planning a dinner party soon, this concept of making desserts ahead is something I talk about a lot over on my post about making entertaining easy. It takes all the last-minute fuss away!
Variations on Classic French Vanilla Custard
While this basic recipe delivers a flawless **Classic French vanilla custard**, sometimes you just crave a little twist, right? It’s so easy to adjust things without throwing off that perfect texture we worked so hard to achieve. If you want to pump up the flavor, you can add finely grated lemon zest right into the milk while warming it; the citrus cuts through the richness beautifully.
For a slightly earthier spice note, skip the nutmeg and instead mix a tiny pinch of cinnamon or even cardamom right in with your sugar and eggs. My favorite personal variation for grown-ups is replacing just a tablespoon of the milk with a nice splash of dark rum or bourbon when you warm up the dairy. Whatever you choose, just remember that final sprinkle of nutmeg on top of your **custard cups with nutmeg topping** really adds that comforting, aromatic finish.
Storage and Reheating Instructions for Your Vanilla Custard Cups
Once baked and thoroughly chilled, these custards are happily stored in the refrigerator. Make sure they are covered tightly—plastic wrap pressed right onto the surface helps prevent a skin from forming. They’ll stay perfectly delicious for about three days. Trust me on this one, though: do not reheat them! Baking custard makes the proteins set firmly. If you try to warm them up, you risk getting that slightly watery, rubbery texture. Serve them straight from the fridge, or let them sit out on the counter for about 20 minutes to take the deep chill off.
Frequently Asked Questions About Vanilla Custard Cups
Can I make a stovetop version of these vanilla custard cups?
You totally can! If you’re looking for something quicker that resembles a pudding more than a baked dessert, absolutely give the stovetop method a try. I wrote down the whole process in the recipe notes, but essentially, you follow the same tempering steps, but instead of baking, you cook the mixture over low heat until it coats the back of a spoon (about 175°F). It yields that lovely texture perfect for my easy stovetop custard pudding guide. It’s a great option if you don’t want to mess with the water bath!
Why did my baked custard cups curdle or become rubbery?
That almost always comes down to heat management. If your oven was too hot or you skipped the water bath, the eggs cooked too fast, and they seized up, making them rubbery. The water bath is essential because it creates a steamy, humid environment that keeps the temperature around the custards gentle and even. This is the number one rule for those **Perfect smooth custard texture tips**.
Can I make these ahead like an old fashioned vanilla pudding cups?
Yes, they freeze beautifully for short-term storage if they are completely chilled first! But they are much better fresh. If you’re looking for a true ‘no-bake’ option, that stovetop recipe I mentioned earlier is your best bet for that **Old fashioned vanilla pudding cups** style dessert, as it sets up in the fridge without needing heat at all.
Nutritional Estimates for This Creamy Baked Dessert
As always on Pure Plate Path, these numbers are just estimates based on the specific amounts listed in the recipe. Since we are using whole milk and real sugar, there are some natural fats and carbs here, but the portion control of the cups keeps things reasonable!
- Serving Size: 1 cup
- Calories: 210
- Sugar: 18g
- Sodium: 85mg
- Fat: 10g
- Saturated Fat: 6g
- Carbohydrates: 19g
- Protein: 11g
Make Ahead Dessert Cups: Timing Your Vanilla Custard Cups
One of the best things about making these **vanilla custard cups** is that they are champions of advance preparation! You absolutely must chill them for a long time—a minimum of four hours, but honestly, overnight is where they hit their peak structure. This chilling time lets the sugars settle and the proteins firm up completely. If you’re hosting, making these the day before means your final dessert prep for the night is done!
When it’s time to serve those **Individual dessert cups**, gently pull them out of the fridge. A sprinkle of that fresh nutmeg right before serving really wakes up the vanilla. If you’re planning a dinner party soon, this concept of making desserts ahead is something I talk about a lot over on my post about making entertaining easy. It takes all the last-minute fuss away!
Variations on Classic French Vanilla Custard
While this basic recipe delivers a flawless Classic French vanilla custard, sometimes you just crave a little twist, right? It’s so easy to adjust things without throwing off that perfect texture we worked so hard to achieve. If you want to pump up the flavor, you can add finely grated lemon zest right into the milk while warming it; the citrus cuts through the richness beautifully.
For a slightly earthier spice note, skip the nutmeg and instead mix a tiny pinch of cinnamon or even cardamom right in with your sugar and eggs. My favorite personal variation for grown-ups is replacing just a tablespoon of the milk with a nice splash of dark rum or bourbon when you warm up the dairy. Whatever you choose, just remember that final sprinkle of nutmeg on top of your **custard cups with nutmeg topping** really adds that comforting, aromatic finish.
Storage and Reheating Instructions for Your Vanilla Custard Cups
Once these beauties are chilled and set, covering them tightly is super important to keep them fresh. You can easily keep these in the fridge for up to three days, which makes them such a wonderful make-ahead option! Now, here’s my big rule: please don’t try to reheat baked custard.
When baked custard gets hot again, those delicate egg proteins just seize up, and you lose that smooth, silky texture instantly. Skip the microwave entirely! Serve your **vanilla custard cups** cold right from the fridge, or you can let them hang out on the counter for about 20 minutes if you want to take that hard chill off.
Frequently Asked Questions About Vanilla Custard Cups
I know some of you might have questions, especially if you’re trying this for the first time or wondering if you can skip some steps. That’s totally fine! We all start somewhere, and my goal is to make sure your first batch of **vanilla custard cups** turns out amazing, not frustrating.
Can I make a stovetop version of these vanilla custard cups?
Yes, you absolutely can, though I think the oven version gives the best, silkiest texture. If you’re in a real rush or just prefer a smoother, more pudding-like consistency that sets up cold, the stovetop method is fantastic. I actually laid out exactly how to do it in the recipe notes! It’s basically the same tempering process, but instead of baking, you just cook it on low heat until it coats the back of a spoon. This gives you a wonderful result for those who prefer an easy stovetop custard pudding texture, rather than a firm baked product. It’s a great alternative if you’re curious about a **no bake vanilla custard guide**!
Why did my baked custard cups curdle or become rubbery?
Ugh, that’s the worst! Usually, that happens for one of two reasons, and it’s almost always related to temperature control. First, if you didn’t use the water bath, the direct, harsh heat caused the eggs to overcook quickly, turning them grainy or rubbery. Second, if you opened the oven door a bunch or the water bath boiled dry, you introduced too much heat too fast. Remember those **Perfect smooth custard texture tips**? The water bath is key because it acts as a buffer, gently steaming the custard into perfect submission. Don’t stress—just use lots of water next time!
Can I substitute the whole milk?
I highly recommend sticking to whole milk for that rich, comforting flavor you expect from **old fashioned vanilla pudding cups**, but I know sometimes we have to improvise. If you *must* substitute, using half-and-half will get you close to the right richness. Skim milk just won’t give you the creamy body we are looking for in this baked recipe. If you use something lighter, you might notice the custard seems a little less firm after chilling.
Nutritional Estimates for This Creamy Baked Dessert
Because we believe in knowing what we’re putting into our bodies—even when it’s a comforting treat like these lovely **creamy baked dessert** cups—I’ve pulled together the general nutritional breakdown for one serving. Now, I always tell people to take these numbers with a grain of salt, because depending on the exact size of your eggs or what brand of milk you used, your totals might shift a tiny bit.
These estimates are based on the recipe as written, using the full amounts divided into four servings. It’s good information to have, especially when you’re learning to incorporate simple, homemade treats into a balanced routine!
- Serving Size: 1 cup
- Calories: 210
- Sugar: 18g
- Sodium: 85mg
- Fat: 10g
- Saturated Fat: 6g
- Carbohydrates: 19g
- Protein: 11g
Simple Homemade Vanilla Custard Cups

Make creamy, individual servings of classic baked vanilla custard in ramekins using simple ingredients. This recipe focuses on achieving a smooth texture for a comforting dessert.
- Prep Time: 15 min
- Cook Time: 45 min
- Total Time: 60 min
- Yield: 4 servings 1x
- Category: Dessert
- Method: Baking
- Cuisine: American
- Diet: Vegetarian
Ingredients
- 2 cups whole milk
- 1/2 cup granulated sugar
- 3 large eggs
- 1 teaspoon pure vanilla extract
- Pinch of salt
- Freshly grated nutmeg for topping (optional)
Instructions
- Preheat your oven to 325°F (160°C). Bring a kettle of water to a boil for the water bath.
- In a medium saucepan, gently heat the whole milk over medium heat until small bubbles form around the edges. Do not let it boil. Remove from heat.
- In a separate bowl, whisk together the eggs, sugar, vanilla extract, and salt until well combined and slightly frothy.
- Slowly temper the eggs by pouring about one cup of the warm milk mixture into the egg mixture while whisking constantly. This prevents the eggs from scrambling.
- Pour the tempered egg mixture back into the saucepan with the remaining warm milk. Whisk gently until everything is fully incorporated.
- Strain the custard mixture through a fine-mesh sieve into a large measuring cup or bowl to remove any chalazae or unmixed egg bits, which helps create a smooth texture.
- Place four to six 6-ounce ramekins into a deep baking dish. Divide the custard mixture evenly among the ramekins.
- Carefully pour the boiling water into the baking dish until the water reaches halfway up the sides of the ramekins. This water bath is key for even cooking.
- Bake for 35 to 45 minutes, or until the edges are set but the center still has a slight jiggle when gently nudged.
- Carefully remove the ramekins from the water bath using tongs. Let them cool on a wire rack to room temperature.
- Cover the cooled custards and chill in the refrigerator for at least 4 hours, or until completely cold and firm.
- Before serving, sprinkle the tops with freshly grated nutmeg, if desired.
Notes
- For the creamiest baked custard texture, avoid over-whisking the eggs, as this incorporates too much air, leading to bubbles on the surface.
- If you prefer a stovetop version, heat the milk, whisk eggs and sugar, temper, then cook over low heat, stirring constantly until the mixture coats the back of a spoon (about 175°F or 80°C). Do not boil. Chill thoroughly before serving.
- These individual dessert cups are excellent for make ahead dessert plans for small groups.
Nutrition
- Serving Size: 1 cup
- Calories: 210
- Sugar: 18
- Sodium: 85
- Fat: 10
- Saturated Fat: 6
- Unsaturated Fat: 4
- Trans Fat: 0
- Carbohydrates: 19
- Fiber: 0
- Protein: 11
- Cholesterol: 150