

Oh, my friends, let’s talk about those moments when you absolutely crave something decadent but your schedule just screams ‘No Time!’ I get it. Life is busy, even here at Pure Plate Path, and that’s exactly where Sarah Miller’s philosophy shines: wellness includes enjoying a treat, and it doesn’t have to be complicated. That’s why, today, we are diving headfirst into the simplest, most gorgeous indulgence imaginable: the red velvet cake balls! Forget the tiered cakes and complicated layering. These are rich, bite-sized, and, best of all, they’re practically no-bake assembly. We are mixing up a dream batter using that fantastic cream cheese frosting we all love to deliver the ultimate flavor punch in one perfect sphere.
- Why You Will Love Making These Red Velvet Cake Balls
- Essential Ingredients for Perfect Red Velvet Cake Balls
- Step-by-Step Instructions for No Bake Red Velvet Cake Balls
- Tips for Success When Making Red Velvet Cake Balls
- Making and Storing Your Red Velvet Cake Balls Ahead of Time
- Creative Variations for Red Velvet Cake Balls
- Serving Suggestions for Your Bite Sized Treats
- Frequently Asked Questions About Red Velvet Cake Balls
- Nutrition Estimate for Red Velvet Cake Balls
- Nutrition Estimate for Red Velvet Cake Balls
Why You Will Love Making These Red Velvet Cake Balls
I’ve made a lot of treats—some took days! But these little marvels? They are pure joy with minimal effort. If you’re looking for that classic deep red velvet flavor wrapped up in a gorgeous, easy package, this is it. You need these in your life immediately, especially if you’re planning gatherings or just need a sweet fix after a chaotic Tuesday. Honestly, the best part is how quickly they come together! They just make sense for busy lives.
- They are truly No Bake Cake Balls; we just combine and roll after a quick bake of the cake base.
- We use a clever Cake Mix Hack which guarantees that perfectly moist, fudgy texture every single time.
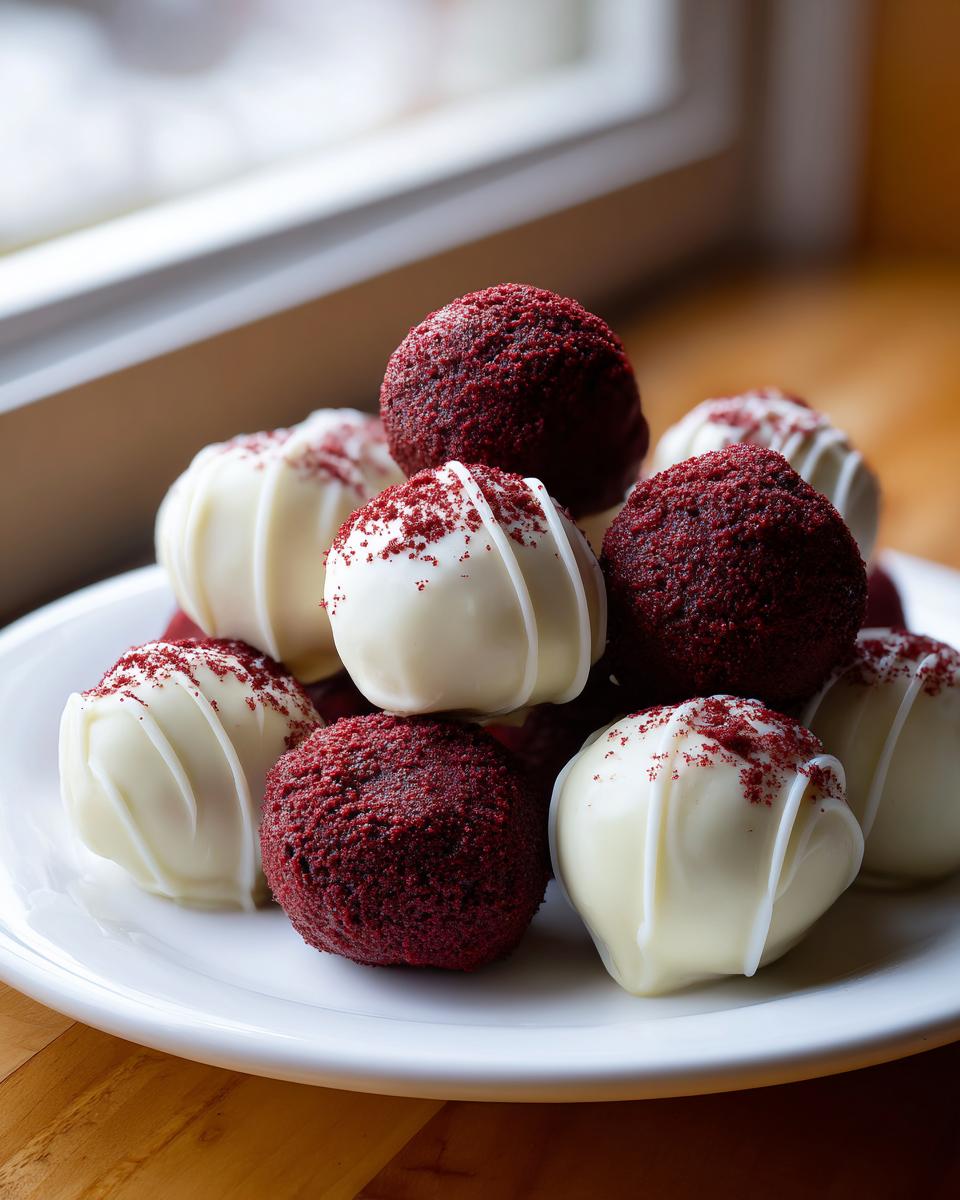
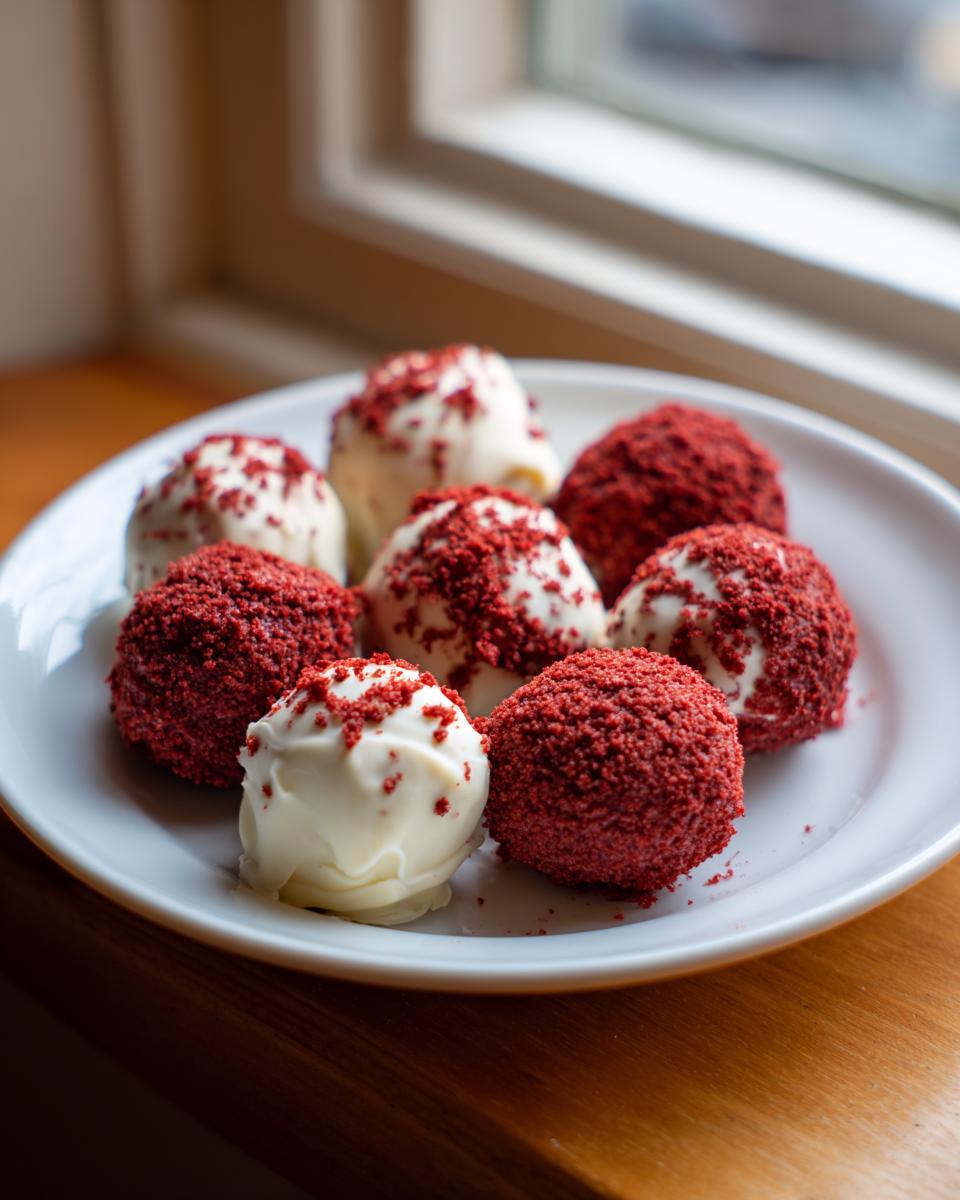
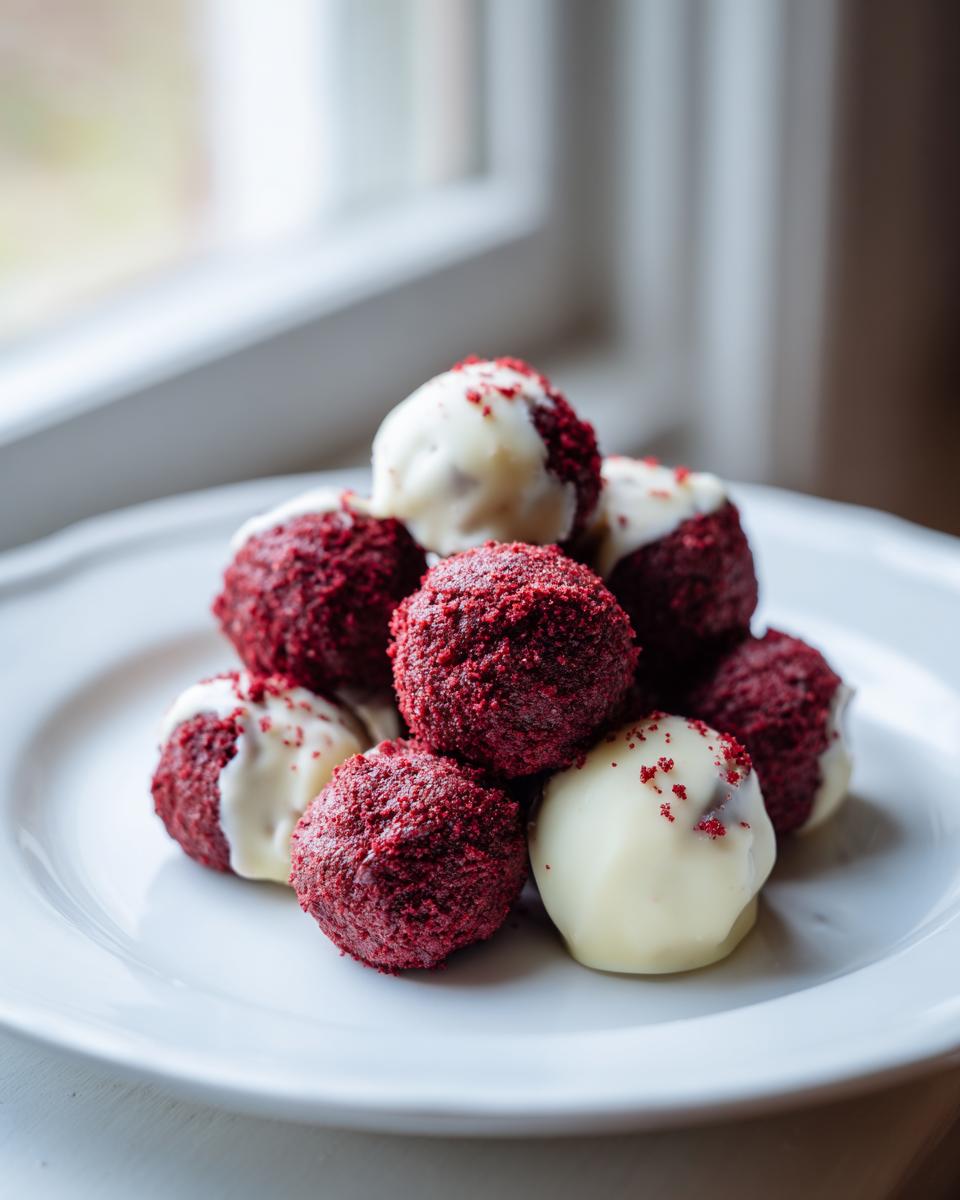
- They look incredibly elegant when dipped in white chocolate, making them superb for gifting or as Party Desserts.
- The combination of that iconic red velvet flavor with the tangy cream cheese frosting is just next-level indulgence!
If you enjoy my ultra-simple Cherry Pie Bars, you’ll find this recipe hits the same sweet spot of wow-factor built on simplicity.
Essential Ingredients for Perfect Red Velvet Cake Balls
Okay, so since these are assembled rather than built from scratch, the ingredients are super straightforward, but choosing the *right* ones makes all the difference between a good treat and an amazing one. We’re relying on a fantastic shortcut here, but I want you to know that for meltable coatings, quality matters!
Here is what you need to grab for your red velvet cake balls:
- One box (about 15.25 oz) of your favorite red velvet cake mix. I usually rely on Betty Crocker—it just gives that familiar texture that works so well here.
- One whole container (16 oz) of cream cheese frosting. You can totally make your own, but for speed, the tub frosting is what makes this a quick win!
- About 12 oz of white chocolate melting wafers or good quality chips. This is key for a smooth finish!
- A tiny bit of vegetable shortening (optional, but trust me on this one).
- Red sprinkles or sanding sugar if you want that festive pop!
I’ve learned over the years that the brand of cake mix you choose really sets the final texture, especially since we aren’t adding any extra eggs or oil beyond what the box calls for. Also, use good white chocolate wafers, not just cheap baking chips. Those wafers melt so much cleaner, giving you those beautiful, smooth chocolate covered desserts.
Ingredient Notes and Substitutions for Red Velvet Cake Balls
Let’s talk about coating first, because dealing with seized or lumpy chocolate is the fastest way to ruin your vibe! That tiny bit of vegetable shortening? It’s liquid gold for dipping. It lowers the viscosity of the melted white chocolate just enough so that when you dip your cold balls in, you get a thin, even shell instead of a thick, cracked blanket.
Now, what if you can’t find that specific red velvet mix? Don’t panic! You can absolutely use a standard box of yellow or even plain white cake mix. Just add about 2 to 3 tablespoons of good quality red food coloring—gel paste works best—to the wet ingredients called for on that box. Mix it up until you get that gorgeous, deep red color before baking. The flavor will be slightly less acidic, but honestly, once it hits that cream cheese frosting in the middle, no one will ever know the difference!
Step-by-Step Instructions for No Bake Red Velvet Cake Balls
Now for the fun part! Because we start with a baked cake, this technically moves into the ‘assembly’ category, which is why it’s such a lifesaver when you need quick dessert ideas. My biggest rule here? Patience during the cooling phase. If you try to crumble a warm cake, you’ll just get sad, sticky mush instead of lovely crumbs! This is where we build that fudgy interior everyone raves about.
Baking and Crumb Preparation for Red Velvet Cake Balls
First, we need cake! Prepare that red velvet mix exactly as the box says—use the oil, eggs, and water it calls for. Don’t worry about the frosting that sometimes comes with the mix; we are tossing that and using our own tub of cream cheese frosting later. Bake it up in a 9×13 pan so it’s thin enough to bake quickly and cool evenly.
Once it’s baked, you have to let it cool completely. I mean bone cold! If you are using leftover cake, that’s wonderful—just make sure it isn’t rock hard from the fridge, or your dough will be too dry later. Once cool, just tear the cake into pieces and crumble it right into a large bowl. You want fine crumbs—get rid of any huge chunks or especially dark, crusty edges you might have.
Mixing the Dough and Rolling the Red Velvet Cake Balls
This is where the magic happens! Dump that entire container of store-bought cream cheese frosting right over your cake crumbs. Now, use a strong spoon or just your clean hands (my favorite way!) and start mixing it all together. You need to combine it thoroughly until it stops looking like crumbs in frosting and starts looking like actual, unified dough. It should be thick enough that you can roll it smoothly.
If your dough feels way too wet—which can happen if your frosting was a little looser—just pop the whole bowl into the fridge for about 15 minutes to firm up. Too dry? Add just another tablespoon of frosting until it holds together. Once it’s ready, roll your bite-sized treats into uniform balls, about one inch wide. Pop these rolled beauties onto a sheet lined with parchment paper and chill them in the fridge for at least 30 minutes. This chilling step is non-negotiable for the next step!

Coating Your Red Velvet Cake Balls in White Chocolate
While those little guys are getting cold, it’s time to melt our chocolate coating. Follow the package instructions for your white chocolate wafers, but remember that optional teaspoon of vegetable shortening? Stir that in once melted. This helps create flawless chocolate covered desserts.
Pull out those chilled balls. Working quickly, dip one ball at a time using a dipping tool or two forks. Submerge it completely, then lift it out. Here’s the trick: gently tap the fork against the side of your bowl to let all that extra chocolate drip off. We want a thin shell, not a blob! Place them back on the parchment paper. If you’re decorating, do it right away before the chocolate sets up. If you do everything fast, they’ll set up perfectly at room temperature, but popping them back in the fridge for 10 minutes solidifies the coating in a snap!
Tips for Success When Making Red Velvet Cake Balls
Making red velvet cake balls is supposed to be easy, but sometimes the small issues can trip you up. Trust me, I’ve been there—staring at a bowl of sticky frosting and crumbs that refuses to cooperate! If you follow the chilling steps religiously, you’re 90% of the way there. Remember, these are supposed to be No Bake Cake Balls assembled from a baked component, so temperature control is everything.
If your dough is sticking to your hands like overly aggressive contact paper, that means it’s too warm or maybe the frosting brand you used was extra soft. Don’t add more cake mix! Just scoop the mixture onto a parchment-lined tray and chill it for an extra 20 minutes. That firmness is crucial before rolling.
Now, the chocolate dipping—that’s where things go wrong for beginners. If your white chocolate coating is seizing up and getting thick and grainy when you dip, it usually means one tiny drop of water got in there. Whoops! That happens to all of us. My trick is to stir in about half a teaspoon of coconut oil or vegetable shortening when it seizes. It won’t be as perfect, but it will loosen up enough to coat those cold little balls beautifully, preventing cracking later. A properly chilled ball dipped into warm, smooth chocolate? That’s how you get those gorgeous shells that look like professional indulgent sweets!
Making and Storing Your Red Velvet Cake Balls Ahead of Time
Isn’t it just the WORST when you’re hosting and realize you have no time the day of the event? That’s why I plan ahead whenever I make these yummy red velvet cake balls. The fantastic news is that this recipe is practically begging to be made a day or two early. Since we rely on that boxed cake mix and rich frosting, they actually taste *better* the next day once all those flavors have really settled in together—just like magic!
If you’re planning for a big crowd or prepping for the holidays—think Easy Holiday Baking here—you can absolutely make them ahead. The main thing you need to remember, because they contain real cream cheese frosting, is temperature control. You can’t just leave them on the counter for days!
For short-term storage, just pop them into an airtight container. Don’t stack them too high, or you risk smooshing those pretty chocolate coatings. If you need to stack them, put a layer of wax paper between the layers. Store them in the refrigerator, and they should stay perfectly fresh for up to a full week. That’s fantastic for getting things done early!
What about freezing? Yes, you can freeze these beauties! If you wrap them really well—I use a freezer bag after they are fully set—they will hold up beautifully in the freezer for about two to three months. When you want to serve them, just pull out what you need and let them thaw slowly overnight in the fridge. They are the ultimate make-ahead party desserts because you can be totally relaxed on the actual party day!
Creative Variations for Red Velvet Cake Balls
We love this recipe because it’s already so simple, but when you have a little extra time or just want to mix things up for a special crowd, these are amazing candidates for playing around! If you’re tired of the classic look, try turning these into something a little different. Think elegant Red Velvet Truffles for a more sophisticated platter.
The easiest tweak? Changing the shell! While the white chocolate coating is beautiful against that vibrant red, melting down some dark chocolate or even milk chocolate creates a deeper, richer contrast. You get that lovely bittersweet snap against the sweet interior. Make sure your chocolate is tempered correctly or use those melting wafers—we don’t want any bloom or streaky messes!
For the grown-ups at your next gathering—maybe Valentine’s Day or a fun holiday party—you can spike the center mix slightly. When you are combining the cake crumbs and the cream cheese frosting, stir in just a teaspoon or two of bourbon or dark rum. It adds this amazing depth that complements the cocoa notes perfectly, turning them into little boozy bites. Just be sure to chill them extra well after adding the liquid!
If you’re looking to step up the creaminess factor even more, consider turning these into Red Velvet Cheesecake Bites. Before you roll them into balls, take a small dab of softened cream cheese, fold it into your cake/frosting mix, and let that mixture chill longer. The extra dairy content makes the middle even softer and tangier, almost like a tiny slice of heaven. These simple swaps let you recycle this basic recipe for months without anyone ever getting bored!
For more decadent Southern-inspired sweets that will knock everyone’s socks off, you absolutely have to check out my Velvety Southern Sweet Potato Pie recipe.
Serving Suggestions for Your Bite Sized Treats
These red velvet cake balls aren’t meant to hide! They are showstoppers, especially when presented well. For Valentine Desserts or your Christmas Treats plate, use deep red, gold, or silver cupcake liners to nestle each ball. It gives them a formal, elegant look, even though they took almost no time!
If you’re putting them out for a party, try lining a tiered platter with fresh greenery or simple chocolate shavings. Since they are so rich and sweet, they pair perfectly with a strong black coffee or a mild almond milk latte. They are the definition of indulgent sweets—small, beautiful, and utterly satisfying, and they make any dessert spread look instantly professional. For an easy serving idea, check out how I bring simplicity to dinner with my Easy Black Bean Soup!
Frequently Asked Questions About Red Velvet Cake Balls
I know you might have a few little questions swirling around before you dive into making these gorgeous spheres of joy. That’s totally normal! When I started exploring red velvet dessert recipes, I had loads of these same questions myself. Here are the ones I hear most often about whipping up these simple treats.
Can I make red velvet cake balls without baking a cake first?
That’s a great question! The method I shared here relies on baking a cake from the mix first because that baked crumb structure is what mixes perfectly with the cream cheese frosting to create that signature dense, fudgy texture for our red velvet cake balls. If you skip baking entirely, you are actually making a different type of truffle, usually using crushed cookies, like Oreos, instead of cake crumbs. If you wanted true no bake cake balls, you could try swapping the baked cake crumbs for finely crushed sandwich cookies! But for this specific recipe, chilling that baked cake until it’s cold is part of the magic.
What is the best way to store red velvet cake balls?
Because we use real cream cheese frosting in the middle—which is what gives them that amazing flavor complexity—they really need to stay cold to stay safe and fresh. I strongly recommend storing your finished, chocolate-coated balls in an airtight container in the refrigerator. They stay absolutely perfect there for about a week! If you’re prepping for something like Easy Holiday Baking way in advance, you can totally freeze them. Just make sure the chocolate shell is fully hardened first, then wrap them tightly. They thaw beautifully overnight in the fridge.
How do I prevent my red velvet cake balls from cracking when dipped?
This is the classic challenge when making any kind of chocolate covered desserts, and it all comes down to temperature contrast, honey! If your cake ball is even slightly room temperature, the cold chocolate coating hits it and contracts way too fast, causing those annoying little cracks to spiderweb across the surface. The hard rule is: your balls need to be rock-solid cold from a good chunk of time in the fridge or even the freezer for about 15 minutes before dipping.
Secondly, make sure your melted coating isn’t too hot! If the chocolate is scorching hot, it melts the surface of the ball just enough that it warps when you pull it out. Keep the coating around 90 to 95 degrees Fahrenheit if you can gauge it, or just make sure it’s completely smooth and slightly runny, not piping hot. A cold center dipped into perfectly warm, flowing chocolate will set up smooth and glossy every single time. If you want more tips on keeping your sweet creations perfect, check out my guide for Moist Bakery Style Strawberry Muffins—the chilling advice is similar!
Nutrition Estimate for Red Velvet Cake Balls
Now, I always try to keep the focus on flavor and fun here, and I don’t want anyone stressing over macros, but because these festive treats are so popular for parties year-round, it’s good to have a rough idea of what you’re snacking on. Remember, these figures are just estimates based on the ingredients listed in the recipe—your specific brands of cake mix and frosting will change things up!
- Serving Size: 1 ball
- Calories: About 220
- Sugar: Around 20g
- Fat: Roughly 13g
- Protein: About 2g
Again, this is for one perfect little bite! They are definitely an occasional, indulgent sweet, not an everyday granola bar replacement, but wow, are they worth it! Finding balance, even in dessert, is what we’re all about here at Pure Plate Path, as you see in my roundup of healthy desserts.
PrintEasy No-Bake Red Velvet Cake Balls with Cream Cheese Frosting

Create these rich, bite-sized red velvet cake balls using a simple cake mix hack and cream cheese frosting. They are coated in white chocolate for an indulgent, easy party dessert.
- Prep Time: 25 min
- Cook Time: 30 min
- Total Time: 85 min
- Yield: 24-30 servings 1x
- Category: Dessert
- Method: No Bake (Assembly)
- Cuisine: American
- Diet: Vegetarian
Ingredients
- 1 box (15.25 oz) red velvet cake mix
- 1 container (16 oz) cream cheese frosting (store-bought or homemade)
- 12 oz white chocolate melting wafers or chips
- 1 tablespoon vegetable shortening (optional, for smoother coating)
- Red sprinkles or sanding sugar (optional, for decoration)
Instructions
- Prepare the red velvet cake according to the package directions, but use only the ingredients listed on the box (usually eggs, oil, and water). Do not use the frosting listed on the cake mix box.
- Bake the cake in a 9×13 inch pan. Let the cake cool completely on a wire rack.
- Crumble the cooled cake into fine crumbs in a large bowl. Discard any overly browned edges.
- Add the entire container of cream cheese frosting to the cake crumbs. Mix well with a sturdy spoon or clean hands until a thick, uniform dough forms.
- Roll the dough into small, uniform balls, about 1 inch in diameter. Place the balls on a parchment-lined baking sheet.
- Chill the cake balls in the refrigerator for at least 30 minutes. This step helps them hold their shape during dipping.
- Melt the white chocolate wafers according to package directions. If using shortening, stir it into the melted chocolate for a thinner consistency.
- Dip each chilled cake ball into the melted white chocolate, ensuring it is fully coated. You can use a dipping tool or two forks.
- Tap the fork gently on the side of the bowl to remove excess chocolate.
- Place the dipped cake balls back onto the parchment-lined sheet. Immediately sprinkle with red sprinkles, if desired.
- Allow the chocolate coating to set completely at room temperature, or speed up the process by chilling them again for 10-15 minutes.
Notes
- You can use leftover baked red velvet cake instead of baking a fresh one.
- For a richer flavor, use homemade cream cheese frosting.
- Store finished red velvet cake balls in an airtight container in the refrigerator for up to one week.
- These make excellent edible gifts when packaged nicely.
Nutrition
- Serving Size: 1 ball
- Calories: 220
- Sugar: 20g
- Sodium: 150mg
- Fat: 13g
- Saturated Fat: 8g
- Unsaturated Fat: 5g
- Trans Fat: 0.2g
- Carbohydrates: 25g
- Fiber: 0.5g
- Protein: 2g
- Cholesterol: 15mg