
Oh, the sorrow of slicing into a pie only to watch the filling run all over the plate! It happens to the best of us, and honestly, it’s why so many people switch to the convenience of canned stuff. But listen, going back to takeout because of a soggy bottom isn’t the path that aligns with our philosophy here at Pure Plate Path. We are here to help you reclaim those simple joys, and that starts with mastering the cherry pie filling from scratch.
I remember getting so frustrated with runny fillings when I was trying to balance work and wellness back in the day, just like I talked about in my own story. That’s why I worked tirelessly to nail down this stovetop method. This recipe guarantees you get that perfectly thick, beautifully glossy result every single time. Trust me, once you taste this vibrant, sweet-tart homemade cherry pie filling, you won’t even look at the can aisle again. This simple act of stirring cherries on the stove is pure, calming self-care.

- Why This Homemade Cherry Pie Filling Beats Anything From a Can
- Essential Ingredients for Perfect Cherry Pie Filling
- Simple Stovetop Instructions for Thick Cherry Pie Filling
- Making Your Versatile Cherry Filling From Scratch Work for Any Dessert
- Storage and Make Ahead Cherry Filling Tips
- Frequently Asked Questions About Homemade Cherry Pie Filling
- Estimated Nutritional Data for This Cherry Pie Filling
- Share Your Perfect Cherry Pie Filling Creations
Why This Homemade Cherry Pie Filling Beats Anything From a Can
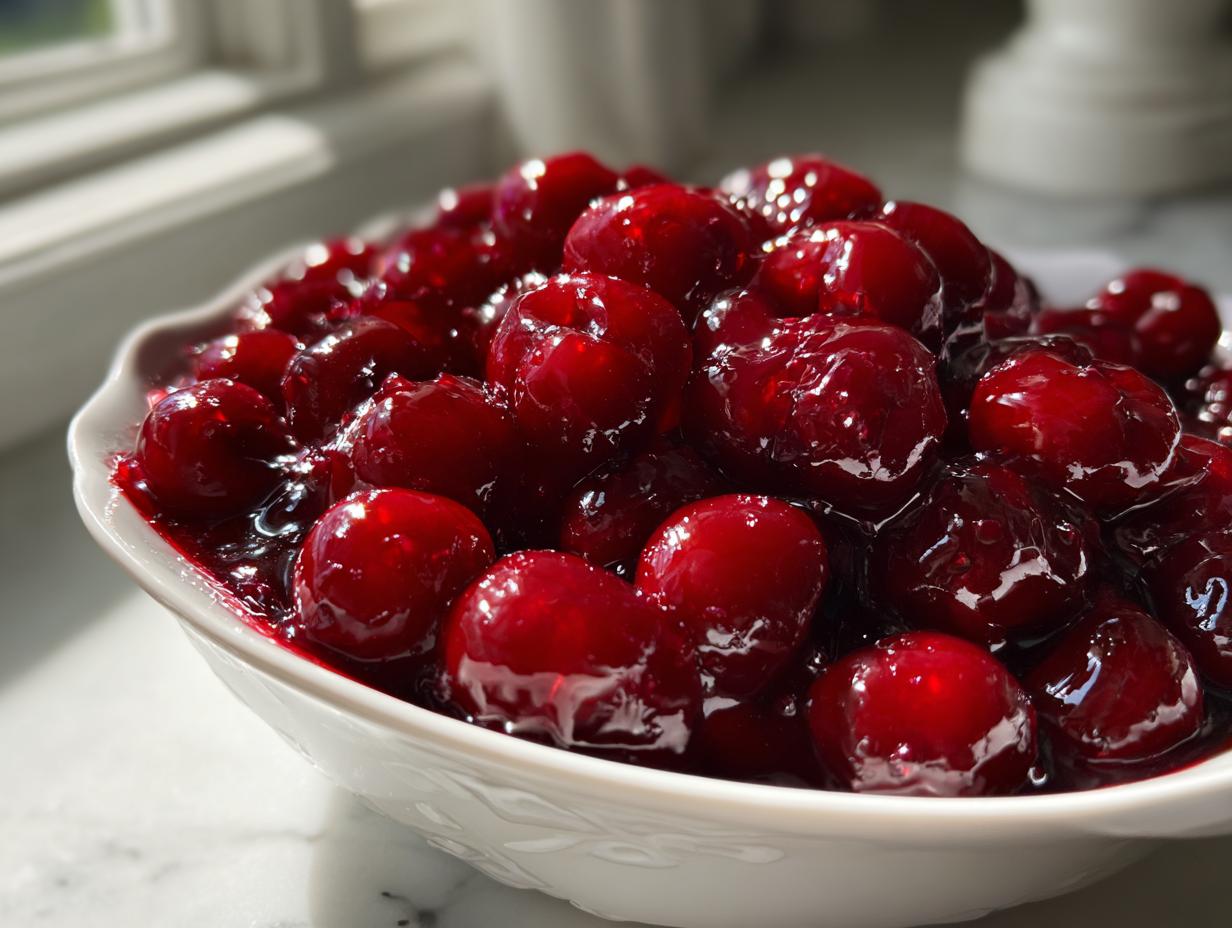
Honestly, once you switch to making your own, you’ll realize those store-bought jars are mostly just sugar syrup with a few sad cherries floating around. We are aiming for flavor here, real flavor! This recipe creates a rich, vibrant flavor profile because we control the sugar, ensuring you get that perfect sweet-tart balance that makes cherries sing. Plus, you skip all those weird stabilizers and artificial colors they pump into commercial stuff. When you see the depth of color in this thickened filling, you’ll be amazed at what real fruit can do.
This is about creating quality that you can feel good about serving your family. If you are looking for that amazing, firm set in your pie, this recipe delivers a genuinely thick cherry pie filling that holds up beautifully. Nothing beats that first view of a sliceable pie!
Achieving Bakery Style Texture with Cornstarch
The secret weapon here is totally simple: cornstarch activated correctly. Forget flour, which can give you a cloudy look. When you gently whisk the cornstarch with the sugar *before* it even hits the heat, you eliminate those pesky lumps. When that mixture hits the boiling liquid, bam! It thickens quickly into that unbelievable, smooth, glossy cherry topping texture. That’s our magic trick for that beautiful bakery style cherry pie filling.

Essential Ingredients for Perfect Cherry Pie Filling
When we talk about making something from scratch that tastes incredible, the ingredients have to be top-notch. We only need a handful of things for this quick fruit filling recipe, but quality matters! You’ll need about four cups of cherries. Whether you use fresh cherries picked right off the tree or those lovely frozen ones hidden in your freezer drawer, they both work perfectly here. Just remember, if you use frozen, don’t bother thawing them first—just toss them in straight from the icebox. Oh, and make sure they are pitted! Nobody wants to bite into a pit.
Ingredient Notes and Substitutions for Your Cherry Pie Filling
This recipe aims for a beautiful sweet tart cherry filling balance, so I set the sugar amount just right. But if your cherries are naturally super sour—maybe you found some lovely sour cherry pie filling recipe style fruit—feel free to bump that sugar up by another quarter cup. If you want that real, authentic punch of flavor reminiscent of the best shops, definitely don’t skip the almond extract—it brings out the cherry flavor amazingly! It’s my little secret touch for that professional, bakery style flavor.
Simple Stovetop Instructions for Thick Cherry Pie Filling
Okay, this is where the magic happens, and it happens fast! I call this my stovetop cherry filling because you aren’t messing around with an oven here; you are making it right on the flame. Just grab a medium saucepan. If you’re using frozen cherries (see, super quick and easy?), they go in straight from their icy bag along with the water. Next, you gently pour in your pre-mixed sugar and cornstarch blend over the top. Give it a little stir so everything gets acquainted, then turn the heat up to medium.
You need to stir patiently, but constantly! Don’t walk away; this only takes a few minutes. You’re looking for that moment when the whole mixture starts bubbling up—that’s the activation starting to happen. Once it gets significantly thicker and has that beautiful sheen, pull it right off the heat. That’s it for the main cook! Now you stir in the lemon and vanilla (and that almond secret weapon if you got it) for brightness. Remember, this gorgeous mixture needs to cool completely before you even think about pouring it into a crust or topping a cheesecake. Patience rewards you later!
The Key Step: Activating the Thickening Agent
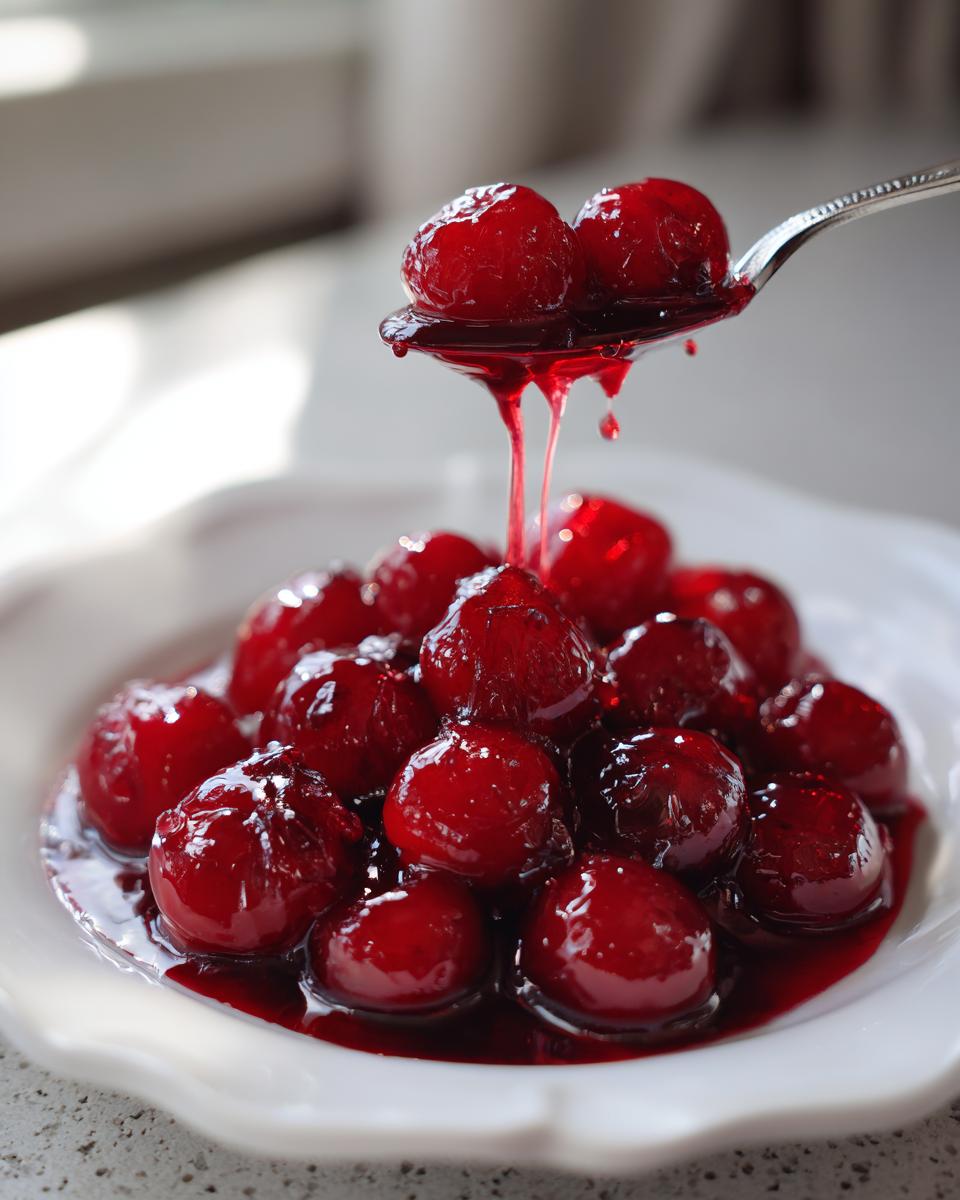
Step four is the moment of truth for getting that no runny pie filling result we all dream about. When that mixture starts boiling, you’ll see it transform from watery juice to something that clearly coats the back of your spoon. Keep stirring without stopping until it’s totally glossy and visibly dragging. That means the cornstarch has done its job perfectly and set up properly. Don’t stop stirring too soon, or it won’t reach its full thickening power!
Cooling: Why You Must Wait to Use Your Cherry Filling From Scratch
I know you’re excited to use your beautiful cherry filling from scratch immediately, especially if you made it just for a dessert tonight. But seriously, hold off! This is important: the filling continues to gel and firm up as it cools down. If you put hot filling into a pie crust, it will weep and make your bottom crust soggy. Let it cool down on the counter until it’s room temperature—it’ll be noticeably firmer, ready for slicing!
Making Your Versatile Cherry Filling From Scratch Work for Any Dessert
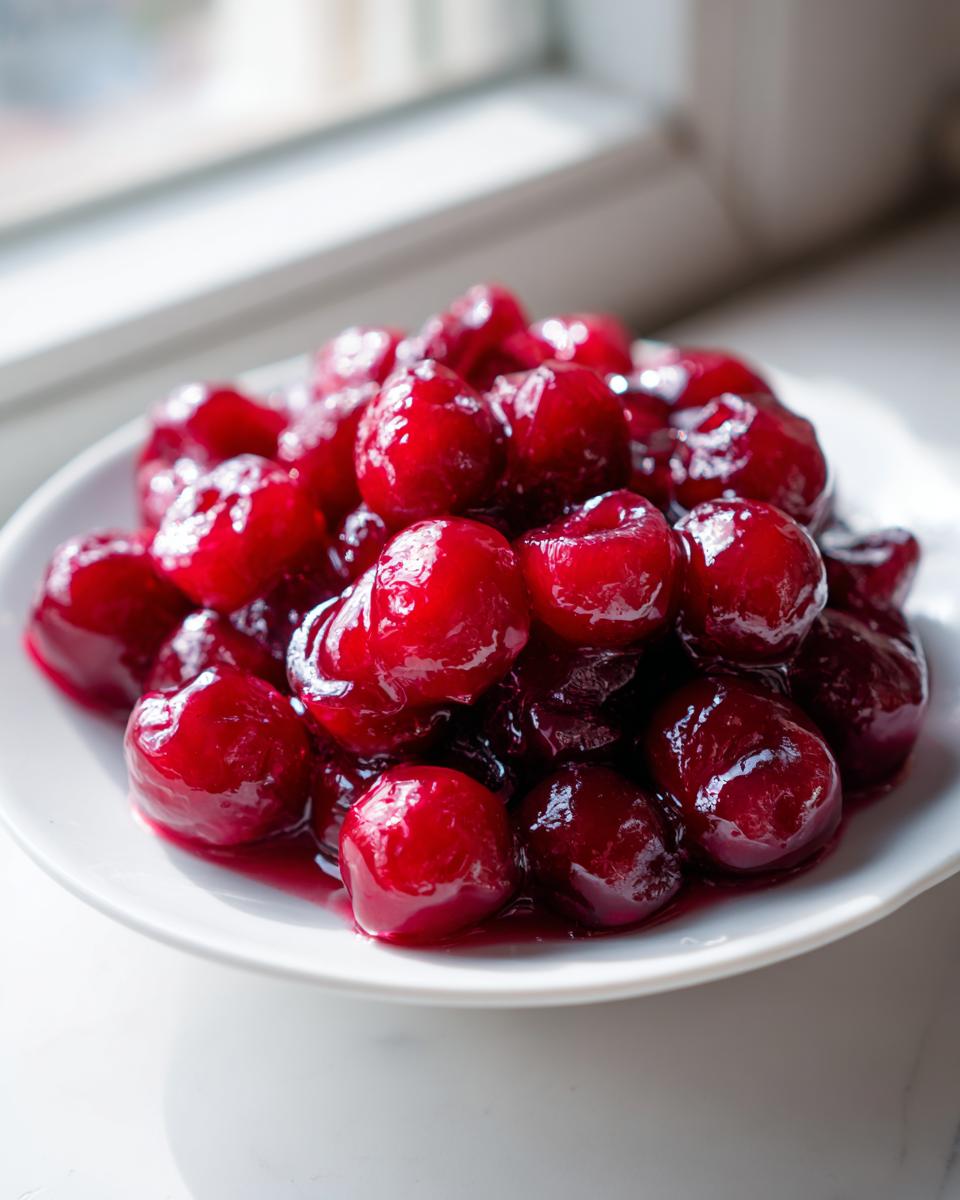
The best part about mastering a great base recipe like this is realizing you’ve just unlocked a whole world of delicious possibilities! We didn’t just make the best cherry pie filling; we made a fantastic, adaptable cherry dessert topping. Sure, it’s mandatory for an incredible double-crust pie, but think bigger!
This thick, fruity mixture is absolutely stunning spooned over a cold slice of cheesecake. It cuts through the richness perfectly—seriously, try it as a homemade pie filling for cheesecake; you won’t regret it. I also love swirling a massive spoonful directly into my vanilla bean ice cream after a long day. It reminds me a little bit of making my rich chocolate sauce recipe, but with that perfect sweet-tart punch!
Keep a fresh batch ready because it’s fantastic warmed up slightly for tarts, stuffed into flaky turnovers, or drizzled over pancakes. It’s so much better than reaching for something artificial!
Storage and Make Ahead Cherry Filling Tips
One of the biggest perks of this whole process is that you don’t have to bake a pie *today* to enjoy this! This is your secret weapon for busy weeks. You can totally make a batch of this make ahead cherry filling on a lazy afternoon and save the hard work for later. Store it simply in an airtight container; it keeps beautifully in the fridge for about a whole week. Not bad for something so fresh, right?
If you want to keep it even longer, this recipe freezes like a dream! Pop it into a freezer-safe container, leaving a little headspace so it can expand without cracking the plastic. It lasts really well for up to three months. Then, when the craving hits, just thaw it in the fridge overnight. It saves so much time!
Frequently Asked Questions About Homemade Cherry Pie Filling
I totally get it—sometimes you just need quick answers when you’re standing there staring into your pantry. Here are a few things folks always ask me when they are whipping up their first batch of this cherry filling. If you still have questions after trying this recipe, please reach out to me at my contact page!
Can I use canned cherries instead of fresh or frozen for this cherry pie filling?
I really, really discourage using that pre-made, syrupy canned filling—that’s what we are trying to escape! However, if you have a can of just fruit packed in water or juice, you can certainly use those cherries. Just drain off most of that liquid first, since we are controlling the liquids right here in the recipe to get that perfect thickness.
What is the best way to get a truly glossy cherry topping?
That gorgeous sheen happens because we are meticulous about mixing the cornstarch with the sugar *before* anything gets wet. When you make sure that dry blend is totally smooth, and you stir constantly while it heats up, you activate that starch perfectly for a smooth, super glossy finish. No grainy or dull texture here!
Can I use a different thickener instead of cornstarch in this recipe?
While cornstarch is my go-to for this specific glossy look, you certainly could try using tapioca starch if you have it on hand. It works similarly, but I find cornstarch gives the absolute best texture when you want that rich, almost clear, non-cloudy result in your final homemade cherry pie filling.
Estimated Nutritional Data for This Cherry Pie Filling
Now, I always want to be totally upfront with you about what goes into your body, which is part of finding that healthy path we talk about. Since this is a homemade filling, these numbers are just my best educated guess based on the ingredients we used—sugar and cherries are the big players here, of course! If you adjust the sugar or use a different sweetener, these values will change, so just keep that in mind.
- Serving Size: 1/2 cup
- Calories: 220
- Sugar: 35g
- Fat: 0g
- Carbohydrates: 55g
- Protein: 0g
This is just a guide because every cherry is different, but it helps us see roughly what we are working with when we use this incredible homemade filling!
Share Your Perfect Cherry Pie Filling Creations
I truly hope you’ve found the secret to ditching that disappointing, runny canned goo! Now that you’ve made this fantastic cherry pie filling, I want to see it shine! Please take a moment to rate this recipe below and leave a comment telling me how you used it—did it work perfectly in your pie, giving you that sliceable result we aimed for? Seeing your success stories is the whole reason we built this community here at Pure Plate Path. You can check out our terms of use before you share! Don’t forget to share a picture!
PrintFoolproof Thick & Juicy Homemade Cherry Pie Filling From Scratch
Stop settling for runny canned goo. Learn the secret to making the best homemade cherry pie filling that is perfectly thick, glossy, and bursting with fresh, sweet-tart flavor. This easy stovetop recipe works with fresh or frozen cherries.
- Prep Time: 10 min
- Cook Time: 15 min
- Total Time: 25 min
- Yield: About 5 cups 1x
- Category: Dessert Component
- Method: Stovetop Cooking
- Cuisine: American
- Diet: Vegetarian
Ingredients
- 4 cups fresh or frozen sweet cherries (pitted)
- 1 cup granulated sugar
- 1/2 cup water
- 1/4 cup cornstarch
- 1 tablespoon fresh lemon juice
- 1 teaspoon vanilla extract
- 1/4 teaspoon almond extract (optional, for bakery style flavor)
Instructions
- If using frozen cherries, do not thaw them first. Place the cherries and water in a medium saucepan.
- In a small bowl, whisk together the sugar and cornstarch until fully combined. This prevents lumps.
- Pour the sugar and cornstarch mixture over the cherries and water in the saucepan. Stir gently to combine.
- Place the saucepan over medium heat. Stir constantly until the mixture begins to bubble and thicken significantly. This process activates the cornstarch and creates the thick texture you want.
- Once the filling is thick and glossy, remove the pan from the heat.
- Stir in the lemon juice, vanilla extract, and almond extract (if using).
- Allow the filling to cool completely on the counter before using it in a pie or dessert. Cooling allows the filling to set to its final, sliceable consistency.
- Store cooled filling in an airtight container in the refrigerator for up to one week, or freeze for up to three months.
Notes
- Using cornstarch is the key to achieving a thick, no-runny-pie filling texture that rivals bakery style results.
- For a sweeter filling, increase the sugar by 1/4 cup. For a more tart flavor, use sour cherries if available.
- This versatile cherry filling works perfectly as a topping for cheesecake, ice cream, or turnovers.
Nutrition
- Serving Size: 1/2 cup
- Calories: 220
- Sugar: 35
- Sodium: 2
- Fat: 0
- Saturated Fat: 0
- Unsaturated Fat: 0
- Trans Fat: 0
- Carbohydrates: 55
- Fiber: 2
- Protein: 0
- Cholesterol: 0