
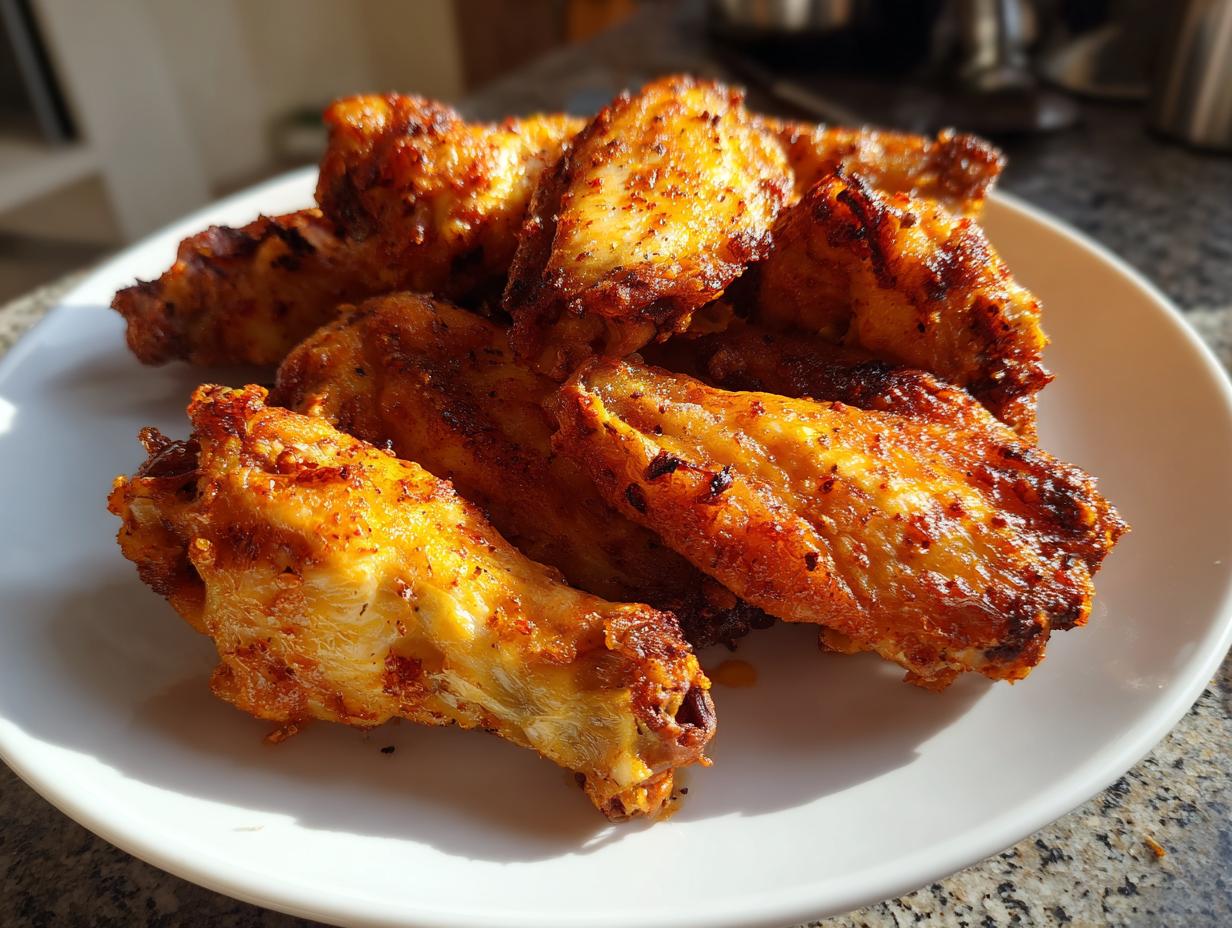
If you’ve ever wrestled with a batch of oven wings only to find the skin rubbery, sad, and utterly lacking in crunch, I totally get it. That’s why I’m so excited to share this game-changer. We are talking about achieving ultimate crispiness for crispy baked chicken wings—the kind of shatteringly good skin you only expect from deep frying, but we’re doing it cleanly and easily in the oven. Believe me, I’ve spent way too many weeknights trying random hacks after my marketing day was done. I needed solutions that were foolproof, fast, and genuinely delivered on the promise of amazing flavor without the grease. This method is the result of that search, giving you that perfect crunch so you never have to settle for soggy again.
Here at Pure Plate Path, we focus on making healthy eating simple and joyful. I, Sarah Miller, developed this technique because eating well shouldn’t mean missing out on satisfying, comforting foods like these wings. This simple setup and seasoning process is my tried-and-true approach for your next batch of quick, easy weeknight dinners and it feels like magic when you pull them out golden brown!
- The Secret to Truly Crispy Baked Chicken Wings: Why This Method Works
- Gathering Ingredients for Your Crispy Baked Chicken Wings
- Step-by-Step Instructions: How to Make Crispy Chicken Wings
- Tips for Perfect Crispy Baked Chicken Wings Every Time
- Flavor Variations for Your No Fry Chicken Wings
- Serving Suggestions for Game Day Chicken Wings
- Storage and Reheating Instructions for Crispy Baked Chicken Wings
- Frequently Asked Questions About Healthy Chicken Wings Recipe
- Nutritional Estimates for This Chicken Wing Appetizers Recipe
The Secret to Truly Crispy Baked Chicken Wings: Why This Method Works
Okay, let’s talk science, but the fun kind! When it comes to oven baked chicken wings that actually crisp up, you need three things working together perfectly: stripping moisture, creating a dry surface, and blasting air flow. If you skip the drying step, you’re effectively steaming your wings, and nobody wants that. But the real star here is the coating. Forget heavy batters; we are using the famous baking powder chicken wings trick.
Baking powder isn’t for leavening here; it actually raises the pH level of the chicken skin. This simple chemical reaction helps break down the proteins on the surface, allowing the skin to dry out faster and render the fat beautifully as it cooks. When you combine that surface preparation with high heat, you are basically mimicking a deep fryer without submerging anything in oil. It takes the guesswork out of getting that perfect, shattering crunch! Always remember to use that seasoning mix we mixed up; it’s what makes these special. You can check out my easy egg bites recipe too, which also relies on getting surface texture right!
Achieving Ultimate Crispiness with High Heat Baked Wings
The cooking setup is just as important as the seasoning. We bake these using high heat baked wings principles—starting hot helps set that crisp surface right away. More importantly, always use a wire rack! That rack lifts the wings away from the pan, letting the heat circulate underneath them. That circulation is what turns them into truly incredible oven fried wings, ensuring every side gets golden brown and crunchy, not just the top.
Gathering Ingredients for Your Crispy Baked Chicken Wings
You’ll be amazed at how few ingredients we actually need for this recipe. The magic isn’t in complexity; it’s in the technique! For two pounds of wings, we’re keeping things simple yet powerful. You need 1 tablespoon of baking powder—and I strongly suggest going aluminum-free if you can find it, as it sometimes gives a cleaner flavor finish. That’s followed by 1 teaspoon each of salt, garlic powder, onion powder, and black pepper, plus half a teaspoon of paprika for color.
We are keeping the base seasoning straightforward so that whatever sauce or rub you choose later really shines through. Don’t forget that optional sauce coating if you plan to toss them immediately after baking!
Ingredient Notes and Substitutions for Juicy Baked Wings
When you buy your chicken, make sure you separate your flats from your drumettes if they came whole. I like baking them together, but they cook slightly differently, so keep an eye on them. Now, listen closely: use baking powder, NOT baking soda. They aren’t interchangeable in this recipe; baking soda is too strong and will leave a metallic taste. We want that pure, dry surface for maximum crispiness. If you are aiming for the absolute best texture for these juicy baked wings, this distinction matters a lot.
If you skip the sauce, you can just use the dry rub ingredients listed above! Super easy.
Step-by-Step Instructions: How to Make Crispy Chicken Wings
Now we get to the fun part—the actual assembly! This method is broken down into very specific phases because timing and temperature are everything when you’re chasing ultimate crispiness wings. Don’t worry if it sounds detailed; it’s just my way of ensuring you have success on your first try. We want that perfect texture, and missing one small step can mean the difference between crunchy perfection and a slightly chewy disappointment. Follow these steps exactly, and you’ll be amazed at the results. If you love easy cooking like this, my baked teriyaki salmon is another must-try!
Preparing the Wings for Maximum Crunch
First things first: get your oven heated up to 425 degrees Fahrenheit! This initial blast of heat is vital. Before that, you must set up your baking sheet with foil (that’s for easy cleanup, genius move!) and top it with a wire cooling rack. Then, the most critical step for any cook trying to achieve crispy baked chicken wings: pat those wings bone dry with paper towels. Seriously, dry them until you think they can’t get any drier. Any surface moisture is your enemy here!
Coating and Baking for Oven Baked Chicken Wings
Once they are dry, toss the wings straight into that bowl with your baking powder and spice blend. You really need to work it in so every little nook and cranny is coated with that magical powder. Arrange them on the rack, making sure none of the pieces are touching. We start baking at 425°F for 20 minutes to immediately start rendering that fat and crisping the skin. After that high-heat blast, drop the oven down to 400°F and bake another 20 to 25 minutes. This two-stage baking process for your oven baked chicken wings ensures the inside cooks through while the outside achieves that gorgeous, golden crunch.
Tips for Perfect Crispy Baked Chicken Wings Every Time
Now that you have the basic steps down, let me share the little things that take this recipe from ‘good’ to ‘I’m never ordering takeout wings again.’ The biggest mistake I see people make when trying to get the best baked wings recipe is overcrowding the rack. When the wings touch, they steam each other. It traps moisture. If you need a double batch, use two separate racks, even if you have to baby-sit them a little more. That air circulation is literally the key to the crisp!
I remember my first attempt; I piled them in because I was rushing to get dinner ready for a football game, and they came out pale on the bottom. Oof. It was disappointing! The next time, I used two racks and the difference was night and day. The skin was golden everywhere. Also, and this is huge: if you are tossing in sauce, you must do it the second they come out of the oven. The heat and residual crispiness grab onto the sauce instantly. If you let them cool even five minutes, the sauce just sits on top instead of baking into that wonderful crust.
And don’t forget, if you make a simple dipping sauce, my creamy garlic sauce is shockingly good alongside these savory wings!
Flavor Variations for Your No Fry Chicken Wings
While the base recipe gives you perfectly seasoned, crunchy wings, half the fun of chicken wings is deciding on the final flavor profile! Since we used a simple salt-and-spice mix underneath the skin, these wings are perfectly prepped for whatever comes next. They are the ultimate blank canvas!
If you want that classic tangy kick, toss them immediately when they come out of the oven into your favorite sauce. That’s perfect for making classic homemade buffalo wings baked right in your oven—no fryer required. I love making a big batch and then dividing them into smaller bowls so half can be sauced and half can stay dry for variety.
For those who prefer a dry rub experience, just skip the wet sauce entirely! You can buy a fantastic commercially available dry rub, or you can easily whip up your own blend mixing smoked paprika, brown sugar, cayenne, and extra garlic powder. If you’re having a party, you absolutely have to try my recipe for buffalo chicken dip alongside these wings. And don’t forget, you can use leftovers to make my easy buffalo chicken wrap the next day!
Serving Suggestions for Game Day Chicken Wings
So, you’ve got your basket of perfectly crispy, golden wings cooling slightly—now what? The presentation is almost as important as the crunch, especially when you’re setting out a spread for your game day chicken wings viewing party. You can’t just serve wings naked, right? That feels unfinished!
You absolutely need cool, crisp vegetables to balance that savory heat. I always slice up plenty of celery sticks and carrots—this is the classic pairing for a reason, and it gives people something refreshing to dip. And speaking of dipping, make sure you have plenty of ranch or blue cheese dressing available. A little cooling dip goes a long way!
If you want something heartier than just veggies, try setting these bad boys next to a batch of my easy baked jalapeno poppers. It makes the whole appetizer spread feel complete and irresistible!
Storage and Reheating Instructions for Crispy Baked Chicken Wings
I always hope there are leftovers because these wings are just as good the next day, *if* you handle the reheating right. Store any plain (un-sauced) wings in an airtight container in the fridge for up to three days. If you already sauced them, try to eat those on day one; reheating sauced wings often softens the crisp, no matter what you do.
Now, for bringing back that amazing crunch: Do not, under any circumstances, use the microwave! That just guarantees rubbery sadness. The best approach is popping them back into a 400-degree oven for about 8 to 10 minutes. If you happen to have an air fryer, that is the MVP here—set it to 380 degrees for 4 or 5 minutes. That little blast of dry heat revives that perfect crust like nobody’s business!
Frequently Asked Questions About Healthy Chicken Wings Recipe
I always get so many questions after people try this recipe for the first time because they just can’t believe how good these chicken wing appetizers turn out without any oil! Since we are covering the science of crispiness, I figured it was best to just answer the most common stumbling blocks right here so you can bake with total confidence every time. If you’re looking for more ways to eat well during the day, be sure to check out my ideas for healthy breakfast ideas!
Can I skip the baking powder when making crispy baked chicken wings?
Oh, please don’t try this! If you skip the baking powder, you skip the crunch. It truly is the primary agent that reacts with the skin to dry it out and render the fat just right. Without it, you’ll end up with the soggy, steamed wings we are trying so hard to avoid.
Are these guilt free chicken wings suitable for meal prep?
They are definitely a much healthier choice than their deep-fried cousins, making them a solid option for guilt free chicken wings! The caveat is texture. If you meal prep, you must reheat them in the oven or an air fryer the next day, otherwise, the crispy coating will soften up in the fridge.
What is the best way to ensure my wings stay juicy?
To keep those amazing interiors juicy while you focus on getting the outside perfect, you have to resist the urge to pile them onto the rack. Don’t overcrowd them! Give them space so the air can move completely around each piece. Also, pull them out as soon as they are done; overcooking equals dry meat every time, even for easy weeknight chicken wings.
Nutritional Estimates for This Chicken Wing Appetizers Recipe
I always work to make sure the food we eat here at Pure Plate Path is balanced, even when it’s game-day fuel! Now, please remember these numbers are just estimates based on the ingredients listed, before adding heavy sauces. For four servings of these amazing chicken wing appetizers, you’re looking at about 250 calories per serving, with 15g of fat and a fantastic 26g of protein. They are naturally very low in carbohydrates. If you need to reach out with any questions about the technique or the recipe itself, please don’t hesitate to connect with me via the contact page!
PrintThe Ultimate Secret to Truly Crispy Baked Chicken Wings: Flawless Crunch Every Time (No Frying Needed)

You can achieve shatteringly crisp, juicy baked chicken wings without deep frying. This recipe uses a simple baking powder trick and high heat to render the fat, giving you the ultimate crunch for your game day or weeknight meal.
- Prep Time: 15 min
- Cook Time: 45 min
- Total Time: 60 min
- Yield: 4 servings 1x
- Category: Appetizers
- Method: Baking
- Cuisine: American
- Diet: Low Fat
Ingredients
- 2 lbs chicken wings (flats and drumettes separated)
- 1 tablespoon baking powder (aluminum-free is best)
- 1 teaspoon salt
- 1 teaspoon garlic powder
- 1 teaspoon onion powder
- 1/2 teaspoon black pepper
- 1/2 teaspoon paprika
- Optional: 1/4 cup of your favorite Buffalo sauce or dry rub seasoning
Instructions
- Preheat your oven to 425 degrees Fahrenheit. Line a large baking sheet with foil for easy cleanup, then place a wire cooling rack on top of the baking sheet. This setup allows air to circulate completely around the wings for maximum crispiness.
- Pat the chicken wings completely dry using paper towels. This step is crucial for crispiness; remove as much surface moisture as possible.
- In a large bowl, combine the baking powder, salt, garlic powder, onion powder, black pepper, and paprika.
- Add the dried chicken wings to the bowl. Toss thoroughly until every piece is evenly coated with the dry mixture. The baking powder reacts with the chicken skin during baking to create a dry, crisp surface.
- Arrange the coated wings in a single layer on the wire rack. Do not let the wings touch each other; space them out for even cooking.
- Bake for 20 minutes at 425 degrees Fahrenheit.
- Flip the wings over. Reduce the oven temperature to 400 degrees Fahrenheit and continue baking for another 20 to 25 minutes, or until the skin is deeply golden brown and very crisp.
- If you desire extra crispiness or char, switch the oven to the broiler setting for the last 1 to 2 minutes, watching constantly to prevent burning.
- Remove the wings from the oven. If you are making sauced wings, immediately toss the hot, crispy wings in your desired sauce (like Buffalo sauce) in a clean bowl. If you prefer dry rub wings, sprinkle with extra seasoning now.
- Serve your healthy chicken wings recipe immediately with celery sticks and blue cheese dressing.
Notes
- The key to success is using baking powder and ensuring the wings are completely dry before seasoning.
- For the juiciest interior, do not overcrowd the baking rack; use two racks if necessary.
- If you plan to toss the wings in sauce, toss them immediately after they come out of the oven so the sauce adheres to the hot, crisp skin.
- This method creates oven fried wings that are much healthier than deep frying.
Nutrition
- Serving Size: 4 wings
- Calories: 250
- Sugar: 0
- Sodium: 350
- Fat: 15
- Saturated Fat: 5
- Unsaturated Fat: 10
- Trans Fat: 0
- Carbohydrates: 1
- Fiber: 0
- Protein: 26
- Cholesterol: 90