
There is truly nothing that compares to the smell of honest-to-goodness bread baking in your oven. That warm, yeasty fragrance instantly calms the entire house, right? That’s why, even when my schedule as a busy marketer got totally out of hand, I fought hard to keep making homemade French bread. I needed that connection back! This recipe is the one I finally perfected—it cracks the code on getting that amazing, bakery-style contrast: a beautifully crisp, crackly exterior hugging a perfectly soft, fluffy interior. And the best part? You can have two golden loaves ready in under two hours. If you’re looking for a simple, no-fuss bread baking success story, you can find loads of inspiration for pairing it with your meals over at my guide to quick and easy weeknight dinners.
- Why This Homemade French Bread Recipe Delivers Bakery Style Bread
- Ingredients for Your Easy French Bread
- How to Prepare Quick French Bread Recipe
- Baking Homemade Bread Tips for Beginners
- Serving Suggestions for Your Fresh French Bread
- Storage and Reheating Instructions for Leftover French Bread
- Frequently Asked Questions About Making French Bread
- Nutritional Estimates for This Fluffy Loaf Recipe
- Share Your Homemade French Bread Success
Why This Homemade French Bread Recipe Delivers Bakery Style Bread
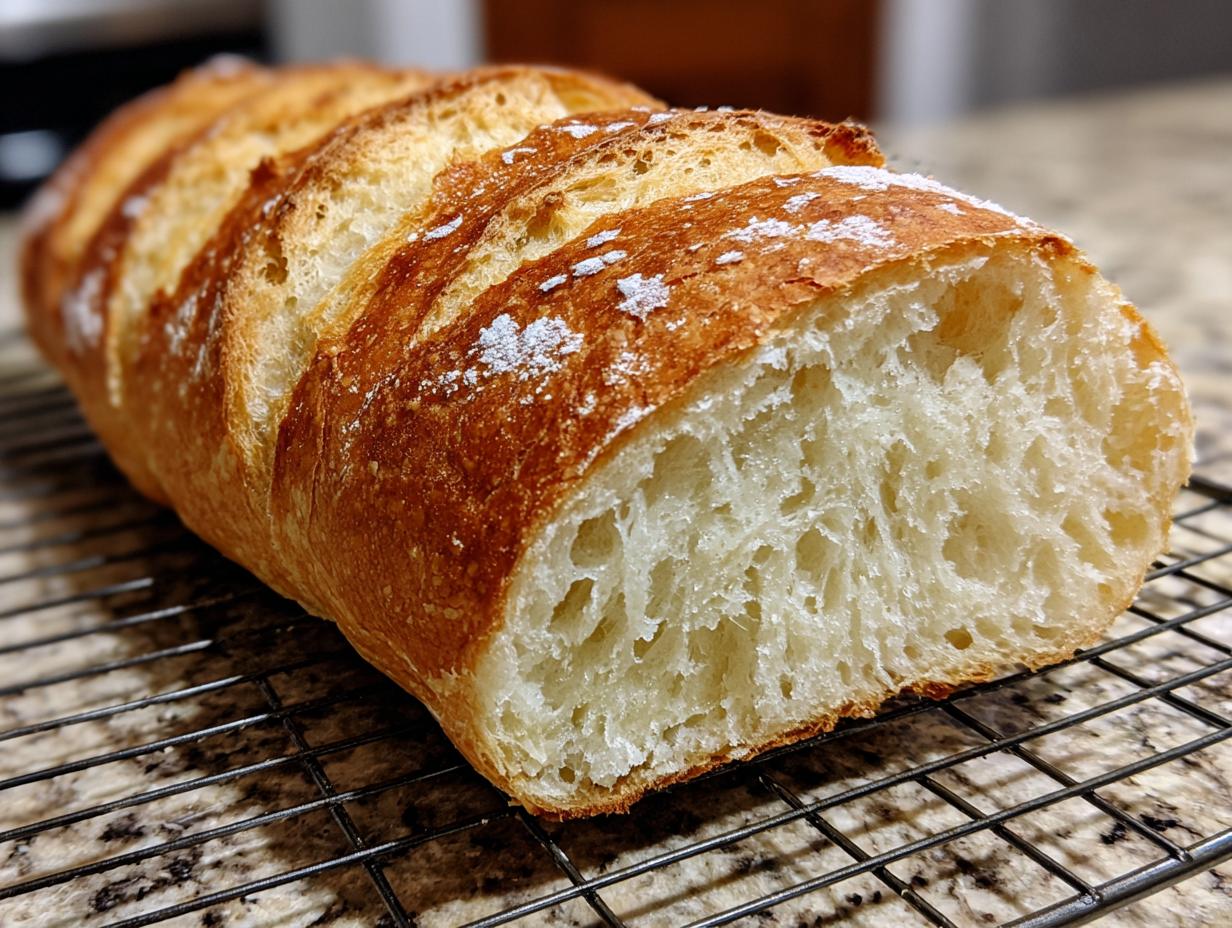
I know you want that perfect Bakery Style Bread, right? That golden, shatteringly crisp crust that gives way to a cloud-like interior. Everyone wants Soft French Bread at Home, but a lot of quick recipes just end up tasting like soft white bread. What makes these loaves different is finding that sweet spot in the timing and the baking environment. Trust me, we nail both here!
We’re not using any complicated scoring techniques or weird flours. The secret is really combining proper kneading for gluten development with maximizing steam during the bake. That steam is what lets the crust expand beautifully without hardening too fast, leading to that signature crackle, while the moderate rise time guarantees a lovely, tender crumb.
Achieving the Perfect Soft French Bread at Home Texture
The texture is all about balance. You need to knead the dough just long enough—until it’s smooth and elastic but not tough. If you under-knead, the loaf collapses, giving you a dense brick instead of a fluffy interior. The two-stage rising process is also non-negotiable; that first long rest builds the flavor and the structure needed for a big oven spring.
For that soft crumb, just be sure not to add too much flour during shaping. The dough should still feel slightly tacky when you roll it out. Then, when you bake it—this is my expert tip—we use steam! Putting a pan of hot water in the oven mimics professional baker conditions, giving you that fantastic, non-rock-hard crust that sings when you slice into it.
Ingredients for Your Easy French Bread
When you look at this list, you’ll see we’re using simple stuff you probably have right now. No weird specialty flours needed to make fantastic French bread! I always measure mine out and place them in little bowls before I even touch the mixer. It just keeps everything so much cleaner, especially when you’re dealing with sticky dough.
- 1 packet active dry yeast (that’s about 2 1/4 teaspoons, I always use active dry!)
- 1 1/2 cups warm water (seriously, aim for 105°F to 115°F—too cold and the yeast snoozes!)
- 1 tablespoon granulated sugar (this feeds the yeast, it won’t make the bread taste sweet!)
- 1 teaspoon salt
- 3 1/2 to 4 cups all-purpose flour (we’ll add this slowly!)
- 1 tablespoon olive oil, plus more for greasing the bowl
- 1 egg white, lightly beaten with 1 teaspoon water (this is for the shine!)
Ingredient Notes and Substitutions for Making French Bread
Let’s talk yeast activation first. That foamy top you see after 5 to 10 minutes? That’s the magic happening! If you don’t see foam, your water was either too hot and killed the yeast, or too cold and it woke up slowly. Toss it and try again; it’s easier than dealing with a flat loaf later.
Regarding flour, I call for 3 1/2 cups to start. If you live somewhere humid, you might need that extra half cup, making it closer to 4 cups total. Always add flour until the dough is just smooth and barely tacky on your hands—not sticky enough to glue itself to the counter. Don’t go over 4 cups, though, or you’ll lose that soft texture. And that little egg white wash? That’s totally optional, but brushing it on just before baking gives your Homemade French Bread Recipe that beautiful, slightly glossy, golden color you see in the bakeries.
How to Prepare Quick French Bread Recipe
Okay, let’s get down to business! I want you to feel confident making this Quick French Bread Recipe, so pay close attention to the timing. Since we’re aiming for high quality in a short time, we can’t rush the yeast. Once you activate your yeast in the warm, sugary water—wait until it’s foamy, like a nice cappuccino head. That’s your green light!
Next, we mix in the rest of what I call the ‘wet’ stuff, and then start adding that flour. I use a big wooden spoon because I love feeling the dough come together. Don’t dump all the flour in at once; we start with 3 1/2 cups.
Step-by-Step Guide to Simple Yeast Bread Dough
Once it’s too tough for the spoon, turn it out onto a lightly floured surface—and get ready to work! Kneading is where you build the structure that keeps the inside soft but strong. You need to push, fold, and turn for a solid 5 to 7 minutes. My rule of thumb for beginners is this: when you poke the dough, it should slowly, gently spring back to shape. If it stays indented like soft clay, you need a few more minutes of kneading. If it’s sticking everywhere, add flour a tablespoon at a time until it’s smooth!
After that, we cover it and let it chill out in a warm spot for about an hour (Step 4). Be patient here! This long rise is essential. If you’re looking for more quick wins in the kitchen that save you time without sacrificing flavor, check out my easy egg bites recipe!
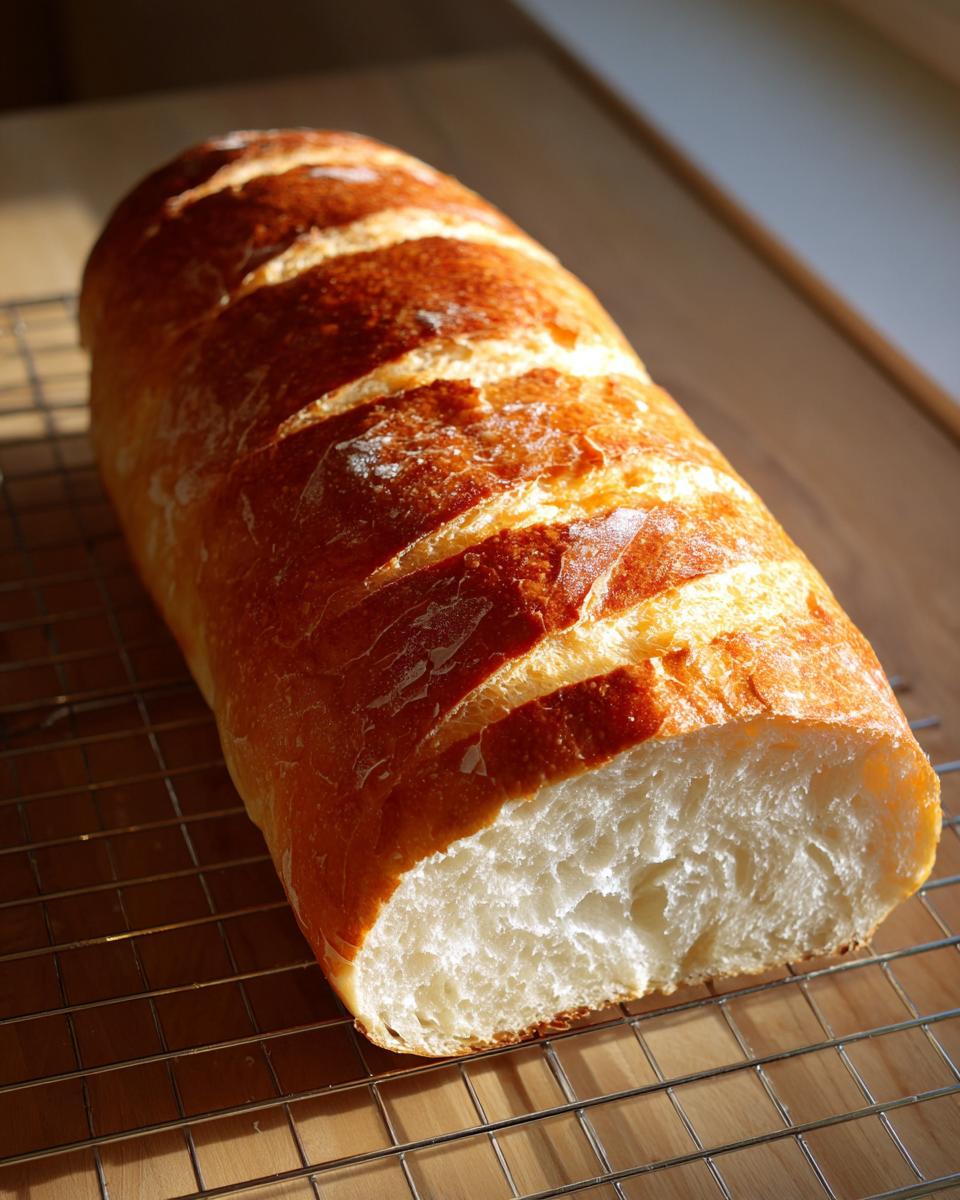
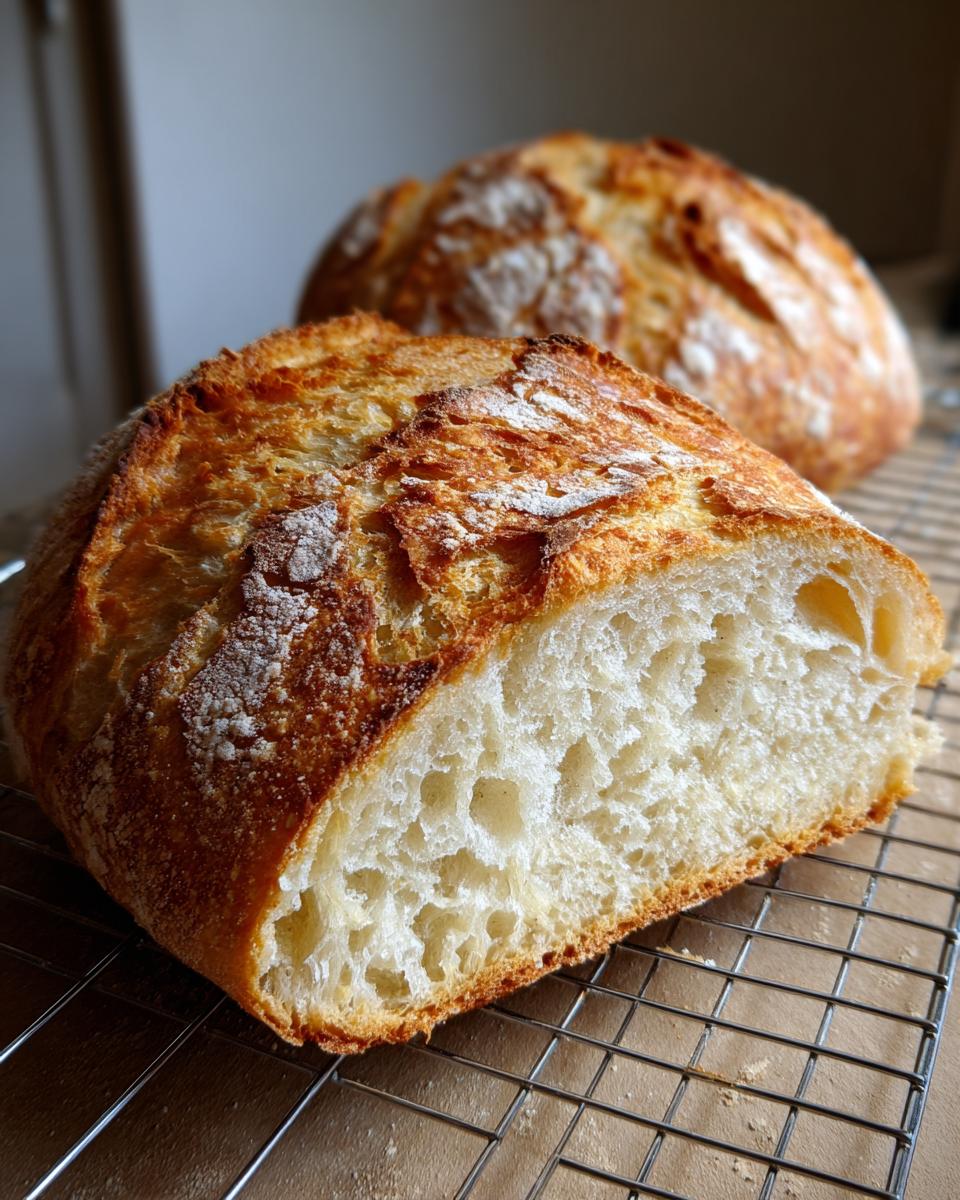
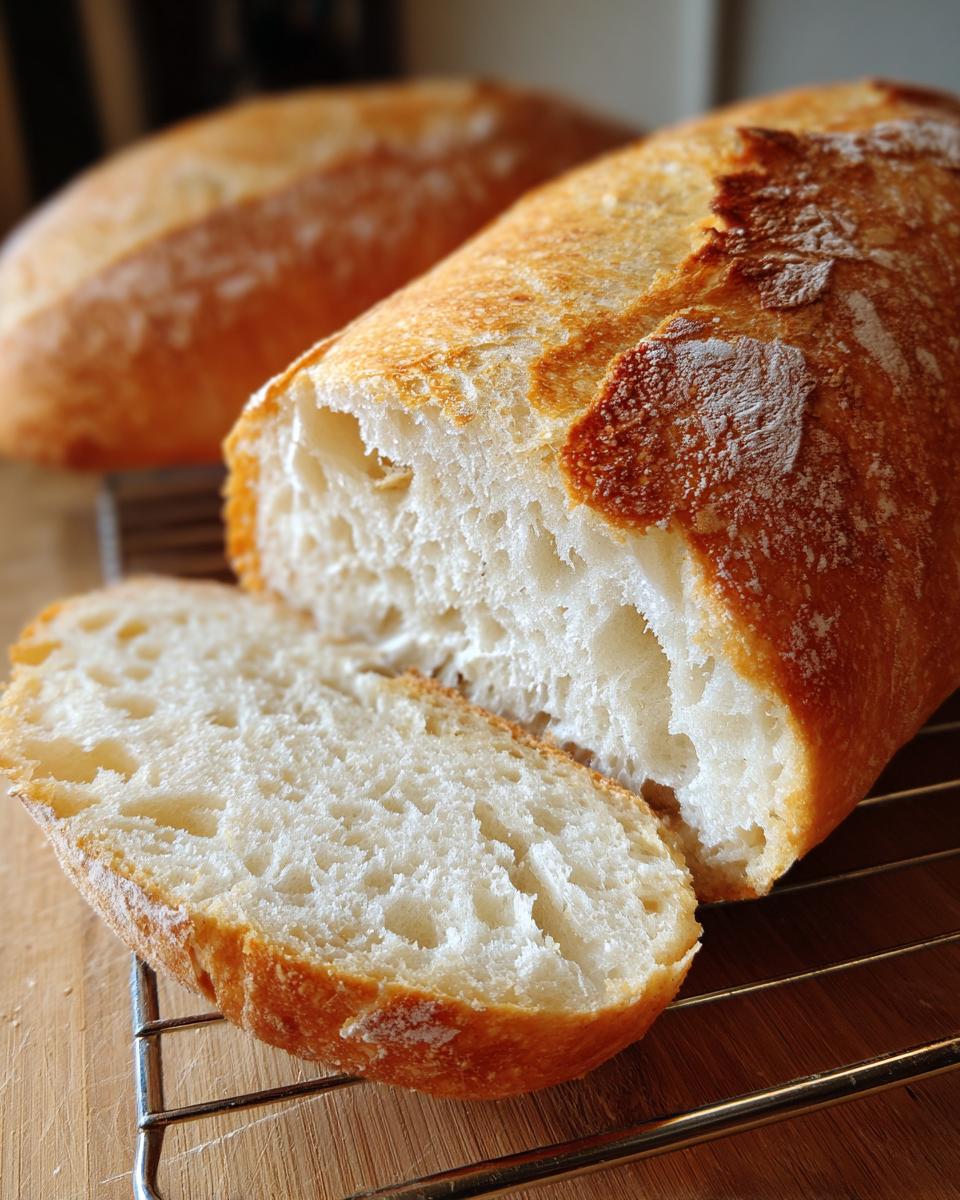
Shaping and Baking Your Homemade French Bread
When the dough has doubled, we gently punch it down—no beating the air out, just deflate it softly. Divide it in two and gently roll each piece into long logs, about 12 to 14 inches. Don’t press too hard when shaping; we want to keep those air pockets we just made!
Let them rest for that second 30-minute rise while your oven blasts up to 400°F. Right before they go in, brush on that egg white wash for shine, and then score them with three shallow diagonal cuts. Now, for that crusty exterior bread magic: this is the trick I learned from my great aunt! Place a metal pan filled with boiling water on the lowest rack while the oven preheats. When you slide the loaves in, the steam trapped in the oven keeps the crust soft enough to expand fully before hardening. Bake for about 20 to 25 minutes until they are that beautiful golden brown color.
Baking Homemade Bread Tips for Beginners
Look, making Homemade French Bread can give you the jitters the first few times, especially when dealing with yeast. Don’t let this stop you! I want to save you from common mistakes in this section on Baking Homemade Bread Tips.
The number one issue I see from folks just starting out in Beginner Bread Baking is forgetting about the environment. If your kitchen is chilly, your dough will take forever to rise, or worse, it might stall out completely. If your dough isn’t doubling during that first nap, don’t just let it sit all day! Try moving the bowl onto the stovetop right above a barely warm burner—just for a few minutes to give it a little boost.
Another frequent panic moment is scoring. People worry too much about pretty slashes. If the loaf is properly proofed (the second rise), it needs those slashes so it doesn’t just burst open randomly in the oven. They don’t have to be perfect diagonals like you see in fancy magazines. If you’re struggling with crust shattering, you might find some great wisdom on achieving crunch over at this guide for crusty mini baguettes. Just remember to breathe and trust the yeast!
Serving Suggestions for Your Fresh French Bread
Okay, your beautiful, crusty loaves are cool! Now the fun part: eating them! This Dinner Side Bread is so versatile, which is why I always use this recipe. For dinner, you absolutely have to try dipping this fresh bread into my easy creamy garlic sauce. It soaks up every bit!
But don’t stop there! This makes the absolute best Bread for Sandwiches because the crust holds up without being too hard on your mouth. Think about stacking up some thick turkey and Provolone, or even just butter and a sprinkle of salt. The soft interior is just perfect for holding fillings without getting soggy, even if you make your sandwich ahead of time.
Storage and Reheating Instructions for Leftover French Bread
Let’s be honest, this Homemade French Bread Recipe is best eaten within about twelve hours of coming out of the oven. That crust is heavenly when it’s fresh! If you have any leftovers, try not to just leave them sitting on the counter uncovered. The crust goes soft and the crumb gets rubbery pretty fast, even though this recipe is generally moister than standard loaves.
For short-term storage—like the next day—wrap a cooled loaf tightly in aluminum foil. This traps the moisture inside, keeping the crumb wonderfully soft. Don’t use plastic wrap initially, though, because it traps too much moisture and will definitely make that lovely crust go limp.
Now, if you have more than one day’s worth, you have two choices. You can slice it up and freeze the slices in an airtight freezer bag—it freezes beautifully for sandwiches later. Or, if you want to eat a whole loaf the next day, you need to revive it! That’s my favorite trick for cheating the system.
To bring that crust back to life, crank your oven up to 350°F. Place the foil-wrapped loaf directly onto the rack for about 8 to 10 minutes. This lets the interior steam itself soft again while reheating the outside. If you want maximum crunch, unwrap it for the last 3 minutes of reheating. You’ll crackle-crust delight again, I promise!
Frequently Asked Questions About Making French Bread
I know you probably have questions swirling around once you start tinkering with yeast recipes! That’s totally normal when you’re diving into Baking Homemade Bread Tips. I put together the things I got asked most often when I first started perfecting my Homemade French Bread Recipe. If you want to learn more about what guides my entire food philosophy here at Pure Plate Path, you can always check out my About Page!
Can I make this a One Hour Bread Recipe?
That’s the dream, isn’t it? While this recipe gets you to the oven super fast—often done in just under two hours total, which is pretty quick for yeast bread—I really, really advise against cutting the first rise short to hit a strict sixty minutes. The flavor and the structure of that interior crumb just won’t develop properly if you rush the yeast.
If you are really, truly pressed for time—we’re talking needing bread in 45 minutes—you can look into some specialized no-knead recipes, but they often have a chewier texture. For this specific fluffy loaf, you need that full hour for the first rise. Trust me, waiting that extra 45 minutes for the dough to double pays off beautifully in texture.
What is the difference between this French Bread and a Baguette?
This is a great question that gets right to the heart of shaping! Technically, this recipe makes a rustic, soft-crust loaf, not a true classic French baguette. Traditional baguettes are long, skinny, and rely on a very high-hydration dough and intense steam to create a super thin, aggressively crackly crust and a very open, airy hole structure inside. They are harder to manage for a beginner.
Our goal here is a broader, slightly thicker loaf that yields a wonderful Crusty Exterior Bread but still leans toward a soft, manageable crumb perfect for making a hearty sandwich. If you want to try a more traditional shape, you can certainly shape this dough into long, thinner loaves, but because the hydration is slightly lower than a true baguette dough, you might not get that airy, open crumb you see in the bakeries. Still, it’s a fantastic, Easy French Bread loaf every single time!

Nutritional Estimates for This Fluffy Loaf Recipe
Now, I’m no nutritionist, so take these numbers with a grain of salt—or maybe a grain of yeast! I pulled these Soft French Bread at Home estimates based on dividing the entire recipe yield into 10 generous slices per loaf, making 20 total servings. I find that when you’re baking something this comforting, focusing too hard on the numbers can spoil the joy, but it’s good to have a general idea!
This is a simple yeast bread, so you’ll see the carbs are the main component, which is exactly what you expect from a satisfying homemade loaf. I’ve seen people use this for dinner side dishes, so knowing it’s low in fat is a nice bonus!
- Serving Size: 1 slice (1/10 loaf)
- Calories: Around 160 (it varies slightly depending on how much flour you incorporated!)
- Fat: About 2 grams
- Carbohydrates: 31 grams
- Protein: 5 grams
- Sugar: Just 1 gram (that’s naturally occurring sugars from the flour!)
Just a little disclaimer here: Since every kitchen environment affects how much flour gets absorbed, these are just estimates. The actual numbers for your Homemade French Bread Recipe might shift slightly based on how aggressively you knead or if you decide to skip the egg wash. If you are tracking macros very strictly, weighing your final baked loaves and dividing by 20 would give you the most accurate count!
Share Your Homemade French Bread Success
Wow, you did it! You took the plunge, dealt with the yeast, and now you have that amazing, warm, crusty loaf filling your kitchen. I need to know how it went! Baking is so much better when we share the wins—and the learning moments.
Seriously, please pop down to the comments section below and tell me everything! Did you get that golden crust I’m always raving about? Was the interior as fluffy as you hoped? Hearing your results, especially when you nail that tricky texture requirement, means the absolute world to me and helps everyone else starting out feel more confident.
If you took a picture of your beautiful, freshly baked French bread—maybe sitting next to a bowl of dipping oil or sliced up for dinner—I would love to see it! Tag me on social media so I can cheer you on. Knowing I helped bring that fresh aroma to your home is exactly why I created Pure Plate Path.
If you have any lingering questions about keeping your loaves perfect or want to suggest another simple side dish idea, shoot me a message through the contact form. Happy baking, and enjoy every single soft, crusty bite!
PrintEasy Homemade Soft and Crusty French Bread (Ready in Under 2 Hours)
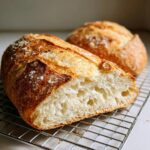
Make soft, fluffy French bread at home with a satisfyingly crusty exterior. This simple recipe uses basic ingredients and guides you through the steps for a delicious loaf perfect as a dinner side or for sandwiches.
- Prep Time: 20 min
- Cook Time: 25 min
- Total Time: 1 hour 50 min
- Yield: 2 loaves 1x
- Category: Bread
- Method: Baking
- Cuisine: French
- Diet: Vegetarian
Ingredients
- 1 packet active dry yeast (about 2 1/4 teaspoons)
- 1 1/2 cups warm water (105°F to 115°F)
- 1 tablespoon granulated sugar
- 1 teaspoon salt
- 3 1/2 to 4 cups all-purpose flour
- 1 tablespoon olive oil, plus more for the bowl
- 1 egg white, lightly beaten with 1 teaspoon water (for brushing)
Instructions
- Activate the yeast: In a large bowl, combine the warm water, sugar, and yeast. Let this stand for 5 to 10 minutes until foamy.
- Mix the dough: Add the salt, olive oil, and 3 1/2 cups of flour to the yeast mixture. Mix with a wooden spoon until a shaggy dough forms.
- Knead: Turn the dough out onto a lightly floured surface. Knead for 5 to 7 minutes, adding small amounts of the remaining flour only if the dough is too sticky to handle. The dough should be smooth and elastic.
- First Rise: Lightly oil a large bowl. Place the dough in the bowl, turning to coat. Cover the bowl with plastic wrap or a clean kitchen towel. Let the dough rise in a warm place for 60 to 75 minutes, or until doubled in size.
- Shape the loaves: Gently punch down the risen dough. Divide it in half. On a lightly floured surface, shape each half into a long, even loaf, about 12 to 14 inches long.
- Second Rise: Place the shaped loaves on baking sheets lined with parchment paper, leaving space between them. Cover loosely and let them rise for 30 minutes. Preheat your oven to 400°F (200°C) during the last 15 minutes of this rise.
- Prepare for baking: Lightly brush the tops of the loaves with the egg white wash. If you want a crispier crust, use a sharp knife to make three diagonal slashes across the top of each loaf.
- Bake: Bake for 20 to 25 minutes, or until the crust is golden brown and the bread sounds hollow when tapped on the bottom.
- Cool: Transfer the baked French bread to a wire rack to cool completely before slicing.
Notes
- For a chewier crust, place a shallow pan of water on the bottom rack of the oven while preheating to create steam.
- If you want a softer crust, skip the egg white wash and simply brush the tops with melted butter immediately after removing them from the oven.
- This homemade French bread is best eaten the day it is baked.
Nutrition
- Serving Size: 1 slice (1/10 loaf)
- Calories: 160
- Sugar: 1
- Sodium: 180
- Fat: 2
- Saturated Fat: 0.5
- Unsaturated Fat: 1.5
- Trans Fat: 0
- Carbohydrates: 31
- Fiber: 1
- Protein: 5
- Cholesterol: 0