
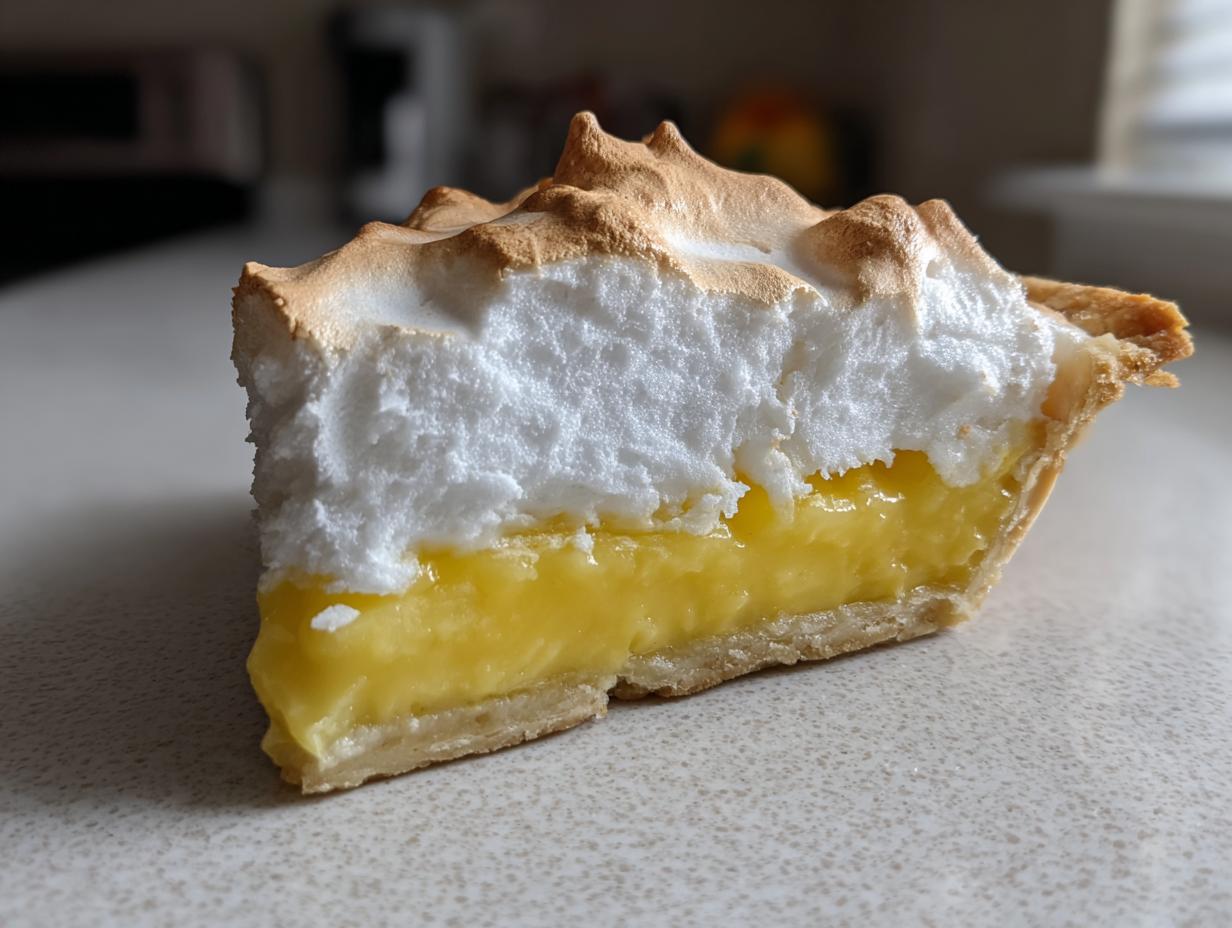
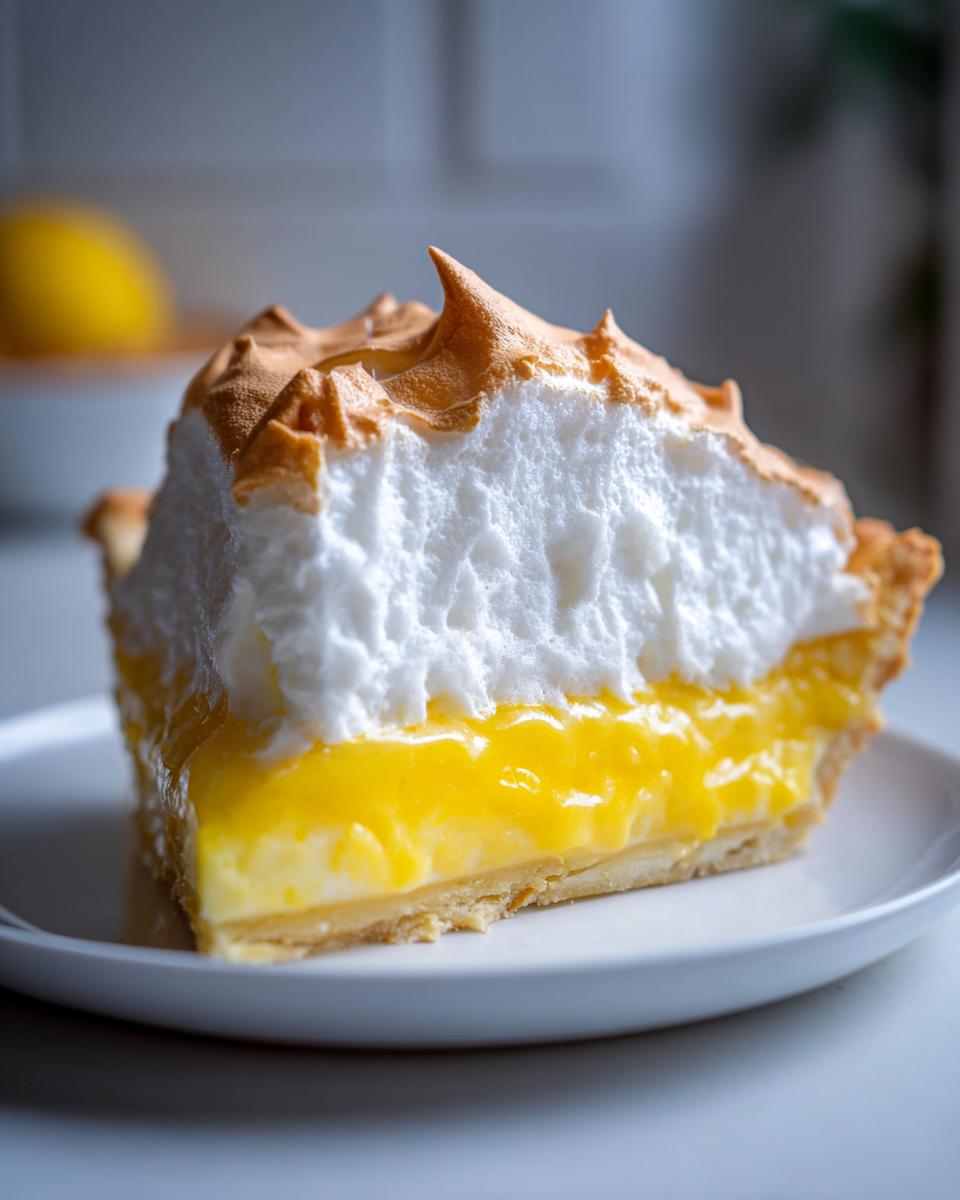
Oh my goodness, when you picture dessert magic, chances are you see those glorious, towering white peaks against sunny yellow filling, right? That’s the dream of a perfect lemon meringue pie. I’m Sarah, and trust me, I know how terrifying that meringue can be. It often looks amazing, then collapses into a syrupy pool overnight! We decided here at Pure Plate Path that we wouldn’t settle for anything less than perfect, which is why this recipe is my tried-and-true method for a classic, homemade, from-scratch pie that stays beautifully stable and doesn’t weep. It’s about getting back to simple, nourishing techniques that bring real joy to the table.
- Why This Classic Lemon Meringue Pie Recipe Works (The Secret to Perfect Lemon Meringue)
- Gathering Your Ingredients for Homemade Lemon Pie From Scratch
- Step-by-Step Instructions for the Best Lemon Meringue
- Baking and Cooling: Mastering the Lemon Meringue Bake
- Tips for Success with Your Lemon Meringue Pie Recipe
- Storage & Reheating Instructions for Classic Lemon Pie
- Variations on the Lemon Meringue Theme
- Frequently Asked Questions About Lemon Meringue
- Share Your Perfect Lemon Meringue Creation
Why This Classic Lemon Meringue Pie Recipe Works (The Secret to Perfect Lemon Meringue)
This isn’t just another recipe; it’s a blueprint for success! So many people try to make a proper lemon meringue pie and end up with a runny, weepy mess, but that’s usually down to timing, not talent. We’ve cracked the code to make this the ultimate tart and sweet pie that always looks like a true showstopper dessert. The stability comes from two non-negotiable steps: how we whip the whites and the temperature of the filling when we assemble it.
Achieving a Fluffy Meringue Topping
If you want that impossibly fluffy meringue topping that stands tall, you have to treat those egg whites like royalty. First, they must be completely at room temperature—no exceptions! We also use just a tiny bit of cream of tartar right at the start; it stabilizes everything beautifully, helping those peaks hold their shape. Remember, the sugar for the meringue has to go in slowly, tablespoon by tablespoon. If you dump it all in, you deflate all that precious air you just beat in!
The Importance of Hot Lemon Filling for Lemon Meringue
This is my biggest secret to preventing that dreaded meringue weep! You absolutely must spread your meringue onto the lemon filling while the filling is still piping hot—I mean, straight off the stove hot. This high heat essentially cooks the bottom layer of the meringue right into the custard. When the meringue seals against the hot filling, water droplets can’t pool at the bottom. It’s a quick move, but it’s the game-changer for getting those famous no weep lemon meringue tips right.
Gathering Your Ingredients for Homemade Lemon Pie From Scratch
Okay, let’s talk supplies! Making a genuine homemade lemon pie from scratch means we’re skipping anything that comes from a box or a packet. Every item plays a role here, from the tartness of the juice to the richness of the yolks. I’ve listed everything below exactly as I measure it every single time. Seriously, have your egg yolks already lightly beaten and your lemon juice squeezed before you even start cooking the fillings. Trust me, speed is key when that lemon base goes on the stove!
Buttery Pie Crust Tutorial Components
For this masterpiece, we need a sturdy foundation, and that means a fully baked and completely cooled 9-inch pie crust. Whether you use my favorite buttery pie crust tutorial or grab one you love, the most crucial thing is that it’s sitting there, ready, and cool before the hot filling hits it. If the crust is even slightly warm, that beautiful filling might break down when you pour it in. We’re looking for a crisp shell, ready to cradle that sunshine inside!
Zesty Lemon Filling Ingredients
This is where the bright flavor comes from! For the filling, make sure you grab 1/2 cup of *fresh* lemon juice and 1 tablespoon of zest—bottled juice just doesn’t give you that pop for a true zesty lemon dessert experience. We also need four large egg yolks, beaten lightly, and the right amount of sugar and cornstarch. The cornstarch is what gives us that perfect thick texture without turning it into a gluey mess. It’s all about those simple, vibrant fresh components here.
Step-by-Step Instructions for the Best Lemon Meringue
Now for the real fun! This is where we bring everything together to create that flawless lemon meringue beauty. Pay close attention to the heat and stirring required here. If you’re checking out other recipes out there, remember that ours focuses on getting the heat just right for that thick, vibrant curd, proving you don’t need a box mix for the best results. You can find even more inspiration for bright, tangy desserts like this one over at Hayley’s Recipes, but stick with me for this classic version!
Preparing the Crust and Lemon Curd Recipe Base
First things first: Step 1 is just getting that pre-baked crust ready and cool—don’t rush this part! Now for the filling base. In your saucepan, mix 1 1/2 cups of sugar with your cornstarch and salt. Whisk that water in really well to banish any lumps. Bring this to a boil over medium heat, making sure you stir constantly. Once it bubbles, let it boil for a solid minute—this kills the raw starch taste. While that’s happening, gently whisk those four egg yolks in a separate bowl. Then, you need to temper them: slowly drizzle in about a cup of that hot sugar mixture while whisking the yolks like crazy. Slowly, slowly, slowly!
Finishing the Filling and Building the Lemon Meringue
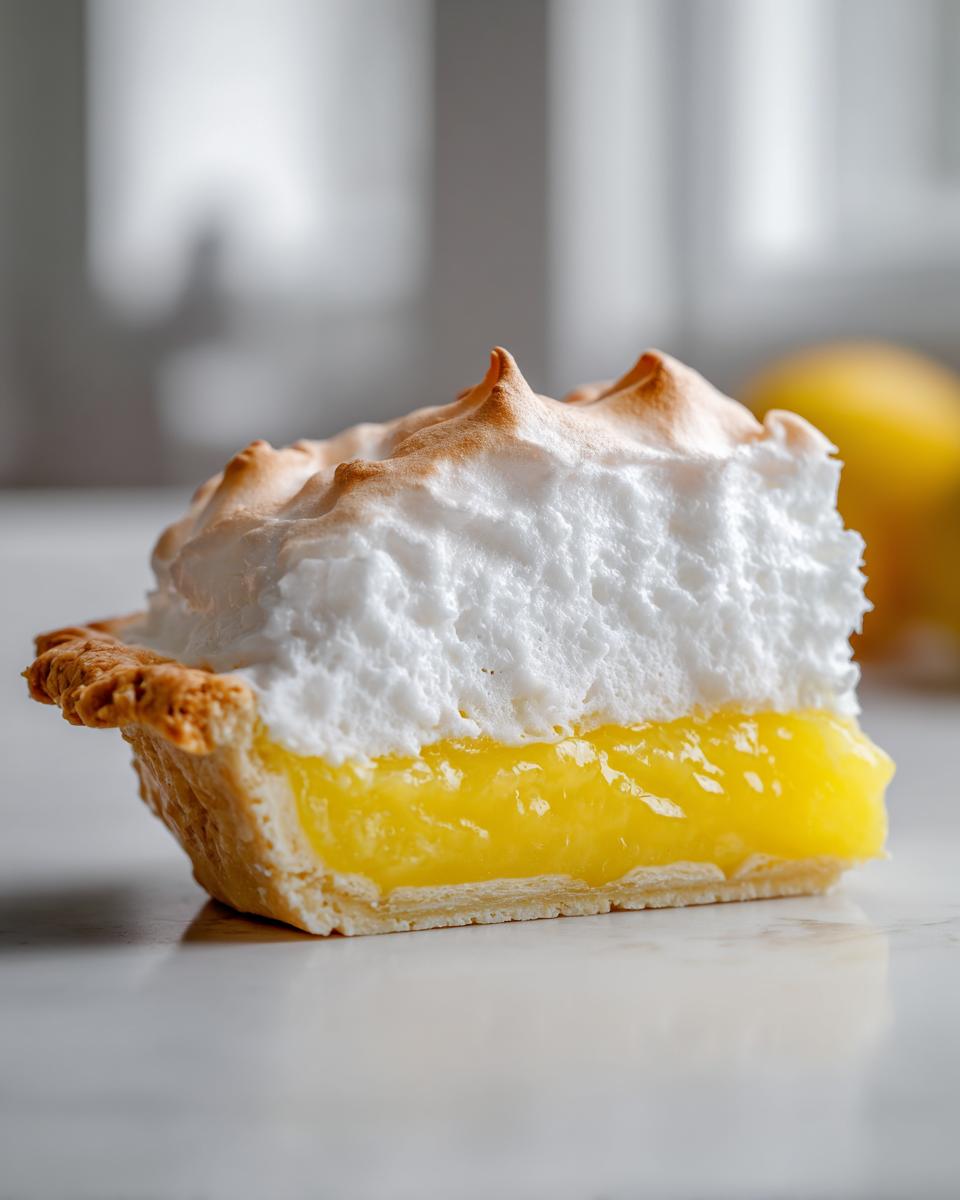
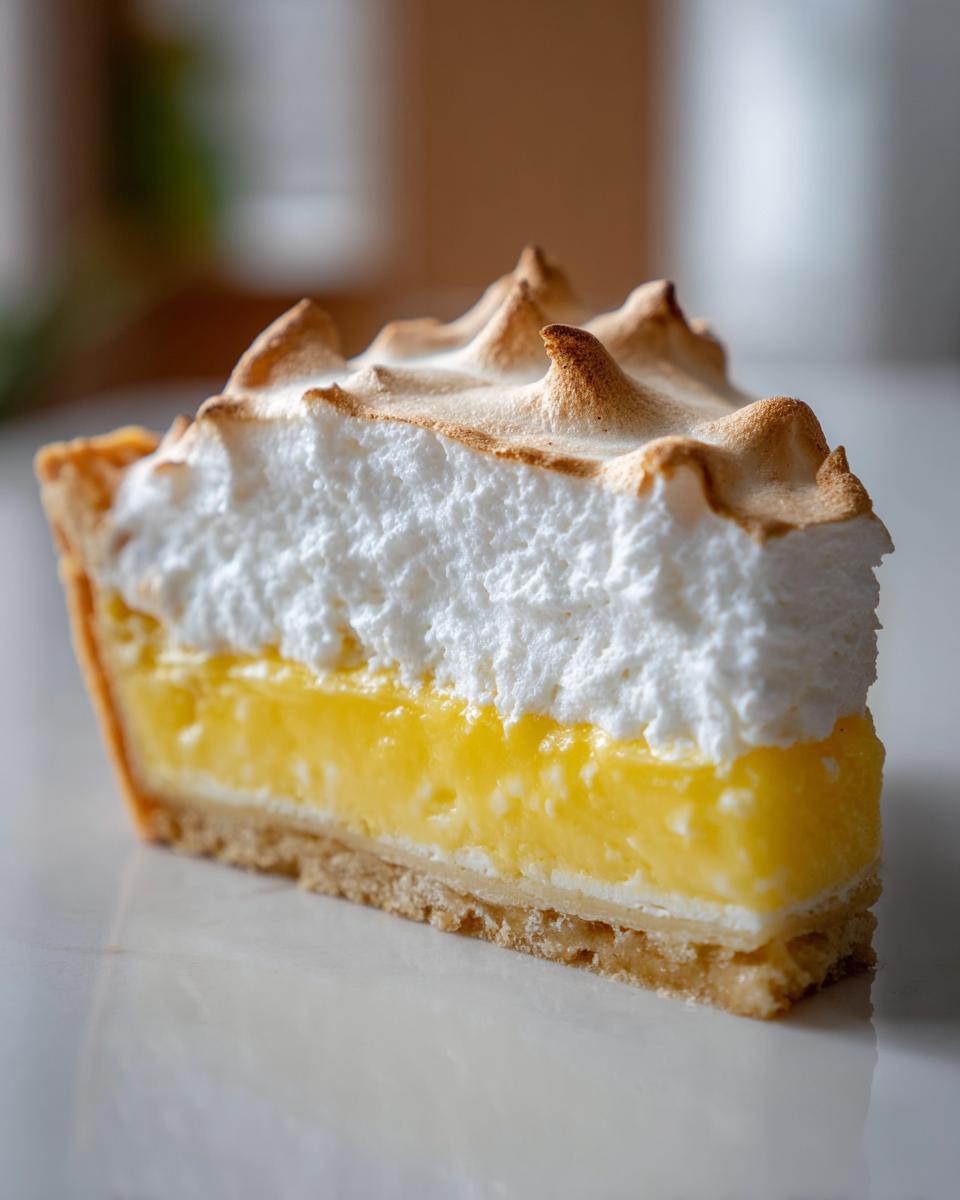
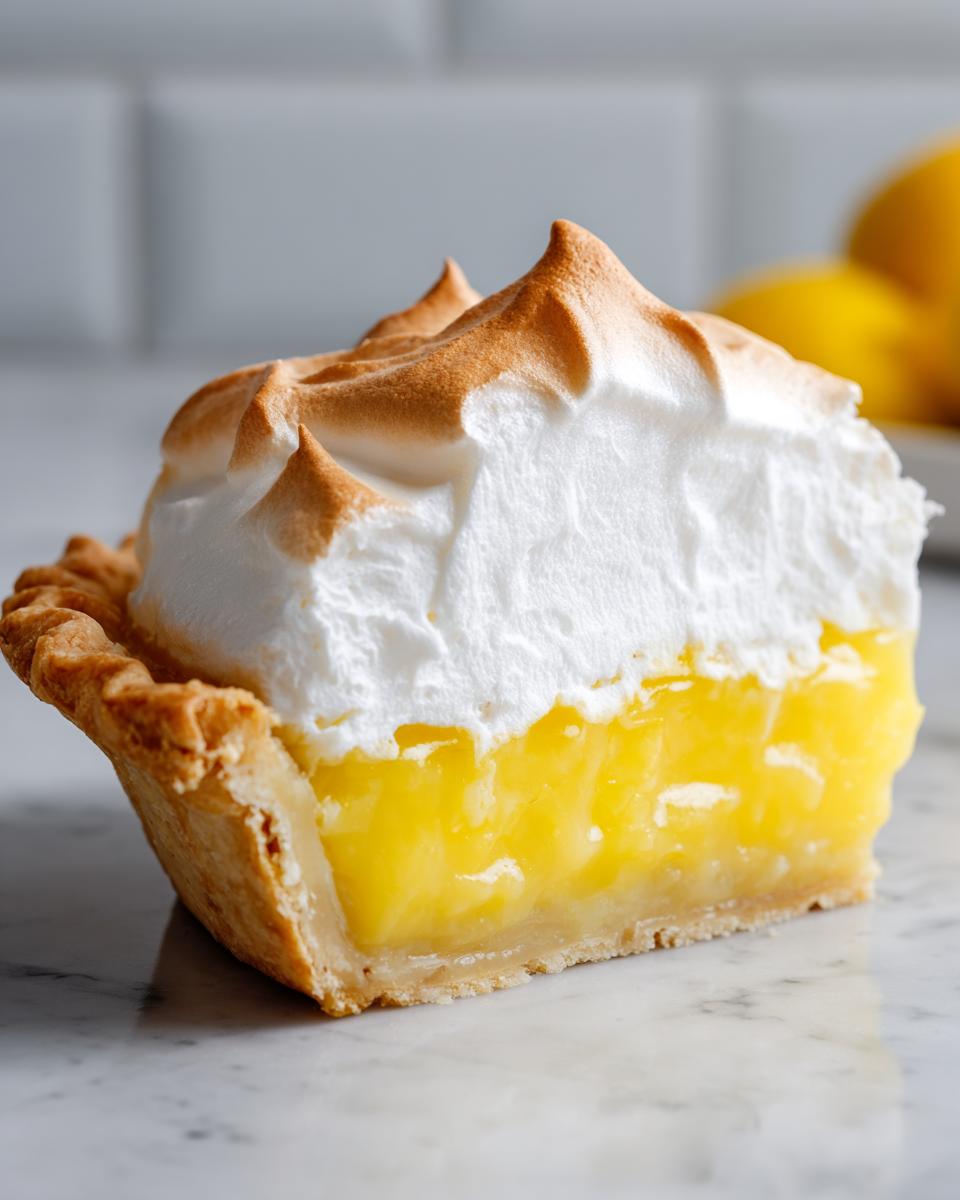
Once tempered, pour that yolk combination right back into the saucepan with the rest of the hot base. Keep stirring constantly over medium heat until it thickens *again* and begins to softly bubble—don’t let it boil hard! Take it off the heat immediately. Now, beat in your lemon juice and zest. Pour that beautiful, hot lemon curd recipe base straight into your cool crust. While that’s setting up slightly, whip your room-temperature egg whites with the cream of tartar until you have soft peaks. Gradually add the final half-cup of sugar until you get those stiff, glossy peaks. Spread that bright, fluffy meringue right over the hot filling, making sure every single edge of the crust is sealed. We need that seal!
Baking and Cooling: Mastering the Lemon Meringue Bake
We are so close now! The final bake is quick, but you need to watch it carefully. Pop that pie into a 350°F oven—that’s 175°C for my international bakers out there—and let those meringue peaks toast up for just 12 to 15 minutes. You want them lightly golden brown, not scorched! But honestly, the bake is less important than the cooling. You absolutely MUST let your lemon meringue pie cool completely on a wire rack at room temperature. This takes at least four hours. Please, resist the urge to refrigerate it early! Cooling down too fast at that stage is what makes the whole thing start weeping on you. Patience pays off beautifully here for that perfect slice.
Tips for Success with Your Lemon Meringue Pie Recipe
Even with these steps down, sometimes you just need that little extra nudge to make sure your lemon meringue pie recipe looks like it came right out of a bakery window! Remember the big one: sealing the meringue to the hot filling is job number one for preventing weepage. If you’ve done everything right with the hot filling, you’re already ahead of the game. But for those times when maybe your egg whites weren’t *quite* room temperature—or you just want an extra showstopper look—try using a kitchen torch!
Instead of baking that last step, pull your pie out and use a standard culinary torch. Gently kiss the peaks until they are golden brown. It gives you so much more control over the color, ensuring you get those beautiful highlights without overcooking the filling underneath. This is the real secret to how to make perfect meringue peaks. If you want more fantastic tips on mastering the from-scratch technique, check out the great advice over at Rock Recipes. And always, always use fresh zest when you can for that ultimate bright flavor!
Storage & Reheating Instructions for Classic Lemon Pie
So you cut into your gorgeous classic lemon pie and you have leftovers. Yay! Here’s the crucial bit about storage: you absolutely must let the pie finish setting up completely at room temperature first. That means waiting those full four hours after baking before you even think about the fridge. Once it’s totally cooled and set, you can cover the pie loosely—don’t press plastic wrap directly onto the lovely meringue, or you’ll smudge it! Store it in the refrigerator for up to three days. If you try to chill it too soon, you’ll invite back those weeping villains!
Variations on the Lemon Meringue Theme
While I absolutely sing the praises of a giant, sliceable pie, sometimes you just need a different presentation, right? Don’t worry, this amazing lemon meringue flavor profile is super versatile! If you’re hosting a fancy gathering, I highly recommend making individual mini lemon meringue tarts. They look so elegant, and everyone gets a perfect ratio of crust to curd to cloud-like topping. My sister made them for Easter last year, and they were gone in minutes!
If you want something super easy to handle for a potluck or picnic, think about turning this into lemon meringue bars. You just bake the lemon curd layer in a 9×13 pan, top it with meringue, bake until golden, and then slice them once they’ve cooled completely. They firm up nicely and are much less fussy than trying to get big slices out of a pie. And for a totally unexpected treat, you can even make airy lemon meringue cookies! These are mostly just baked meringue infused with that bright zest. Seriously, once you master the curd, the possibilities for this zesty dessert are endless!
If you’re looking for a great place to find inspiration on those smaller treats, like those adorable tarts I mentioned, check out the recipes over at Kitchen Knot. They always have fun ways to serve up classic flavors!
Frequently Asked Questions About Lemon Meringue
I know when I first started making these beautiful pies, I had a mile-long list of questions, mostly focusing on how to stop that meringue from doing its awful shrinking trick! It’s completely normal to have hangups, but I promise, sticking to the temperature rules makes all the difference. If you have other questions after trying this, feel free to reach out to us over on contact page!
Why is my lemon meringue weeping after baking?
Weeping happens mainly for two reasons, and we hit on the big one above! First, you have to make sure you seal that meringue tightly all the way to the crust edge when spreading it on the *hot* filling. If there’s a gap, condensation forms underneath it. Second, don’t put it in the fridge too soon! That drastic temperature shock causes the sugar in the meringue to release water, which is the weepiness we are trying to avoid. It needs that slow, room-temperature cool down.
Can I use bottled lemon juice instead of fresh for this lemon meringue recipe?
Oh, please don’t if you can help it! Look, I get it, sometimes lemons are expensive or scarce. But for this particular lemon meringue recipe, the fresh stuff is vital. Bottled juice just doesn’t have the clean, bright acidity that cuts through the sweetness of the filling and meringue. To truly get that fantastic, bright, zesty flavor that makes this pie shine, you must use fresh-squeezed juice and zest. It’s the easy way to ensure your filling tastes amazing.
What is the best way to serve this summer citrus dessert?
This is tricky because everyone has their preference, but I find that this pie shines when it’s somewhere between cool and room temperature. If you slice it straight out of the fridge, the curd is super hard, and the texture isn’t as nice. Let this fantastic summer citrus dessert sit on the counter for about 30 minutes before slicing. That slight warmth really wakes up the lemon flavor, and the meringue stays beautifully fluffy. Just don’t leave it out too long, of course—it’s not a cake!
Share Your Perfect Lemon Meringue Creation
Whew! We did it! We successfully navigated the temperamental world of beautiful, towering meringue and created a stunning, zesty, tart-sweet pie from scratch. I truly hope that making this easy lemon meringue recipe brought you as much joy as it brings my family every spring. Now, this is the part where I get nosy: I want to hear all about it!
Did you manage to avoid the weep? Did your peaks get perfectly golden in the oven? Please, don’t be shy! Drop a comment below and let me know how your pie turned out. I love seeing your successes—and if you ran into a funny little hiccup, we can solve it together in the comments section! And if you snapped a picture of your gorgeous, sliceable masterpiece, tag me on social media! Happy baking, friends!
PrintClassic Homemade Lemon Meringue Pie

Make a showstopping dessert with this classic recipe for Lemon Meringue Pie, featuring a buttery crust, zesty lemon custard, and a tall, fluffy meringue topping.
- Prep Time: 30 min
- Cook Time: 45 min
- Total Time: 75 min
- Yield: 8 servings 1x
- Category: Dessert
- Method: Baking
- Cuisine: American
- Diet: Vegetarian
Ingredients
- 1 recipe for buttery pie crust (9-inch)
- 1 1/2 cups granulated sugar
- 1/3 cup cornstarch
- 1/4 teaspoon salt
- 1 1/2 cups water
- 4 large egg yolks, beaten
- 1/2 cup fresh lemon juice
- 1 tablespoon lemon zest
- 4 large egg whites, room temperature
- 1/4 teaspoon cream of tartar
- 1/2 cup granulated sugar (for meringue)
Instructions
- Prepare and partially bake your 9-inch pie crust according to your preferred recipe. Cool completely.
- For the lemon filling, combine 1 1/2 cups sugar, cornstarch, and salt in a medium saucepan. Whisk in the water.
- Cook the mixture over medium heat, stirring constantly until it thickens and boils. Boil for one minute, then remove from heat.
- In a separate bowl, lightly beat the egg yolks. Slowly temper the yolks by whisking in about one cup of the hot sugar mixture.
- Pour the tempered yolk mixture back into the saucepan with the remaining hot sugar mixture. Cook over medium heat, stirring constantly, until the filling thickens again and just begins to bubble. Do not boil.
- Remove the filling from the heat. Stir in the lemon juice and lemon zest. Pour the hot filling immediately into the cooled, pre-baked pie crust.
- For the meringue, place the room temperature egg whites and cream of tartar in a clean, grease-free mixing bowl. Beat with an electric mixer until soft peaks form.
- Gradually add the 1/2 cup of sugar, one tablespoon at a time, beating well after each addition until stiff, glossy peaks form.
- Spread the meringue over the hot lemon filling, making sure the meringue touches the edge of the crust all around to seal it. Create decorative swirls with the back of a spoon.
- Bake at 350°F (175°C) for 12 to 15 minutes, or until the meringue peaks are lightly golden brown.
- Cool the pie completely on a wire rack at room temperature for at least 4 hours before slicing. Avoid placing it in the refrigerator too soon to prevent meringue weeping.
Notes
- To prevent weeping meringue, make sure the lemon filling is hot when you spread the meringue on top. This helps the meringue set properly.
- Use fresh lemon juice and zest for the brightest flavor.
- For a showstopper dessert, use a kitchen torch to brown the meringue peaks instead of baking for the final step.
Nutrition
- Serving Size: 1 slice
- Calories: 350
- Sugar: 45g
- Sodium: 150mg
- Fat: 15g
- Saturated Fat: 7g
- Unsaturated Fat: 8g
- Trans Fat: 0g
- Carbohydrates: 55g
- Fiber: 1g
- Protein: 5g
- Cholesterol: 90mg